In this post I’ll explain how to install Apache Guacamole from the source on a CentOS server. Guacamole is a clientless remote gateway that supports VNC, RDP, SSH and telnet protocols. The purpose of the remote gateway is to allow you to connect to a device over the gateway, but not directly, in case you have firewall restrictions between your computer and the end device. Let’s say you have a desktop at work and a server with a public IP at home or in the cloud. The server at home/cloud normally listens on port 3389 for RDP or port 22 for SSH. But your corporate firewall doesn’t allow outgoing traffic on these ports so you can’t connect from your work to your servers. Here comes the remote gateway. This server listens on ports 80 and/or 443 and will tunnel the traffic from your work desktop to your home server over 80 or 443. The remote gateway will need access to your end device on the specified ports for RDP or SSH. Most corporate environments allow port 80 and 443 only, that way you can bypass your corporate firewall. I have another post that describes the same exact scenario using Microsoft RDP Gateway, shellinabox and tunneling over putty.
Install Apache Guacamole
Apache Guacamole has some pre-requisites and we need to install them first. Let’s create a work directory where we can place all files necessary.
mkdir /workdir && cd /workdir
yum -y install wget libpng-devel libjpeg-turbo-devel cairo-devel uuid-devel  epel-release maven tomcat
yum -y install freerdp-devel pango-devel libssh2-devel libtelnet-devel libvncserver-devel
yum -y install pulseaudio-libs-devel openssl-devel libvorbis-devel libwebp-devel terminus-fonts
systemctl enable tomcat
The FFmpeg library is not in the official or EPEL repo, so we need to install it as RPM package.
rpm --import http://li.nux.ro/download/nux/RPM-GPG-KEY-nux.ro
rpm -Uvh http://li.nux.ro/download/nux/dextop/el7/x86_64/nux-dextop-release-0-5.el7.nux.noarch.rpm
yum -y install ffmpeg-devel
We also need some compiler tools.
yum -y groupinstall "Development Tools"
Guacamole comes in two parts, a server and a client. The client is a Java servlet running on Tomcat, but both are installed on a server. Don’t get confused, the Guacamole client has nothing to do with the end user client. You don’t need to install any clients on your desktop. Just a plain HTML5 browser.
Let’s download the server first.
wget -O server.tar.gz "http://archive.apache.org/dist/guacamole/0.9.14/source/guacamole-server-0.9.14.tar.gz"
Untar the tarball and configure the server before compiling it.
tar xzvf server.tar.gz
cd guacamole-server-0.9.14
./configure --with-init-dir=/etc/init.d
You should see something like this as the output. Make sure it matches. All of the components except winsock should be installed. If not, check the first yum install commands above and see what went wrong.
NOTE: Some newer versions of CentOS 7 now come with freerdp 2.0 as a default package. If you see that freerdp sections says no, it’s because you have freerdp 2.0 installed. Install freerdp1.2 with yum -y install freerdp1.2.
Library status:

     freerdp ............. yes
     pango ............... yes
     libavcodec .......... yes
     libavutil ........... yes
     libssh2 ............. yes
     libssl .............. yes
     libswscale .......... yes
     libtelnet ........... yes
     libVNCServer ........ yes
     libvorbis ........... yes
     libpulse ............ yes
     libwebp ............. yes
     wsock32 ............. no

   Protocol support:

      RDP ....... yes
      SSH ....... yes
      Telnet .... yes
      VNC ....... yes

   Services / tools:

      guacd ...... yes
      guacenc .... yes

   Init scripts: /etc/init.d

Type "make" to compile guacamole-server.
If everything looks good, compile and install.
make
make install
ldconfig
Let’s enable the automatic startup for the Guacamole daemon.
systemctl enable guacd
It’s time to install the client. You can get a pre-compiled WAR library for the client or you can compile it yourself. I’ll do the later.
cd /workdir
wget -O client.tar.gz "http://archive.apache.org/dist/guacamole/0.9.14/source/guacamole-client-0.9.14.tar.gz"
tar xzvf client.tar.gz
cd guacamole-client-0.9.14
mvn package
Copy the WAR file under Tomcat.
cp guacamole/target/guacamole-0.9.14.war /var/lib/tomcat/webapps/guacamole.war
MySQL server
In order for the end users to authenticate to Guacamole, we can choose LDAP authentication, file based authentication in XML file and authentication that’s stored in a SQL database (MySQL, PostgreSQL). While the file based authentication is the easiest to configure, it doesn’t allow configuring different levels of access. LDAP is an overkill, so the best bet is a MySQL server that’s used to store the authentication.
I’ll use MariaDB SQL. Let’s install it and configure it first.
yum -y install mariadb-server
systemctl enable mariadb
systemctl start mariadb
This is the initial configuration. Highlighted lines is what you type, the rest is output.
mysql_secure_installation

NOTE: RUNNING ALL PARTS OF THIS SCRIPT IS RECOMMENDED FOR ALL MariaDB
      SERVERS IN PRODUCTION USE!  PLEASE READ EACH STEP CAREFULLY!

In order to log into MariaDB to secure it, we'll need the current
password for the root user.  If you've just installed MariaDB, and
you haven't set the root password yet, the password will be blank,
so you should just press enter here.

Enter current password for root (enter for none):
OK, successfully used password, moving on...

Setting the root password ensures that nobody can log into the MariaDB
root user without the proper authorisation.

Set root password? [Y/n] Y
New password:
Re-enter new password:
Password updated successfully!
Reloading privilege tables..
 ... Success!


By default, a MariaDB installation has an anonymous user, allowing anyone
to log into MariaDB without having to have a user account created for
them.  This is intended only for testing, and to make the installation
go a bit smoother.  You should remove them before moving into a
production environment.

Remove anonymous users? [Y/n] Y
 ... Success!

Normally, root should only be allowed to connect from 'localhost'.  This
ensures that someone cannot guess at the root password from the network.

Disallow root login remotely? [Y/n] Y
 ... Success!

By default, MariaDB comes with a database named 'test' that anyone can
access.  This is also intended only for testing, and should be removed
before moving into a production environment.

Remove test database and access to it? [Y/n] Y
 - Dropping test database...
 ... Success!
 - Removing privileges on test database...
 ... Success!

Reloading the privilege tables will ensure that all changes made so far
will take effect immediately.

Reload privilege tables now? [Y/n] Y
 ... Success!

Cleaning up...

All done!  If you've completed all of the above steps, your MariaDB
installation should now be secure.

Thanks for using MariaDB!
We’ll have to create the database now and assign a SQL user with rights to that database. Enter the root SQL password that you’ve previously created and change the database name, user and password to suit your needs.
mysql -u root -p
Enter password:
Welcome to the MariaDB monitor.  Commands end with ; or \g.
Your MariaDB connection id is 11
Server version: 5.5.60-MariaDB MariaDB Server

Copyright (c) 2000, 2018, Oracle, MariaDB Corporation Ab and others.

Type 'help;' or '\h' for help. Type '\c' to clear the current input statement.

MariaDB [(none)]> CREATE DATABASE guacamole_db;
Query OK, 1 row affected (0.00 sec)

MariaDB [(none)]> CREATE USER 'guacamole_user'@'localhost' IDENTIFIED BY 'guacamole_password';
Query OK, 0 rows affected (0.00 sec)

MariaDB [(none)]> GRANT SELECT,INSERT,UPDATE,DELETE ON guacamole_db.* TO 'guacamole_user'@'localhost';
Query OK, 0 rows affected (0.00 sec)

MariaDB [(none)]> FLUSH PRIVILEGES;
Query OK, 0 rows affected (0.00 sec)

MariaDB [(none)]> quit
Bye
We also need a JDBC auth plugin for MySQL, so Guacamole can talk to MySQL. You’ll be prompted for the MySQL root password at the end of the cat command.
cd /workdir
wget -O auth.tar.gz "http://archive.apache.org/dist/guacamole/0.9.14/binary/guacamole-auth-jdbc-0.9.14.tar.gz"
tar xzvf auth.tar.gz
cd guacamole-auth-jdbc-0.9.14/mysql/schema/
cat *.sql | mysql -u root -p guacamole_db
We have to copy the JAR archive to a specific location so Guacamole can find it.
cd /workdir
mkdir -p /etc/guacamole/{extensions,lib}
cp guacamole-auth-jdbc-0.9.14/mysql/guacamole-auth-jdbc-mysql-0.9.14.jar /etc/guacamole/extensions
We also need a MySQL connector for Java, so the Java servlets can talk to MySQL.
cd /workdir
wget -O conn.tar.gz https://dev.mysql.com/get/Downloads/Connector-J/mysql-connector-java-8.0.13.tar.gz
tar xzvf conn.tar.gz
cp mysql-connector-java-8.0.13/mysql-connector-java-8.0.13.jar /etc/guacamole/lib/
Finally, we have to tell Guacamole that we’ll use MySQL. Create a file called guacamole.properties under /etc/guacamole directory. Make sure you have the correct database name, user and password for MySQL when you created the database.
cat <<EOF > /etc/guacamole/guacamole.properties
# Hostname and port of guacamole proxy
guacd-hostname: localhost
guacd-port:     4822
# MySQL properties
mysql-hostname: localhost
mysql-port: 3306
mysql-database: guacamole_db
mysql-username: guacamole_user
mysql-password: guacamole_password
mysql-default-max-connections-per-user: 0
mysql-default-max-group-connections-per-user: 0
EOF
Start the application
Now it’s time to start Guacamole.
systemctl start guacd
systemctl start tomcat
By default, Tomcat apps use port 8080, so if you have a firewall, you have to open the port.
firewall-cmd --zone=public --add-port=8080/tcp --permanent
firewall-cmd --reload
If you use SELinux, you have to allow the HTTP traffic.
setsebool -P httpd_can_network_connect 1
At this point you can go and test Guacamole by going to http://guacamole_ip:8080/guacamole. The default admin user and password is guacadmin.
NOTE: I strongly suggest that you change the password or even create a new admin user.
When I created a test connection, everything worked fine, but I was stuck at the remote session and couldn’t go back to Guacamole. Every time I went to http://guacamole_ip:8080/guacamole, the browser opened the session. If this happens to you, make sure you have at least two sessions configured or simply go to http://guacamole_ip:8080/guacamole/#settings/sessions URL.
nginx as reverse proxy
Using nginx as reverse proxy is optional, but initially I said that most corporate environments block everything except port 80 and 443. Guacamole runs on port 8080 which means it will be blocked as well. You can probably change the port from 8080 to 80, but then you have to reconfigure Tomcat and there might be some issues because everything running on ports 1024 and below requires root privileges. So, I’ll do what everyone else does, use a reverse proxy.
The purpose of nginx will be to listen on port 80 or port 443 and forward that traffic locally to Tomcat on 8080.
Let’s install and configure nginx.
yum -y install nginx
systemctl enable nginx
systemctl start nginx
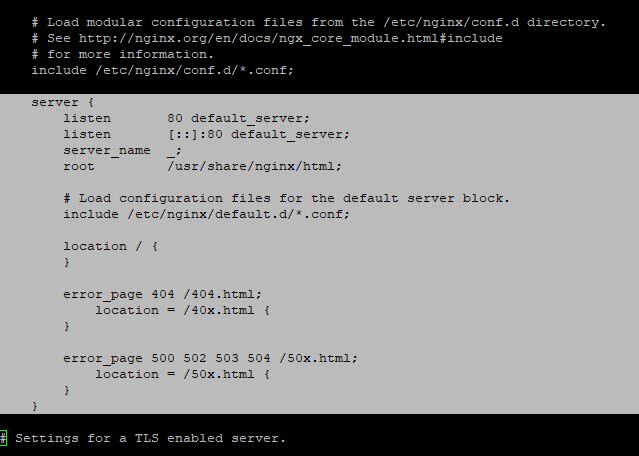
Open /etc/nginx/nginx.conf and remove the section with the server directive. So, this section has to go. Comment it or delete it, then save the file.
Now, create a new nginx config file.
cat <<EOF > /etc/nginx/conf.d/guacamole.conf
server {
    listen 80;
    server_name localhost;
        location /guacamole/ {
                proxy_pass http://localhost:8080/guacamole/;
                proxy_buffering off;
                proxy_http_version 1.1;
                proxy_set_header X-Forwarded-For \$proxy_add_x_forwarded_for;
                proxy_set_header Upgrade \$http_upgrade;
                proxy_set_header Connection \$http_connection;
                access_log off;
        }
}
EOF
Reload the nginx config and you can access your server as http://guacamole_ip/guacamole now.
systemctl restart nginx
Make sure you open the firewall if you have it installed.
firewall-cmd --zone=public --add-port=80/tcp --permanent
firewall-cmd --reload
If you want to go even further and use a specific URL and SSL certificates, then do this. Let’s say you want to access your Guacamole install using https://guac.domain.com. In that case, your guacamole.conf should look like this.
cat <<EOF > /etc/nginx/conf.d/guacamole.conf
server {
    listen 80;
    server_name guac.domain.com;
        return 301 https://\$host\$request_uri;
}
server {
    listen 443 ssl;
    server_name guac.domain.com;
    ssl_certificate star.domain.com.crt;
    ssl_certificate_key star.domain.com.key;
    ssl_session_cache shared:SSL:10m;
    ssl_session_timeout 10m;
    ssl_protocols  TLSv1 TLSv1.1 TLSv1.2;
    ssl_ciphers HIGH:!aNULL:!MD5;
    ssl_prefer_server_ciphers on;

    access_log off;
    location / {
        proxy_pass http://localhost:8080/guacamole/;
        proxy_buffering off;
        proxy_http_version 1.1;
        proxy_set_header X-Forwarded-For \$proxy_add_x_forwarded_for;
        proxy_set_header Upgrade \$http_upgrade;
        proxy_set_header Connection \$http_connection;
    }
}
EOF
Put the certificates under /etc/nginx directory, allow the port 443 on the firewall and restart nginx.
firewall-cmd --zone=public --add-port=443/tcp --permanent
firewall-cmd --reload
systemctl restart nginx
For this to work, you’ll need guac.domain.com to point to your Guacamole server IP in DNS and you’ll need the SSL certificate and private key under /etc/nginx directory.
Finally, when everything looks OK, get rid of the workdir.
rm -Rf /workdir
9 comments
Hi Thanks for your tutorial, very well made. But.. before the ssl section, i still only get a blank page. cannot get the login screen. I do see the favicon of guacamole.. I don’t see error present and system are started, port look open. try : setsebool -P httpd_can_network_relay , ss tupln show port.. So i don’t know ..
Thanks in advance
I’ve seen this behavior if iptables is running. Try disabling temporarily SELinux and firewalld/iptables if you have them enabled. See if that helps.
Hi so yeah, i did put setenforce at 0. It’s all the same, just at the :guacamole.properties , that i did not included the line 1 and 13. Even if i included it, it give me the same. That’s all before the nginx setup that i haven’t done yet. but i should log over http://test.domain.com:8080/guacamole/ I did try permission with chown tomcat:tomcat on the guacamo..war file. but still blank.
try the semodule -l |grep guac … still. I find the pid 30088 related to 3306 is denied. I try to install semanage and now i can’t get it as it look i lost all package manager.. said no mirror find.. maybe it was because of the main change of the rpm package ?
Check out this guy. He had something similar with port 3306 and SELinux.
https://www.doyler.net/security-not-included/guacamole-installation-homelab
Hi, I have installed NGINX to use it as a reverse proxy with guacamole on SSL, I have follow your tutorial step by step and I have create guacamole.conf under /etc/nginx/conf.d/ I have a valid certificate and it is correctly loaded by NGINX (I can see the green padlock into browser addressbar) but I still have 502 Bad Gateway. If I point my browser to http://my.domain.com:8080/guacamole it work like a charm, I got the login screen, I can login and do all the stuff. How can I fix it?
In /var/log/nginx/error.log I got this (part of the message I think is relevant):
[crit] 14183#0: *1 connect() to 127.0.0.1:8080 failed (13: Permission denied) while connecting to upstream,
Thanks for your reply, bests,
Alessandro
Looks like a SElinux issue to me. See if this helps.
Disable SELinux by editing /etc/selinux/config and change SELINUX=enforcing to SELINUX=permissive. Also, type setenforce 0.
SElinux was already set on permissive, setenforce 0 is the way!
Now I can access it via https://my.domain.com
Thankyou very very much!
Best regards,
Alessandro.
I’m getting this error, can you tell me what it can be?
“/guacamole/api/tokens error 500”
The screen goes blank.
Check if SELinux is enabled. Also, if you are running a newer version, it might not work.