In this post, I’ll explain how to install Jenkins on FreeBSD and CentOS. Jenkins runs on port 8080 (8180 in FreeBSD), so sometimes it’s not possible to access these ports because of corporate firewalls. We’ll put Jenkins behind nginx that will act as a reverse proxy. We’ll use port 80 (HTTP) and 443 (HTTPS) if you want to have SSL certificates. The installation is very simple.
Table of Contents
CentOS
The Jenkins package is not part of the default CentOS repository, so we have to download that one first, install Jenkins, enable it to start on boot and then start it. You can skip the first line if you have wget installed. By default, it is not installed.
yum -y install wget
wget -O /etc/yum.repos.d/jenkins.repo http://pkg.jenkins-ci.org/redhat/jenkins.repo
rpm --import https://jenkins-ci.org/redhat/jenkins-ci.org.key
yum -y install jenkins java
systemctl enable jenkins
systemctl start jenkins
If you have a firewall enabled, you have to open the port for 8080.
firewall-cmd --permanent --zone=public --add-port=8080/tcp
firewall-cmd --reload
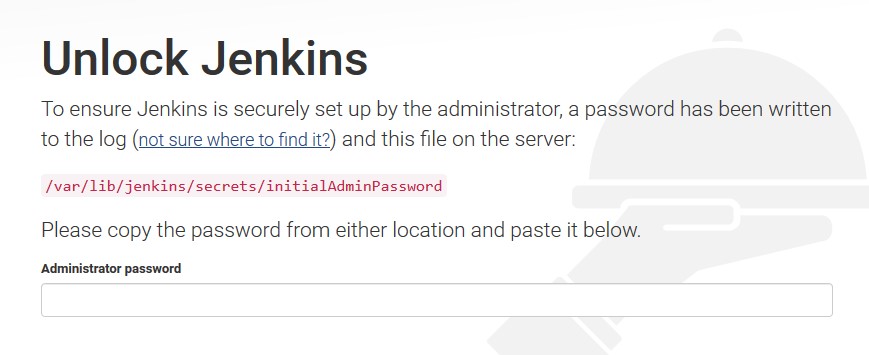
Now, go to http://[ip]:8080 and replace the

Cat out that file, copy & paste the value in the browser and click Continue.
cat /var/lib/jenkins/secrets/initialAdminPassword
7f09cb85a4b843bdab66c768020a7c6e
And that’s it. Follow the prompts to install plugins, provide admin password etc…
nginx as reverse proxy
In order to access the server with out the need to specify the port 8080 and use a DNS name, we’ll have to use nginx that will listen on port 80 or 443 and redirect the traffic to 8080. Let’s install and configure it. In my case, I’ll access the server as jenkins.domain.com.
yum -y install epel-release
yum -y install nginx
systemctl enable nginx
Edit /etc/nginx/nginx.conf and delete everything after this line around line 36. The include line should stay and the last line “}” should stay as well. So, the last lines should look like this.
       include /etc/nginx/conf.d/*.conf;
}
Go to /etc/nginx/conf.d folder and create a new file called jenkins.conf.
This is how my jenkins.conf file looks like. Change the domain in the highlighted line.
server {
    listen 80;
    server_name jenkins.domain.com;

    location / {
        proxy_set_header   X-Forwarded-For $remote_addr;
        proxy_set_header   Host $http_host;
        proxy_pass         "http://127.0.0.1:8080";
    }
}
Don’t forget to open port 80 in your firewall.
firewall-cmd --permanent --zone=public --add-port=80/tcp
firewall-cmd --reload
If you have SELinux, you’ll have to allow HTTP traffic.
setsebool -P httpd_can_network_connect 1
And restart nginx for changes to take effect.
systemctl restart nginx
Now, you can access the server as jenkins.domain.com.
For HTTPS traffic, the configuration is different. You’ll need certificates specified in lines 15 and 16 (under /etc/nginx) and the domain changed in 7,13 and 31. Here is the config (/etc/nginx/conf.d/jenkins.conf) in order to access jenkins over SSL.
upstream jenkins {
  server 127.0.0.1:8080 fail_timeout=0;
}

server {
  listen 80;
  server_name jenkins.domain.com;
  return 301 https://$host$request_uri;
}

server {
  listen 443 ssl;
  server_name jenkins.domain.com;

  ssl_certificate public_cert.pem;
  ssl_certificate_key private_cert.key;
  client_max_body_size 4M;

  location / {
    proxy_set_header        Host $host:$server_port;
    proxy_set_header        X-Real-IP $remote_addr;
    proxy_set_header        X-Forwarded-For $proxy_add_x_forwarded_for;
    proxy_set_header        X-Forwarded-Proto $scheme;
    proxy_redirect http:// https://;
    proxy_pass              http://jenkins;
    # Required for new HTTP-based CLI
    proxy_http_version 1.1;
    proxy_request_buffering off;
    proxy_buffering off; # Required for HTTP-based CLI to work over SSL
    # workaround for https://issues.jenkins-ci.org/browse/JENKINS-45651
    add_header 'X-SSH-Endpoint' 'jenkins.domain.com:50022' always;
  }
}
Make sure you open port 443 on the firewall as we did for port 80 and change SELinux with setsebool.
firewall-cmd --permanent --zone=public --add-port=443/tcp
firewall-cmd --reload
SELinux change.
setsebool -P httpd_can_network_connect 1
You should also restart nginx for the changes to take effect.
systemctl restart nginx
That’s it. You should be able to access Jenkins as jenkins.domain.com over https.
FreeBSD
The installation on FreeBSD is a little bit different. You can install Jenkins from the packages. It will install JDK as well.
pkg install jenkins
The OpenJDK installation depends on these “memory filesystems”. Mount them now.
mount -t fdescfs fdesc /dev/fd
mount -t procfs proc /proc
…and make sure they are mounted on boot.
cat <<EOF >> /etc/fstab
fdesc   /dev/fd         fdescfs         rw      0       0
proc    /proc           procfs          rw      0       0
EOF
We need to make sure jenkins starts on boot.
sysrc jenkins_enable=YES
Now, we can start jenkins.
service jenkins start
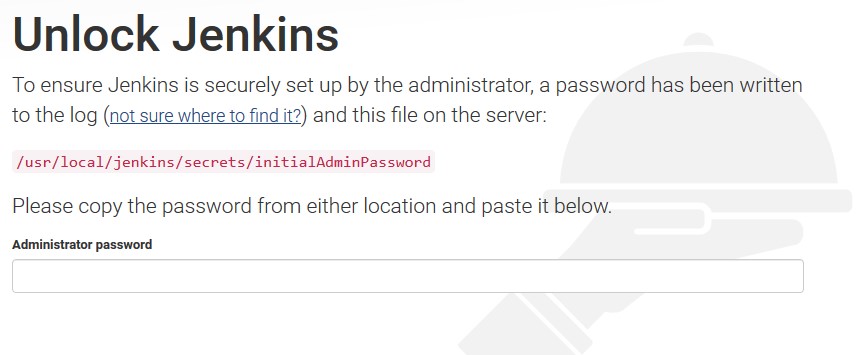
Go to http://[IP]:8180/jenkins and you should see the welcome screen. Replace the [IP] with the IP address of your server. You should see this screen.

Cat out that file, copy & paste the value in the browser and click Continue.
cat /usr/local/jenkins/secrets/initialAdminPassword
c33a584df234433d9a88e19d8e14c289
And that’s it. Follow the prompts to install plugins, provide admin password etc…The jenkins installation on FreeBSD is accessed with a suffix /jenkins. If you try to access it without the suffix, you’ll get this error.
HTTP ERROR 404
Problem accessing /. Reason:
    Not Found
It’s much easier to do the redirects with nginx without the suffix, so we’ll change it.
Edit this file /usr/local/etc/rc.d/jenkins and around line 54 find this.
: ${jenkins_args="--webroot=${jenkins_home}/war --httpPort=8180 --prefix=/jenkins"}
Change it so it looks like this.
: ${jenkins_args="--webroot=${jenkins_home}/war --httpPort=8180 --prefix=/"}
Restart Jenkins and you’ll be able to access it as http://[IP]:8180.
service jenkins restart
nginx as reverse proxy
In order to access the server with out the need to specify the port 8180 and use a DNS name, we’ll have to use nginx that will listen on port 80 or 443 and redirect the traffic to 8180. Let’s install and configure nginx. In my case, I’ll access the server as jenkins.domain.com.
pkg install nginx
Run on boot.
sysrc nginx_enable=YES
Edit /usr/local/etc/nginx/nginx.conf and delete everything after this line around line 39 after #gzip on directive. Add the include line, so the last three lines look like this.
    #gzip  on;
    include /usr/local/etc/nginx/conf.d/*.conf;
}
Create a new conf.d folder mkdir /usr/local/etc/nginx/conf.d and create a new file called jenkins.conf.
This is how my jenkins.conf file looks like. Change the domain in the highlighted line.
server {
    listen 80;
    server_name jenkins.domain.com;

    location / {
        proxy_set_header   X-Forwarded-For $remote_addr;
        proxy_set_header   Host $http_host;
        proxy_pass         "http://127.0.0.1:8180";
    }
}
Restart Jenkins and you should be able to access the site now with http://jenkins.domain.com.
For HTTPS traffic, the configuration is different. You’ll need certificates specified in lines 15 and 16 (under /usr/local/etc/nginx) and the domain changed in 7,13 and 31. Here is the config (/usr/local/etc/nginx/conf.d/jenkins.conf) in order to access jenkins over SSL.
upstream jenkins {
  server 127.0.0.1:8180 fail_timeout=0;
}

server {
  listen 80;
  server_name jenkins.domain.com;
  return 301 https://$host$request_uri;
}

server {
  listen 443 ssl;
  server_name jenkins.domain.com;

  ssl_certificate public_cert.pem;
  ssl_certificate_key private_cert.key;
  client_max_body_size 4M;

  location / {
    proxy_set_header        Host $host:$server_port;
    proxy_set_header        X-Real-IP $remote_addr;
    proxy_set_header        X-Forwarded-For $proxy_add_x_forwarded_for;
    proxy_set_header        X-Forwarded-Proto $scheme;
    proxy_redirect http:// https://;
    proxy_pass              http://jenkins;
    # Required for new HTTP-based CLI
    proxy_http_version 1.1;
    proxy_request_buffering off;
    proxy_buffering off; # Required for HTTP-based CLI to work over SSL
    # workaround for https://issues.jenkins-ci.org/browse/JENKINS-45651
    add_header 'X-SSH-Endpoint' 'jenkins.domain.com:50022' always;
  }
}
You should also restart nginx for the changes to take effect.
service nginx restart
That’s it. You should be able to access Jenkins as jenkins.domain.com over https.

