
Recently I was playing with Kubernetes and racked a substantial bill in AWS and Azure so I decided to bring the lab home. I needed a small but powerful PC that can run multiple test VMs and Kubernetes clusters. Kubernetes on a bare metal is different than EKS or AKS, especially when it comes to handling load balancers, ingress, IAM roles etc. Some of these things don’t exist on a bare metal machine.
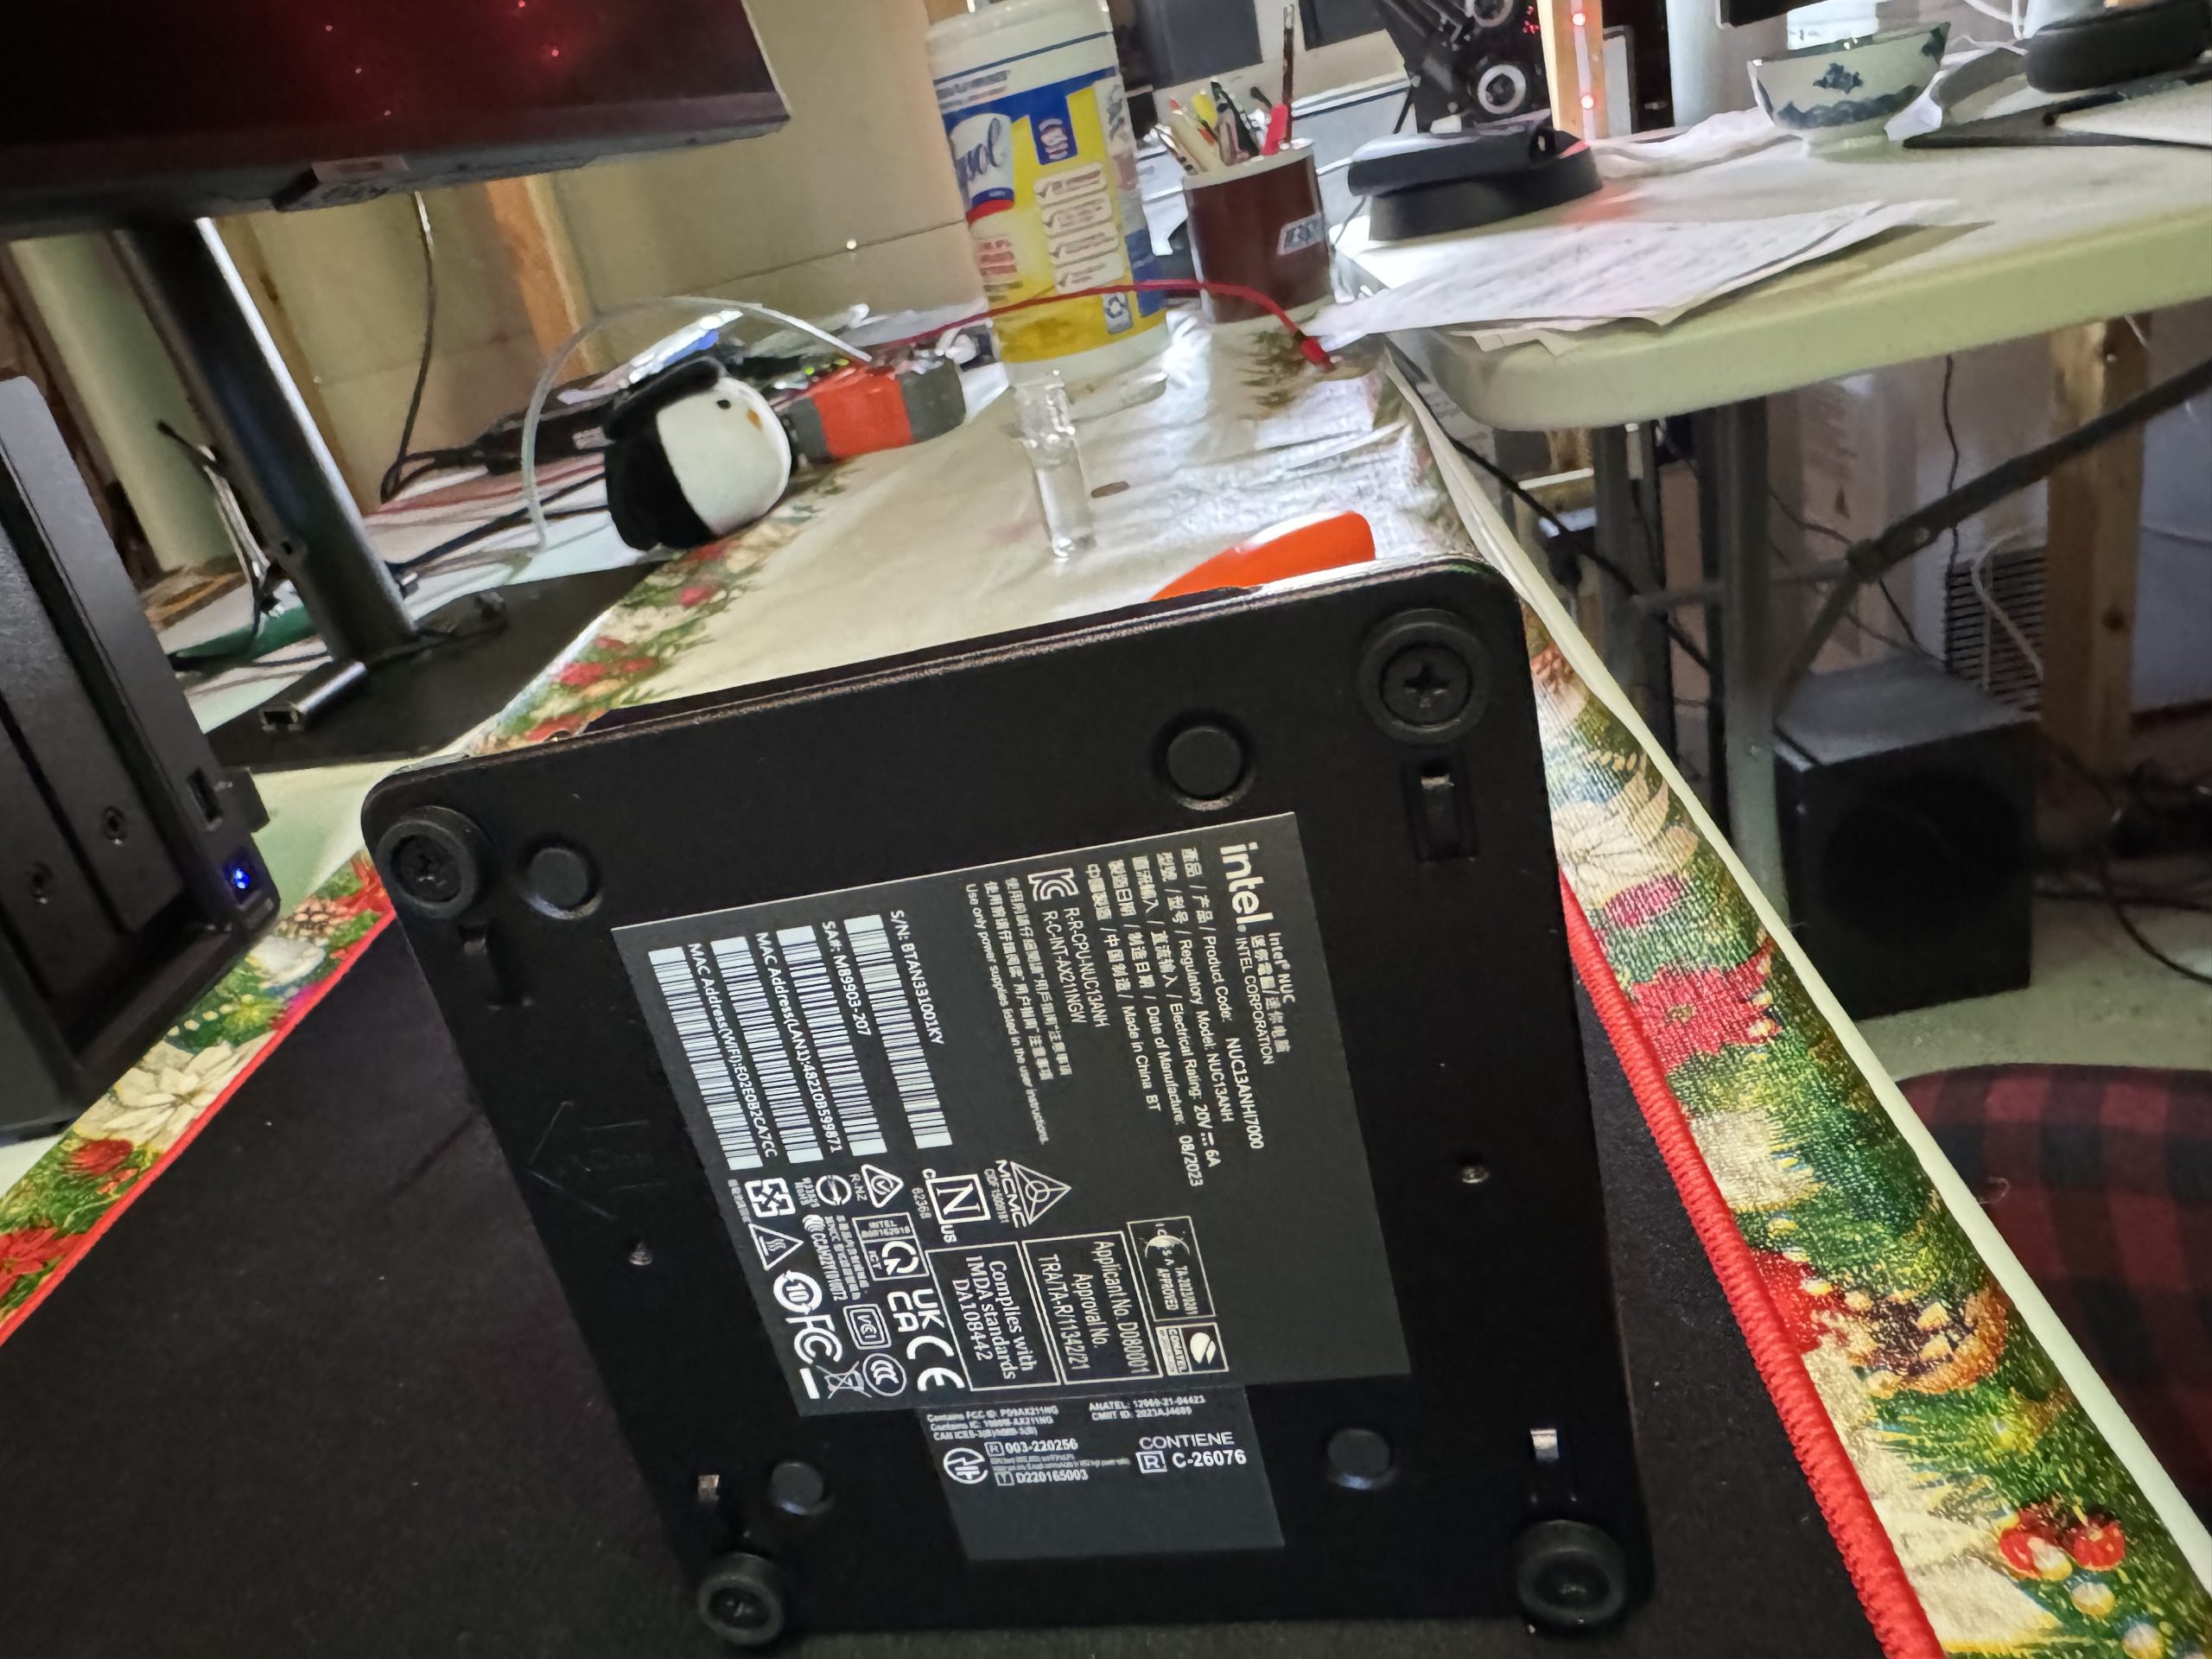
I bought a NUC 13 small factor PC from Amazon and added Samsung NVMe 2TB SSD and Crucial 64GB RAM. After 2 months (these things are expensive!!!), I bought a Synology NAS with 2 x 8GB SATA disks. Next, is to upgrade the NAS with SSD that will act as cache, but I am not in a rush. Nevertheless…
Table of Contents
Initial SSD, RAM setup
First thing you need to do is to CAREFULLY open the PC and make sure you don’t pull too hard and break the ribbon. Good thing is that the screws are not coming off and there is a spring mechanism so it’s super easy to open and close the bottom.
Add the NVMe SSD on the left side, but remove the screw first, bottom left. You’ll use it to tighten the SSD after.
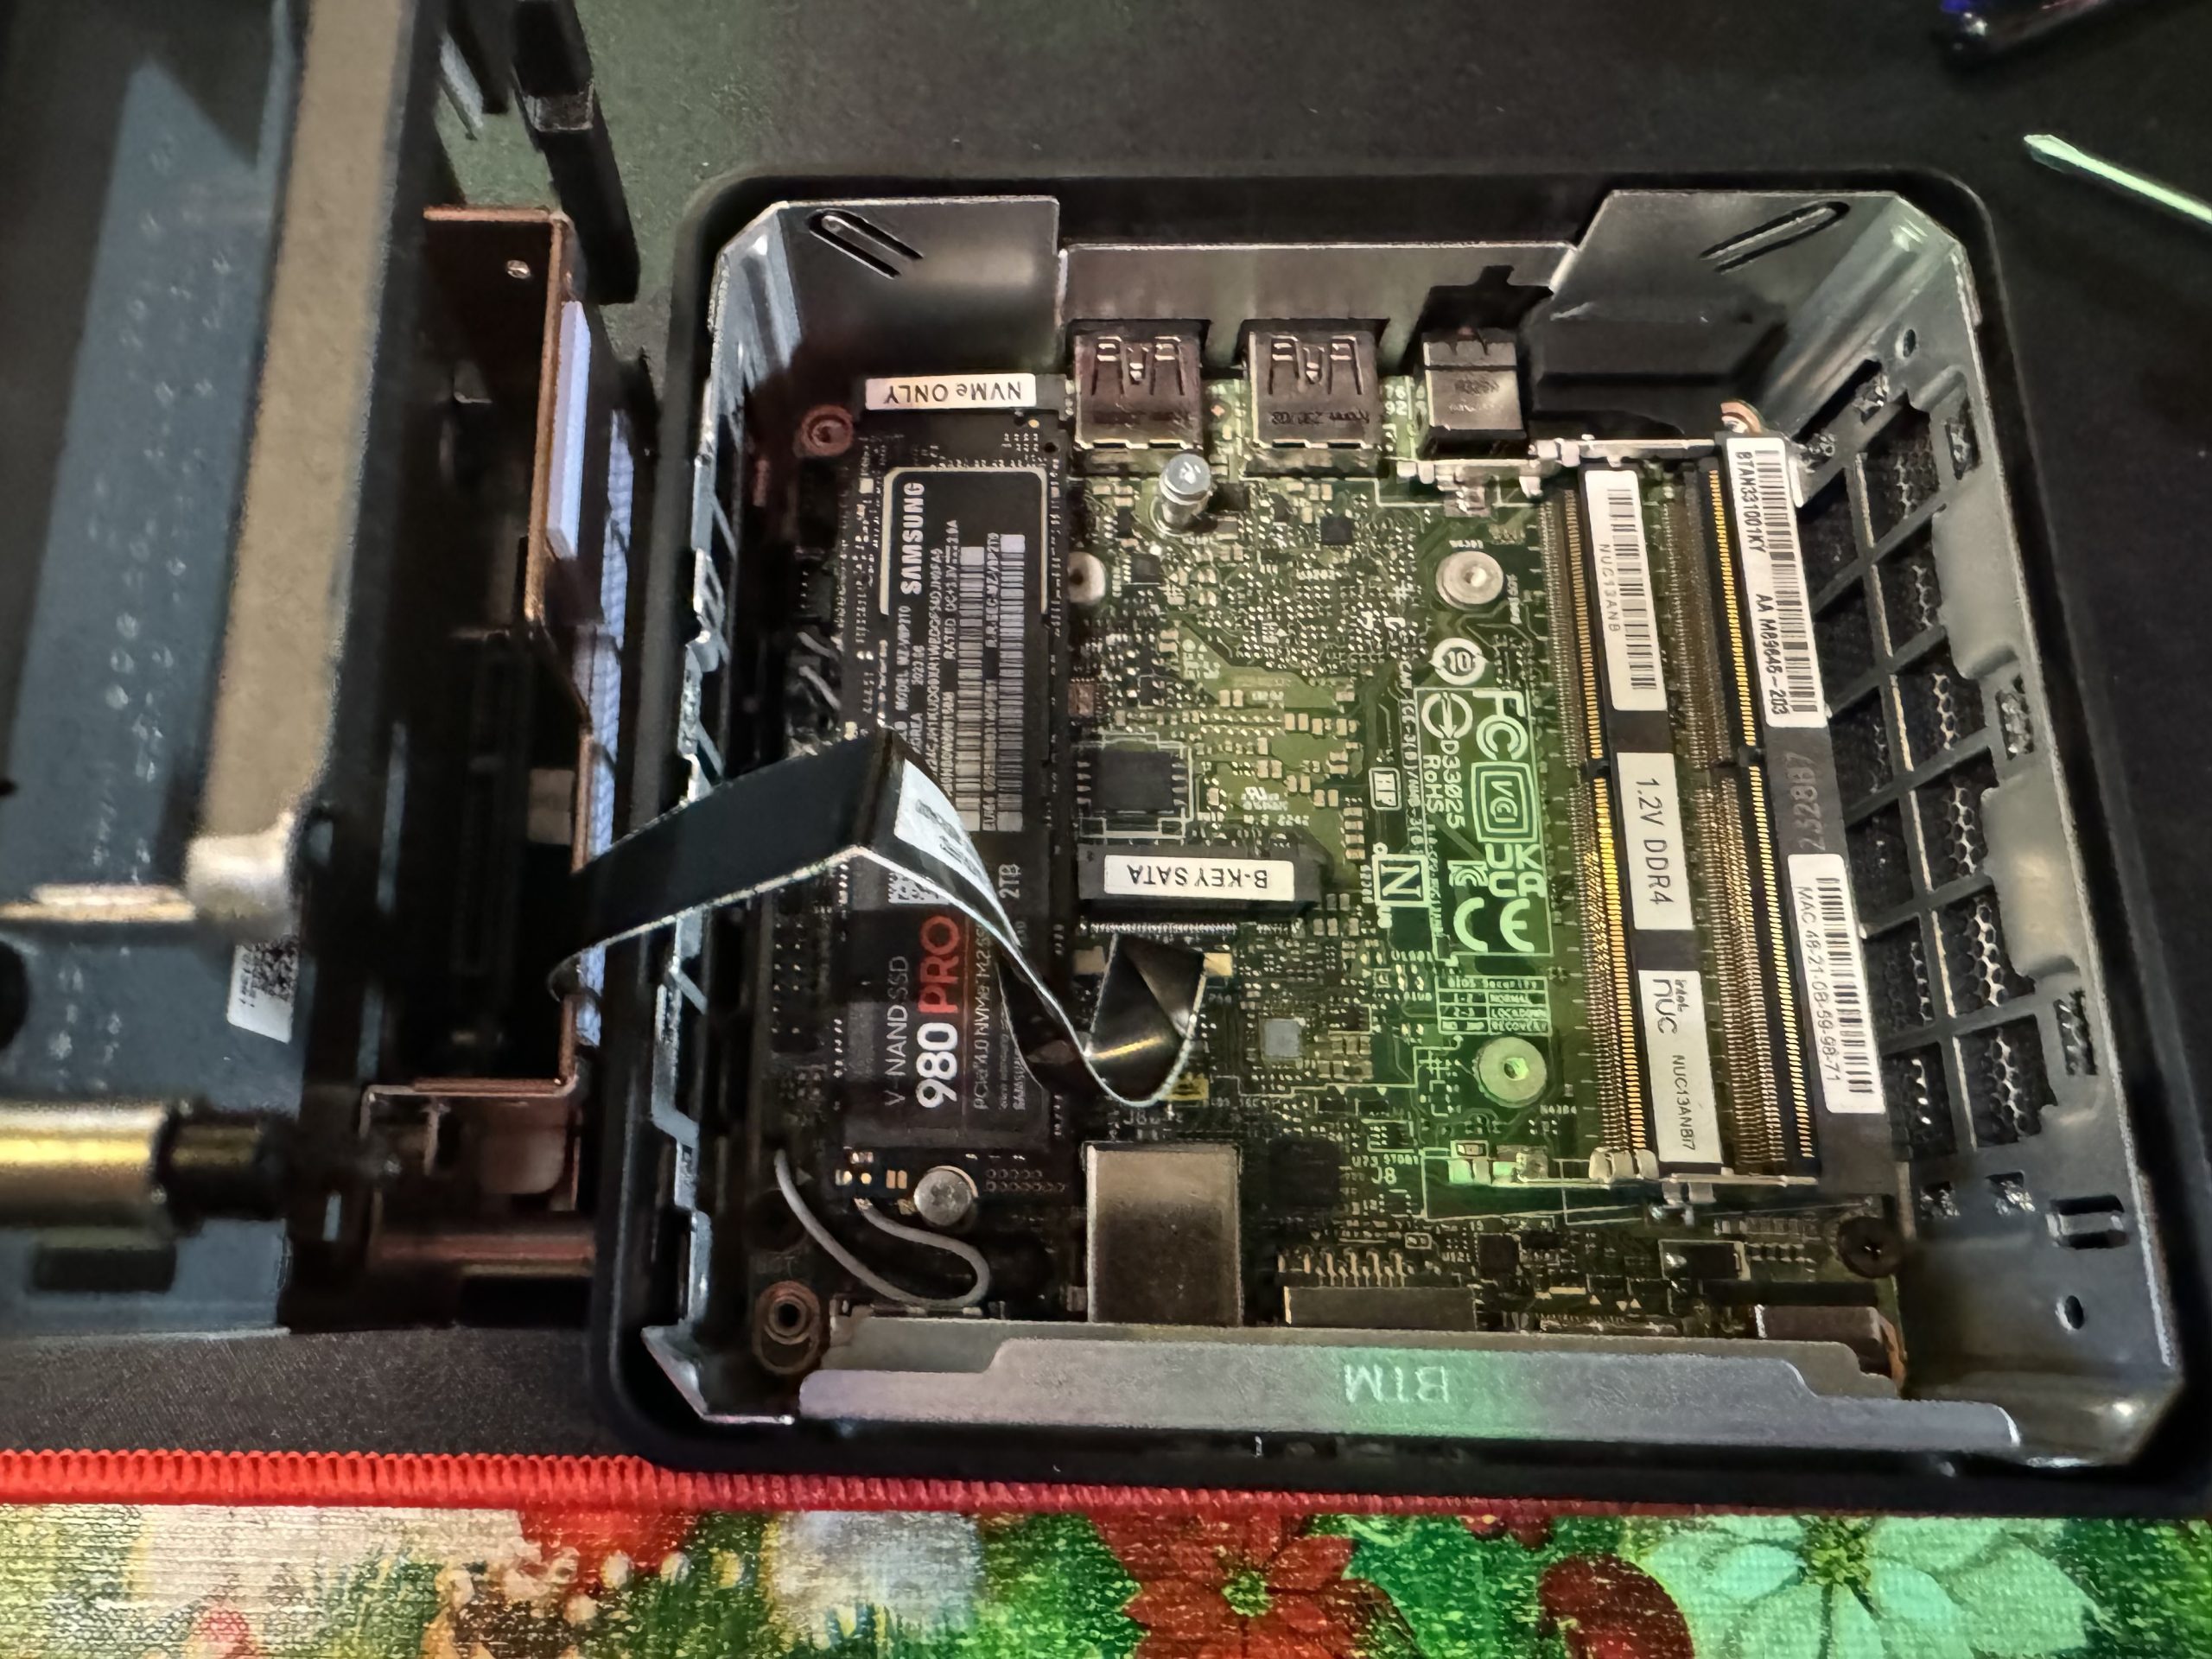
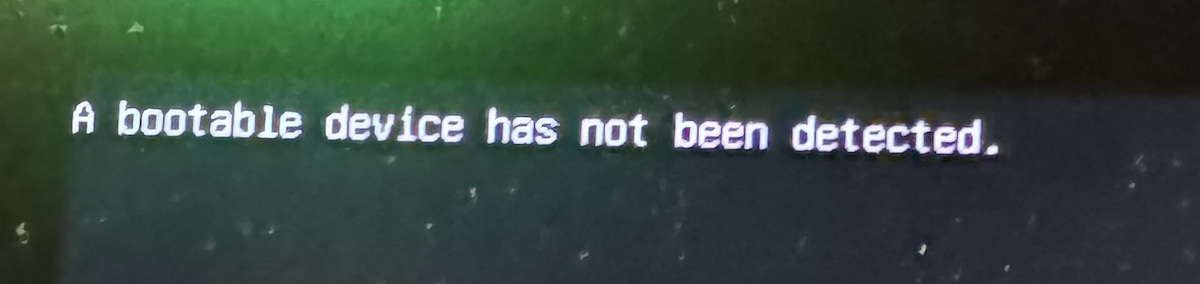
Add the memory on the right side, you can add up to 64GB RAM hence 2 x 32GB modules. If you boot the PC even with a bootable USB stick, you’ll get an error saying “A bootable device has not been detected”.
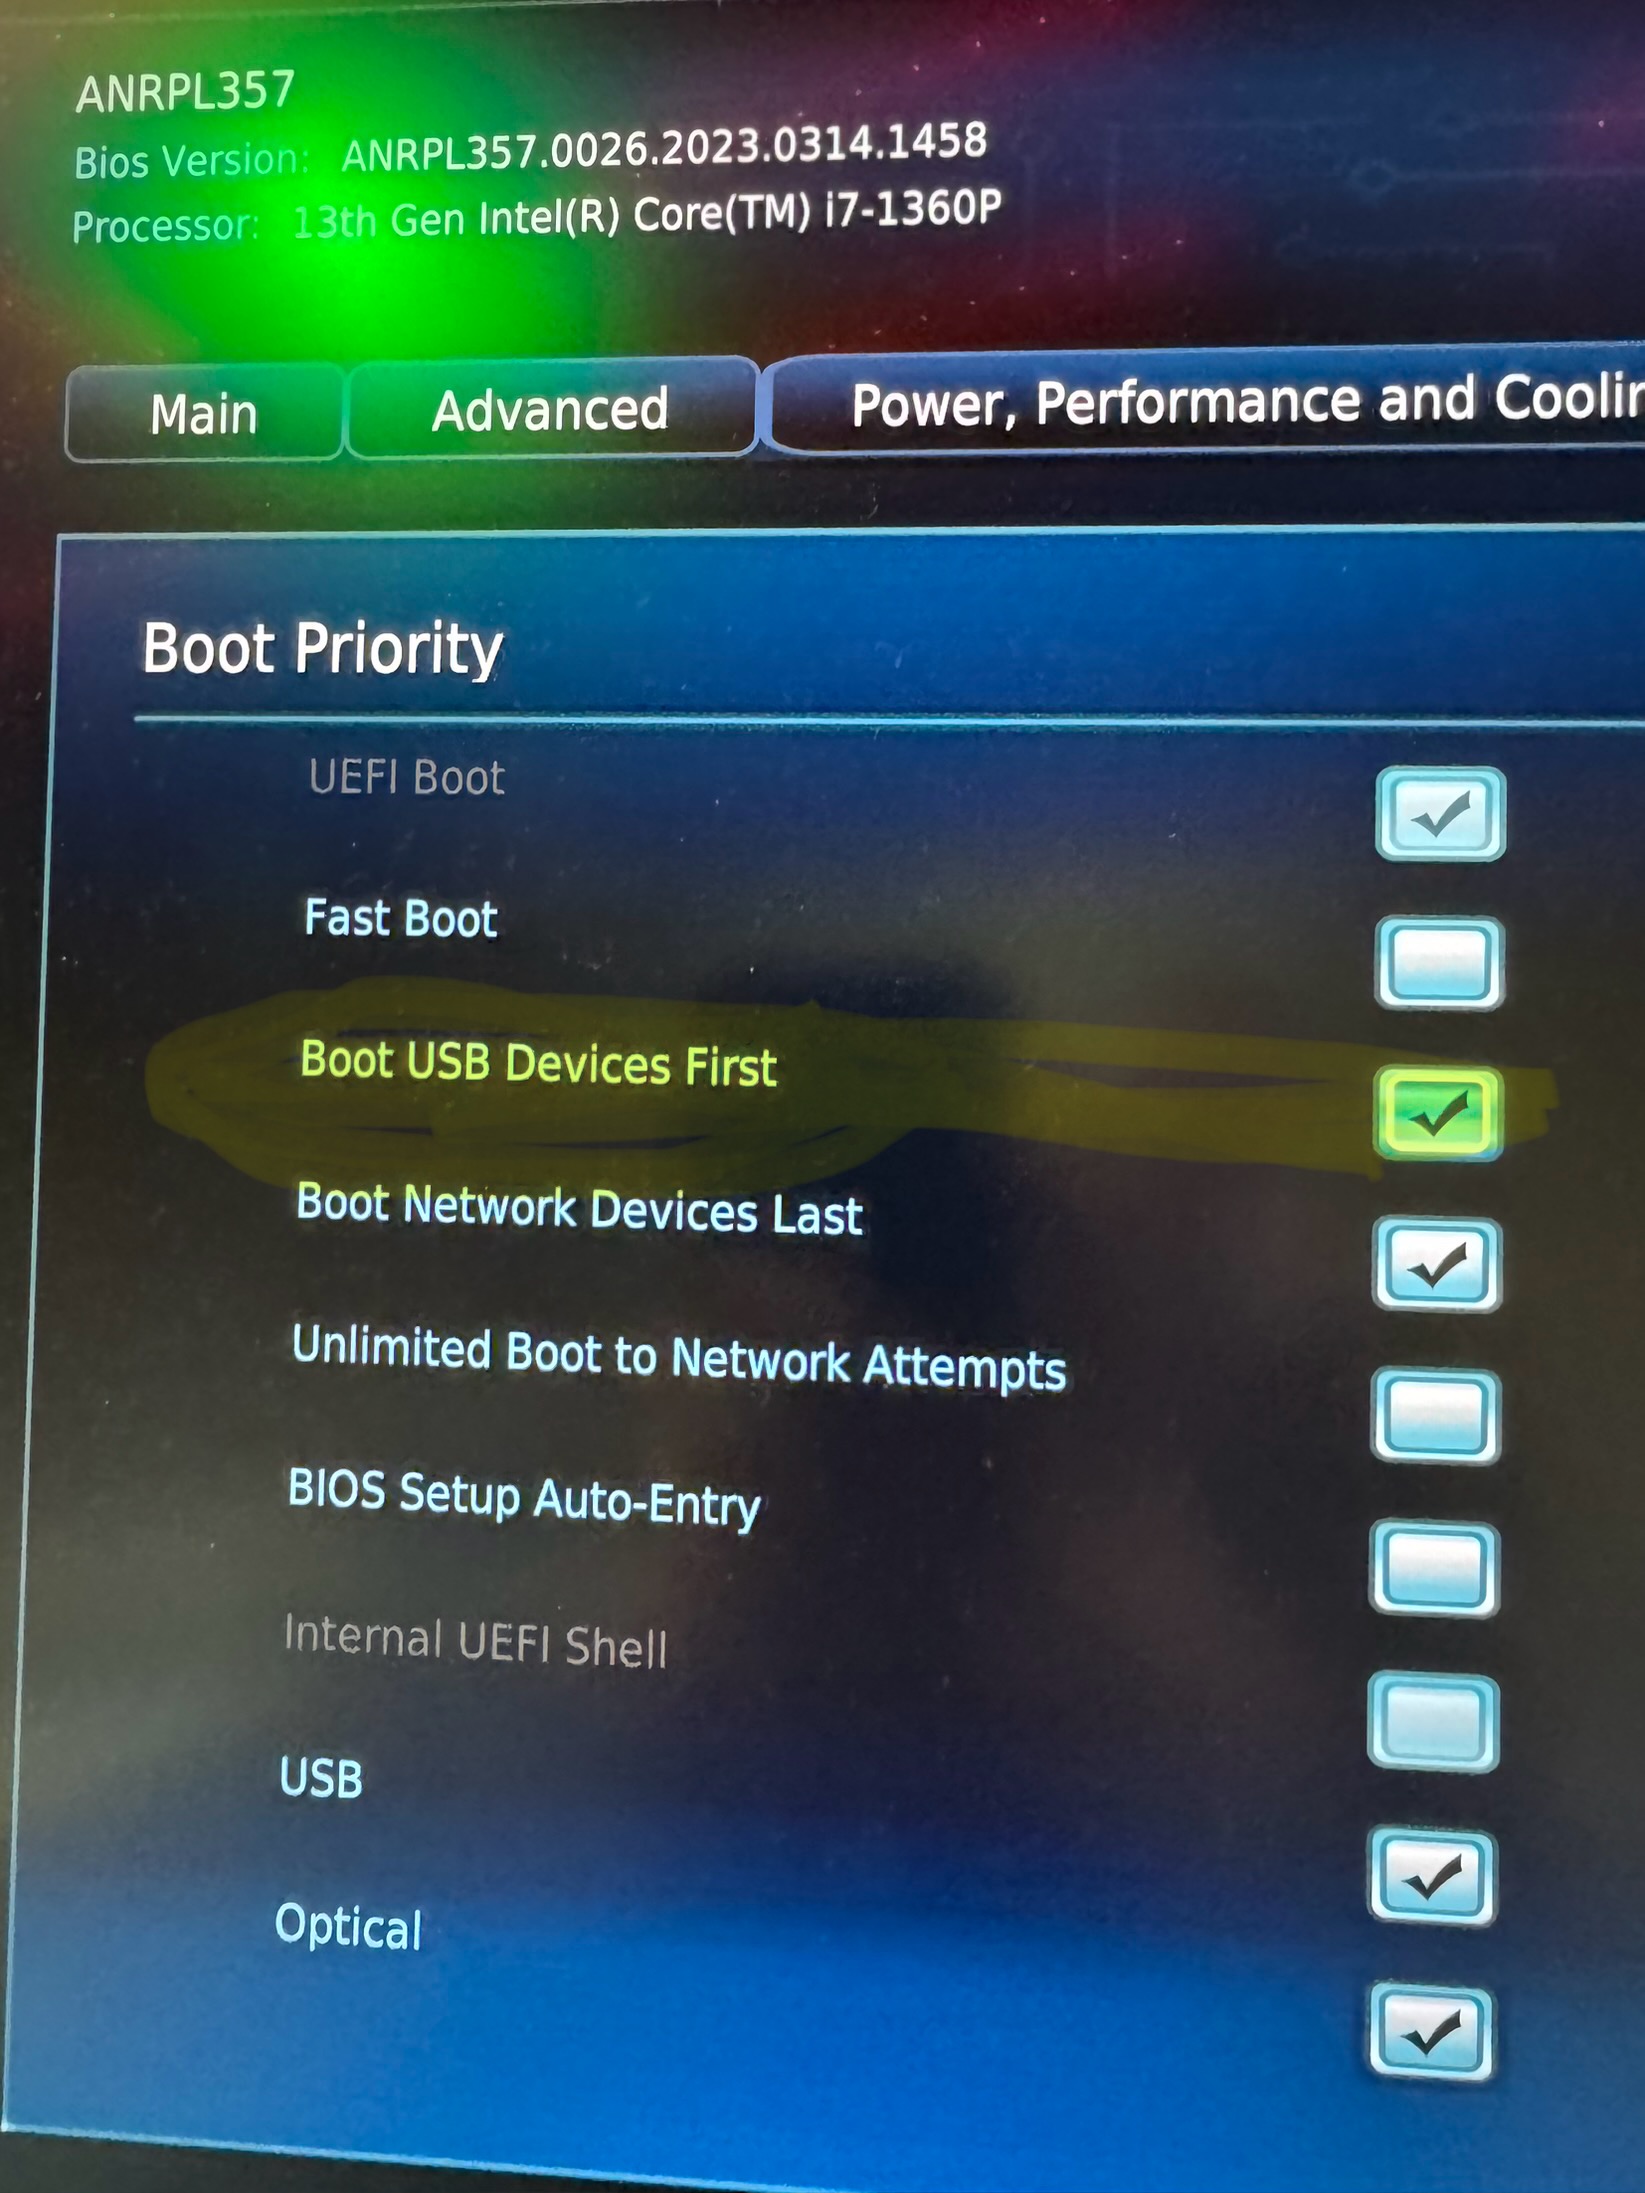
Hit CTRL-ALT-DEL and then F2 to enter BIOS. From there, go to Boot menu, then Boot Priority.
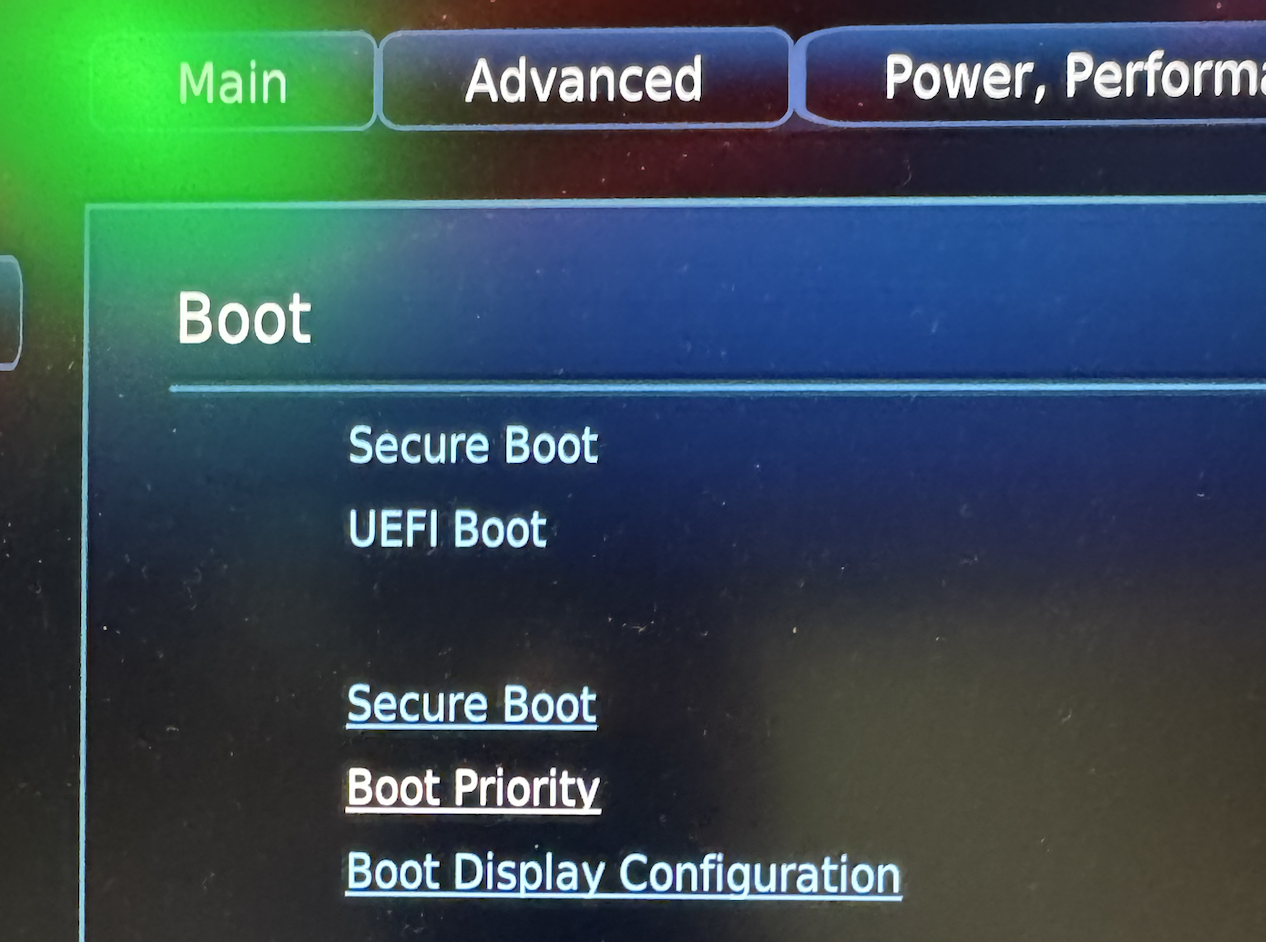
Check Boot USB Devices First.
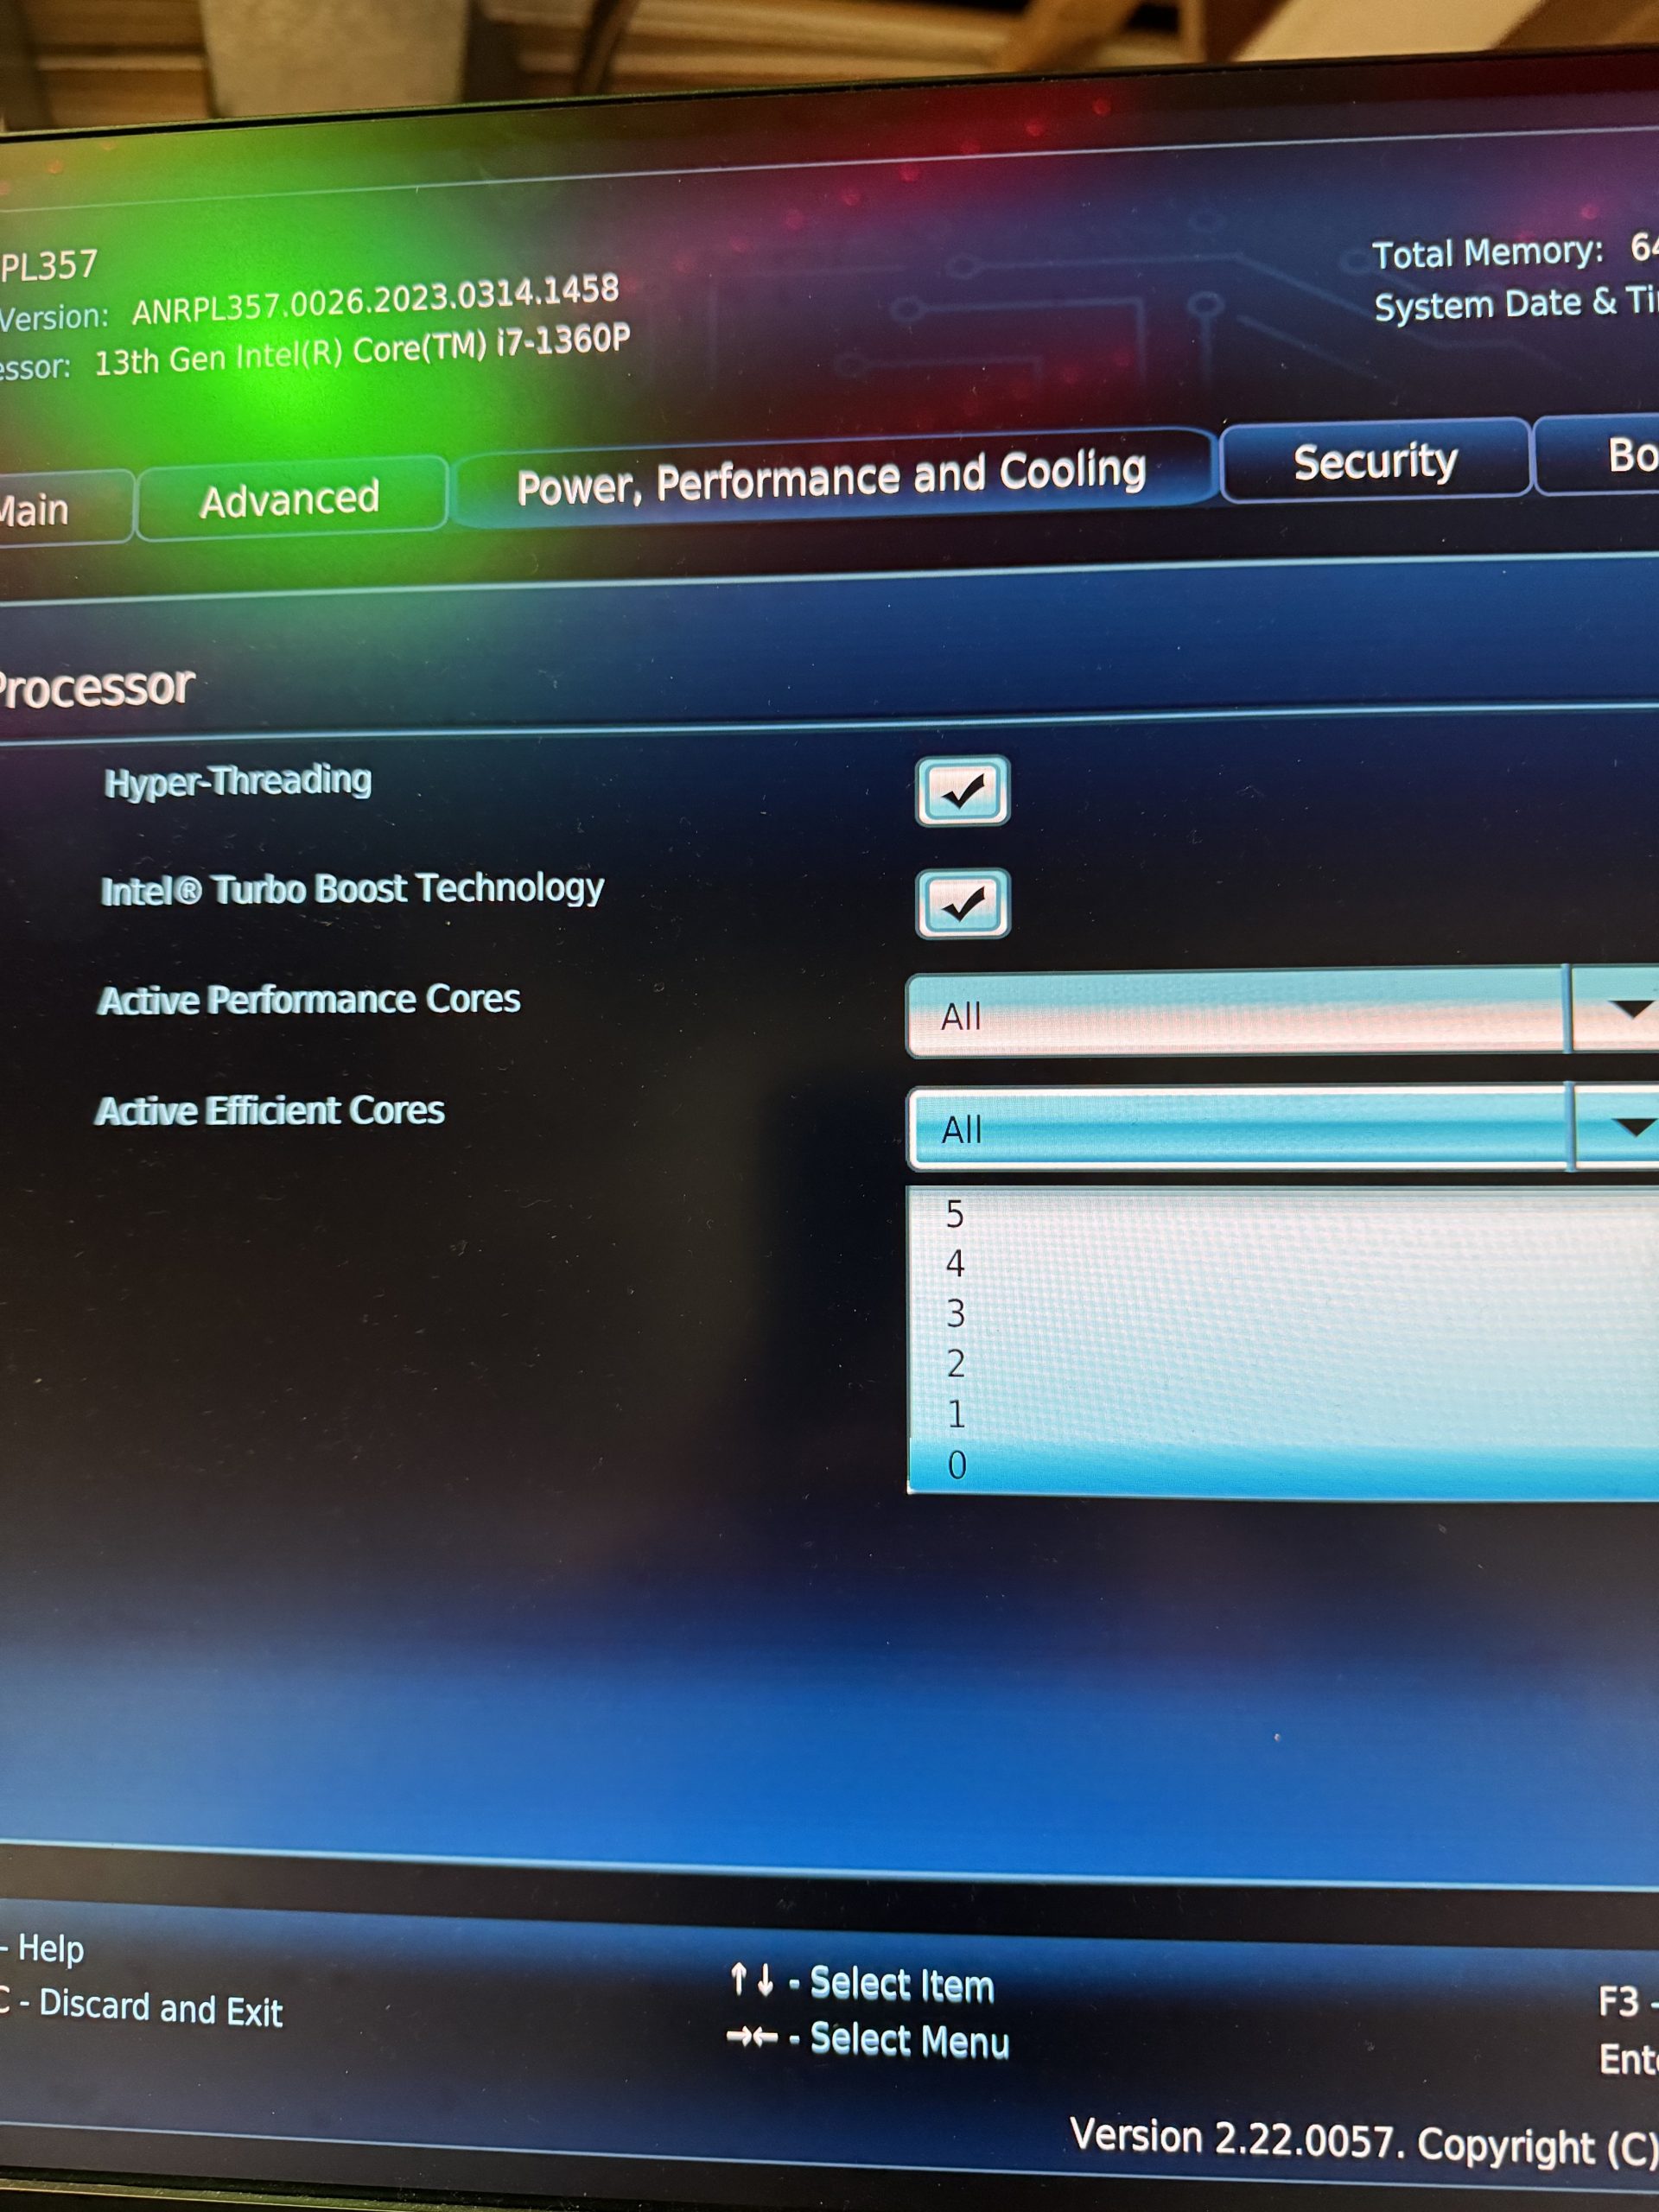
If you boot from ESXi 8 ISO now, most likely you’ll get an Fatal CPU mismatch on feature PSOD error. So, while still in the BIOS, go to Power, Performance and Cooling tab. Expand the first item External Ambient Temperature Tolerance and change the temperature setting to User Defined.
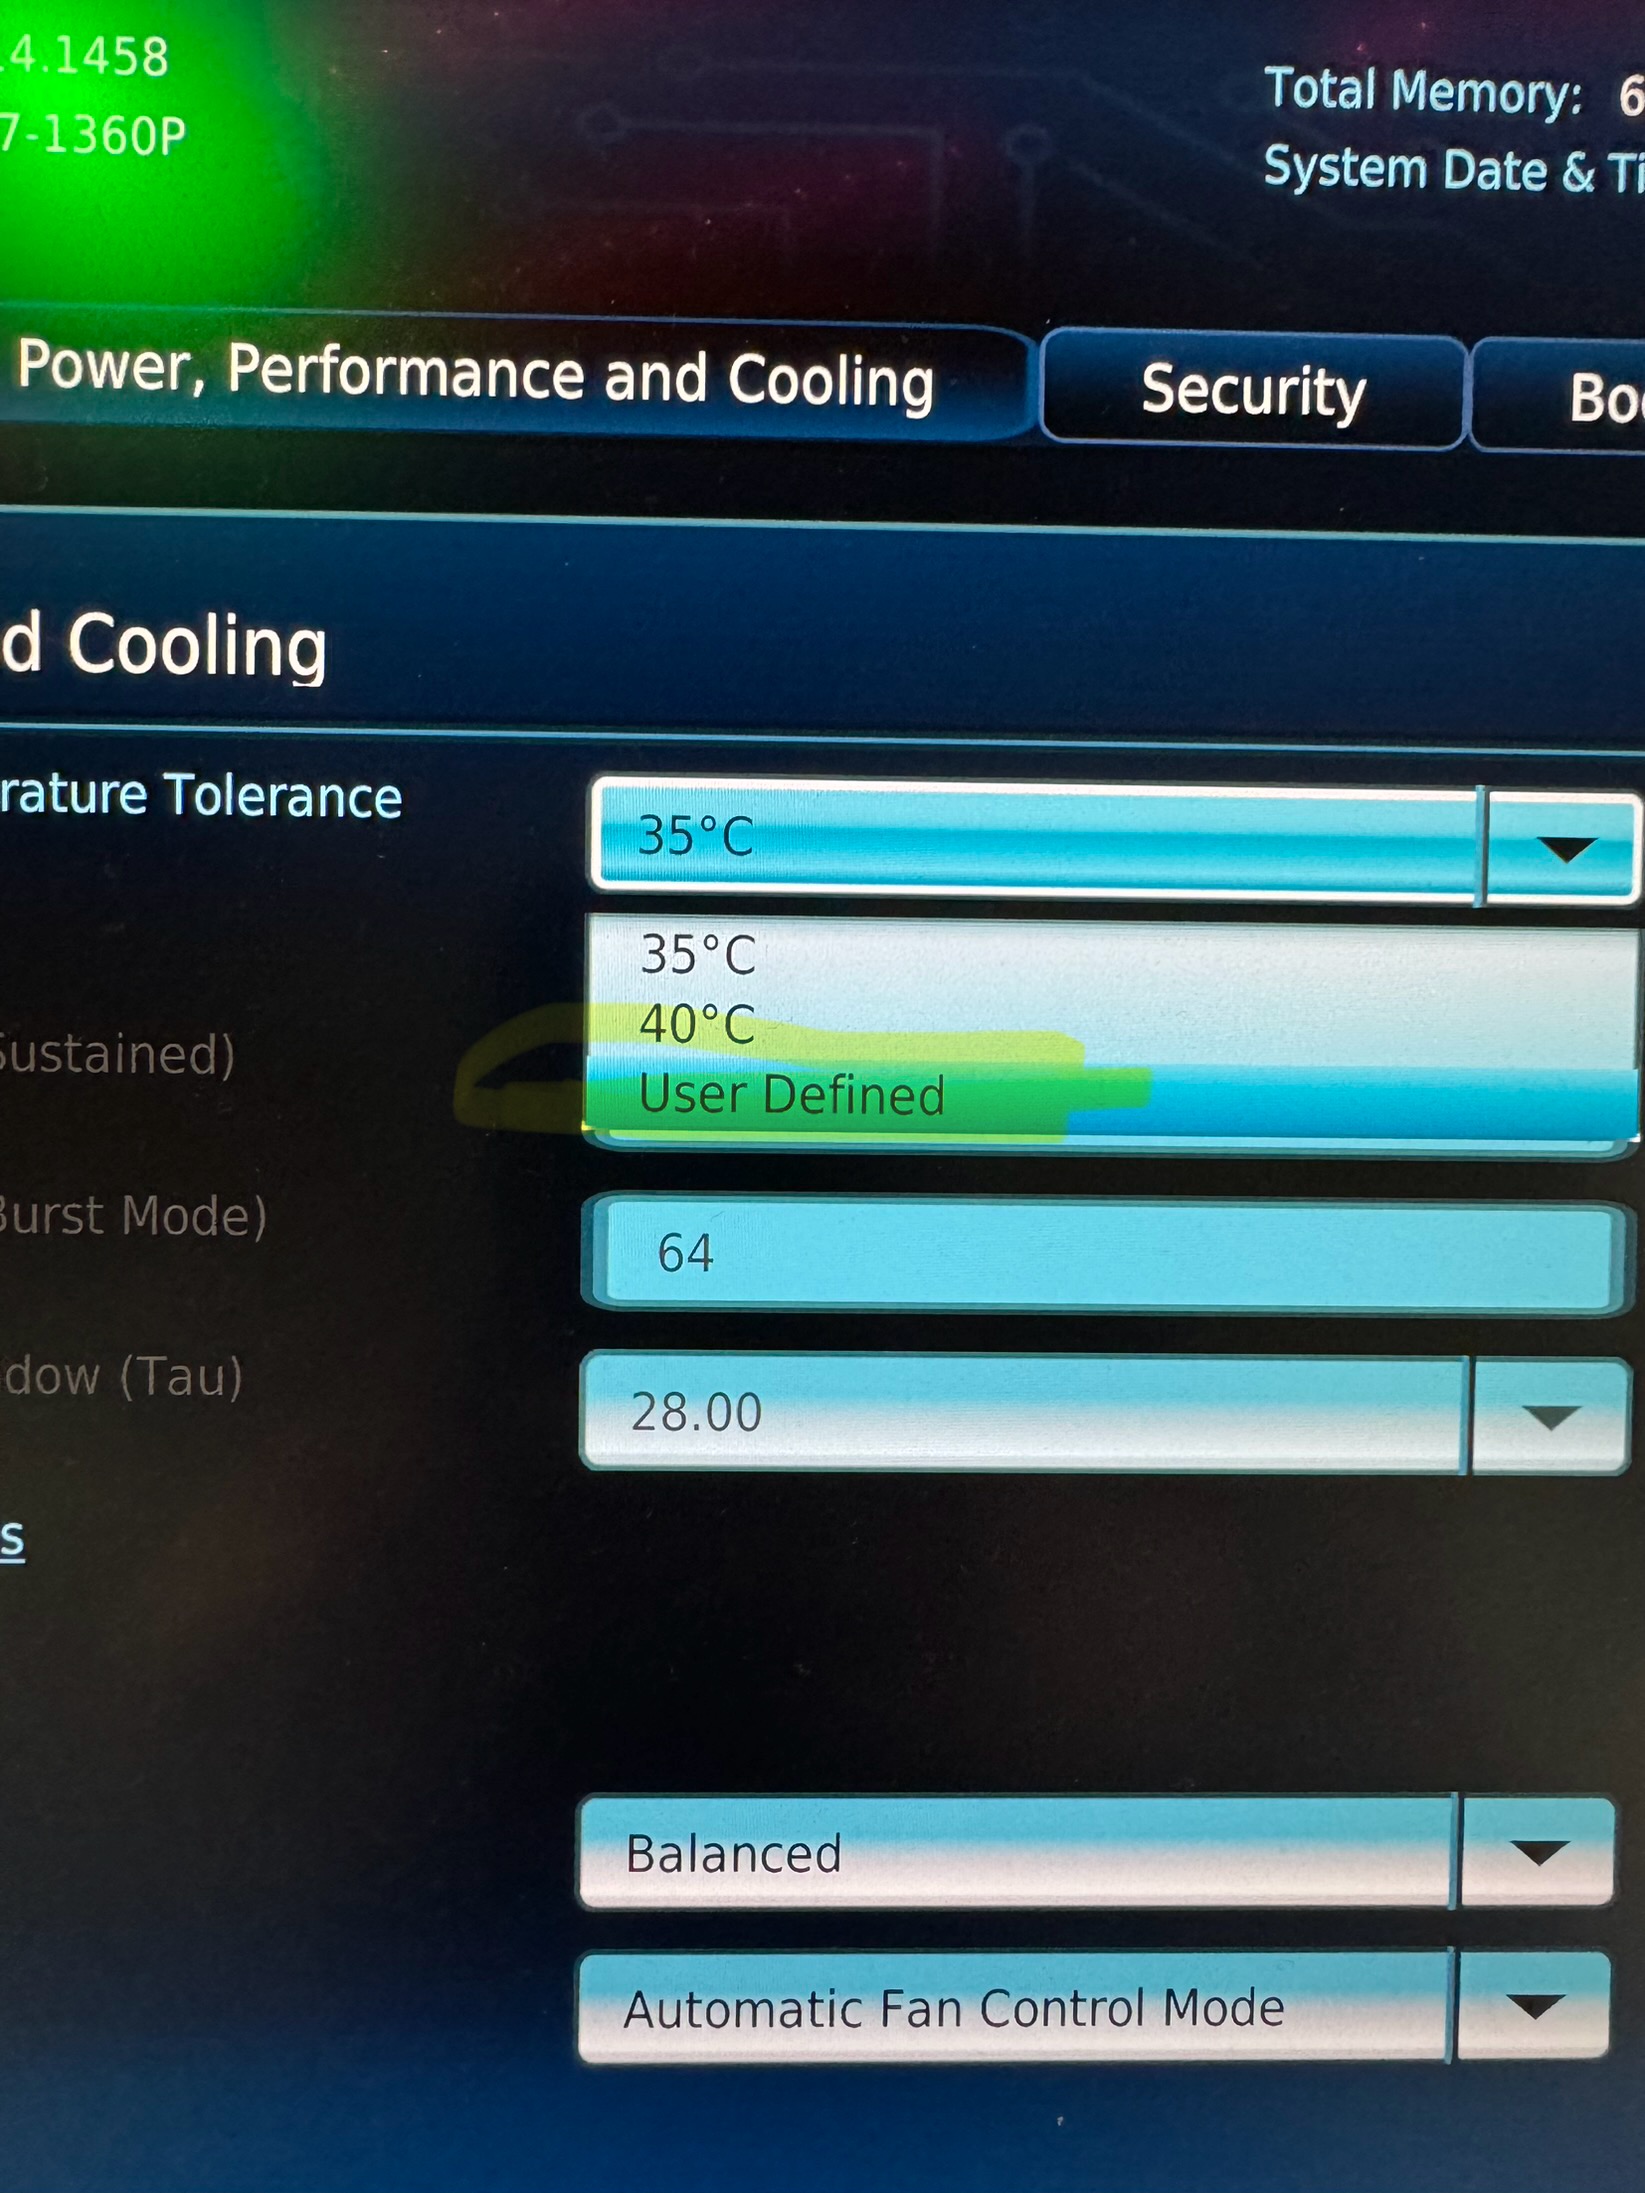
Now, you can enter the Performance menu which was grayed if the setting is not User Defined for the External Ambient Temperature Tolerance.
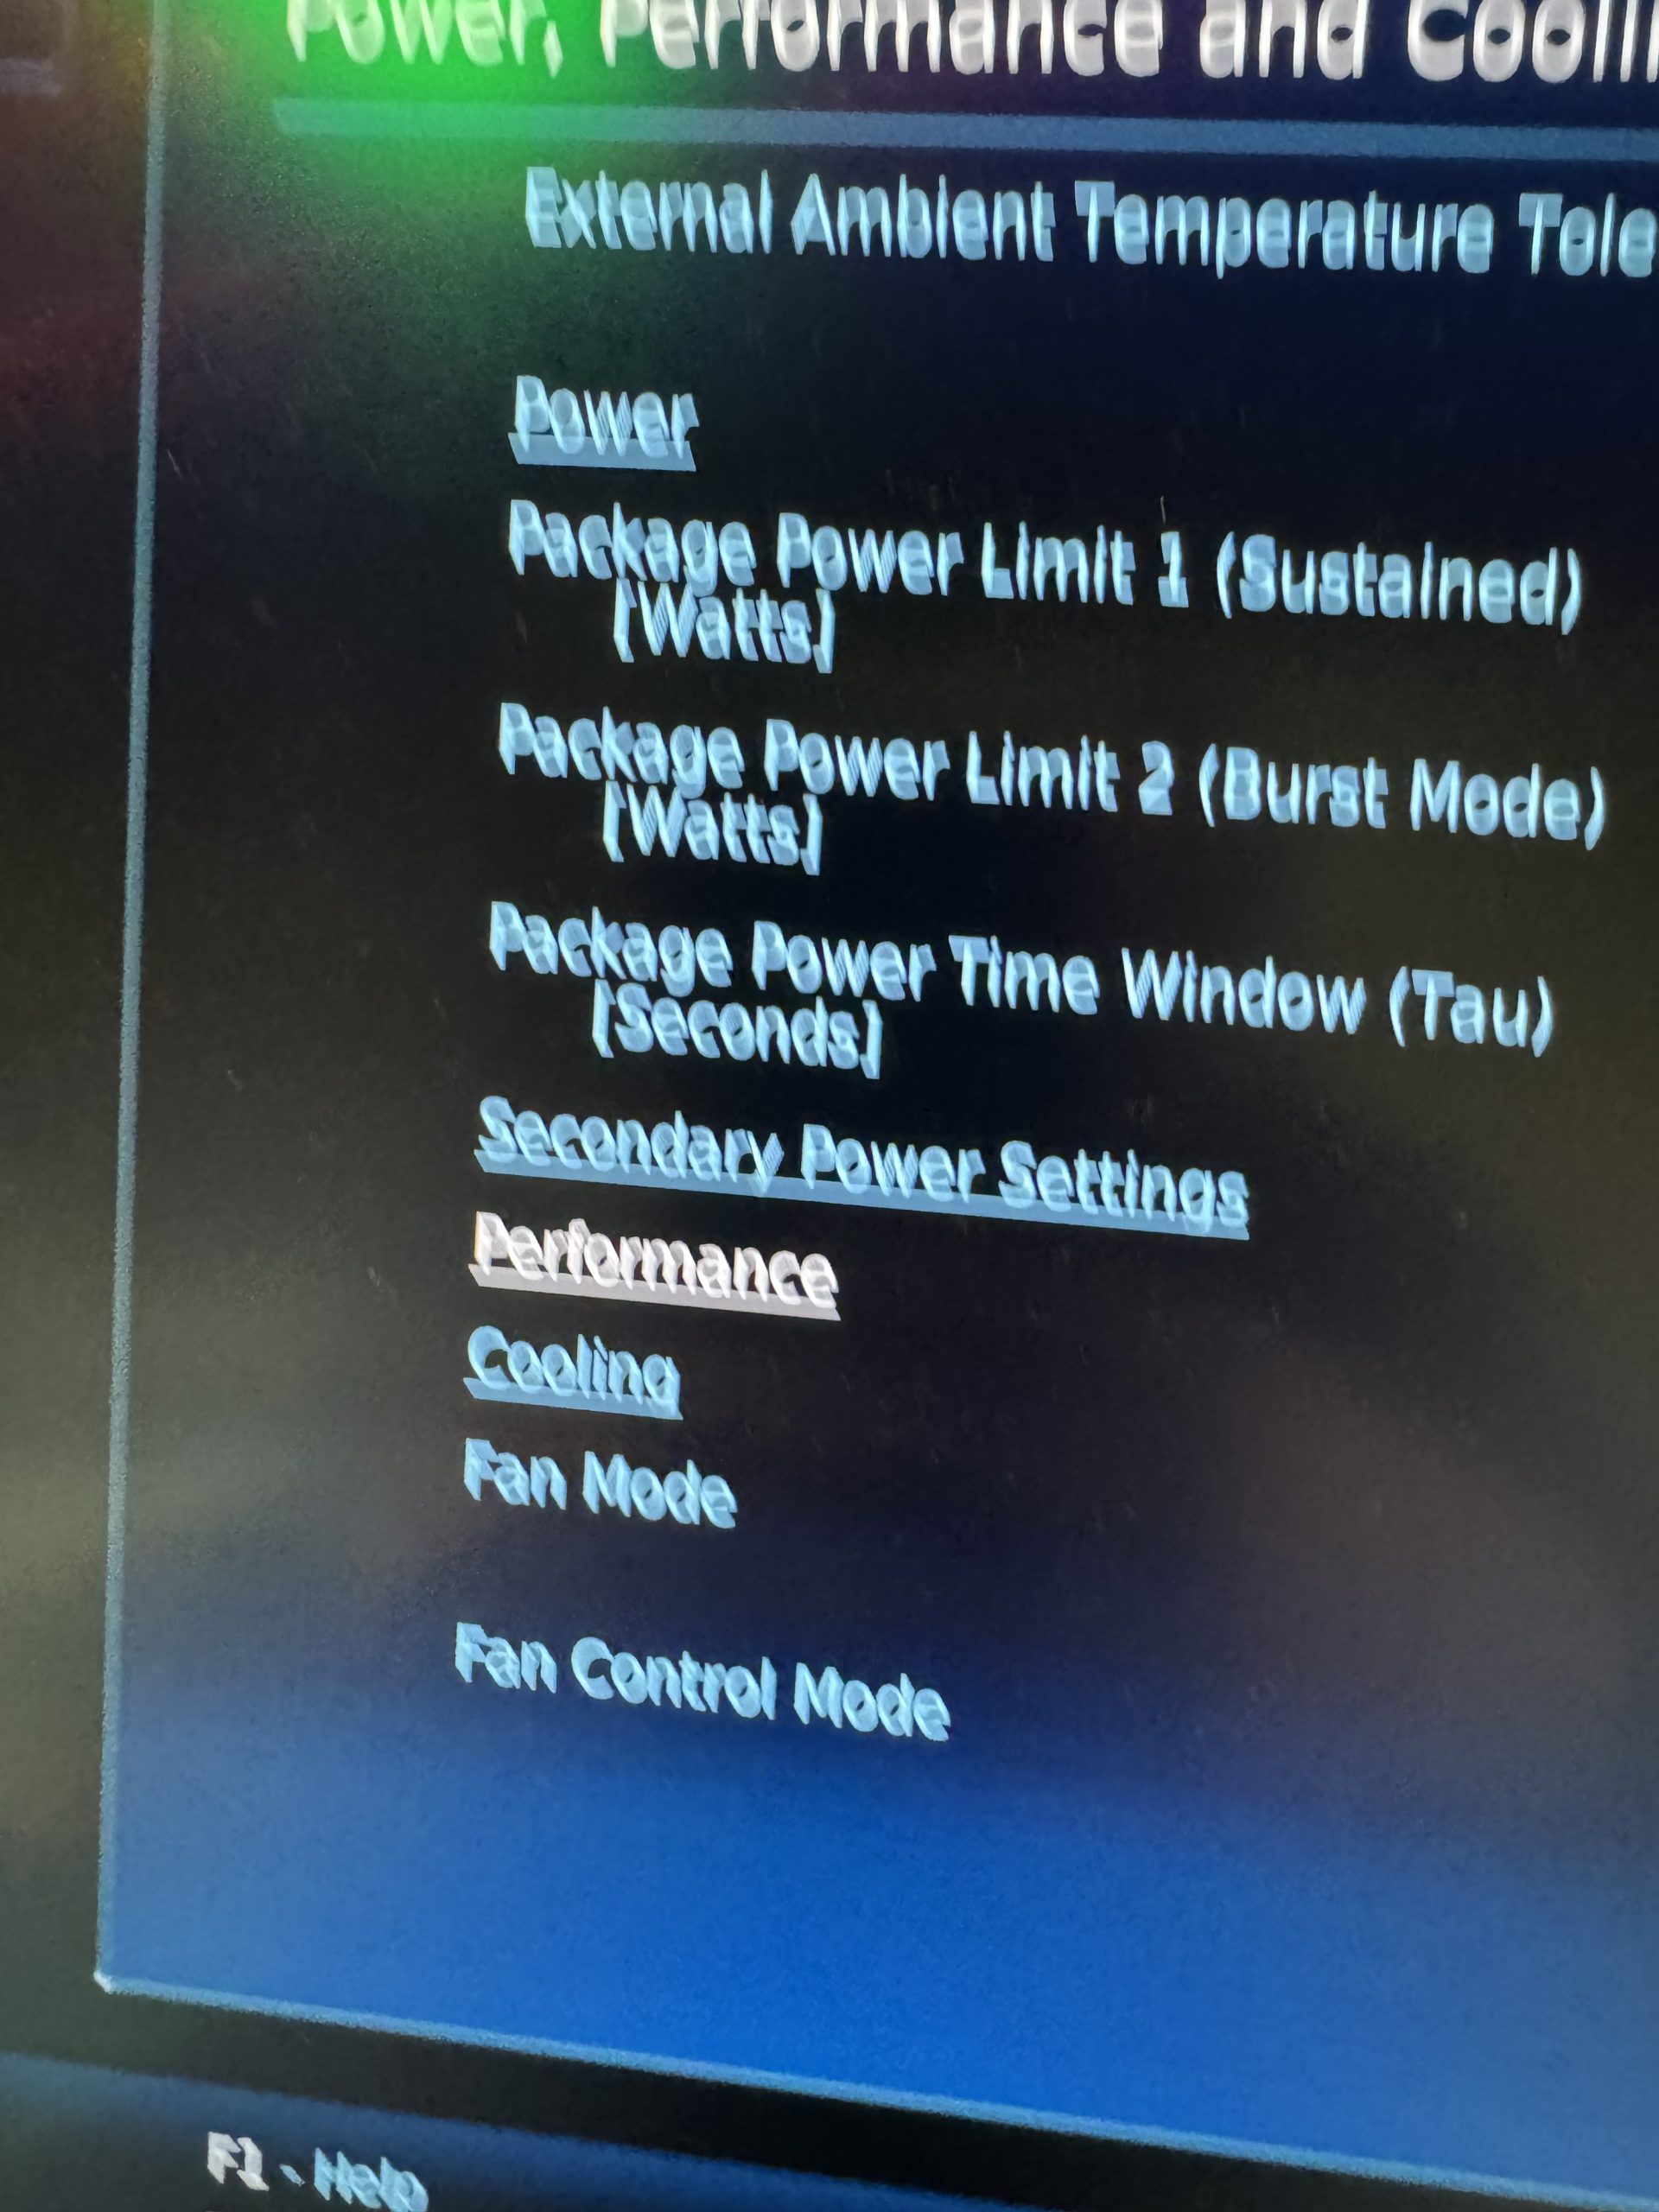
Once there, go to Processor.
Once there, change the number of Active Efficient Cores to 0.
In addition, when you install ESXi 8 and when you access the GUI, you’ll see a nagging warning that TPM cannot be contacted or something similar. No matter how many times you acknowledge this warning it keeps coming back. So, while you in the BIOS, go to Security tab, then Security Features and uncheck Intel Platform Trust Technology.
Save the settings with F10.
Install ESXi 8
At this point, reboot and boot from ESXi ISO USB. Check this guy for more info (link and link).
I have a VMUG Advantage subscription so I can freely download all VMWare software from here. As long as you pay the yearly fee, you can have the licenses and software indefinitely.
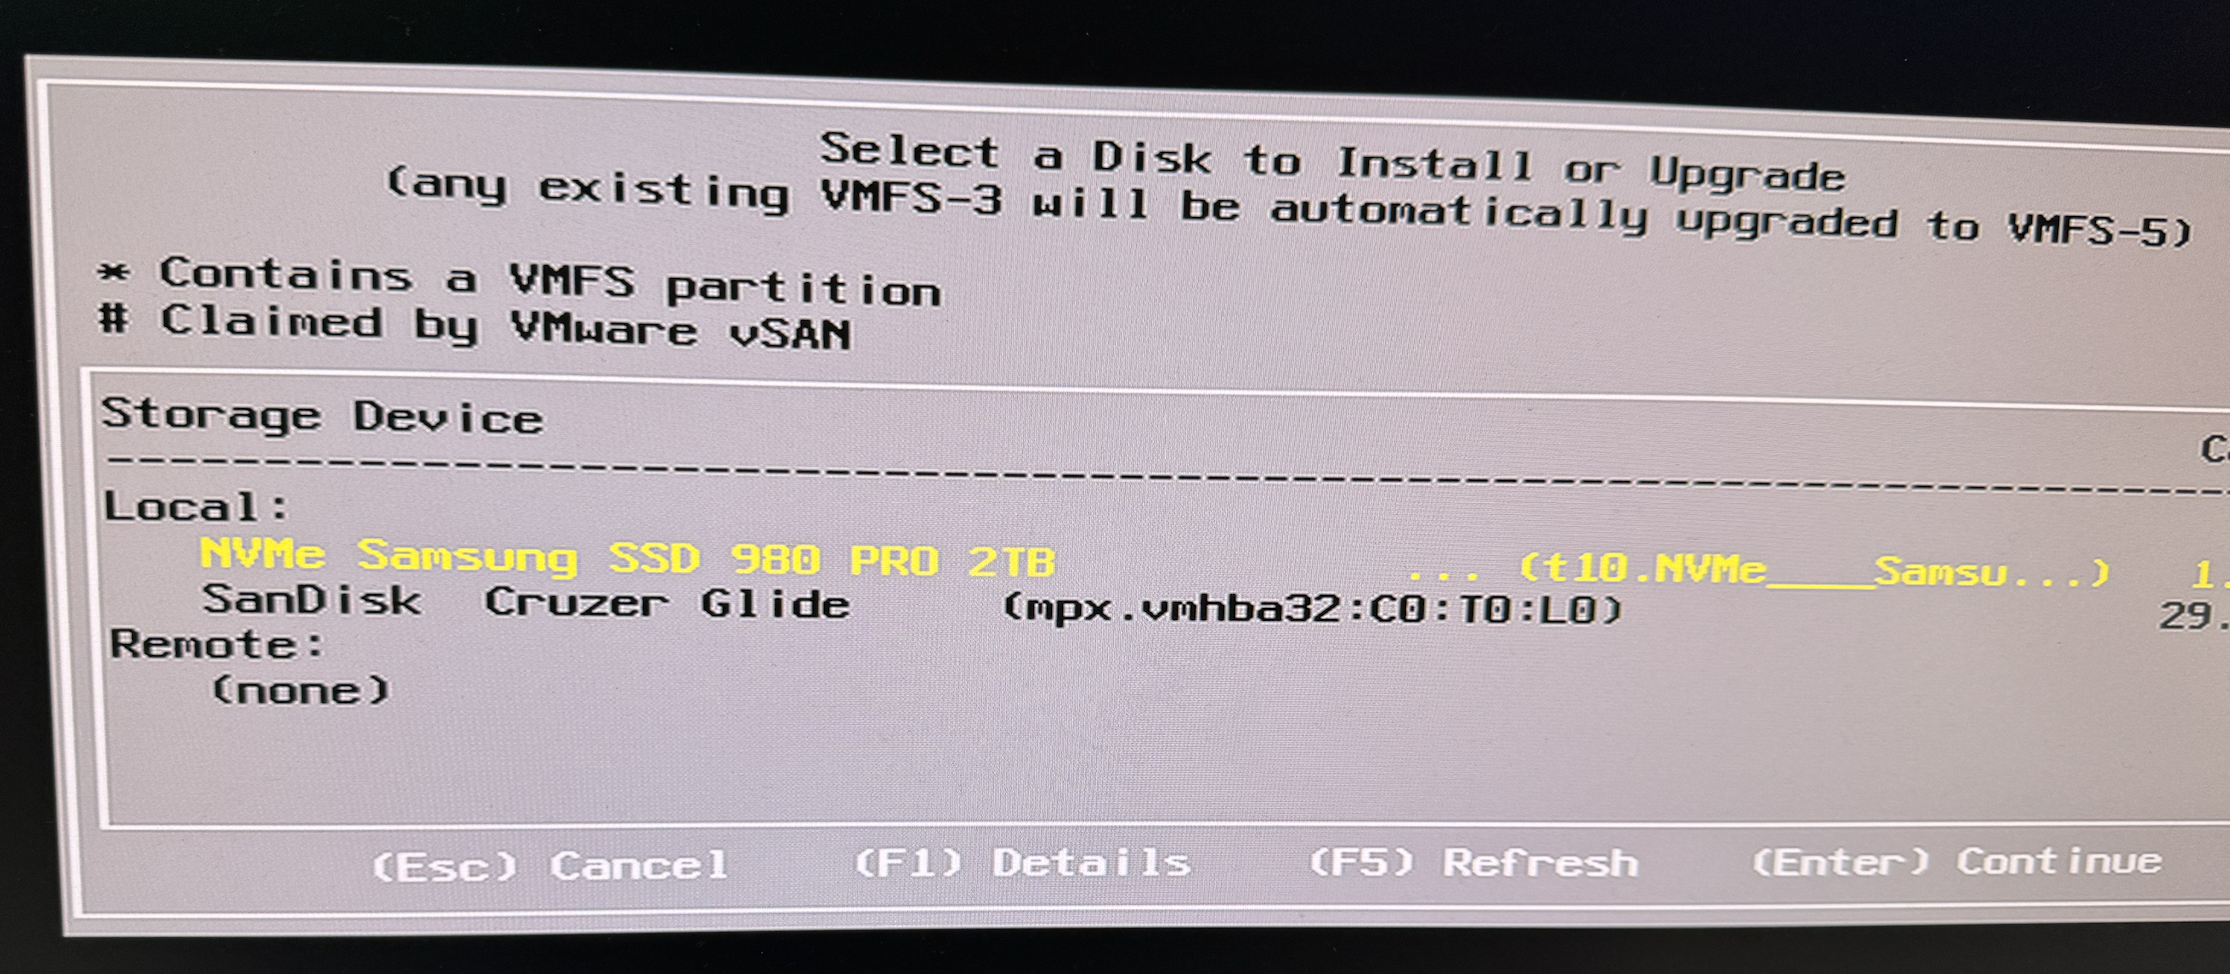
Choose where to install the ESXi (Samsung SSD).
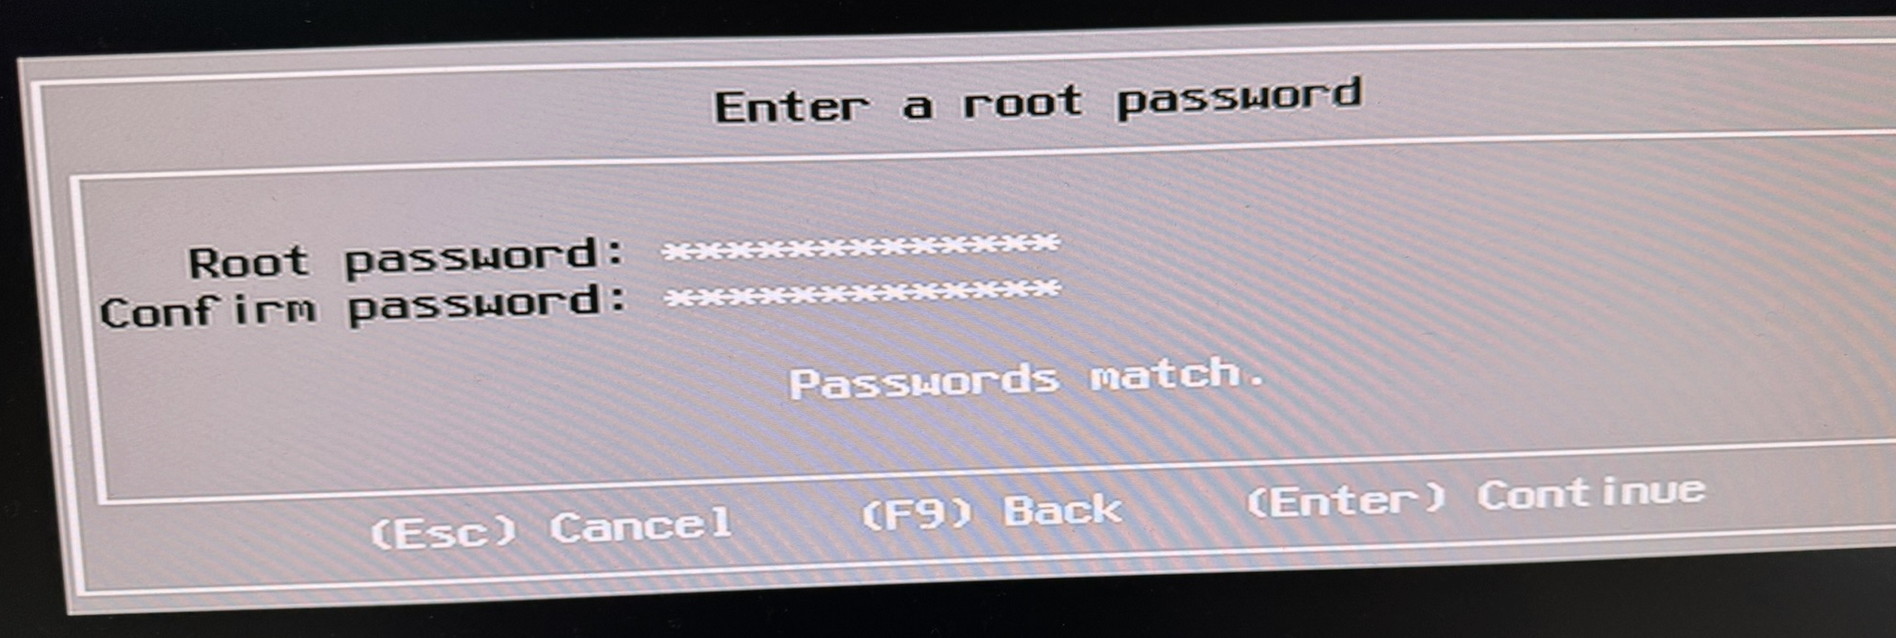
Choose a root password.
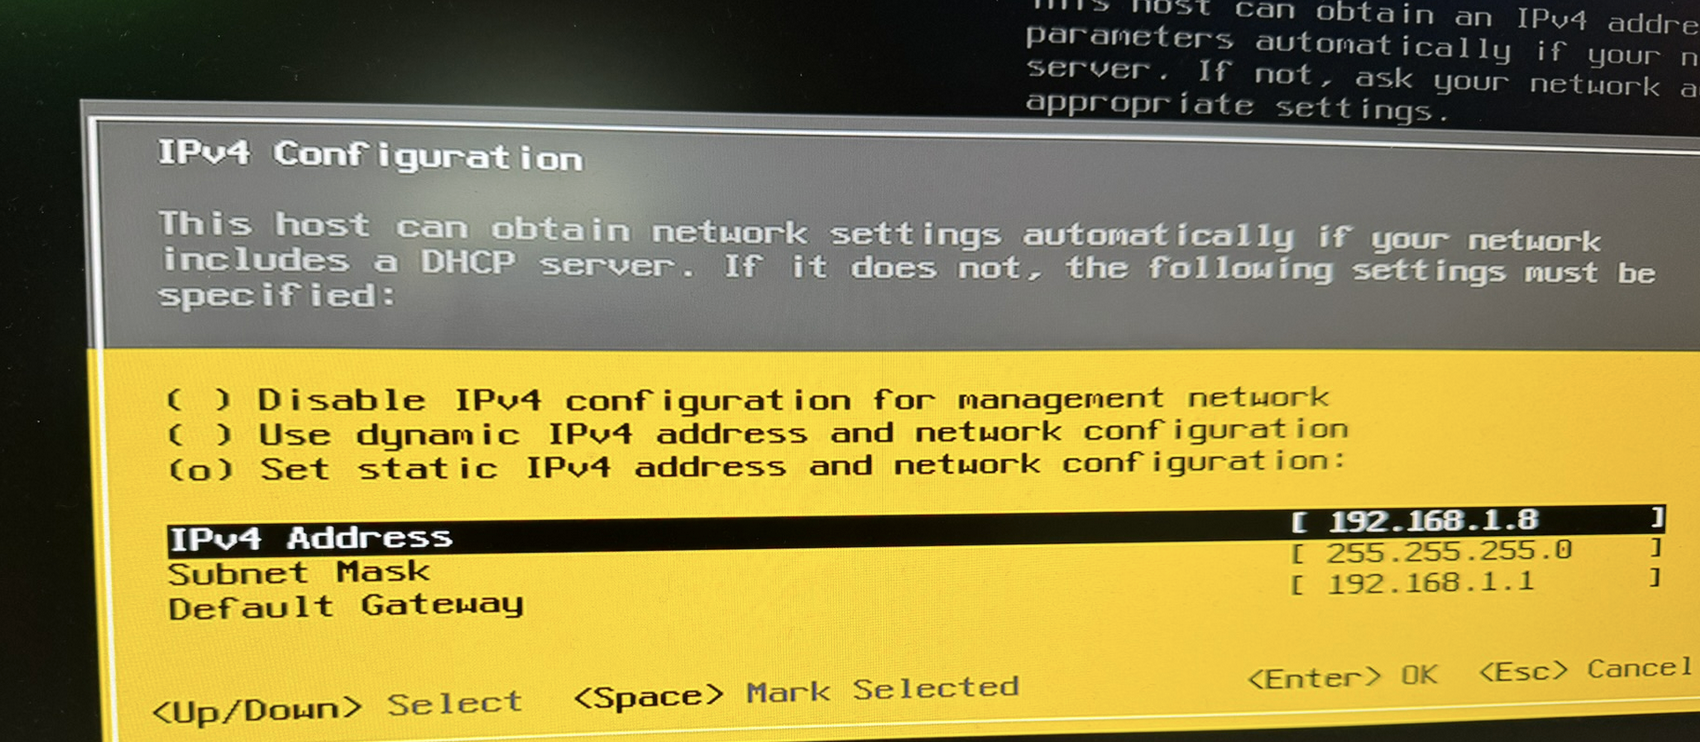
Remove the USB stick and reboot when the installation is over and you’ll see this screen after.
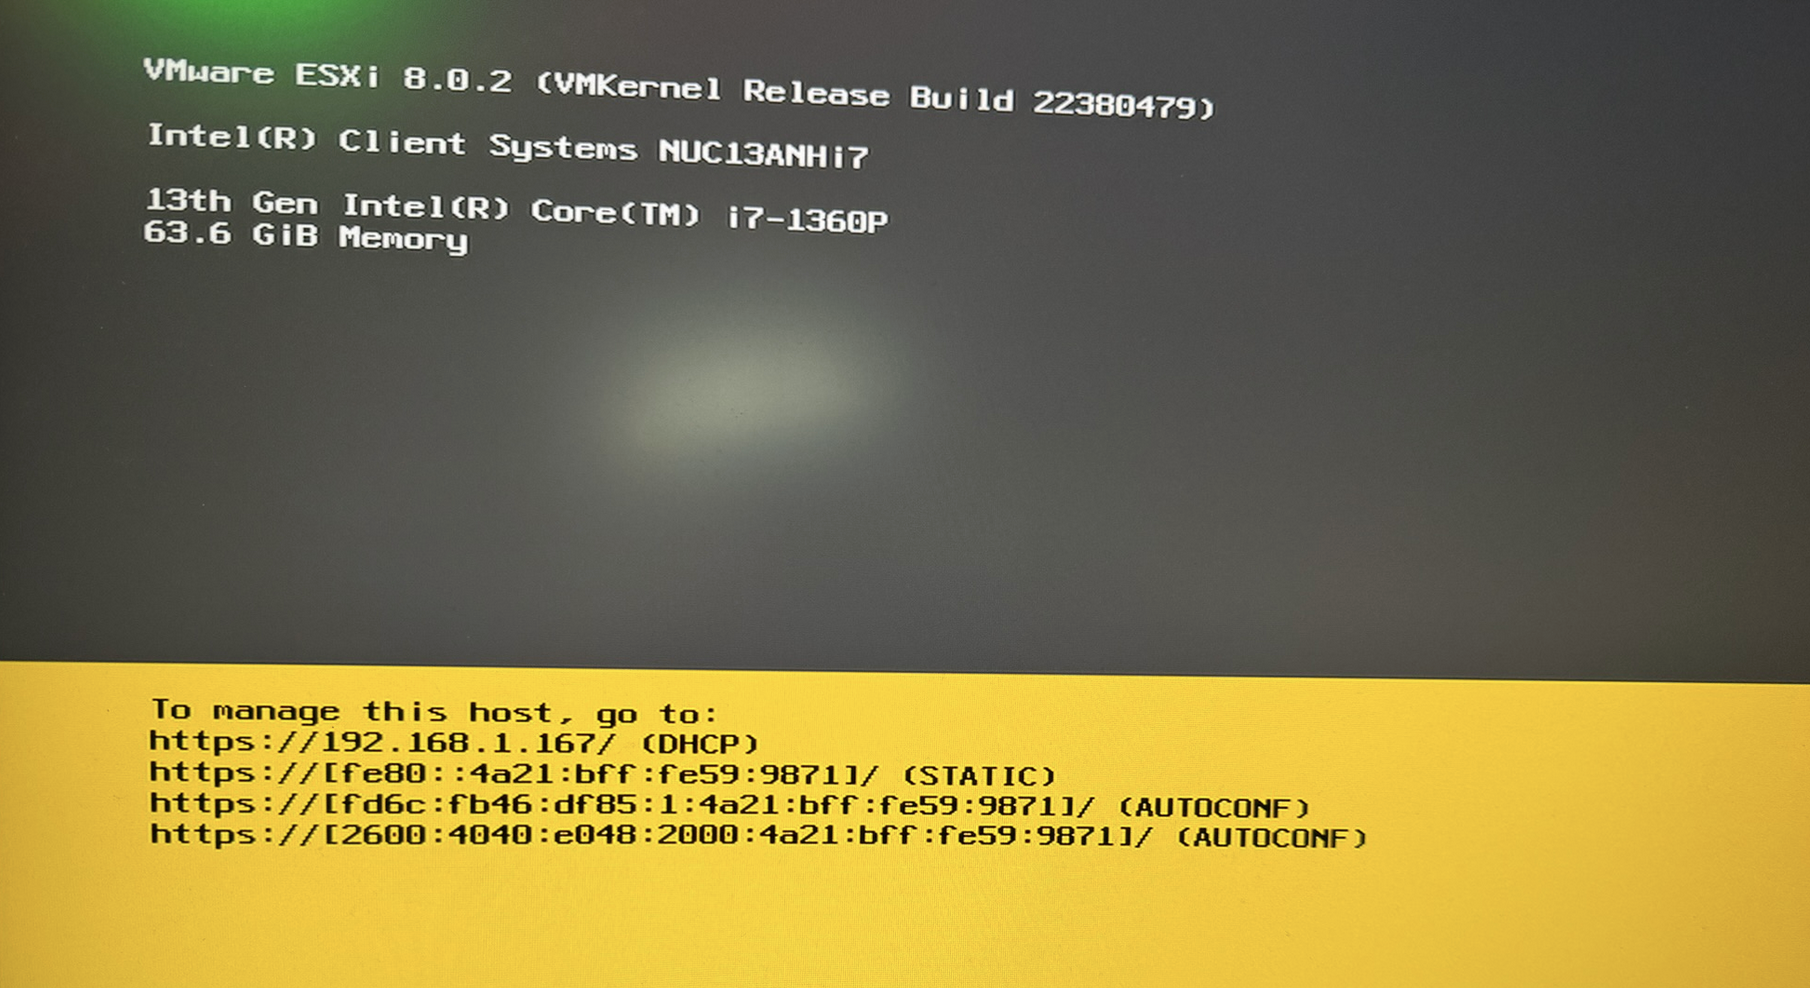
This is my DHCP assigned address, so just change it to a static IP providing DNS and the default gateway. Then, change your FQDN as well. In my case I named my box as esxi1.homelab.local.
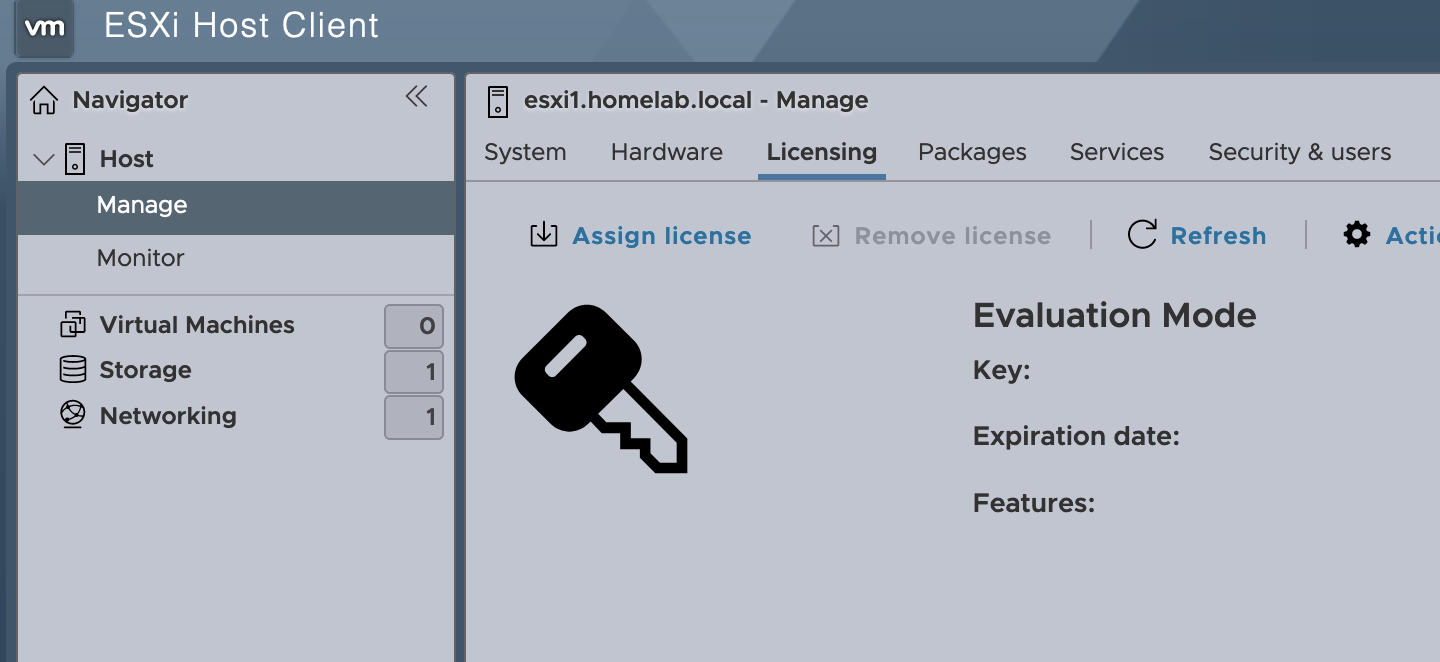
At this point you have a functioning ESXi server. Open up a browser, go to the ESXi IP and log with root and the password you specified.
If you have a license, add it now by going to Manage (upper left corner), then Licensing tab and click Assign license or skip this part and use the evaluation mode.
Optional: Click on Storage then datastore1, Actions from the menu and rename the datastore. In my case I’ll use ESX1-LOCAL.
Install vCenter 8.0 appliance
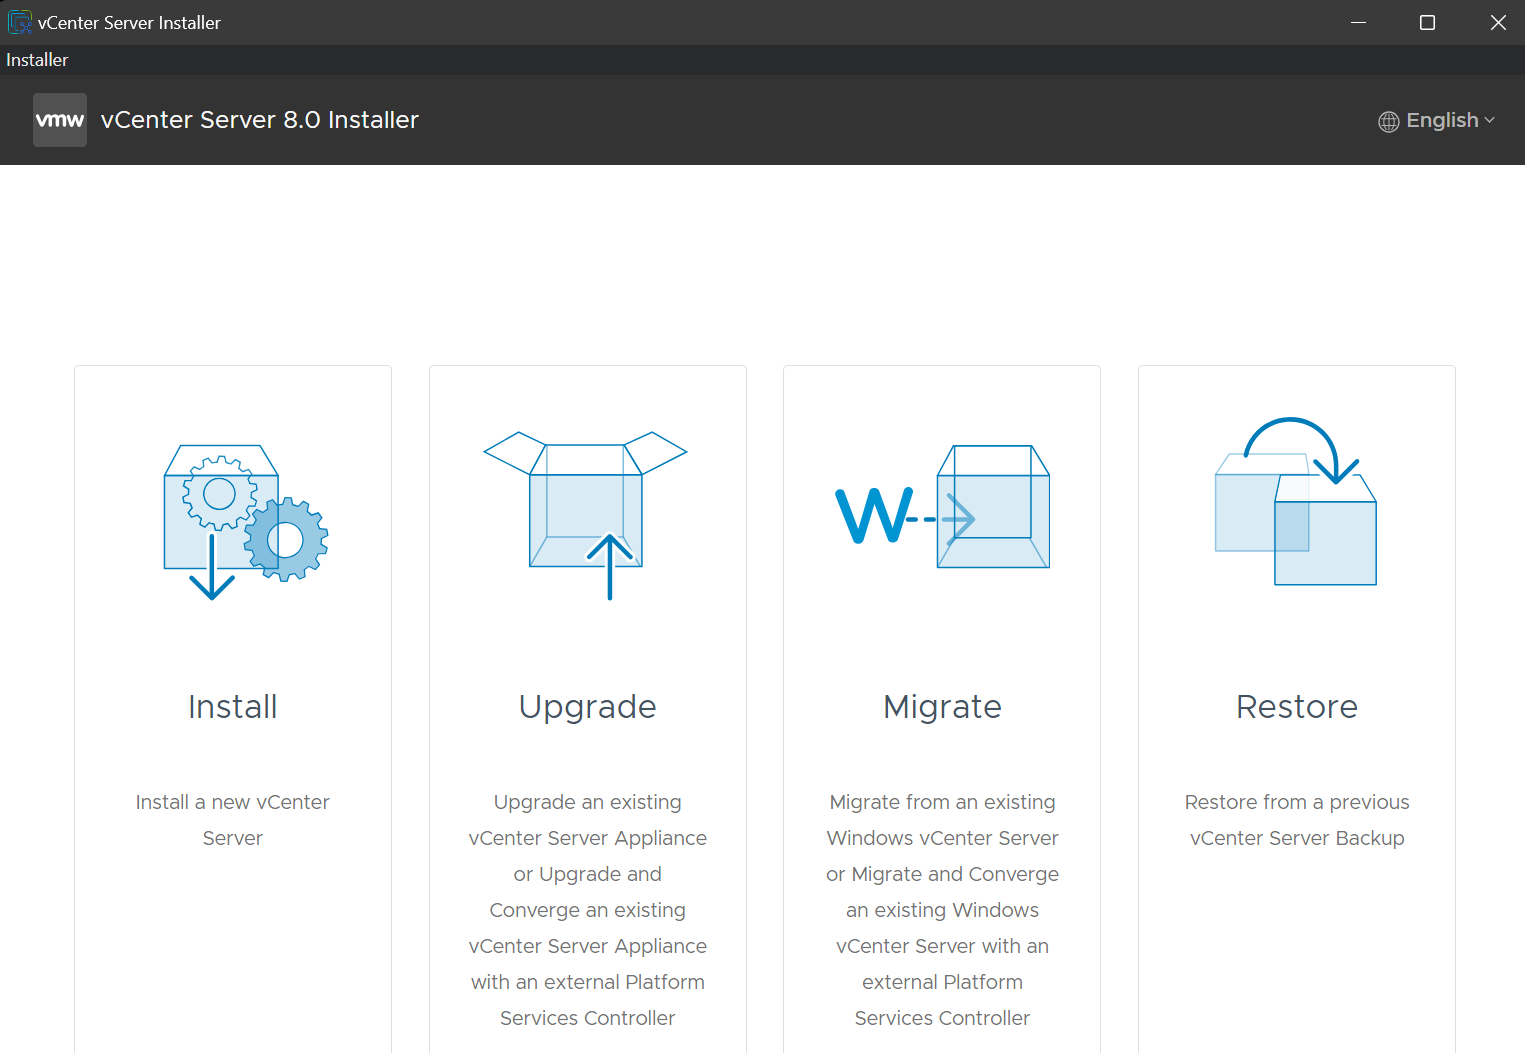
Now, we can install vCenter. Mount the vCenter ISO image, go to vcsa-ui-installer folder and choose the OS (win32, mac, lin64). Run the installer and click Install icon.
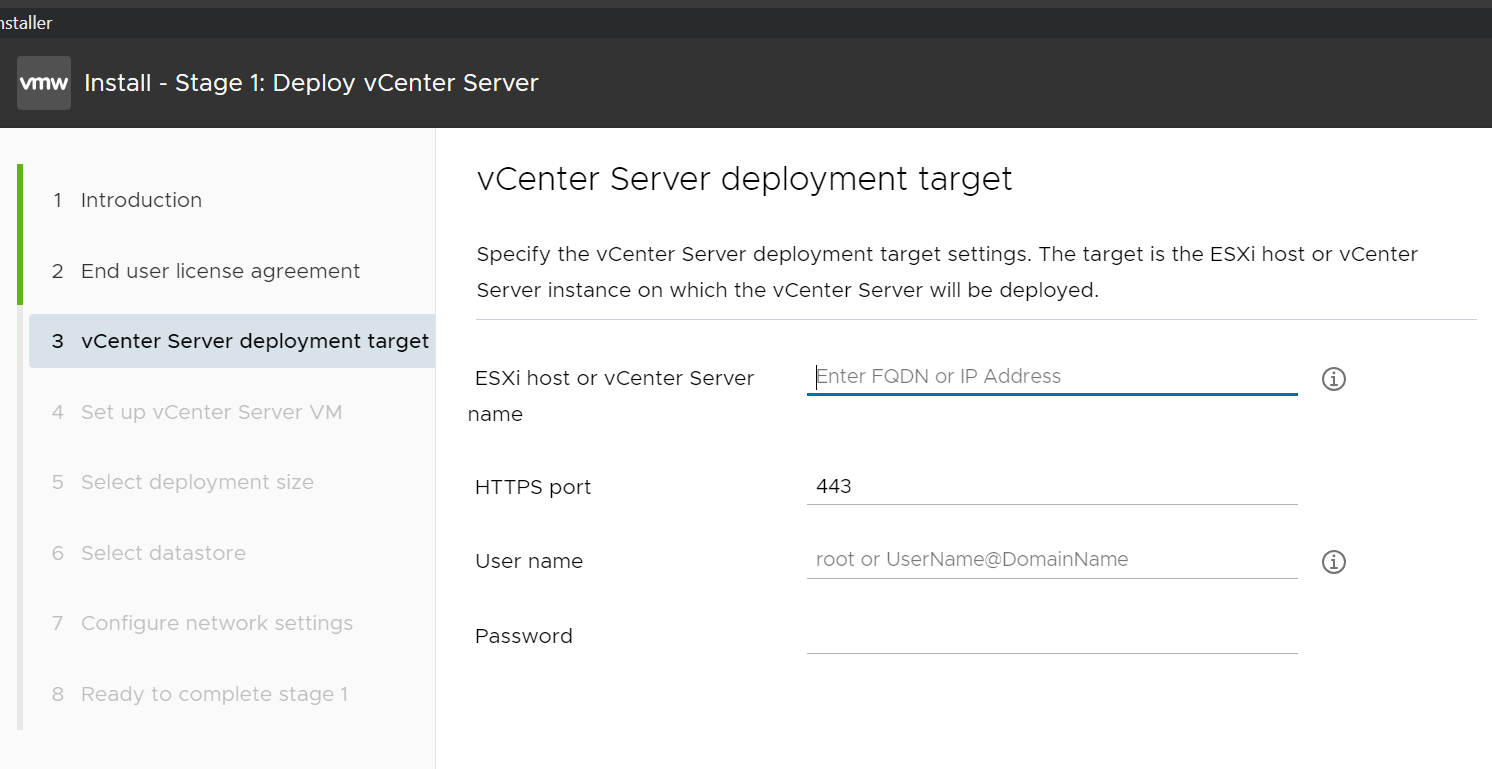
Click Next and Accept the legal terms. Then enter the IP address or FQDN if you have your DNS configured for the ESXi server you just installed. Specify the root password too.
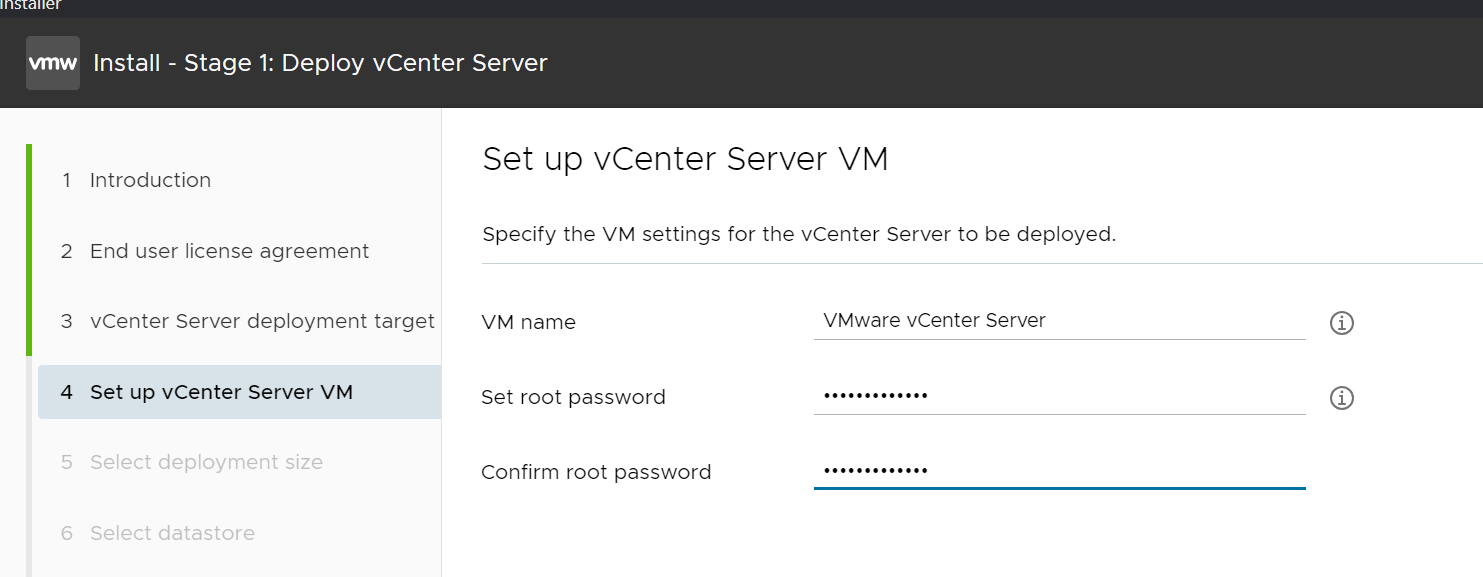
Name the vCenter and specify the vCenter root password. This is not the password that you will use to log to vCenter. This is a password for the appliance itself. You’ll need this only if you have to troubleshoot the appliance or enable/disable SSH on the appliance.
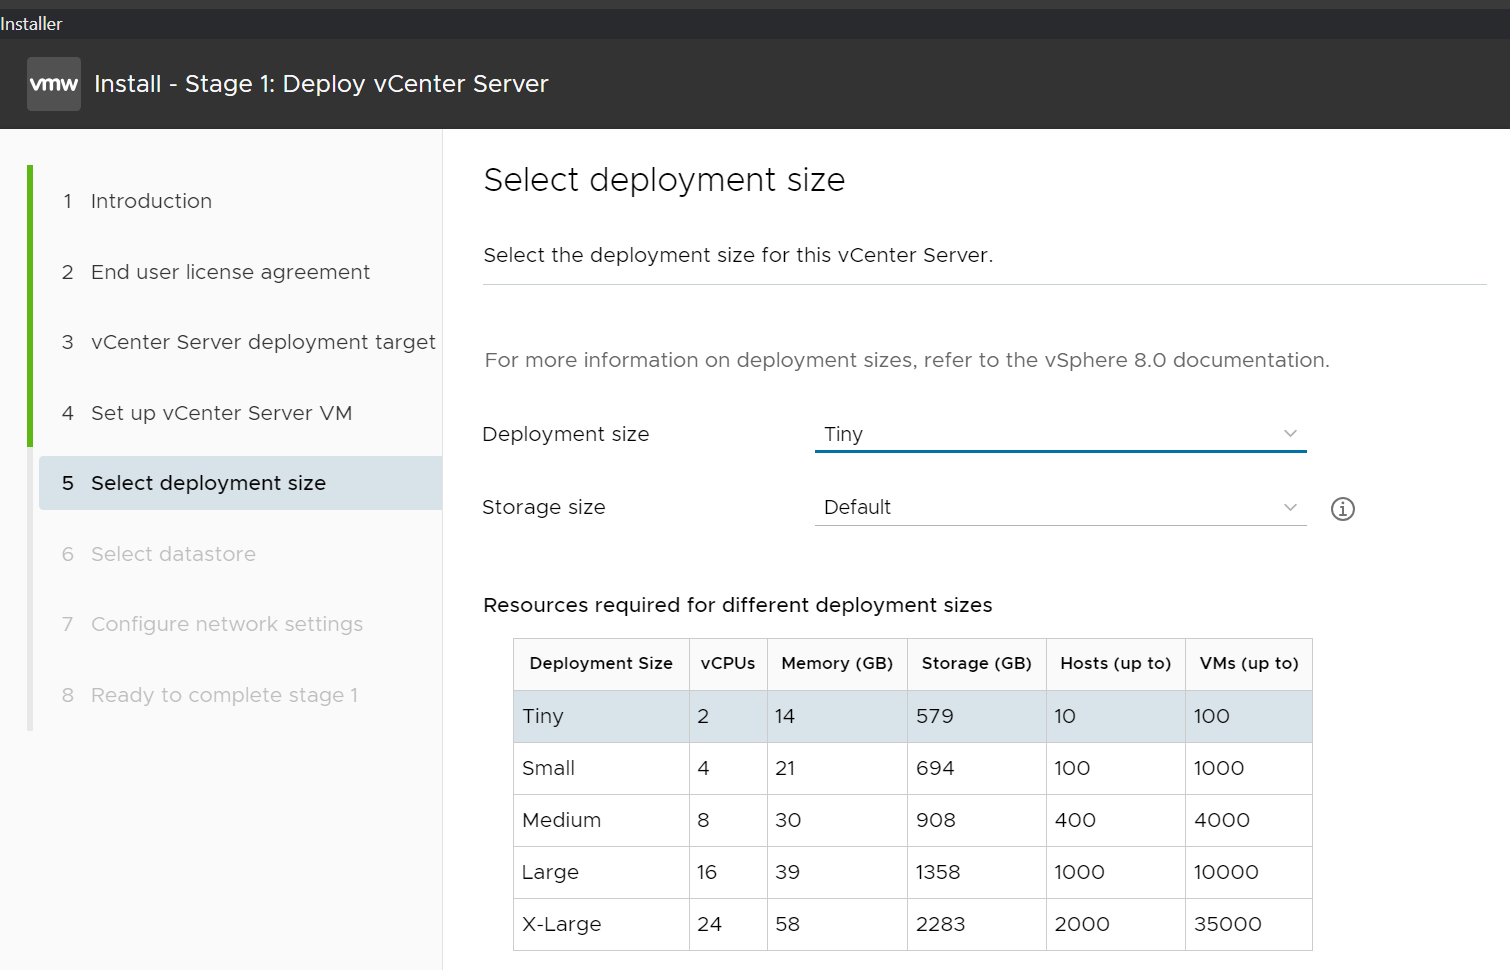
Choose deployment size, for me the smallest size is acceptable. After all, I plan to use this primarily for Kubernetes.
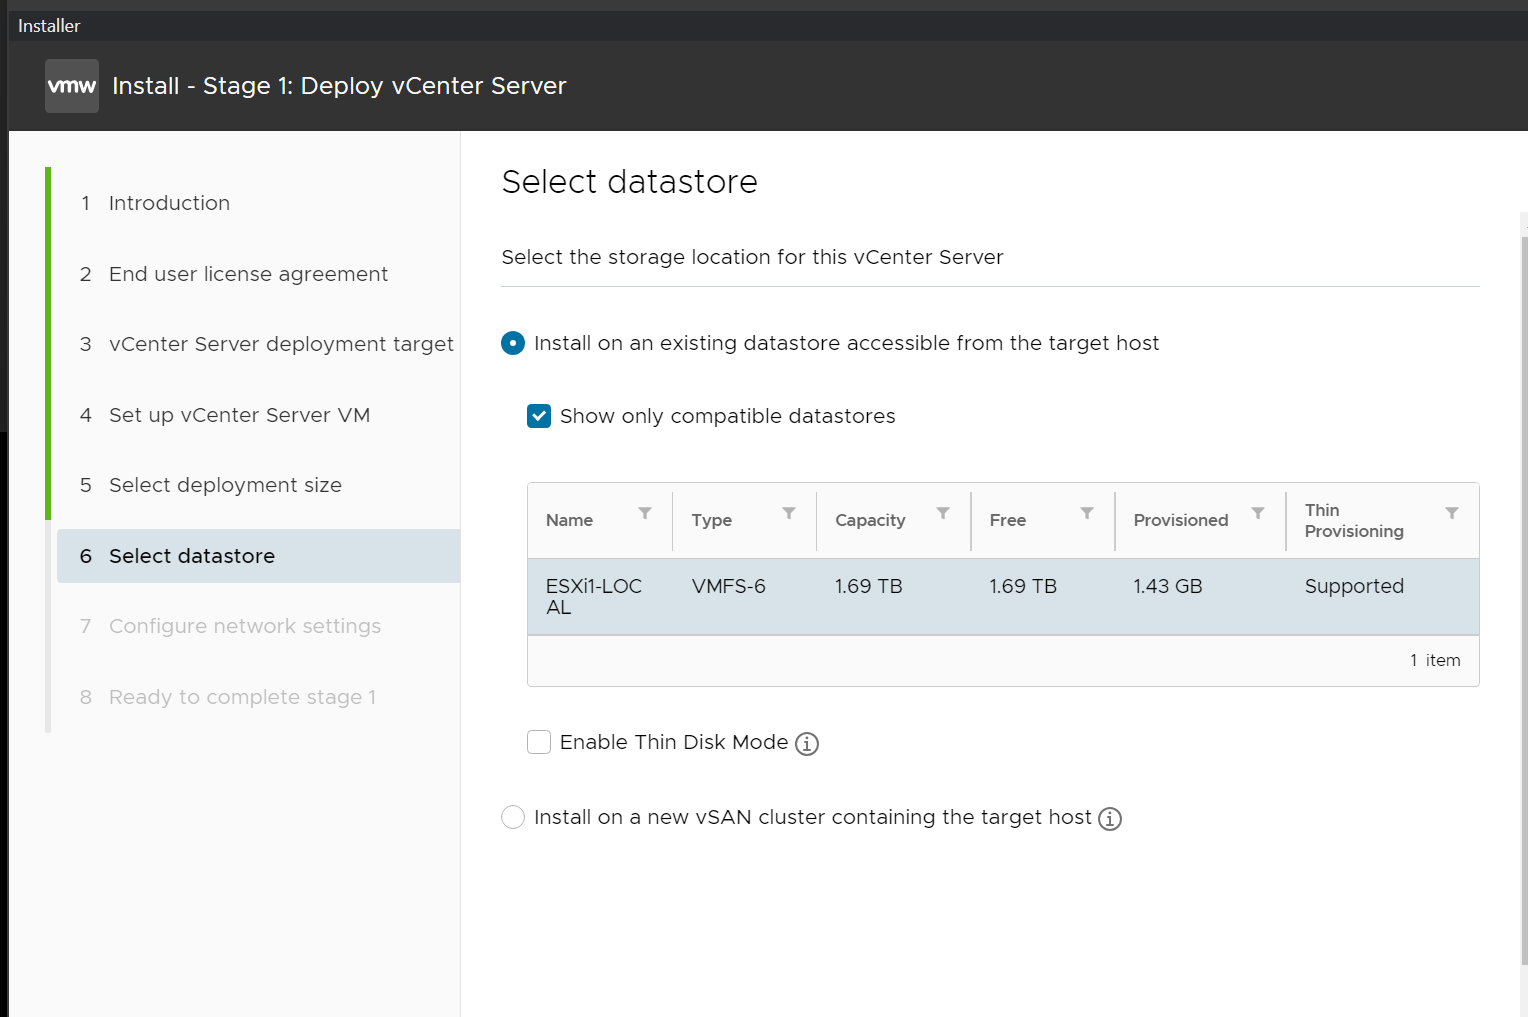
Choose the datastore.
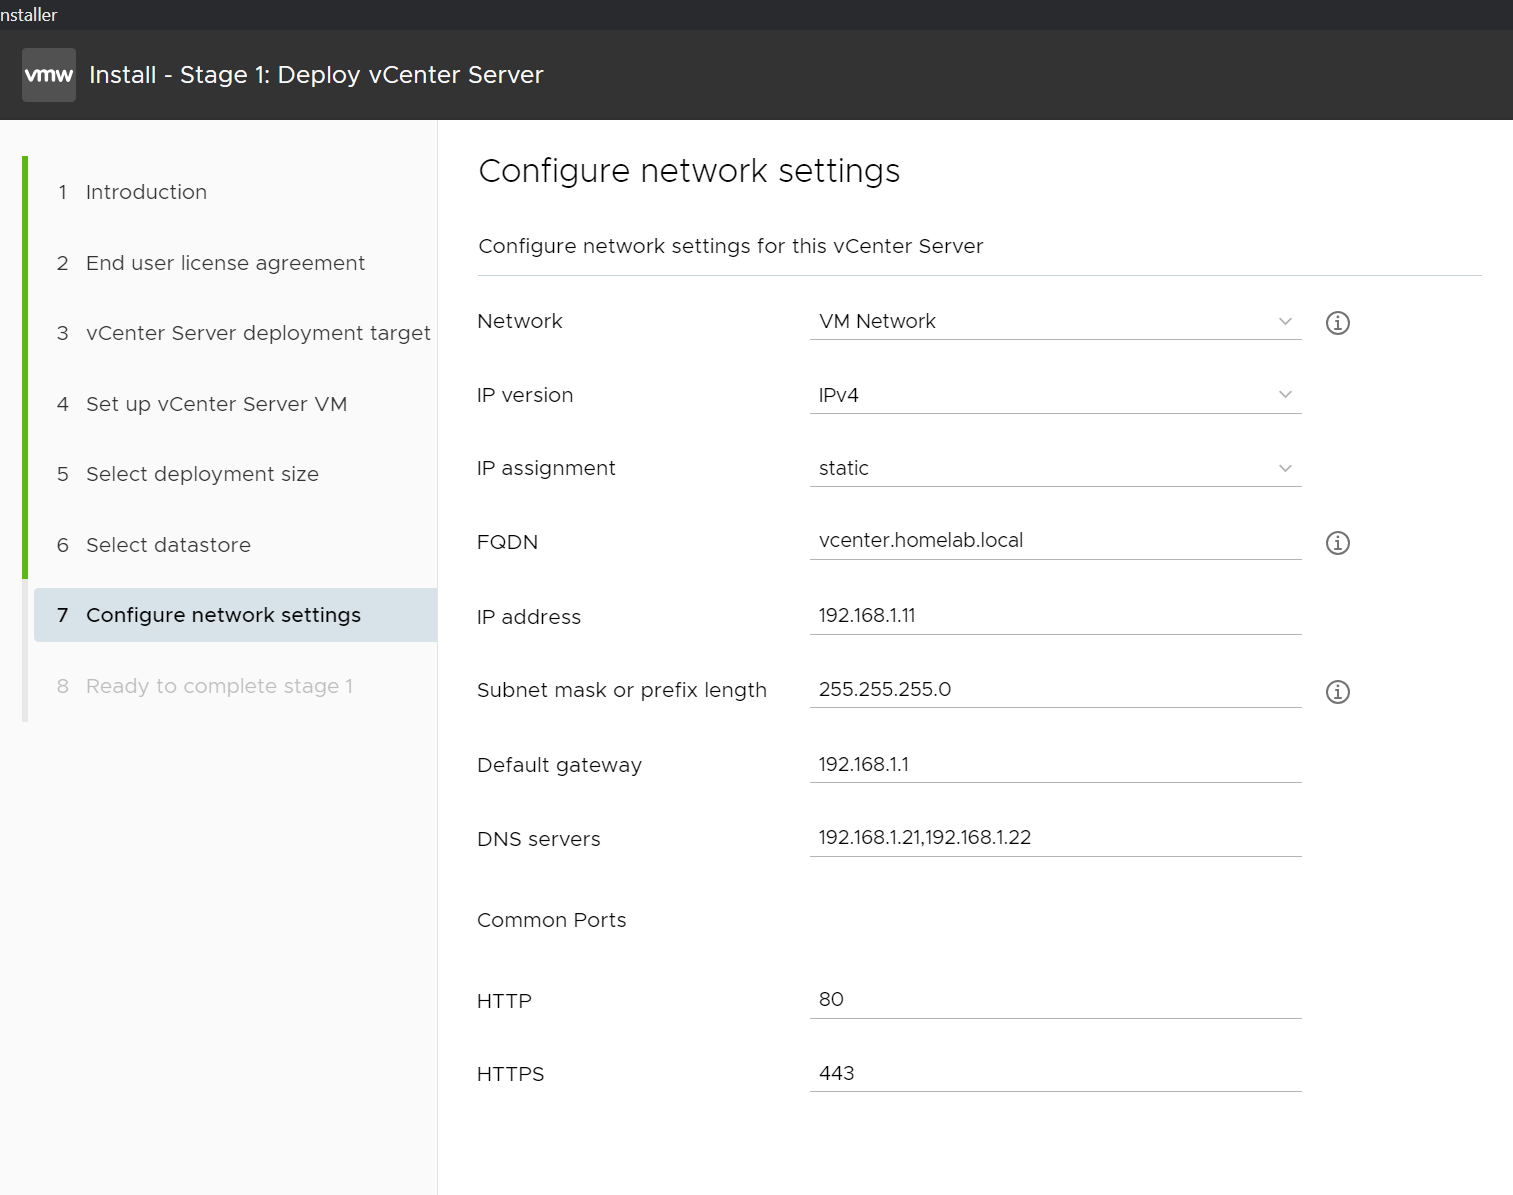
Configure network settings, IP, gateway, DNS, FQDN…
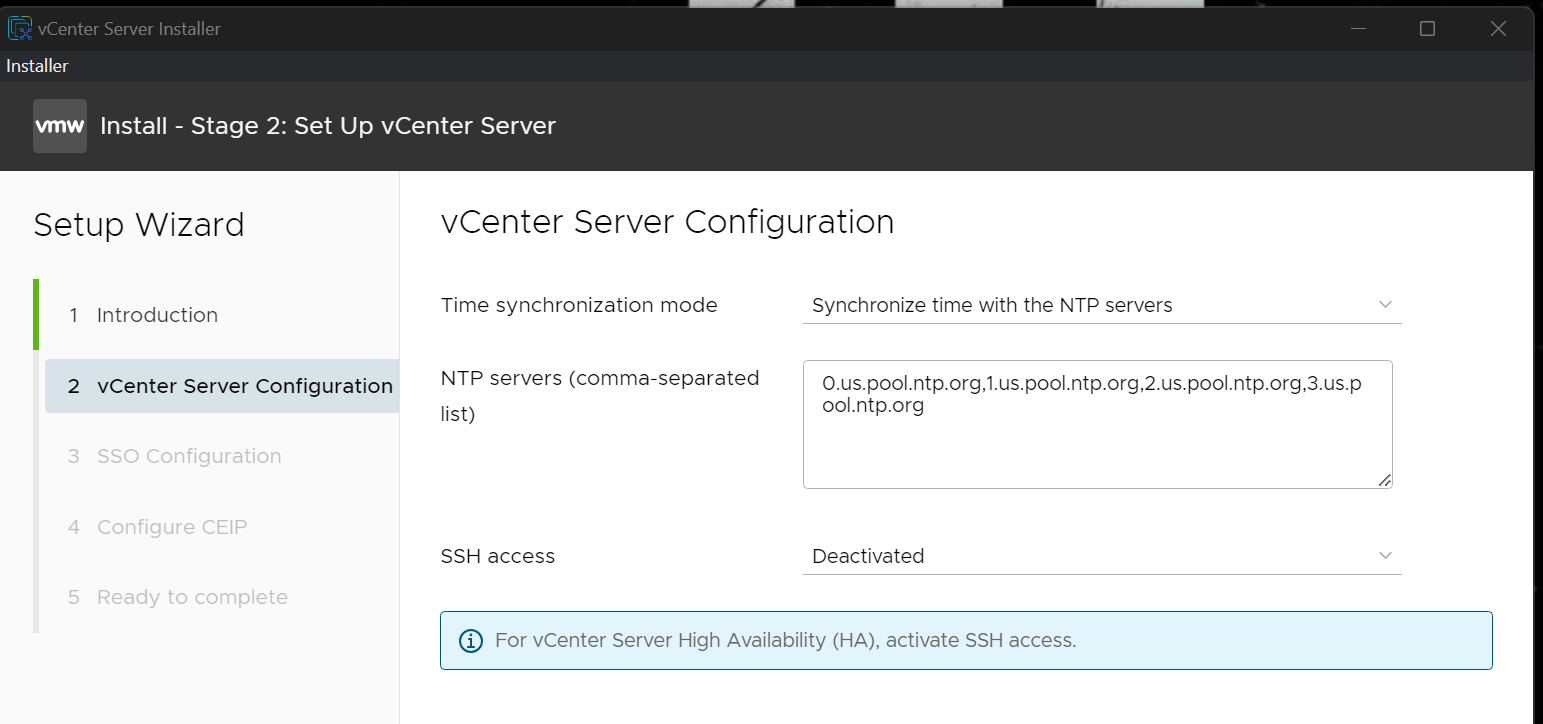
Confirm and click Finish. After some time, you’ll get a prompt to configure vCenter. I chose to use NTP and sync with some public NTP servers. Use whatever is closest to you.
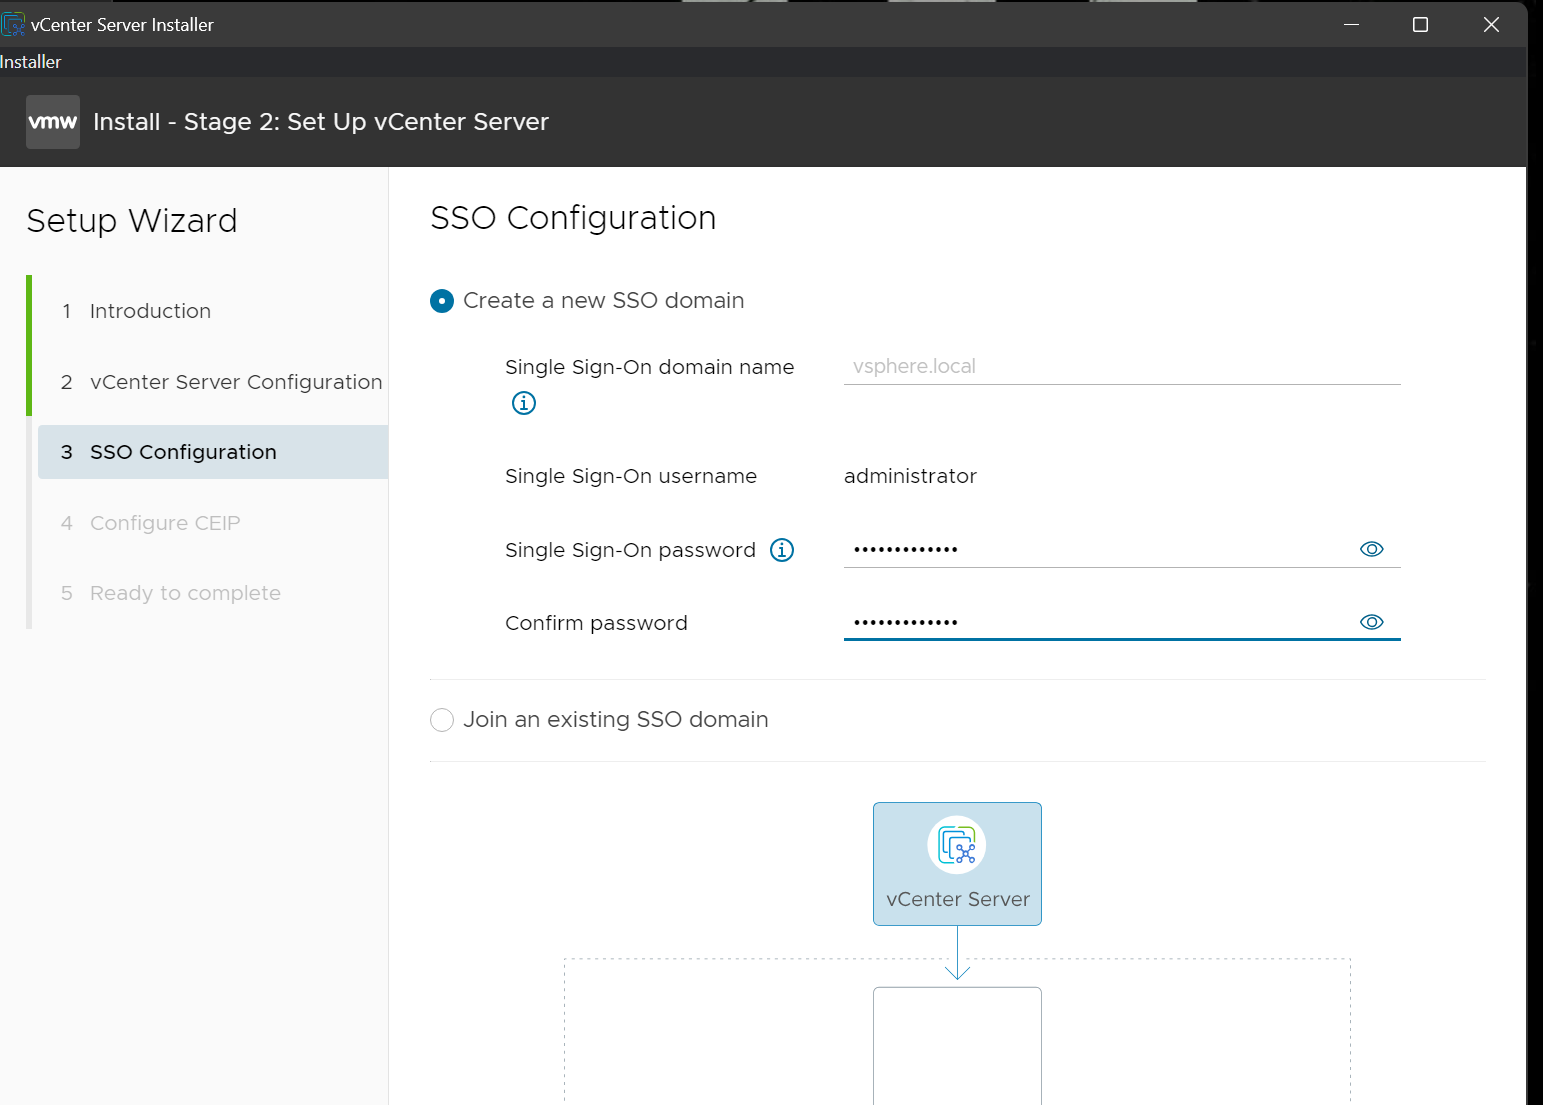
I’ll create a new SSO domain and I’ll use the defaults. I just have to provide a password.
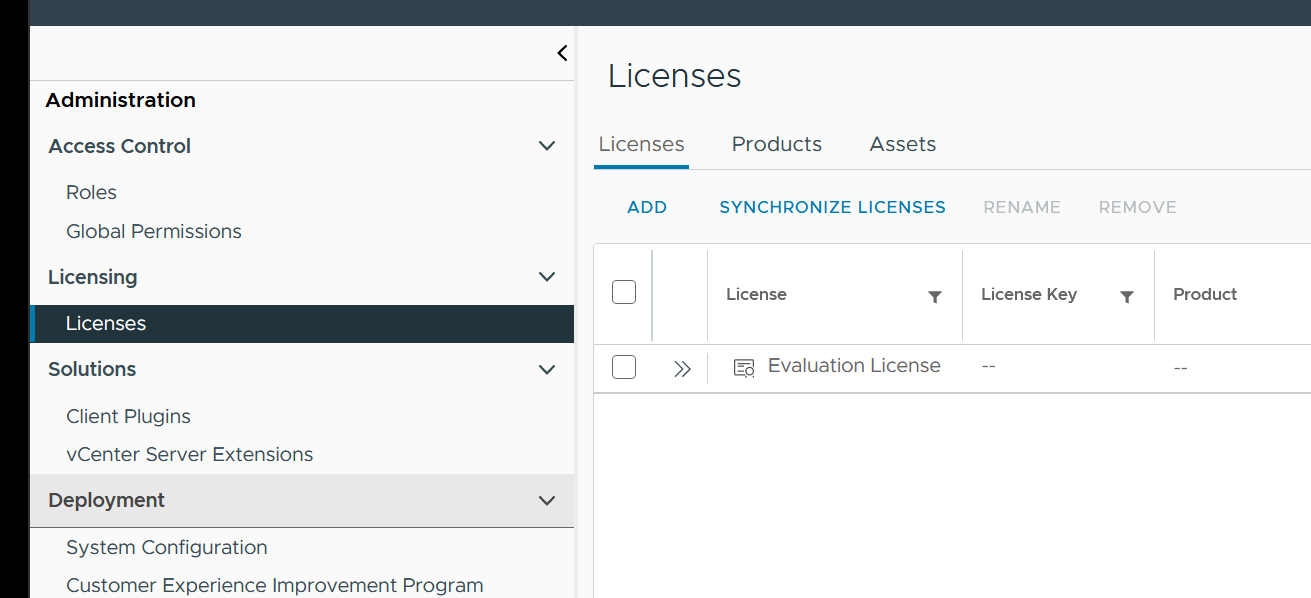
Once vCenter is deployed go to the FQDN or the IP from a browser. Your username is no longer root, it’s [email protected] and your password is the one you specified when you installed vCenter SSO in the previous step. Enter the license by going to Administration | Licenses from the left.
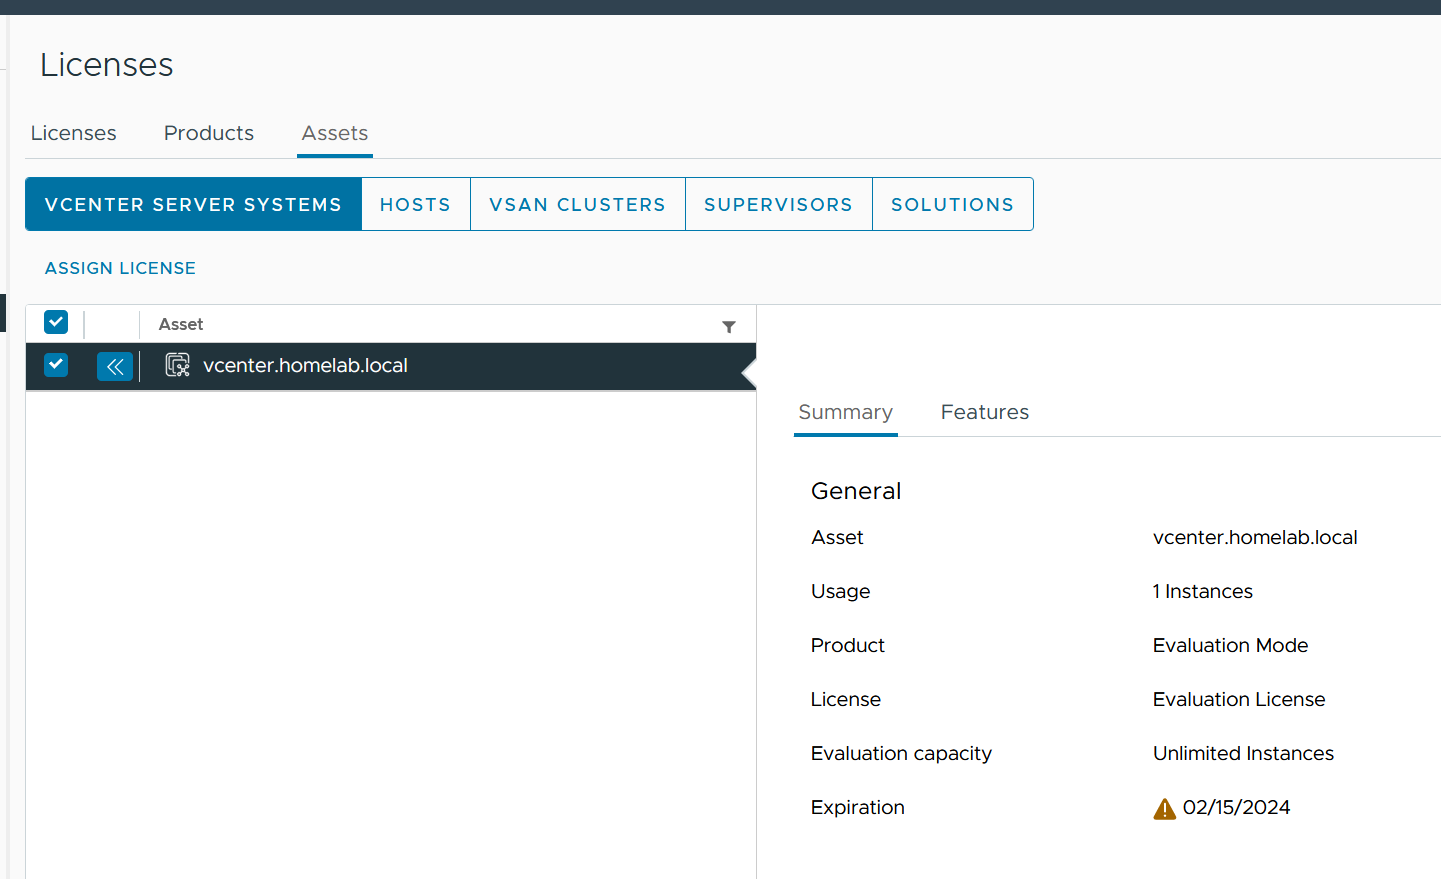
Once you enter the license from the Licenses tab, go to Assets tab and click Assign License.
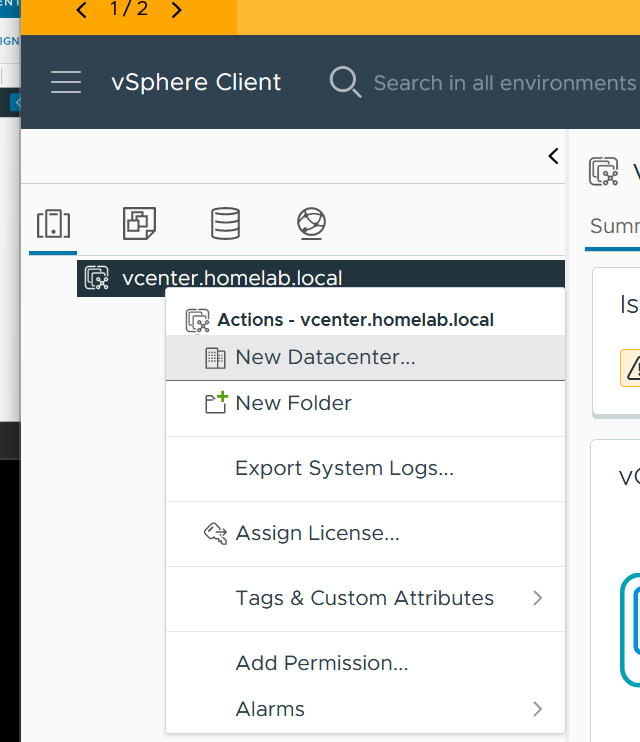
Go to Inventory from the hamburger menu on the left, right-click the vCenter IP or FQDN and choose New Datacenter.
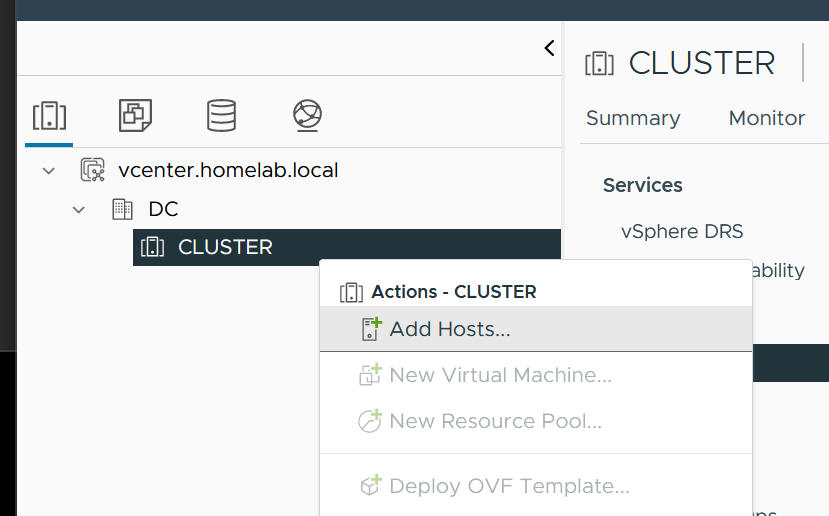
Then right-click on the newly created datacenter and choose New Cluster.
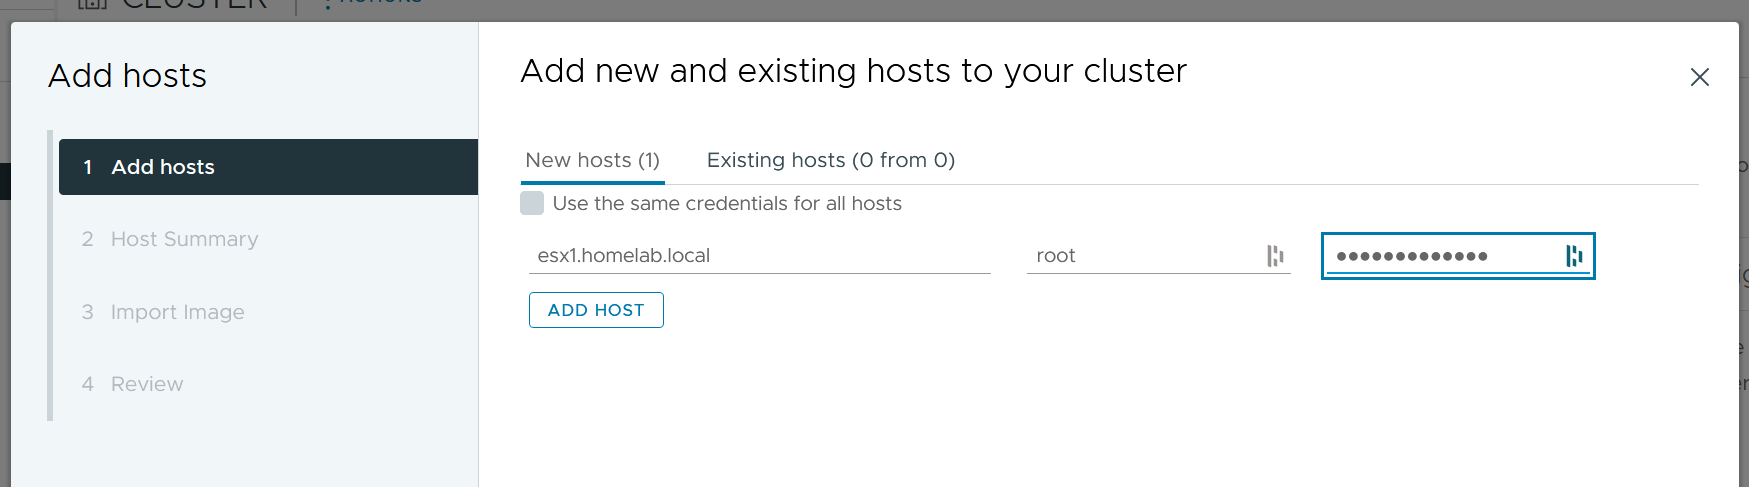
Same thing again, right-click the cluster and choose Add Hosts.
Specify the IP or FQDN and the root password when you installed ESXi initially.
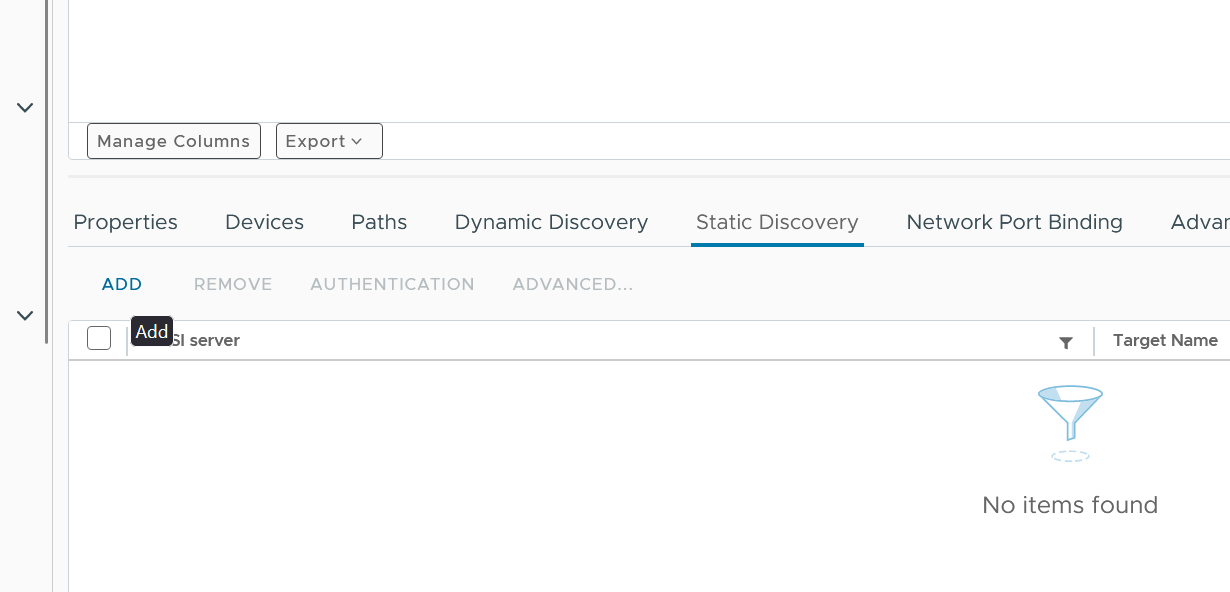
Optional: iSCSI
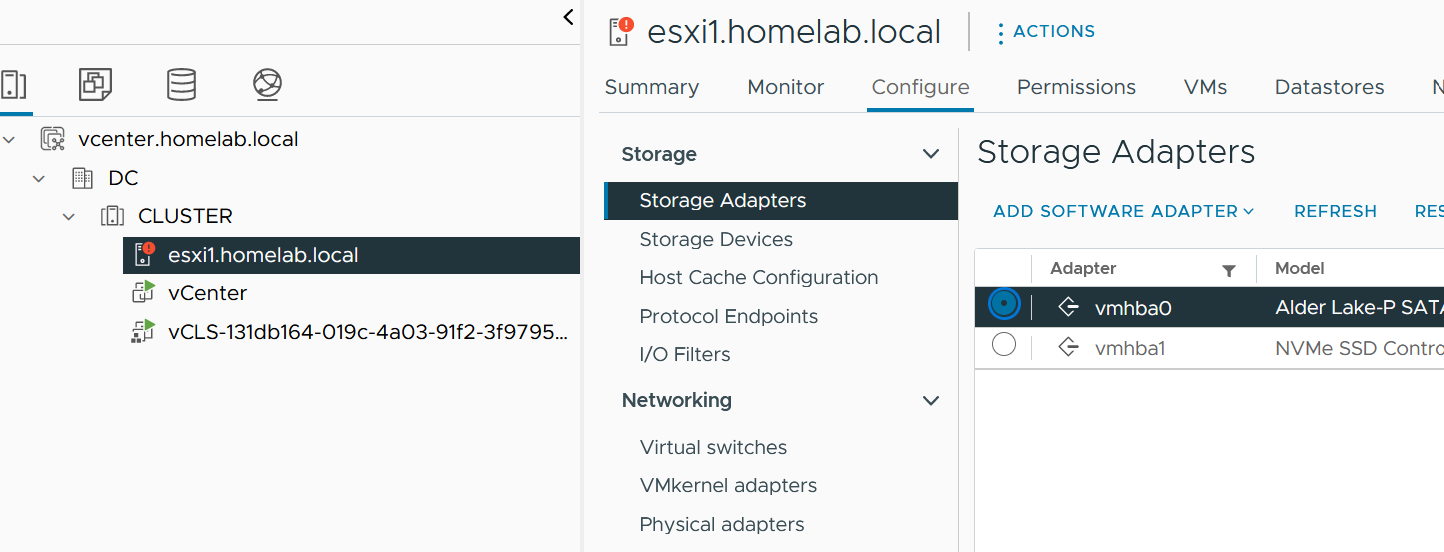
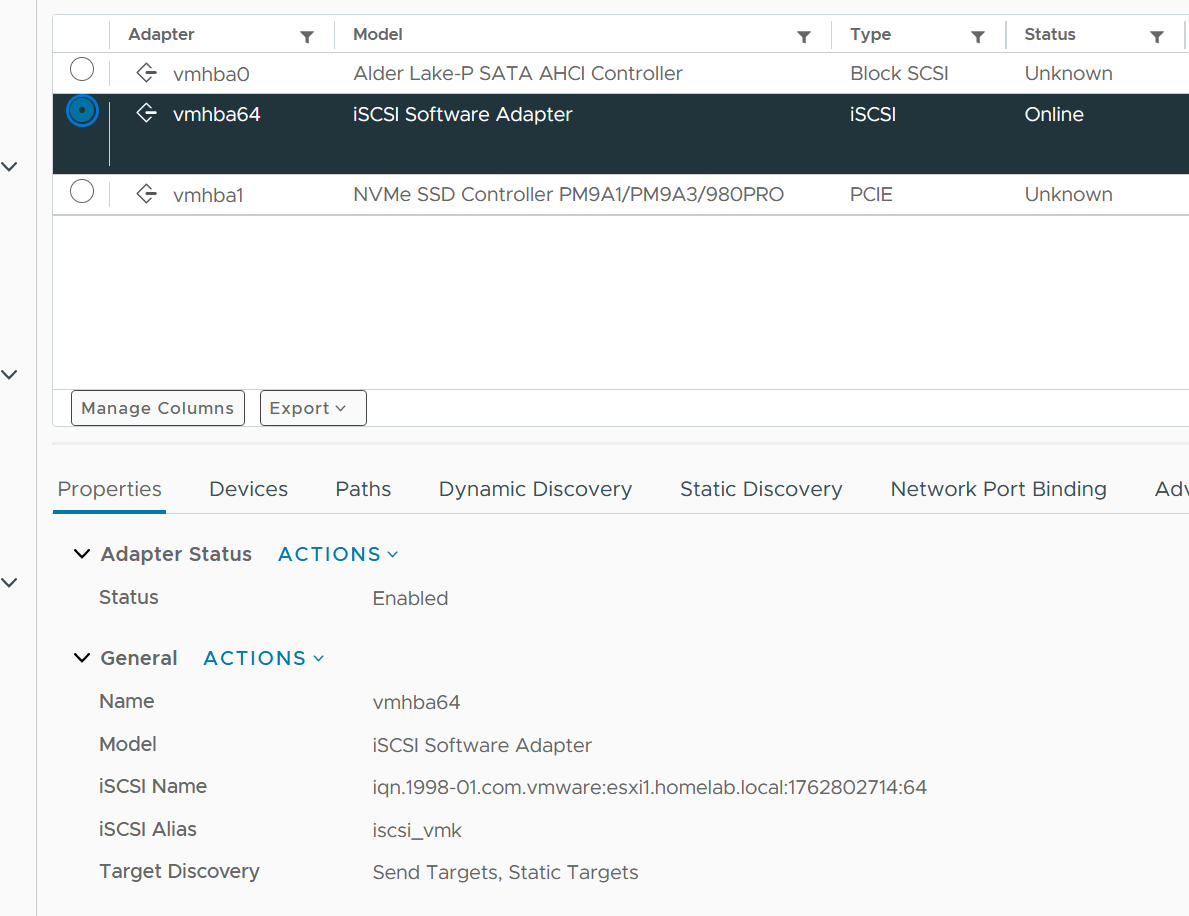
Click on the ESXi hosts, then Configure tab, click Add Software Adapter and then Add iSCSI adapter.
In my case, I have to use static discovery so click on that tab and then Add.
Enter the iSCSI IP and the target name.
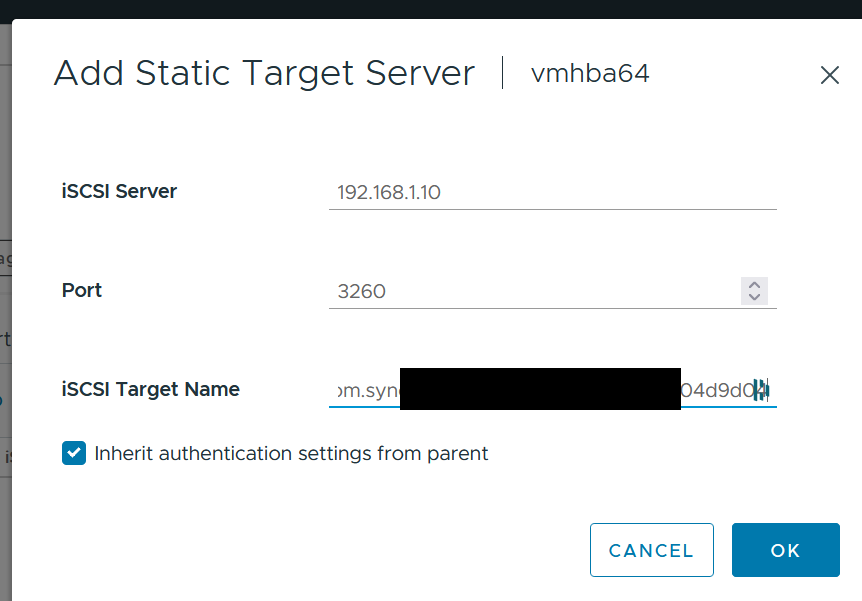
Finally, click on Rescan storagein the menu above. If you need to provide your initiator, this is where you can find it under iSCSI Name (iqn.1998—_.
To learn how you can install Kubernetes on your NUC and how to use k8s Load Balancing see the links from my blog here and here.