
If you have some on-prem workloads (either virtual or physical servers) and you want to migrate them to Azure, this post might be for you. I’ll describe how to migrate these servers in Azure using Azure Migrate and Azure Site Recovery. These tools (actual VMs) will have to be installed in your on-prem environment and they’ll do the heavy lifting for you. Before I begin, there are some pre-requisites. You’ll need a valid Azure subscription, supported VMware vCenter (v5.5 and above) and resources to install two VMs. On my ESXi host, using thin provisioned storage, I needed 8 CPUs, 32GB RAM and 20GB-80GB thin provisioned storage for Azure Migrate: Server Assessment and 8CPUs, 32GB RAM and 40GB disk for Azure Migrate: Server Migration tool. It will take much more space if you have a lots of VMs. I have about 15. You’ll also need a VNET(s) and subnet(s) where you’ll migrate the VMs.
I’ll configure that first. I’ll give you an example of how to migrate a two-tier Windows application (web server + MS SQL server) and a WordPress server running on two CentOS 7 servers.
Table of Contents
Azure VNET/subnet
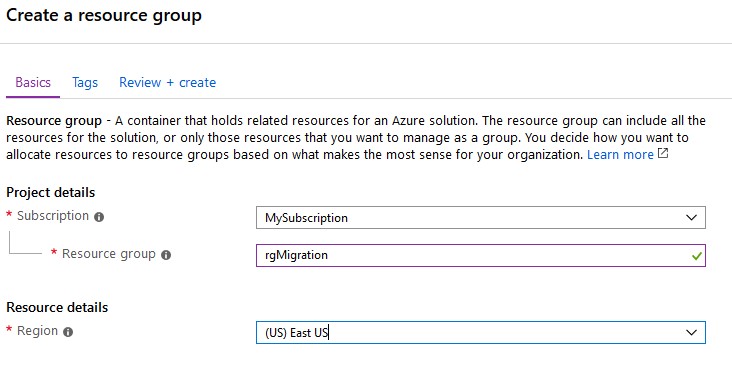
Log to your Azure subscription and create a resource group for the migration. I’ll name mine rgMigration.
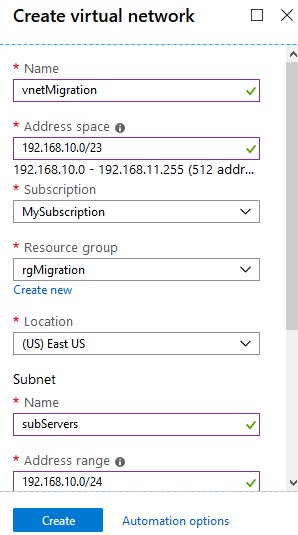
Then create a new VNET and a subnet where you’ll migrate your VMs. You can use the same subnets as on-prem but only if you don’t have a ExpressRoute or VPN between on-prem and Azure. In my case, I have a VPN between my home-lab and Azure, so I have to choose a different subnet. I named my VNET vnetMigration and the subnet subServers.
Azure Migrate
Once completed, in the Azure portal in the middle upper search field, start typing migrate and select Azure Migrate.

You’ll be presented with different options to migrate data, SQL, servers etc. Choose this one that says migrate servers.

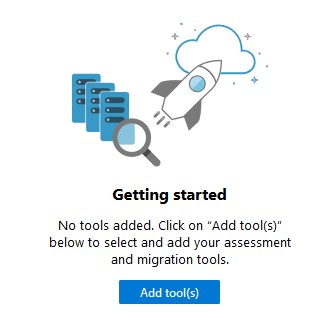
Click on Add tool(s).
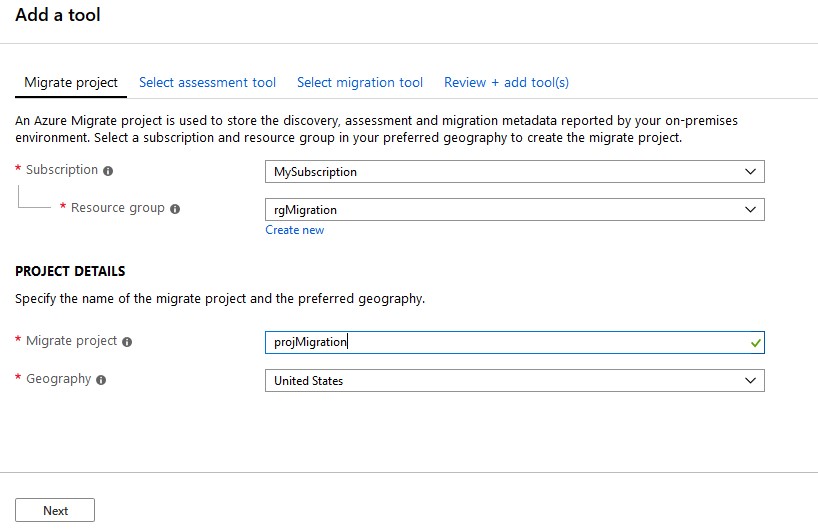
You’ll be prompted to choose the subscription, the resource group, name the project and choose the region. Use whatever suits your needs and click Next.
There are several tools there, we’ll use the Microsoft Migrate: Server Assessment. Click on it to highlight and click Next.

For the migration tool, we’ll choose Azure Migrate: Server Migration. Select, click Next and finally click Add tool(s).

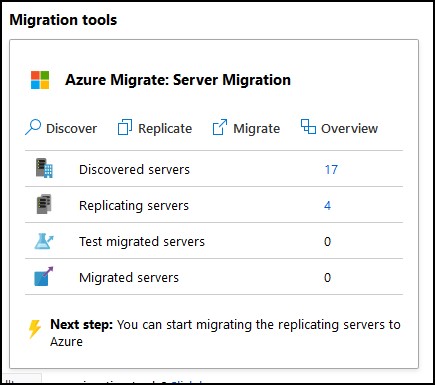
It takes about a minute to provision the tools. You’ll see two tiles on your screen, one for the Assessment tool and the other for the migration.
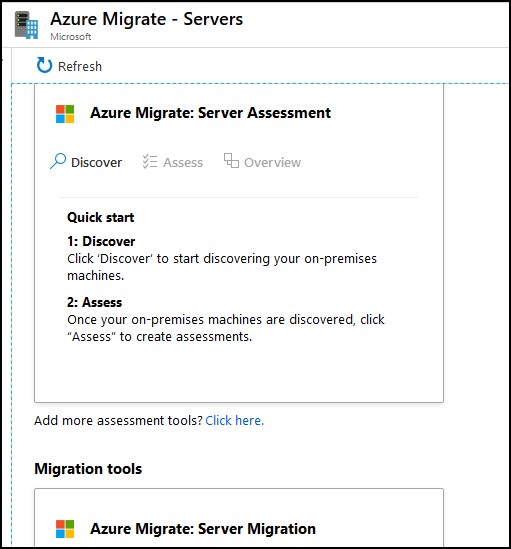
We’ll use the first tool to assess the on-prem servers. This tool will tell us if we have servers that can be actually moved to Azure cloud and it will recommend the size of those servers.
Server Assessment
Click on Discover first. You’ll see another screen where you can download an OVA file for your vCenter. Download the file and deploy the OVA file (v2.19.07.30). I won’t go into details how to do this, it’s super easy. Once you have your VM from the OVA file up and running, open the console for that VM, accept the EULA, change the admin password and log in as Administrator with the password that you just specified. You might also want to change the IP from DHCP to static before proceeding. In addition, disable the IE Enhanced Security Configuration from the Server Manager or you’ll get bombarded with annoying popups from IE.
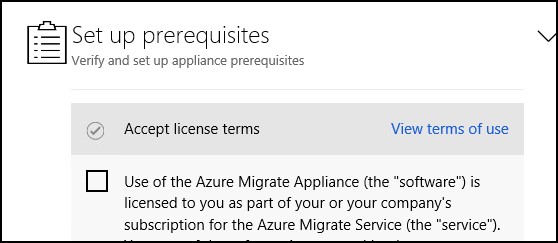
On the desktop, there should be two files, one text file with the appliance version and a shortcut to Microsoft Azure Appliance Configuration Manager. Accept the license terms for the appliance.
Wait for the appliance to do the pre-flight checks and then install VMware vSphere Virtual Disk Development Kit.
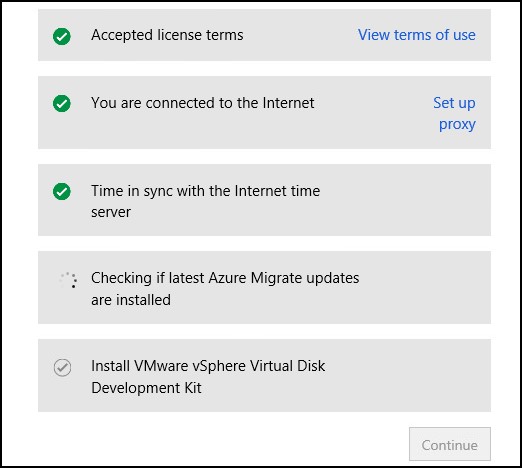
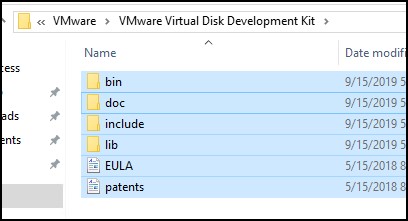
Pretty much, you’ll have to download a ZIP file from VMware site, extract the ZIP and put it under C:\Program Files\VMWare\VMWare Virtual Disk Development Kit.
Click Verify and Install and Continue. Then, login to Azure portal from the appliance to register it.
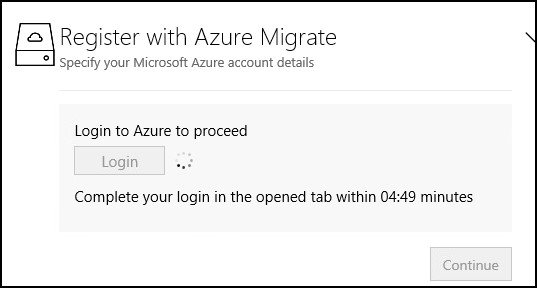
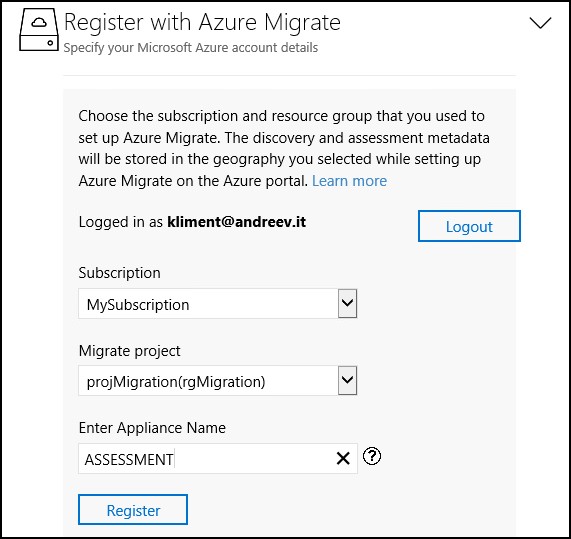
Fill out the subscription, specify the migration project and enter a name for this appliance. Click Register and once successfully registered click Continue.
Specify the vCenter where your VMs reside, enter the username and password and click to Validate Connection.
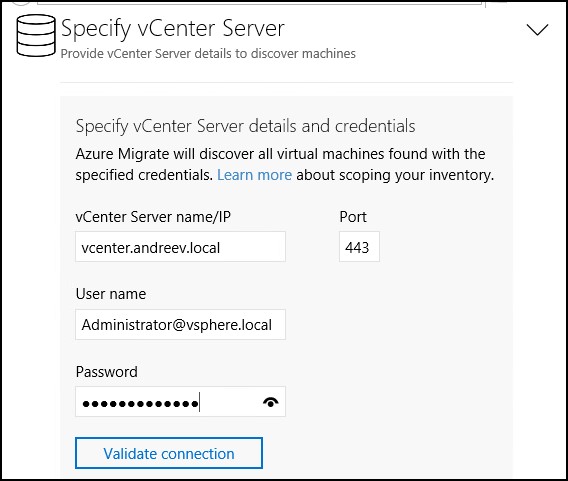
Finally if everything is OK, click on Save and start discovery.
NOTE from the appliance: You will be able to review the discovered machines on the Azure portal and create as-on-premises assessments within 15 minutes. Collection of performance data will be initiated and it is recommended that you create performance-based assessments after 24-hours.
It’s important to leave the appliance running for some time so it can properly determine the usage and size the destination VM for you. If you already know what size your VM will be in Azure, you don’t have to worry about this.
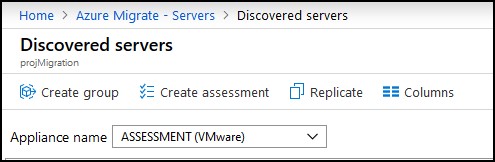
Now, go back to Azure portal and find the Azure Migrate service. Click on Servers and then on Discovered servers under Assessment tools.
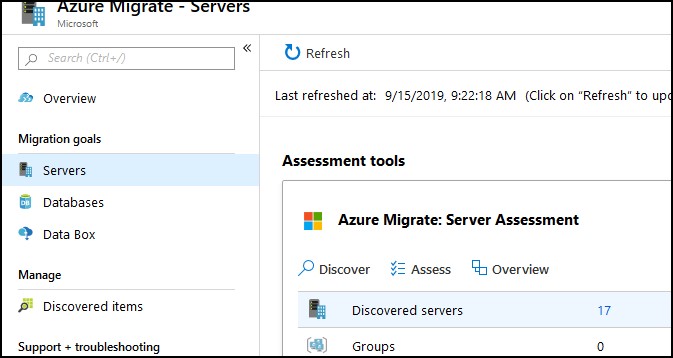
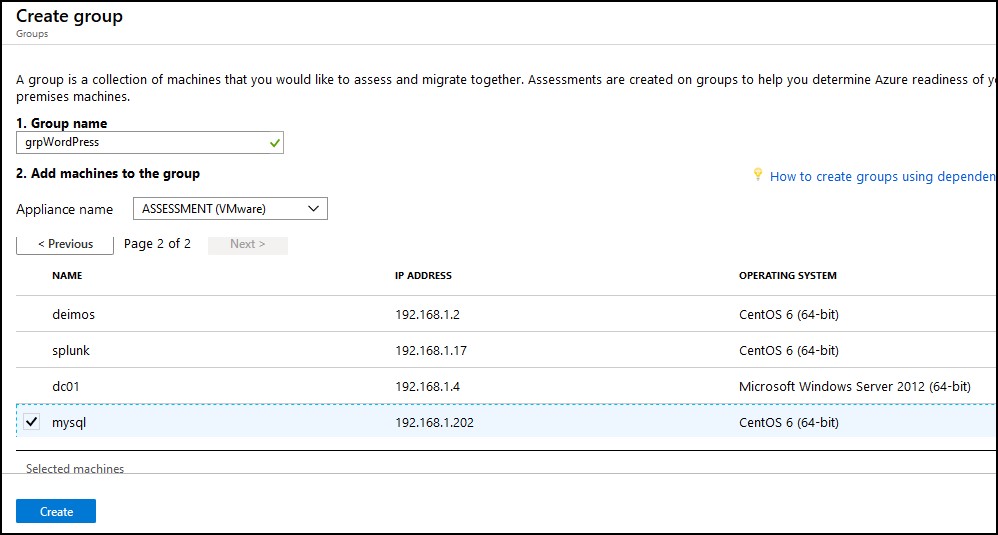
You’ll see a list of all servers in your vCenter and their specs. We’ll create a new assessment group for two Linux servers that I have (apache and mysql) and that are part of my local WordPress installation.
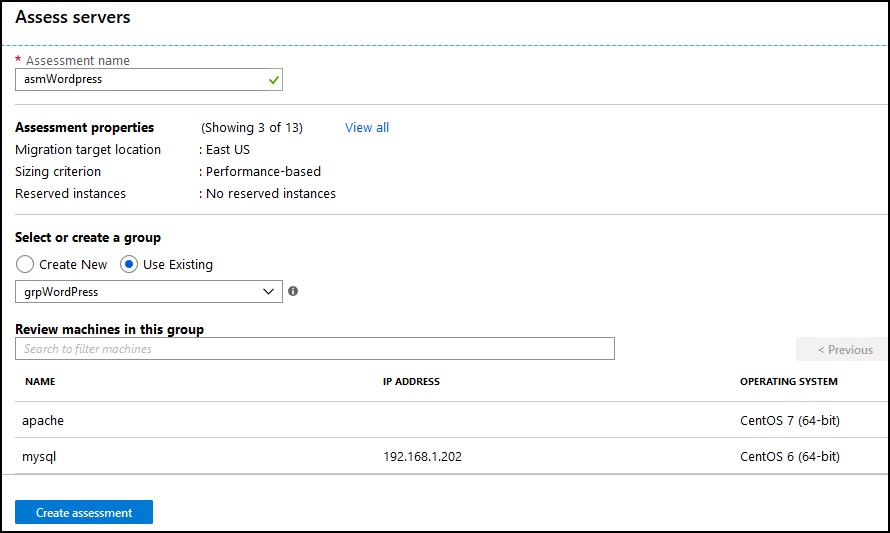
Then, create an assessment for that same group from the top menu.
Make sure you change the assessment properties. That’s where you specify the region. Just click on View all and change the settings there.
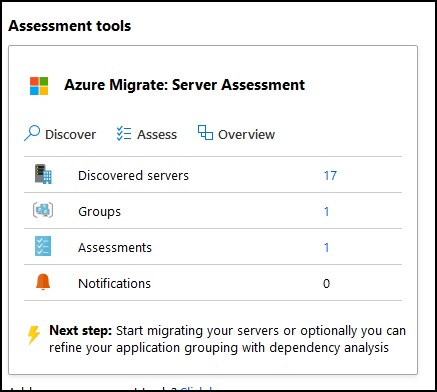
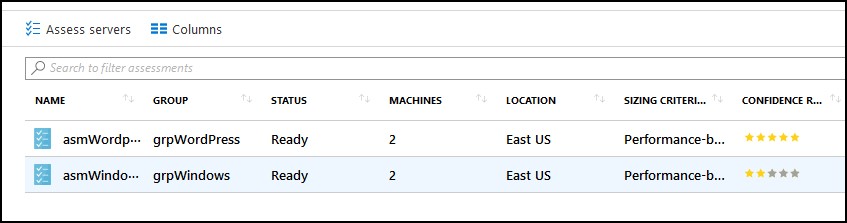
Now if you go back to the Azure Migrate, you’ll see that you have one group and one assessment.
Click on the Groups and then on the actual group. You’ll see something like this.
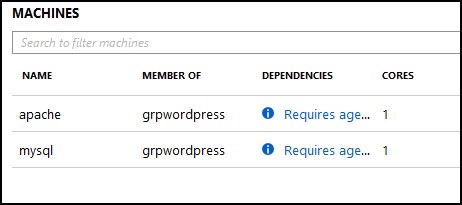
If you want to see what your server is doing in terms of connections to others servers over TCP/UDP, you have to install the agent. It’s not necessary, but you’ll see the dependencies. It’s useful when you migrate some servers as a group and then you realize that you need to migrate another server because there is a dependency.
Dependencies agent
Click on the link Requires agent installation and you’ll see this page. Pretty much you have to install two agents on each server and configure them. But, first you have to configure the OMS Workspace that gathers metadata from the VMs.
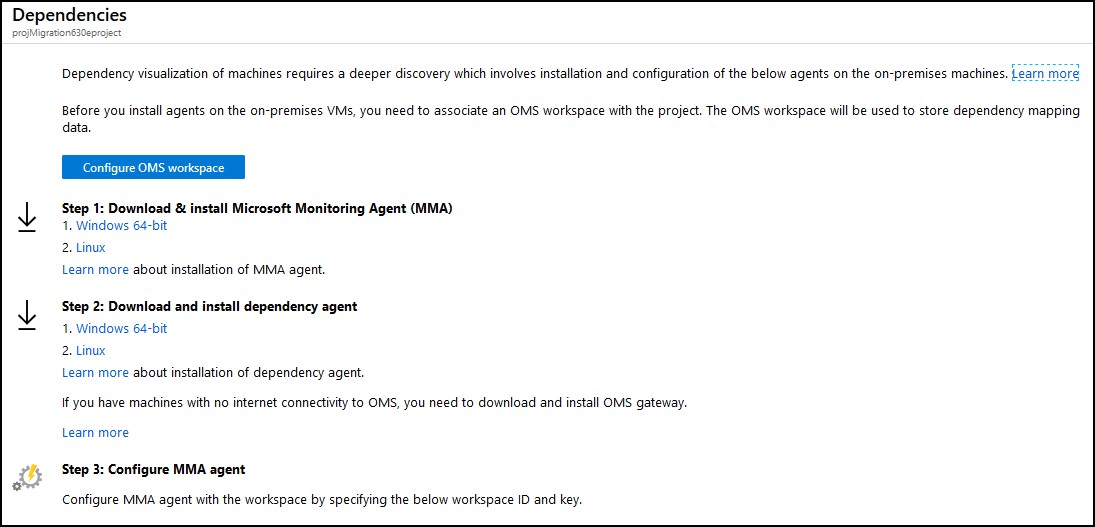
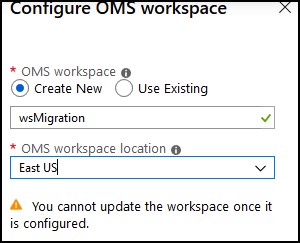
Click on Configure OMS workspace first. Type a name a region and click Configure at the bottom.
Linux
Download both files. You’ll get redirected to github for the first agent. Download omsagent-1.11.0-9.universal.x64.sh for a 64-bit Linux OS or whatever is the latest version. This is a bash script file with an embedded tar binary file. Transfer it to the Linux box, make sure it’s executable and run the script. Check this link for your version of Linux/Unix. Make sure you specify the Workspace ID and the Workspace Key, which you can get at the bottom of the page from the Dependencies screenshot (see the previous screenshot above).
wget https://github.com/microsoft/OMS-Agent-for-Linux/releases/download/OMSAgent_v1.11.0-9/omsagent-1.11.0-9.universal.x64.sh
chmod +x omsagent-1.11.0-9.universal.x64.sh
./omsagent-1.11.0-9.universal.x64.sh --install --enable-opsmgr -w <workspaceID> -s <workspaceKey>
You should see a message saying Shell bundle exiting with code 0.
For the second agent, download it from the Microsoft site, change the permission to execute and run.
wget http://aka.ms/dependencyagentlinux -O InstallDependencyAgent-Linux64.bin
chmod +x InstallDependencyAgent-Linux64.bin
./InstallDependencyAgent-Linux64.bin
Type YES when prompted and you should be good.
Windows
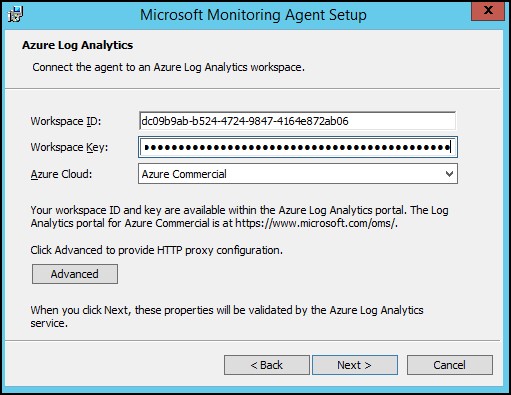
Download both files (MMASetup-AMD64.exe and InstallDependencyAgent-Windows.exe). Install on each server. For the MMA agent, check to connect the agent to Azure Log Analytics (OMS).
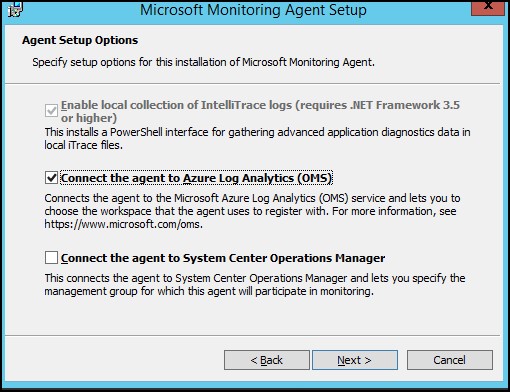
Enter the Workspace ID and the key and choose Azure Commericial.
Installing the dependency agent is even easier, just double-click the EXE and accept the agreement. From the Discovered servers list, click on the server where it says View dependencies and you’ll something like this.

Click on each block to see more details.
Server Migration
Once we have all the pre-requisites in place and we are all confident in the assessment based on the confidence rating, we can proceed with the migration.
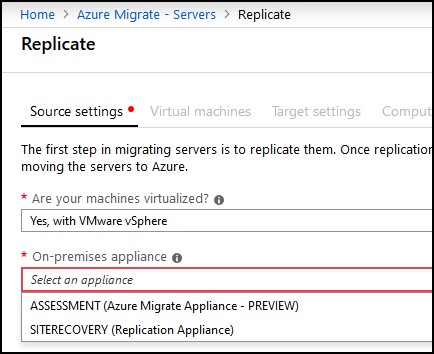
Now, you can do the migration within Azure Migrate: Server Assessment tool. Just click on Discovered Servers under the tool and click Replicate from the menu.
Specify the type of the hypervisor and the on-prem appliance.
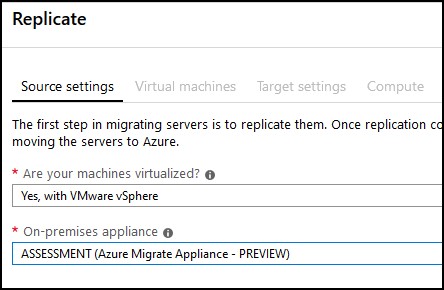
As you can see from the appliance suffix, the migration option of the assessment tool is in preview. You can proceed further. In the screenshot below, I’ll be migrating my Linux servers.
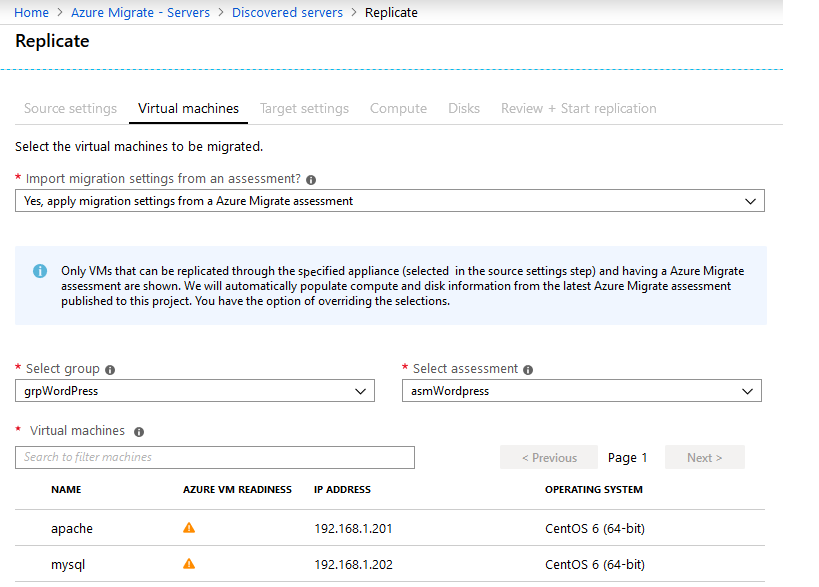
You just have to specify where you want your servers migrated.
Choose the size of the servers, the disk size and you can proceed.

This is probably the way to go, but because it’s in preview, I’ll explain the old way too.
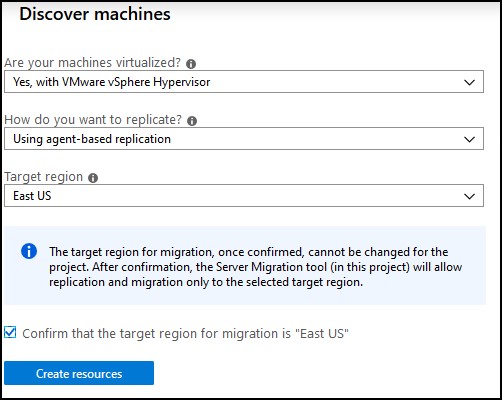
Under the migration tool, click Discover.
Specify where do you want your VMs migrated. This is an important step. Click on Create resources.
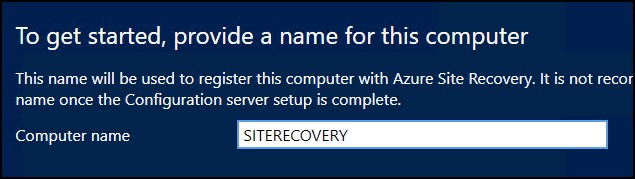
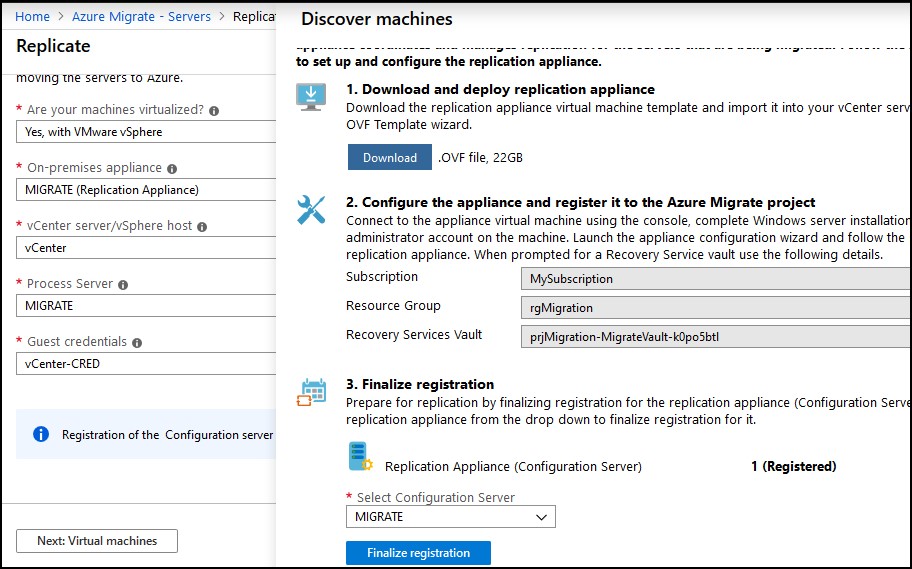
Finish step 1. Download the OVA and install it in your vCenter. Same as with the previous OVA, log to the console, and change the IP to static. First, you’ll be prompted to name the appliance.
Then log in to Azure portal.
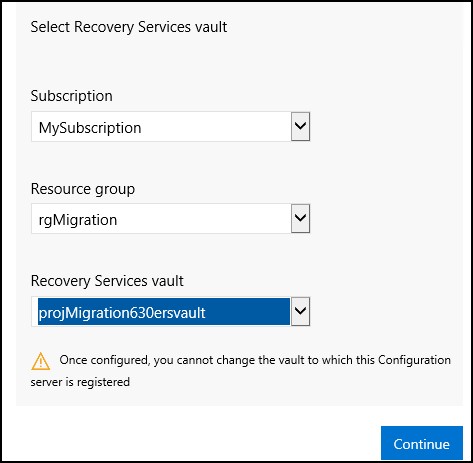
Configure the appliance using the Site Recovery icon on the desktop. It’s gonna ask you to log (again) to Azure and provide the subscription, resource group and the vault. Make sure you choose the vault that’s provided in the same dialog box where you downloaded the OVA. If you fail to provide the proper vault, you’ll have to deal with deleting hidden resources etc…
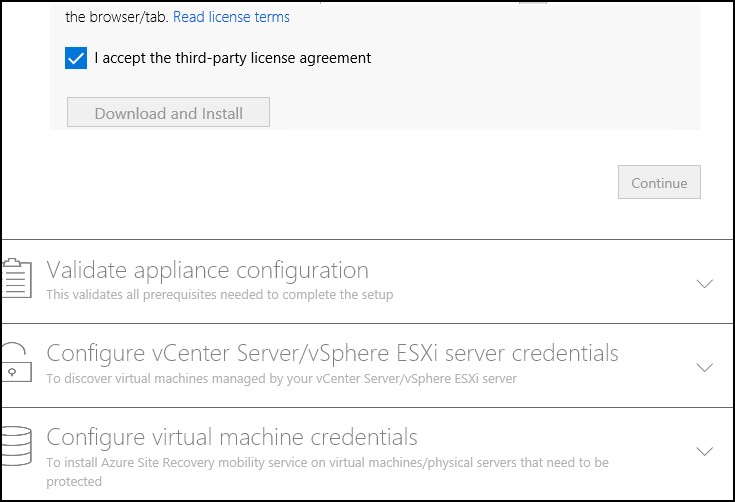
Next step is to agree to install MySQL server on the appliance and specify the vCenter.
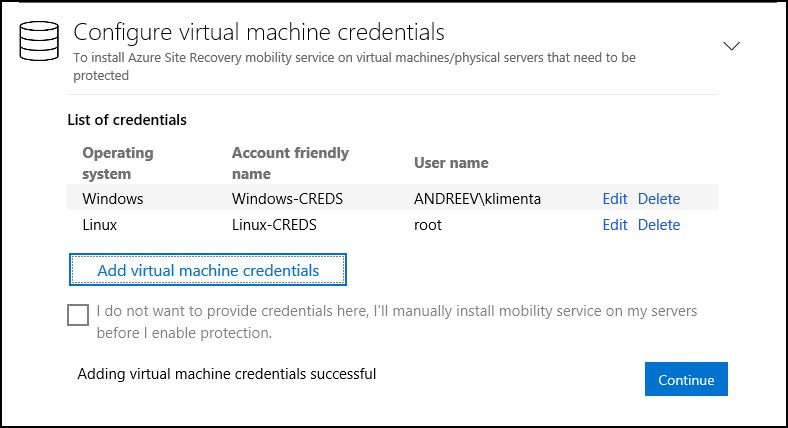
You should also add the credentials for Windows and Linux servers. For example, my username has full access to all Windows VMs and root has access to all Linux servers.
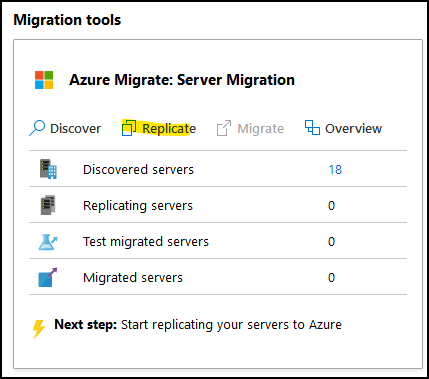
Once completed, you can go to the Azure Portal and if you click on Replicate, you’ll see that our new appliance showed up.
If you are having problems finding out where to register the new appliance, go to the Replicate menu. Fill out the pre-requisites and you’ll get a warning that your appliance is not registered. Click Finalize registration from here.
As you can see, with this tool, migrate is grayed. First, we’ll have to replicate the servers.
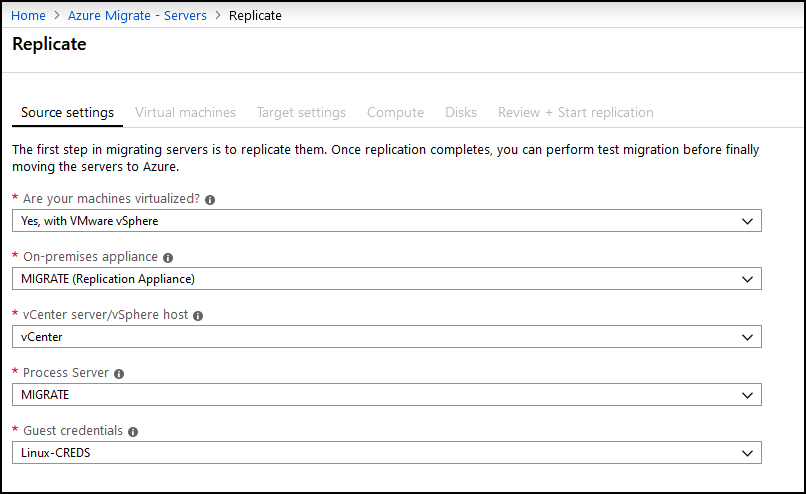
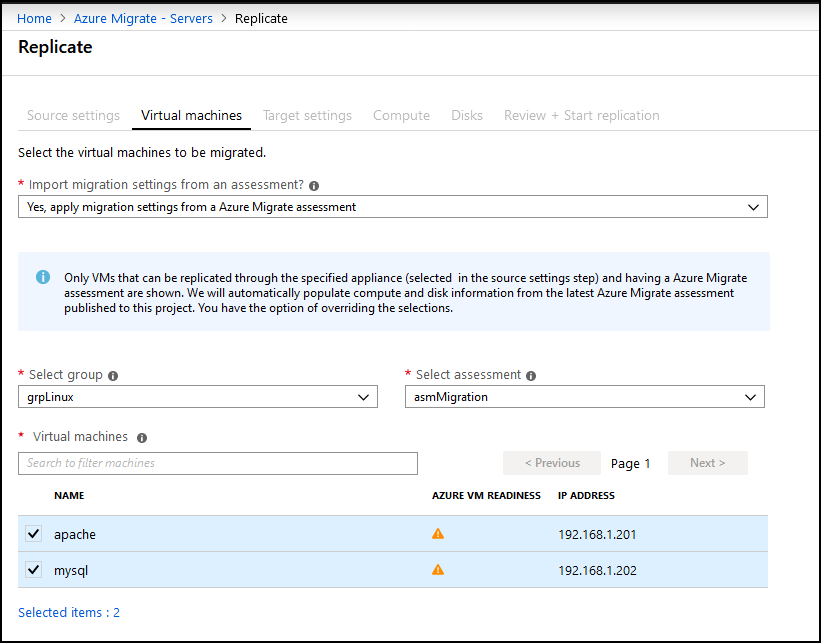
Fill out the settings and proceed. Make sure you choose the right credentials. I’ll be replicating Linux instances, so I chose Linux-CREDS. These were defined when we configured the appliance.
Choose the VMs.
Choose the VNET, subnet etc…
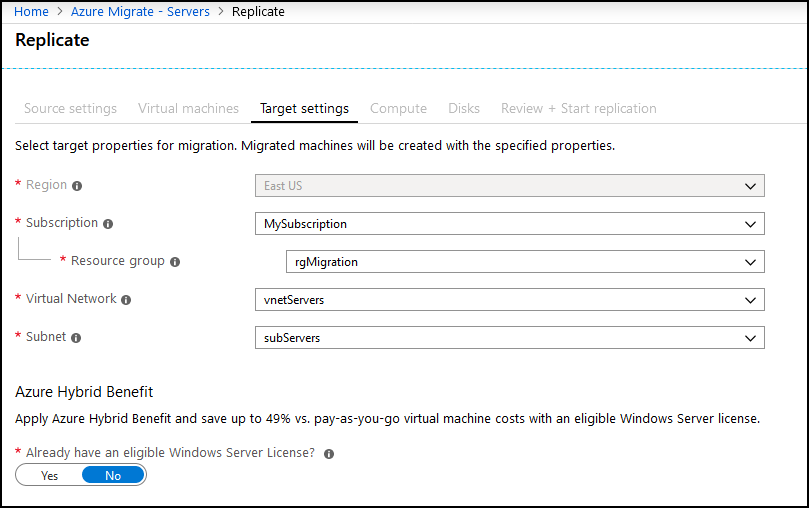
Choose the rest of the requirements (disk etc…) and click on Replicate.
You can check the status from the tool. Click on Overview, then Replicating machines, then click the Other tab.

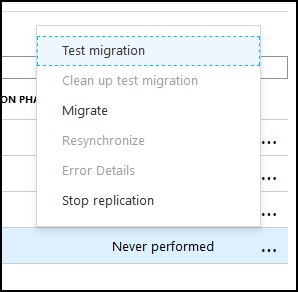
Once the replication is completed, you can do a Test migration or full migration. Click on the menu (three dots) on the right of each VM and do a Test migration first. If you a confident, you can do full migration as well.
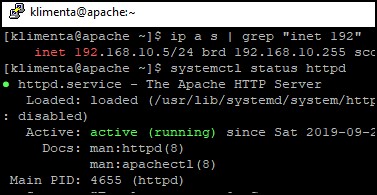
For a test migration, you have to specify a VNET. When you do a test migration, the original VM stays up and the new VM in Azure has a -test suffix. Here I have my apache server test-migrated in Azure.
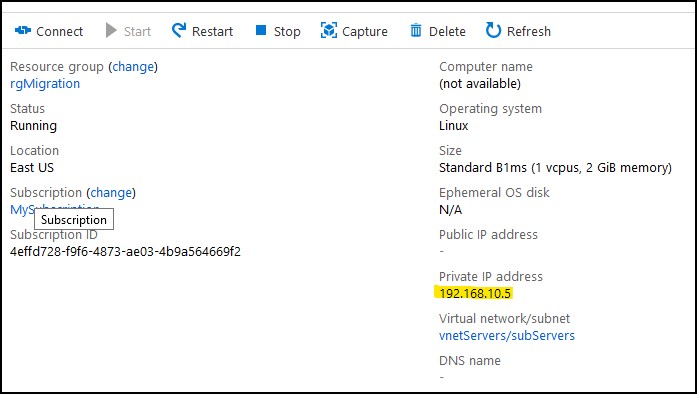
And I can access it over my VPN.
When you a done, you can clean up the test migration from the same menu above and you’ll get an option to delete the test VM. Finally, once everything is OK, you can do a full migration. Click Migrate and you’ll be all set.
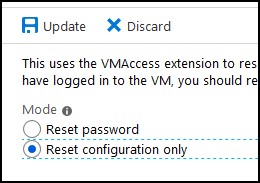
NOTE: If you can’t RDP to your VM in Azure, it’s because RDP port was disabled. You can re-enable it from the console. Go to the VM menu and all the way down, click on Reset password. Do Reset configuration only and after a minute or so, you’ll be able to RDP.
And if you get this error, The remote computer requires Network Level Authentication…blah, blah, domain controller.
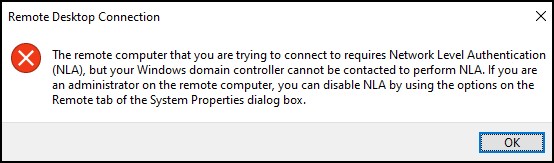
…then log as local administrator and check the DNS settings. Most likely the DNS settings were messed up when migrating. Here is an example of what I got from my VM in Azure.
  Default Gateway . . . . . . . . . : 192.168.10.1
  DHCP Server . . . . . . . . . . . : 168.63.129.16
  DHCPv6 IAID . . . . . . . . . . . : 352324922
  DHCPv6 Client DUID. . . . . . . . : 00-01-00-01-25-0F-72-AF-00-50-56-B9-F7-0F
  DNS Servers . . . . . . . . . . . : 168.63.129.16
Azure assigned a DNS in Azure. Change it to your DNS and you should be OK.
Migrating a physical server
In order to migrate a physical server, you’ll have to follow these steps. In essence, you’ll have to log to the Azure Site recovery VM and go to this folder (C:\ProgramData\ASR\home\svsystems\pushinstallsvc\repository). Transfer the ASR file to each physical instance. While logged in the appliance, get your key.
C:\ProgramData\ASR\home\svsystems\bin\genpassphrase.exe -v
Don’t run the EXE on the VM yet. You’ll have to do it from a command prompt. Open up a command prompt (with admin rights) and execute these lines.
mkdir c:\temp
cd c:\<path_to_EXE>
ren Mi<hit_TAB_for_autocompletion> MobilityServiceInstaller.exe
move MobilityServiceInstaller.exe c:\temp
cd c:\temp
MobilityServiceInstaller.exe /q /x:C:\Temp\
UnifiedAgent.exe /Role "MS" /Silent
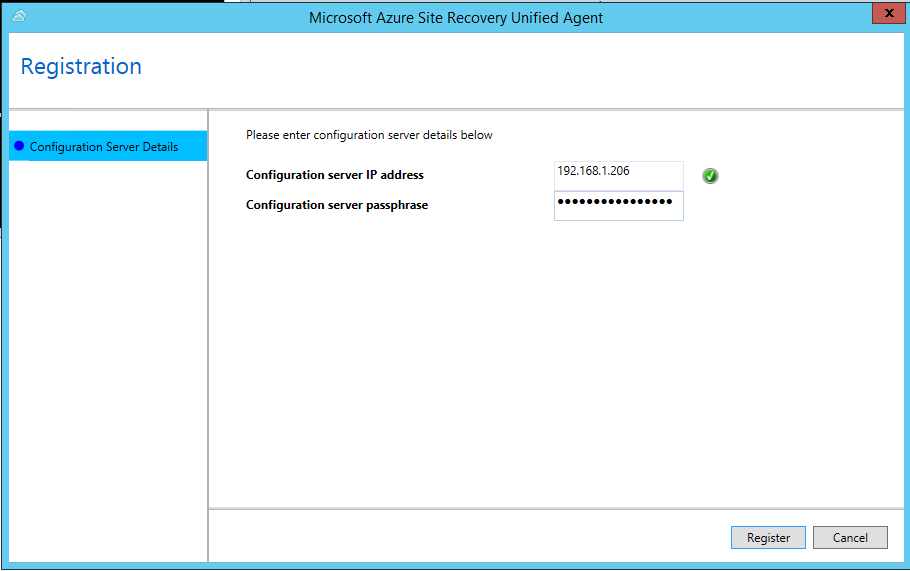
The last command will open a new terminal window and install the agent. Wait to finish and you can exit. Then in the GUI go to c:\program files (x86)\Microsoft Azure Site Recovery\agent folder. Double-click the UnifiedAgentConfigurator.exe file and enter the IP of your Site Recovery appliance and the passphrase that you got from the command above.
After 10 seconds you should have everything ready.
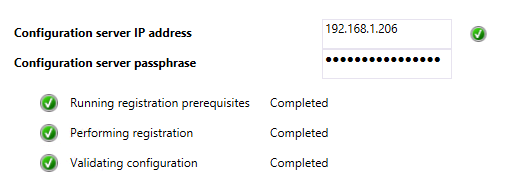
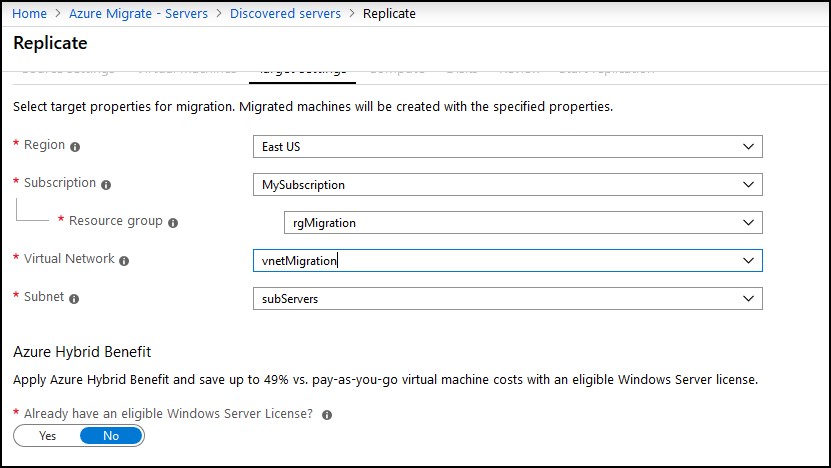
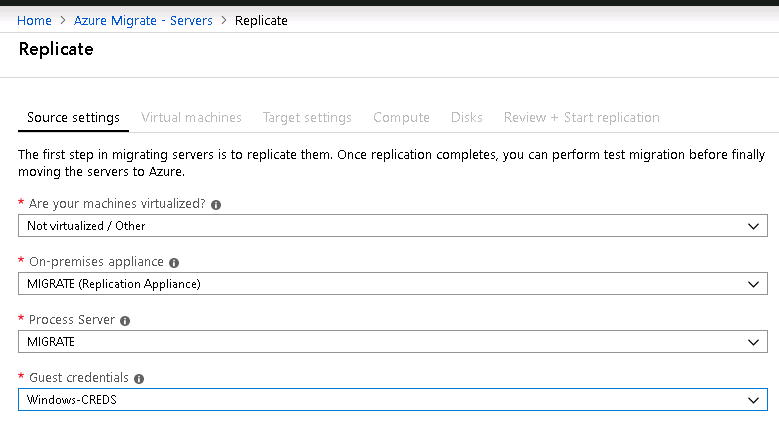
Go back to the portal and in the Azure Migrate: Server Migration tool, click on Replicate. Under the Source settings tab, select that your machines are NOT virtualized. Choose the Site Recovery appliance and specify the credentials that will be used to access the physical server.
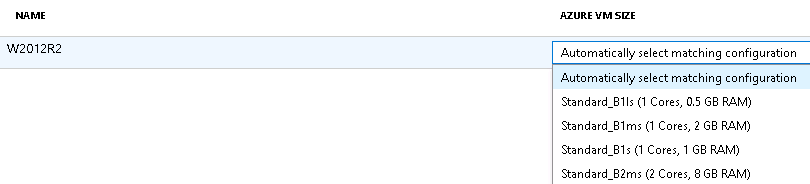
You don’t have an assessment for the physical server, so choose to specify the migrations settings manually. My physical server is called W2012R2.

Choose the subscription, VNET, subnet under Target settings. Choose automatic or specify the compute type of your instance under Compute tab and do the same for the disks under the next tab.
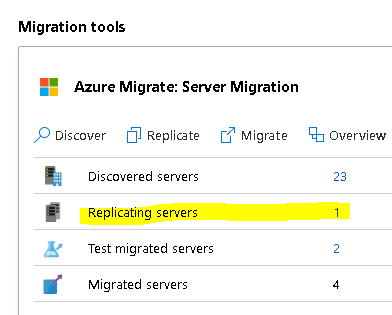
Click Replicate when ready. After a minute or so, you can check the status under Replicating servers.
…and same with the other VMs that were replicated, you can do a test migration and full migration. Once you power up the replicated server, make sure you uninstall any HW related software for the arrays, WMI management etc… And pretty much that’s it!
1 comment
Great article, really helpful. But it takes more than 12 minutes to read!!!