
In this blog post I’ll describe how to create a VPN connection between an Azure subscription and a pfSense router with a public IP using dynamic routing. Before we proceed, you have to understand that the subnets can’t overlap in Azure and behind pfSense. So, if your home network is 192.168.1.0/24, you can’t have the same subnet in Azure. It is also a good practice to write down your subnets and subnet masks before hand, so there are no errors when creating the tunnel. Many times, the tunnel won’t work just because you are rushing things and not paying attention to the subnets and masks. So, here is my setup.
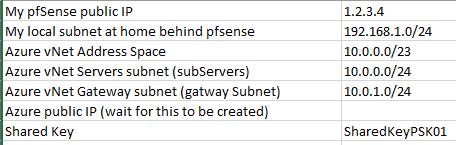
In my home lab I have a pfSense with a public IP (1.2.3.4) and my internal network behind pfSense is 192.168.1.0/24. In Azure, I will create a subnet for the servers that will be part of a bigger network. So, I’ll create a vNet with an address space of 10.0.0.0/23, I’ll carve a smaller subnet 10.0.0.0/24 and use the rest 10.0.1.0/24 for the Virtual Network Gateway. Write down your values.
Table of Contents
Create Azure VPN
Virtual Network and subnets
Log in to Azure (the new portal using Resource Manager), select your default subscription or if you have only one (Pay As You Go), just go and create a new vNet. Fill out the necessary values to suit your needs and click Create.
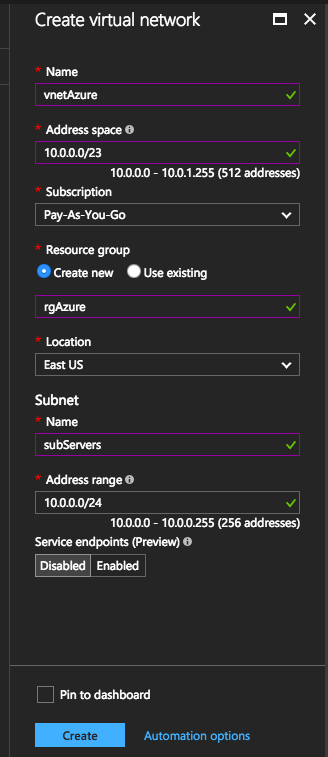
I will have 256 IP addresses for the servers and 256 IPs for the gateway.
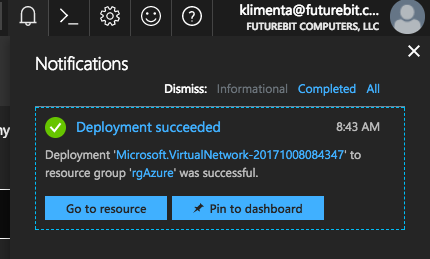
Once the vNet creation completes, usually in 10-15 seconds, click on the bell icon in the upper right corner and click on Go to resource.
There, click on Subnets.

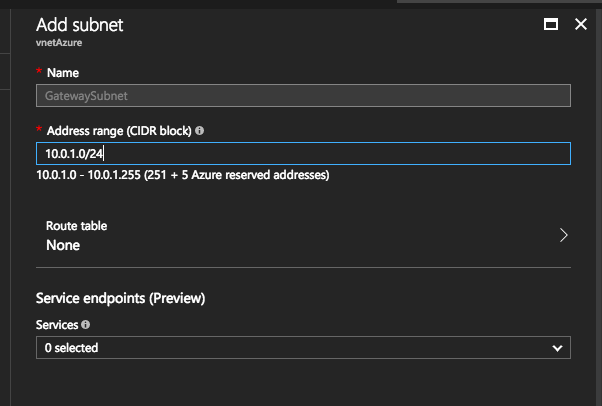
Click on Gateway Subnet.
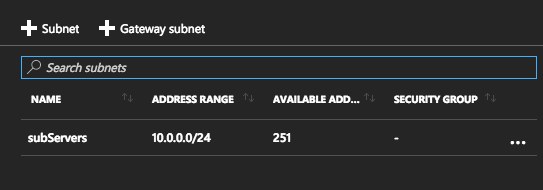
Verify the settings, but for me Azure filled out the subnet correctly with 10.0.1.0/24. You can’t change the name of this subnet. Just click OK.
Virtual Network Gateway
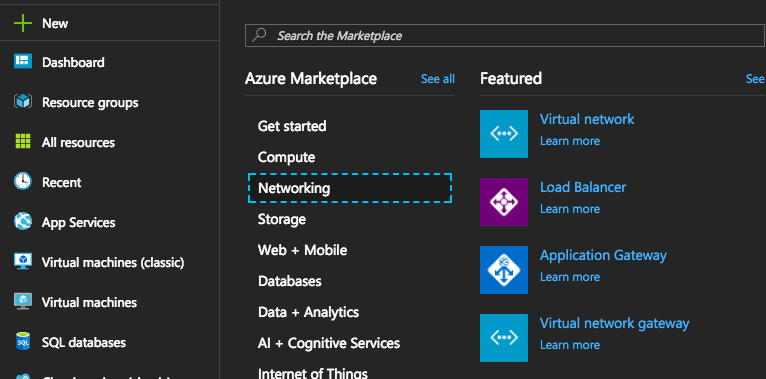
Virtual Network Gateway is the the actual VPN tunnel. Click on New, Networking and then Virtual Network Gateway.
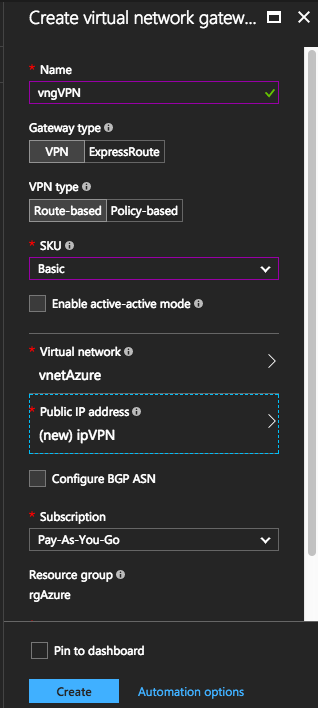
I used the following values when creating the gateway.For the SKU, I choose Basic. To see what each of them means, visit this link, pretty much it’s about the number of connections and the bandwidth that you’ll get. Choose the vnetAzure for the Virtual network and create a new Public IP address. I named my IP ipVPN. Click Create at the end. The creation takes about 30 mins. Once created, click on the ipVPN resource that you created and get your public Azure IP. Write this value down.
Local Network Gateway
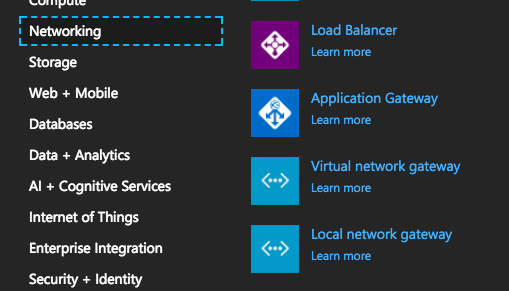
Once the Virtual Network Gateway is provisioned, go and create a Local Network Gateway.
In my case, it looks like this. The IP address 1.2.3.4 (of course not) is the public IP of my pfSense at home and the address space 192.168.1.0/24 is my home network behind the pfSense. Choose the same resource group as the vNet, virtual network gateway tunnel and the same location. Click Create.

Connections
Once created, select your local network gateway and click on Connections.
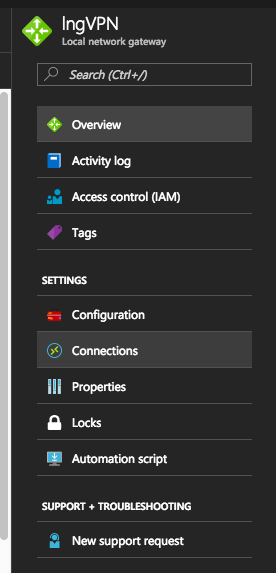
Click Add.
Choose a name, in my case connVPN, choose the virtual network gateway and the local network gateway that we just created and create your shared key. This is the key that the IPsec tunnel will exchange when establishing connection. Choose something more complex and longer, not something like I used.
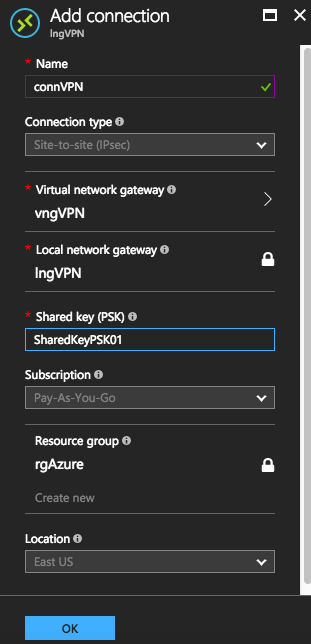
Once the creation finishes, you are pretty much done in Azure for the first part.
pfSense
VPN/IPsec
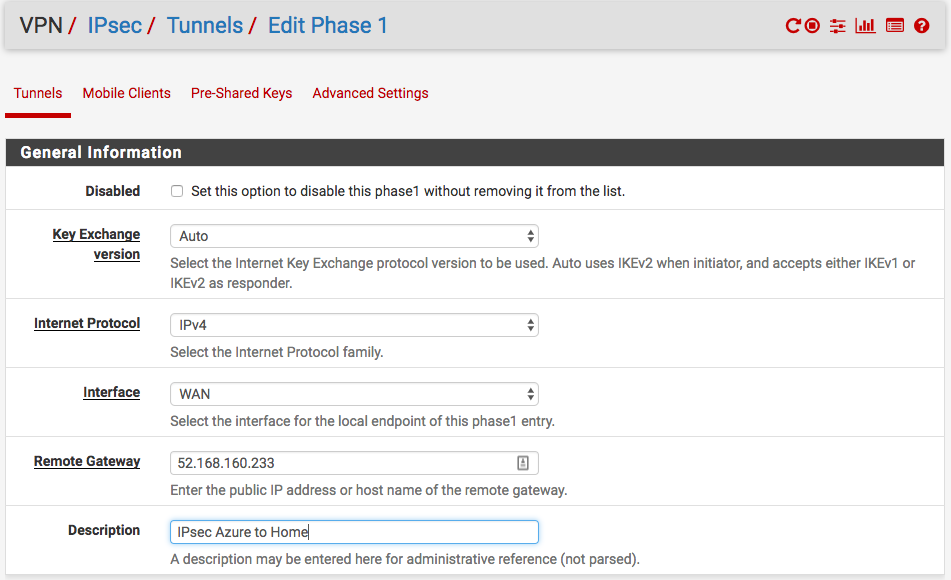
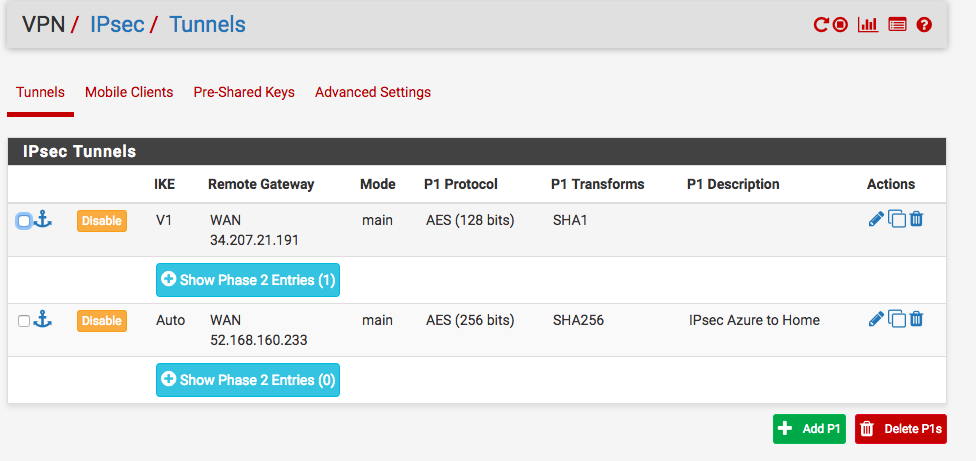
Log in to your pfSense and from the menus go to VPN/IPsec. Click on Add P1 at bottom right. This is to create the first phase of the IPsec tunnel negotiation.
Fill out these values and make sure that you replace with your IPs. For the General Information section I used this. 52.168.160.233 is my Azure public IP. Yours is different.
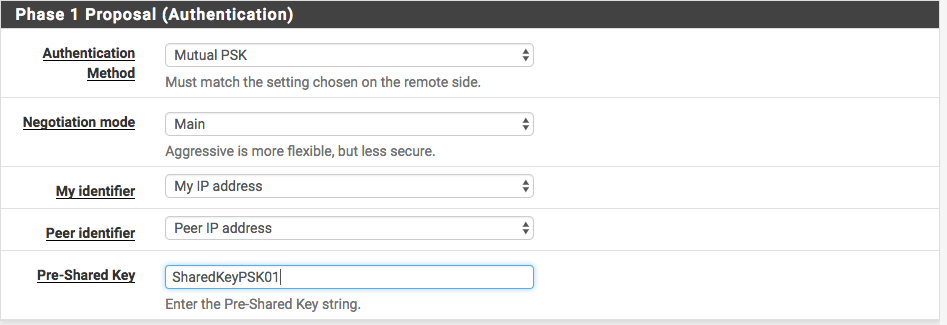
For Phase 1 Proposal (Authentication) use these values and enter your shared key.
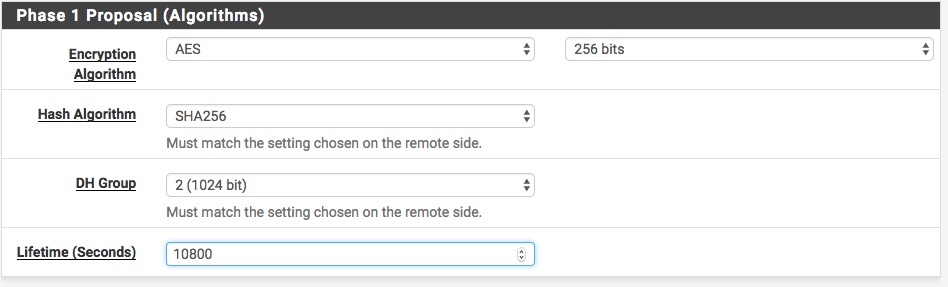
For Phase 1 Proposal (Algorithms) use these values.
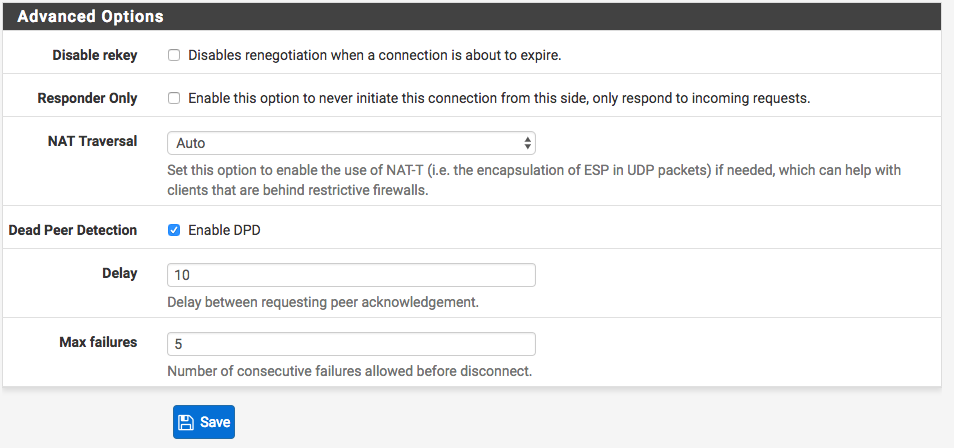
For the Advanced Options, use these values and click Save.
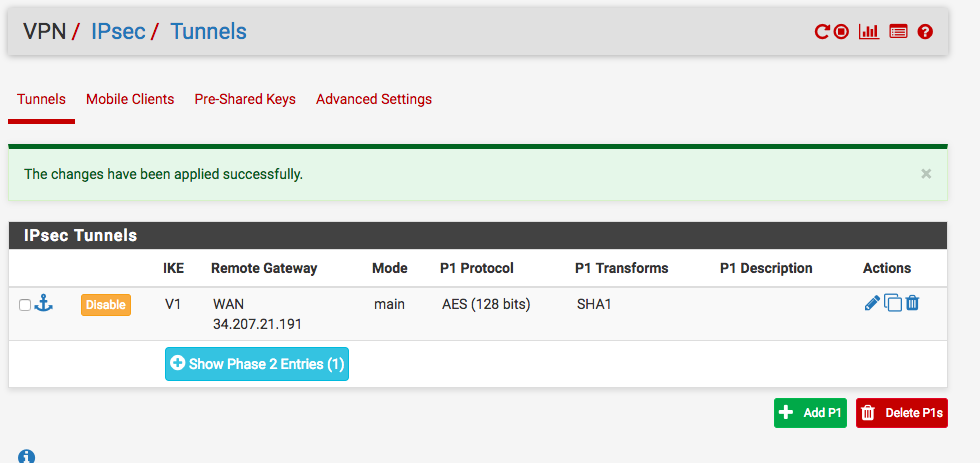
Once the screen goes back to the main VPN/IPsec/Tunnels menu, click Apply Changes. From the same screen, click Show Phase 2 Entries for the entry we just created. I have two, the first one is for AWS, so I used the 2nd one.
Click Add P2.

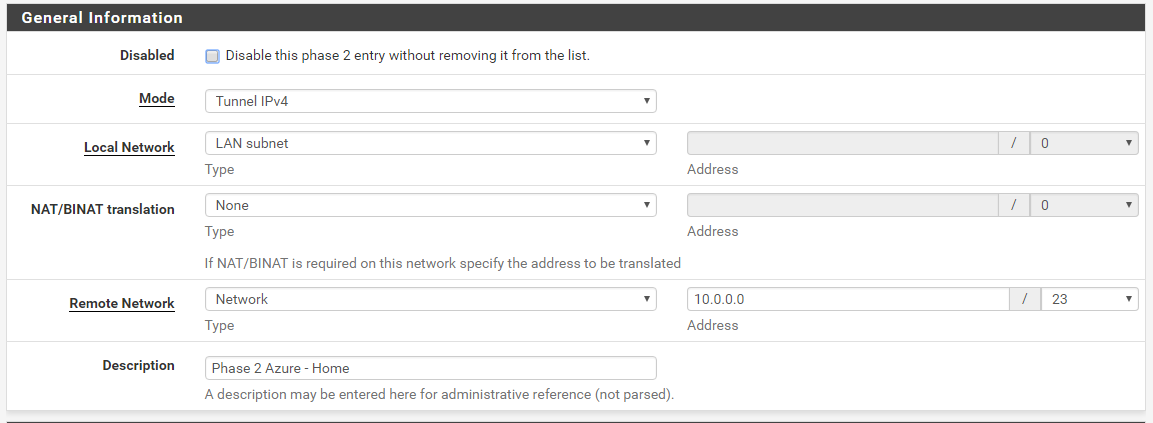
For the General Information section, use these values. Under Remote Network, enter the vNet Address Space, not the server subnet. Look all the way above and make sure you have the same values in what you’ve written and what are you typing here.
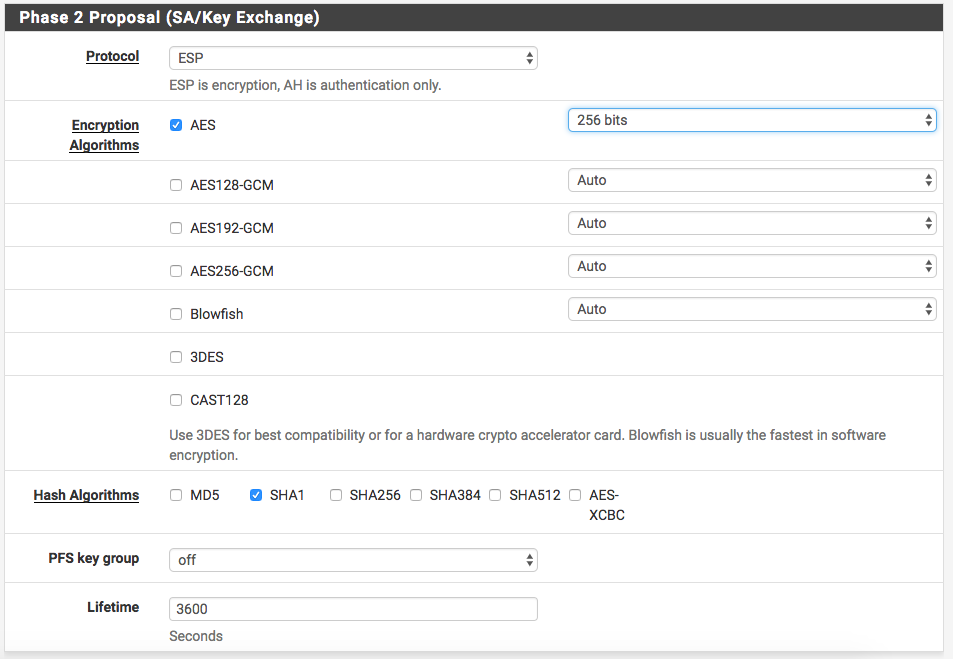
For the Phase 2 Proposal (SA/Key Exchange) I am using these values.
Finally, for the Advanced Configuration, you can leave it as is and click Save. I’ve noticed that if there is no activity in the tunnel between the resources in Azure and my home, the tunnel shuts down from time to time. But, if I enter an IP of an Azure server here, pfsense will ping this host so the traffic will flow constantly and the tunnel stays up. Of course, you have to make sure that your Azure resource allows ICMP in a security group (which is not by default).

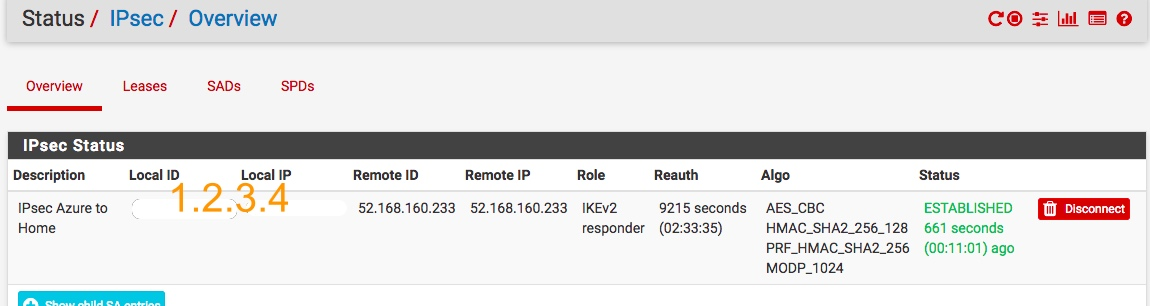
OK, now that you have your P2 phase set up, click Apply Changes again. From the main menu, go to Status, IPsec and you should see your tunnel established.
pfSense is locked down quite a bit by default, so we have to open up the firewall for the IPsec traffic. In order to do that, from the main menu go to Firewall, Rules and then click on the IPsec sub-menu.
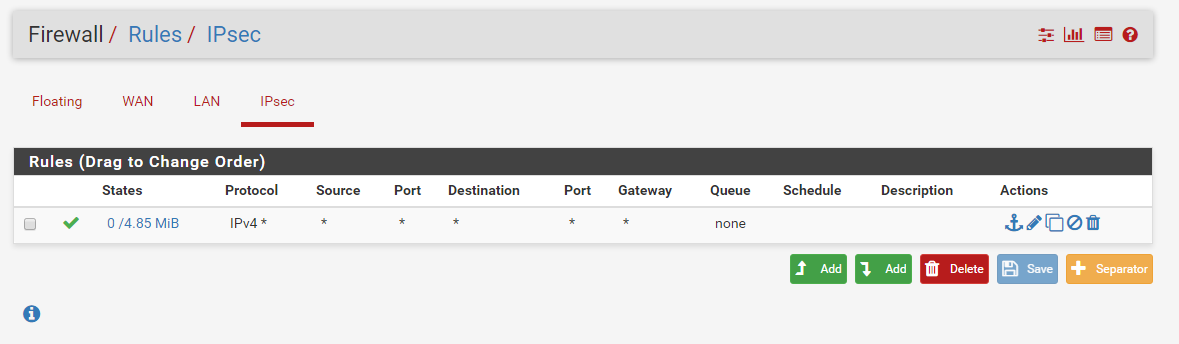
Click Add and fill out the form with the following values. This will allow all traffic to flow from Azure to pfSense without any restrictions. If you want to restrict the rules, e.g. you don’t want ping to be allowed, then you have to create a rule to deny ICMP or create two rules, one for TCP and one for UDP. In my case, I don’t mind all the traffic so I used any to any.
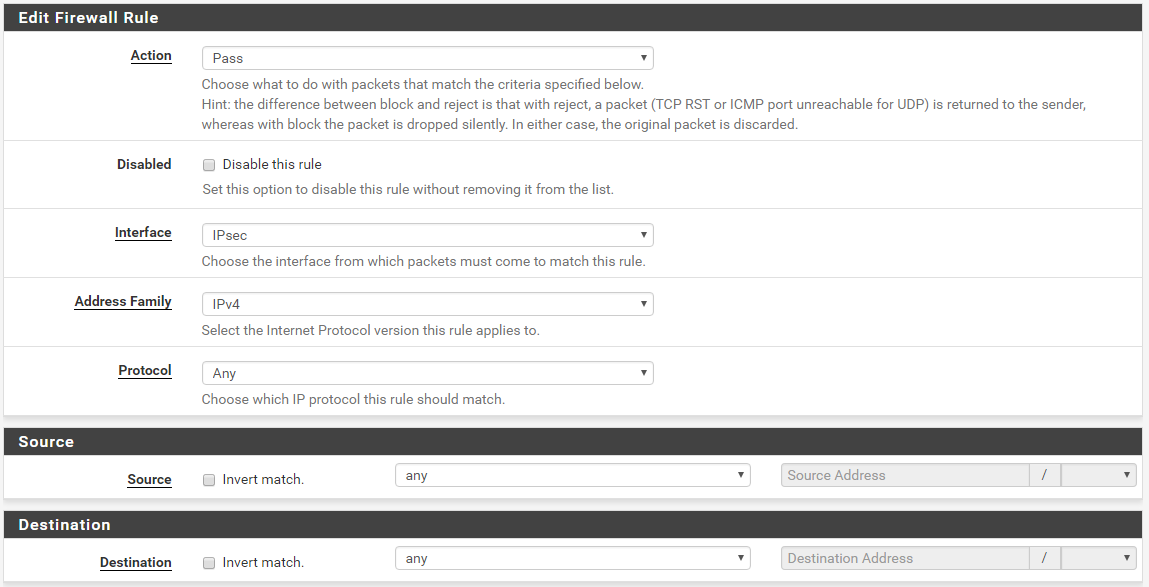
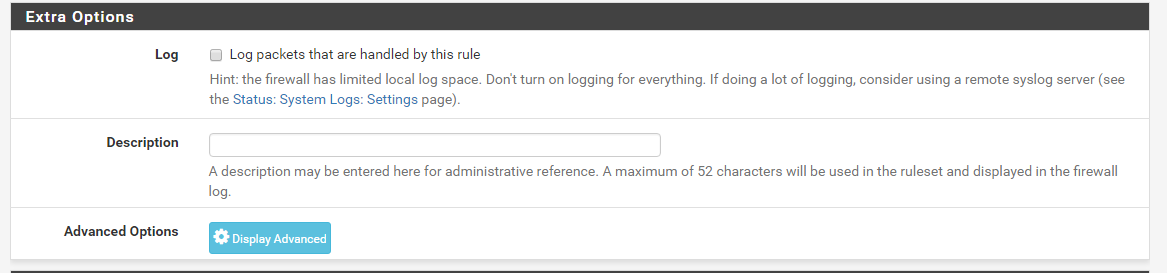
There are no Advanced Options needed. Just click OK and you are good to go.
Test
In order to test, I’ll build a new Windows 2016 VM. Make sure that this VM is in the same resource group as the VPN gateway, uses the vNet that we created and that the subnet is the one for the servers, subServers. You don’t need a public IP. Once you provision this VM, go to the Networking properties of the VM and look up the internal IP. It should be in the same subnet as the subServers subnet. In my case it’s 10.0.0.4.
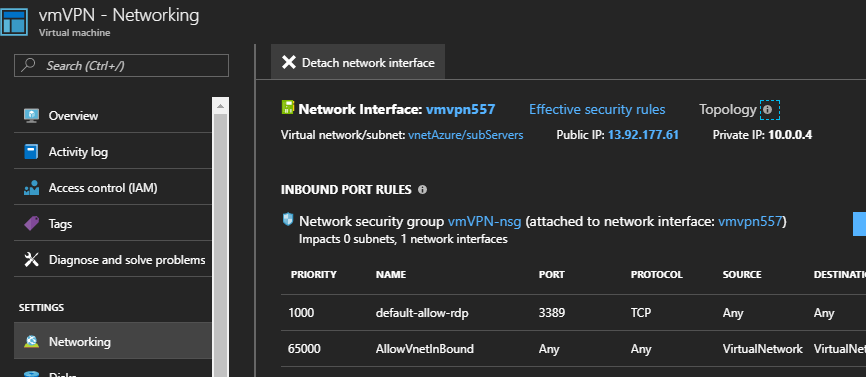
At this point you should be able to RDP to this VM, but ping won’t work. Why? Because, when you create a VM in Azure, it creates a security group that allows RDP only, but not ping (ICMP). Now, if you log to your new VM in Azure and try to ping a resource on your local home network, you’ll see that you can ping it. Why? Because in pfSense we created a rule that allows all traffic from Azure to pfSense to pass. If you want all traffic in both directions, you’ll need a new security group in Azure that allows all traffic and attach this security group to your instances.