
When I was doing some proof of concept using EKS, I’ve noticed that there is a limitation on how many pods can a node run and how EKS CNI assigns the subnet IPs. Apparently, a node can run a maximum of XX pods (based on type) which is very low, e.g. a t3.large instance with 2 CPUs and 8GB RAM can run only 35 pods. On top of that, the IPs that are assigned for the pods are used from the existing pool of IPs and if you have a /24 subnet for the EKS cluster, you’ll run out of IPs in no time. Here is an example of what I did and options how to solve this issue.
Table of Contents
Option 1 – Calico 3rd party CNI
I’ll provision an EKS cluster in a /24 subnet with 3 public and 3 private subnets.
eksctl create cluster --name eksECIC --region us-east-2 --instance-types t3.large \
    --managed --vpc-cidr 192.168.100.0/24 --node-private-networking --version 1.24 --without-nodegroup
I am using the Ohio region which has 3 availability zones. The public and private subnets (total of 6) have /27 subnet which is 32 IPs. Not all of them are usable of course. Let’s create a node group with 3 nodes, and because t3.large is a Nitro instance, we can set the max number of pods to be 110.
eksctl create nodegroup --cluster eksECIC --name old-nodegroup --nodes 3 \
    --node-type t3.large --node-private-networking --managed --max-pods-per-node 200
These are the available 31 IPs that I have in the private subnets.

Let’s provision a small deployment with a single pod and 10 replicas and a network load balancer.
kubectl apply -f demo.yaml
…and this is the deployment file demo.yaml.
apiVersion: apps/v1
kind: Deployment
metadata:
  name: demo
spec:
  replicas: 10
  selector:
    matchLabels:
      run: demo
  template:
    metadata:
      labels:
        run: demo
    spec:
      containers:
      - name: demo
        image: klimenta/serverip
        ports:
        - containerPort: 3000
---
apiVersion: v1
kind: Service
metadata:
  name: loadbalancer
  annotations:
    service.beta.kubernetes.io/aws-load-balancer-type: nlb
    service.beta.kubernetes.io/aws-load-balancer-nlb-target-type: ip
    service.beta.kubernetes.io/aws-load-balancer-scheme: internet-facing
spec:
  ports:
    - port: 80
      targetPort: 3000
      protocol: TCP
  type: LoadBalancer
  selector:
    run: demo
If you look at the available address now, there are 7. So from 31 to 7 with just 10 pods. Check this guy’s blog to see what’s going on.

Let’s scale up the cluster to 100 pods.
kubectl scale --replicas=100 deployment/demo
After a minute or two, check the running pods.
kubectl get pods --field-selector=status.phase=Running | wc -l
69
The console will show 0 available subnets.

If you check the pods with kubectl get pods, you’ll see the remaining containers have a ContainerCreating status.
And if you check one of them, you’ll see this message.
kubectl describe pod demo-698f6fc958-z8smb
....
d9b65ccfeccb7e9e7433ec61fef78faf83d1bae": plugin type="aws-cni" name="aws-cni" failed (add): add cmd: failed to assign an IP address to container
  Warning  FailedCreatePodSandBox  2m29s (x17 over 5m59s)  kubelet            (combined from similar events): Failed to create pod sandbox: rpc error: code = Unknown desc = failed to setup network for sandbox "edfa987c3eddf415068691f914d740fa9ca9ca6ffdfb8db44d1340d913ece0b0": plugin type="aws-cni" name="aws-cni" failed (add): add cmd: failed to assign an IP address to container
Get the load balancer service.
kubectl get svc
NAME           TYPE           CLUSTER-IP      EXTERNAL-IP                                                                     PORT(S)        AGE
kubernetes     ClusterIP      10.100.0.1      <none>                                                                          443/TCP        37m
loadbalancer   LoadBalancer   10.100.25.241   a105789cd3a264ac596c367fce463640-80d2b88acdc17771.elb.us-east-2.amazonaws.com   80:32396/TCP   17m
If you go to a105789cd3a264…amazonaws.com URL, you’ll see the load balancer hitting different pods. Wait for 2-3 minutes if you see that the page can’t be opened. It takes time for DNS to propagate.

Let’s delete the deployment and the old node group.
kubectl delete -f demo.yaml
eksctl delete nodegroup --name old-nodegroup --cluster eksECIC
At this point, we still have the EKS cluster, the etcd database, networking etc, we just don’t have the nodes. Now it’s time to remove the EKS CNI, install Calico and add nodes that will use Calico.
Installation is very simple. Remove the AWS CNI.
kubectl delete daemonset -n kube-system aws-node
Check the pods in all namespaces.
kubectl get pods --all-namespaces
NAMESPACE     NAME                       READY   STATUS    RESTARTS   AGE
kube-system   coredns-5c5677bc78-2k88b   0/1     Pending   0          4m
kube-system   coredns-5c5677bc78-2zz2n   0/1     Pending   0          4m
You will see coredns in pending state, it can’t be deployed anywhere.
Deploy Calico.
kubectl create -f https://raw.githubusercontent.com/projectcalico/calico/v3.25.1/manifests/tigera-operator.yaml
…keep going…
kubectl create -f - <<EOF
kind: Installation
apiVersion: operator.tigera.io/v1
metadata:
  name: default
spec:
  kubernetesProvider: EKS
  cni:
    type: Calico
  calicoNetwork:
    bgp: Disabled
EOF
Deploy the new node group.
eksctl create nodegroup --cluster eksECIC --name new-nodegroup --nodes 3 \
    --node-type t3.large --node-private-networking --managed --max-pods-per-node 200
Let’s deploy the same demo deployment now.
kubectl apply -f demo.yaml
…scale it up to 601 pods.
kubectl scale --replicas=601 deployment/demo
Wait 2-3 mins and check the running ones.
kubectl get pods --field-selector=status.phase=Running | wc -l
There will be 585 pods running, 195 per node. Much, much better. This time the remaining containers will be in Pending state.
kubectl describe pod demo-698f6fc958-smlbq
....
Events:
  Type     Reason            Age                  From               Message
  ----     ------            ----                 ----               -------
  Warning  FailedScheduling  3m27s (x3 over 13m)  default-scheduler  0/3 nodes are available: 3 Too many pods. preemption: 0/3 nodes are available: 3 No preemption victims found for incoming pod.
Option 2 – CNI Custom networking and prefix assignment mode
In this case, we’ll keep the AWS CNI network plugin, but we’ll use what is called CNI Custom networking, meaning we’ll use another CIDR attached to the VPC where pods will run. NOTE: The nodes will still run in the 192.168/24 subnets, it’s just the pods that will run in a much bigger IP space. In addition, this CNI Custom networking won’t solve the density of the pods that we can run on the nodes. We’ll need something called prefix assignment mode that will allow us to run much more pods on a node than usual. See this and this links for more information. For more info regarding prefix assignment mode check out this link. The solution described below is much more complicated than if you just use Calico.
Let’s provision a cluster with the same VPC CIDR and no nodegroups.
eksctl create cluster --name eksECIC --region us-east-2 --instance-types t3.large \
    --managed --vpc-cidr 192.168.100.0/24 --node-private-networking --version 1.24 --without-nodegroup
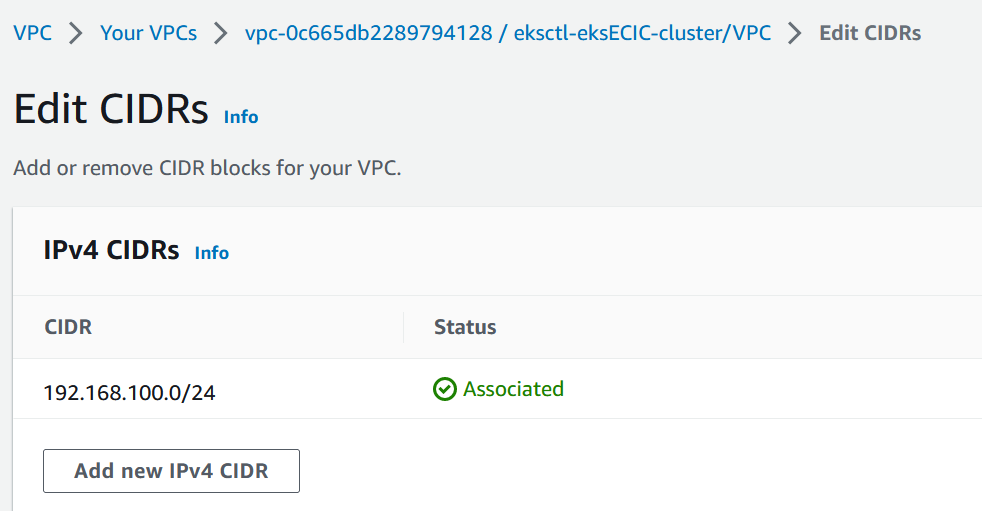
Add a new CIDR and associate it with the VPC. I am using the console but you can use aws ec2 associate-vpc-cidr-block command.Go to the VPC where the EKS cluster resides. From the Actions button, select Edit CIDRs and then click the Add new IPv4 CIDR button.
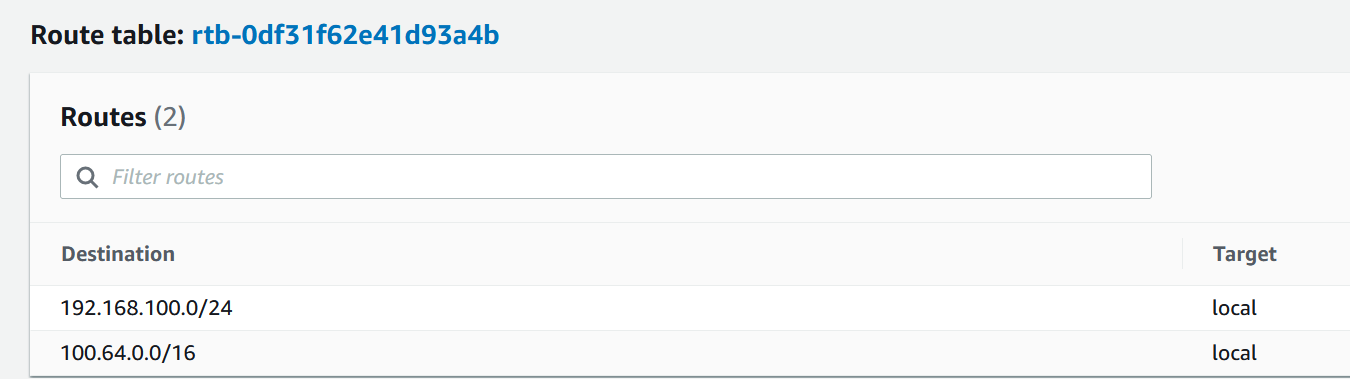
I’ll add 100.64.0.0/16 CIDR and then I’ll create 3 /19 subnets.

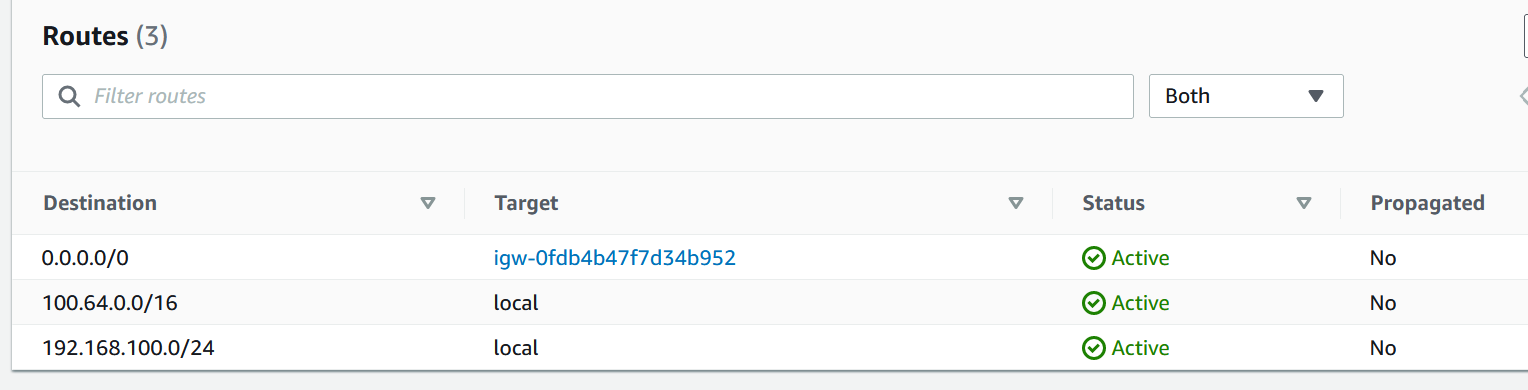
These 3 subnets will be where the pods will run. I also want them to initiate connections to Internet, so I’ll modify the route table and add the Internet Gateway. The three new subnets 100.64/19 that we created have the same route table.
Just add the route to 0.0.0.0/0 to go over Internet Gateway.
Let’s configure the custom networking on the cluster.
kubectl set env daemonset aws-node -n kube-system AWS_VPC_K8S_CNI_CUSTOM_NETWORK_CFG=true
Get the EKS cluster security group.
sec_grp=$(aws eks describe-cluster --name eksECIC --query cluster.resourcesVpcConfig.clusterSecurityGroupId --output text)
echo $sec_grp
For each of the subnets create a custom resource. Define the three 100.64 subnet-ids as variables.
export sub1=subnet-0f3ec5d75caf1b981
export sub2=subnet-0fc39edc5a1ce91c0
export sub3=subnet-0bd6bdfd5543aa086
cat >us-east-2a.yaml <<EOF
apiVersion: crd.k8s.amazonaws.com/v1alpha1
kind: ENIConfig
metadata:
  name: us-east-2a
spec:
  securityGroups:
    - $sec_grp
  subnet: $sub1
EOF
2nd subnet.
cat >us-east-2b.yaml <<EOF
apiVersion: crd.k8s.amazonaws.com/v1alpha1
kind: ENIConfig
metadata:
  name: us-east-2b
spec:
  securityGroups:
    - $sec_grp
  subnet: $sub2
EOF
3rd subnet.
cat >us-east-2c.yaml <<EOF
apiVersion: crd.k8s.amazonaws.com/v1alpha1
kind: ENIConfig
metadata:
  name: us-east-2c
spec:
  securityGroups:
    - $sec_grp
  subnet: $sub3
EOF
NOTE:Make sure you name the metadata in line 5 as I did based on your region and AZ.
Deploy the custom resources.
kubectl apply -f us-east-2a.yaml
kubectl apply -f us-east-2b.yaml
kubectl apply -f us-east-2c.yaml
Confirm it looks good.
kubectl get ENIConfigs
NAME         AGE
us-east-2a   16s
us-east-2b   12s
us-east-2c   8s
Update your aws-node DaemonSet to automatically apply the ENIConfig for an Availability Zone to any new Amazon EC2 nodes created in your cluster.
kubectl set env daemonset aws-node -n kube-system ENI_CONFIG_LABEL_DEF=topology.kubernetes.io/zone
Enable prefix assignment mode. This will allow much more pods per node.
kubectl set env daemonset aws-node -n kube-system ENABLE_PREFIX_DELEGATION=true
Another change.
kubectl set env ds aws-node -n kube-system WARM_PREFIX_TARGET=1
With the default setting, WARM_PREFIX_TARGET will allocate one additional complete (/28) prefix even if the existing prefix is used by only one pod. If the ENI does not have enough space to assign a prefix, a new ENI is generated.
Provision the node group.
eksctl create nodegroup --cluster eksECIC --name my-nodegroup --nodes 3 \
    --node-type t3.large --node-private-networking --managed --max-pods-per-node 200
Check the nodes, they are running in the 192.168/24 original VPC CIDR. See the IP in the names of the nodes.
kubectl get nodes
NAME                                            STATUS   ROLES    AGE     VERSION
ip-192-168-100-122.us-east-2.compute.internal   Ready    <none>   7m39s   v1.24.13-eks-0a21954
ip-192-168-100-155.us-east-2.compute.internal   Ready    <none>   7m39s   v1.24.13-eks-0a21954
ip-192-168-100-167.us-east-2.compute.internal   Ready    <none>   7m37s   v1.24.13-eks-0a21954
Check the pods.
kubectl get pods -A -o wide
NAMESPACE     NAME                       READY   STATUS    RESTARTS   AGE    IP                NODE                                            NOMINATED NODE   READINESS GATES
kube-system   aws-node-txwrd             1/1     Running   0          9m4s   192.168.100.167   ip-192-168-100-167.us-east-2.compute.internal   <none>           <none>
kube-system   aws-node-vdmv7             1/1     Running   0          9m6s   192.168.100.155   ip-192-168-100-155.us-east-2.compute.internal   <none>           <none>
kube-system   aws-node-xss7c             1/1     Running   0          9m6s   192.168.100.122   ip-192-168-100-122.us-east-2.compute.internal   <none>           <none>
kube-system   coredns-5c5677bc78-2lkcx   1/1     Running   0          80m    100.64.76.225     ip-192-168-100-122.us-east-2.compute.internal   <none>           <none>
kube-system   coredns-5c5677bc78-mj6wr   1/1     Running   0          80m    100.64.76.224     ip-192-168-100-122.us-east-2.compute.internal   <none>           <none>
kube-system   kube-proxy-lt7v4           1/1     Running   0          9m6s   192.168.100.122   ip-192-168-100-122.us-east-2.compute.internal   <none>           <none>
kube-system   kube-proxy-m8pf6           1/1     Running   0          9m4s   192.168.100.167   ip-192-168-100-167.us-east-2.compute.internal   <none>           <none>
kube-system   kube-proxy-nlvw7           1/1     Running   0          9m6s   192.168.100.155   ip-192-168-100-155.us-east-2.compute.internal   <none>           <none>
Look at coredns pods. They are running in the new CIDR.
Deploy the demo.
kubectl apply -f demo.yaml
Get the load balancer service.
kubectl get svc
NAME           TYPE           CLUSTER-IP       EXTERNAL-IP                                                                     PORT(S)        AGE
kubernetes     ClusterIP      10.100.0.1       <none>                                                                          443/TCP        83m
loadbalancer   LoadBalancer   10.100.206.187   a7ad3ecf1d52e4fc58dbbdc550237009-ac4778e11af2c0ad.elb.us-east-2.amazonaws.com   80:30230/TCP   45s
If you go to a7ad3ecf1d…amazonaws.com URL, you’ll see the load balancer hitting different pods. Wait for 2-3 minutes if you see that the page can’t be opened. It takes time for DNS to propagate.
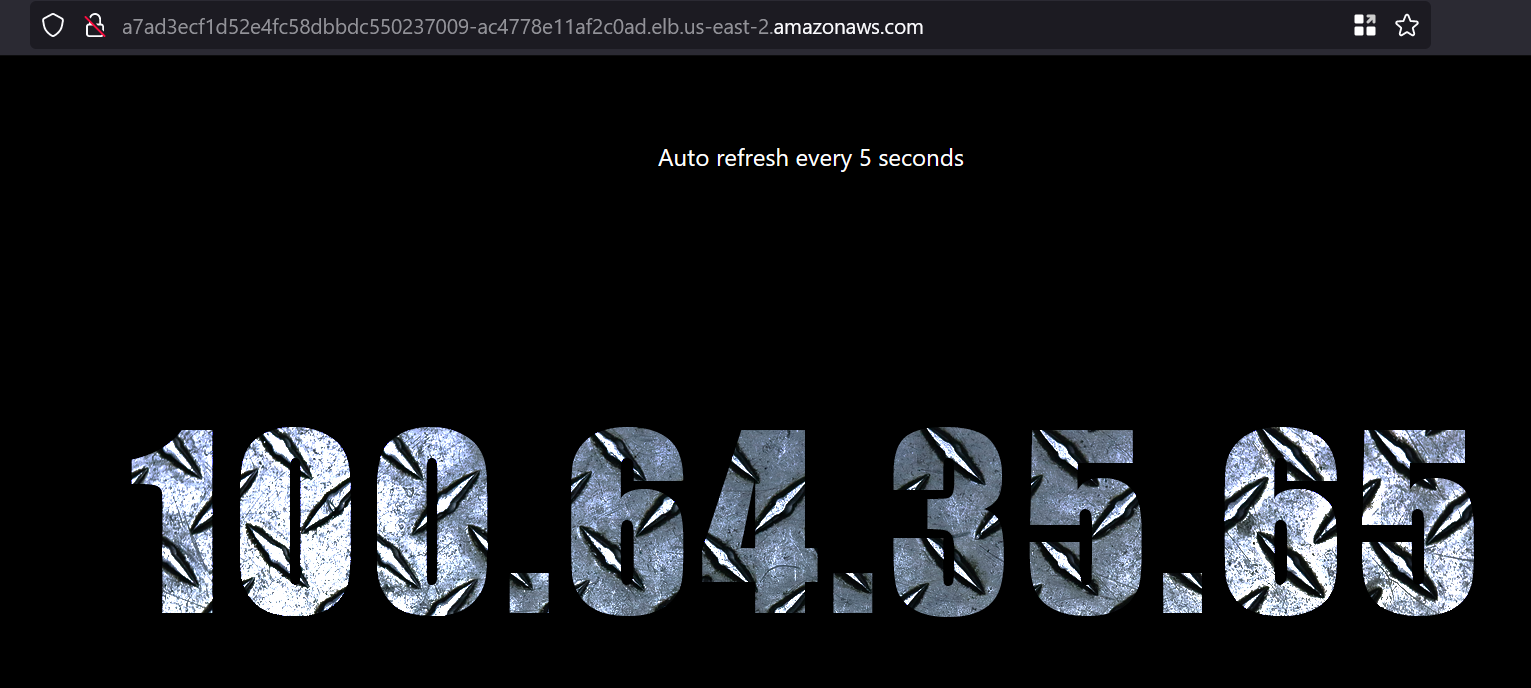
The pods are running in the 100.64 subnet.
Scale up to 601 pods.
kubectl scale --replicas=601 deployment/demo
Wait 2-3 mins and check the running ones.
kubectl get pods --field-selector=status.phase=Running | wc -l
I got 593 total pods. Slightly better than 585 with Calico. The ones that are in pending state show up an error that there are no more resources.
Events:
  Type     Reason            Age    From               Message
  ----     ------            ----   ----               -------
  Warning  FailedScheduling  3m49s  default-scheduler  0/3 nodes are available: 3 Too many pods. preemption: 0/3 nodes are available: 3 No preemption victims found for incoming pod.