
In this post I’ll show you how to configure AD Connector, so you can use your on-prem AD users to log to the AWS Console. AD Connector can be used for other things as well. See the following link for use cases. From the AWS documentation:
AD Connector is a proxy service for connecting your on-premises Microsoft Active Directory to the AWS cloud without requiring complex directory synchronization or the cost and complexity of hosting a federation infrastructure.
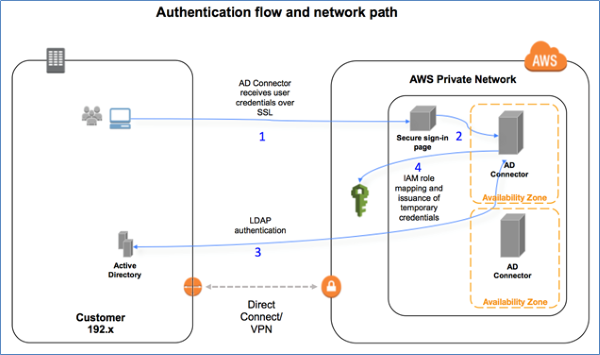
AD Connector forwards sign-in requests to your Active Directory domain controllers for authentication and provides the ability for applications to query the directory for data. After setup, your users can use their existing corporate credentials to log on to AWS applications, such as Amazon WorkSpaces, Amazon WorkDocs, or Amazon WorkMail. With the proper IAM permissions, they can also access the AWS Management Console and manage AWS resources such as Amazon EC2 instances or Amazon S3 buckets.When to use:
Microsoft AD is your best choice if you have more than 5,000 users and need a trust relationship set up between an AWS hosted directory and your on-premises directories. For more information, see Microsoft Active Directory.
Before we begin, make sure that you have everything in place. Check the prerequisites from the following link. There are quite conditions that you have to meet.
The flow looks like this.
Also, I’ve followed this AWS link to complete my AD Connector setup.
Table of Contents
AD setup
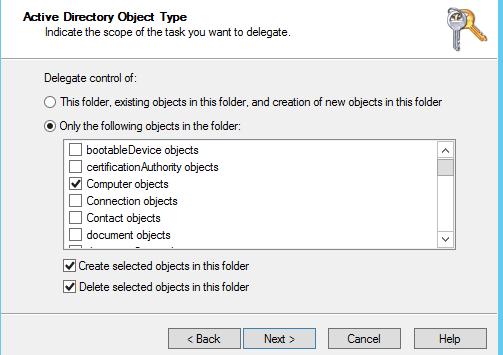
Fire up the AD Users and Computers program on your computer on-prem and create a new AD group. It has to be Global and a Security group. Once created, right-click on your domain name on top and choose Delegate Control. Type the name of the group that you’ve just created and then on the Tasks to Delegate page select Create a custom task to delegate. Click on Only the following objects in the folder, and then select Computer objects and User objects. Click on Create selected objects in this folder and Delete selected objects in this folder at the bottom.
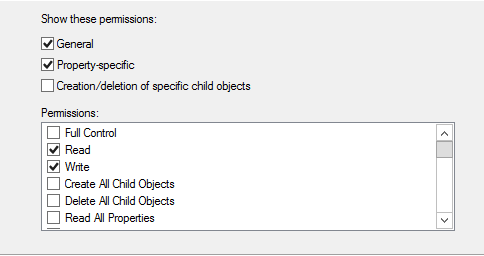
Click Next and on the following screen, click on General and Property Specific check marks and then click on Read and Write.
Review the changes and click Finish.
Now, create a user and add that user to the AD group that you’ve just created. This user will be responsible for the connection between the AD Connector and your on-prem AD. Make sure your user’s password does not expire.
AWS pre-setup
You will have to verify the connection between AWS and your on-prem. AWS documentation recommends that you build or use an existing Windows server, but you can also use some other OS to test the ports. All you have to do is to check if the following ports are open:
- TCP: 53,88,135,389,445,3268,5722,938
- UDP: 53,88,123,138,389,445
In my case, I had an existing Windows server that I had to join it to the domain. Then, I had to download a small program from this link. Unzip the archive and execute the .EXE file as the following command.
DirectoryServicePortTest.exe -d <domain_name> -ip <server_IP_address> -tcp "53,88,135,389,445,3268,5722,9389" -udp "53,88,123,138,389,445"
Replace your domain_name with your FQDN e.g. in my case it’s andreev.local and the server_IP_address with an IP of one of your domain controllers. This is the output of my test.
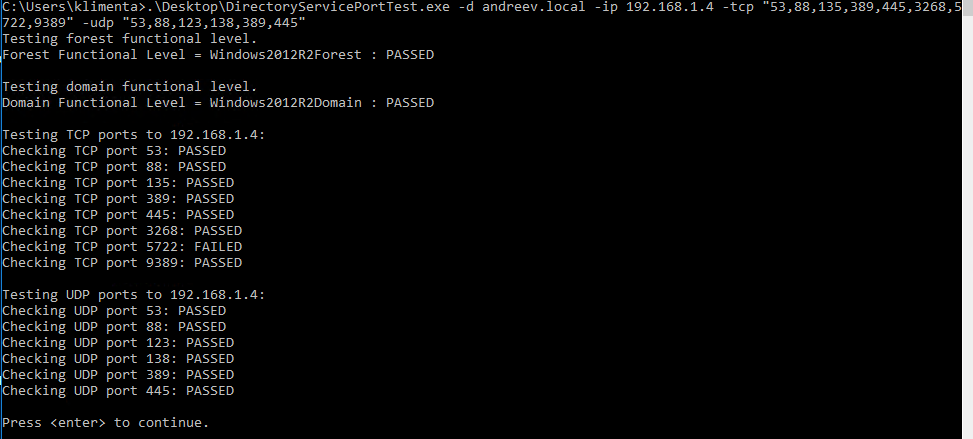
Make sure all ports show as PASSED. In my case, port 5722 (RPC, DFSR (SYSVOL)) shows as failed, but that’s OK as long as your domain controller is 2012 and up.
AWS AD Connector
Go to your AWS console and look for Directory Services. Once there, scroll all the way to the bottom where you can see AD Connector. Do not use Microsoft AD, that’s something different.

When you create the connector, you’ll have to enter these values.
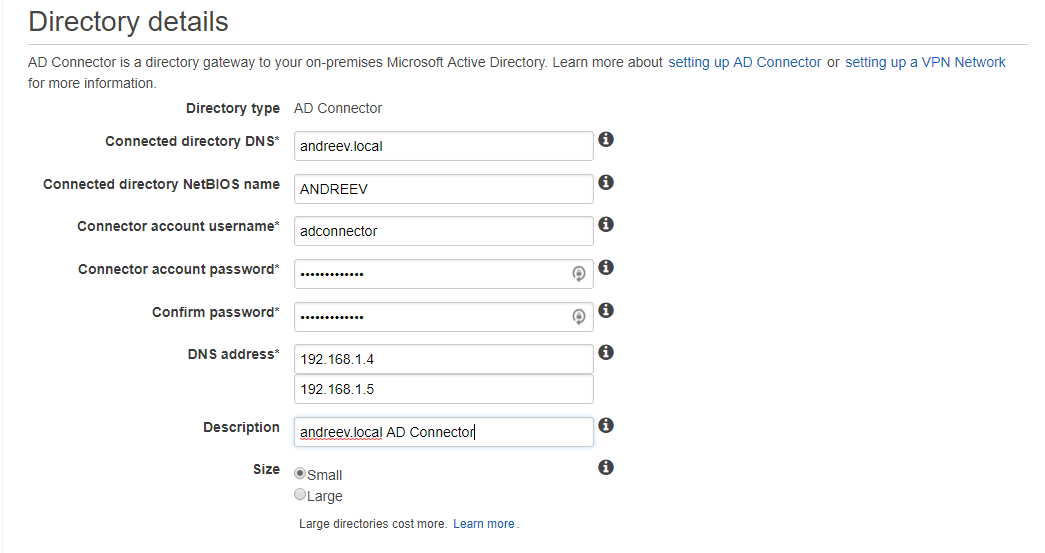
In my case, my domain is andreev.local with NetBIOS name ANDREEV. The AD user that we created before and added it to that AWS AD group is called adconnector. Enter the IPs of the two domain controllers and choose the size (Small/Large).
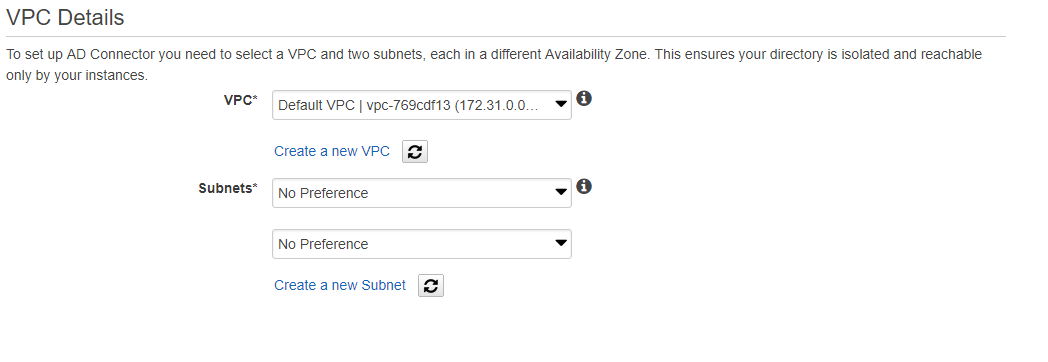
Finally, choose the VPC and two subnets in different availability zones (AZ). The default worked fine for me.
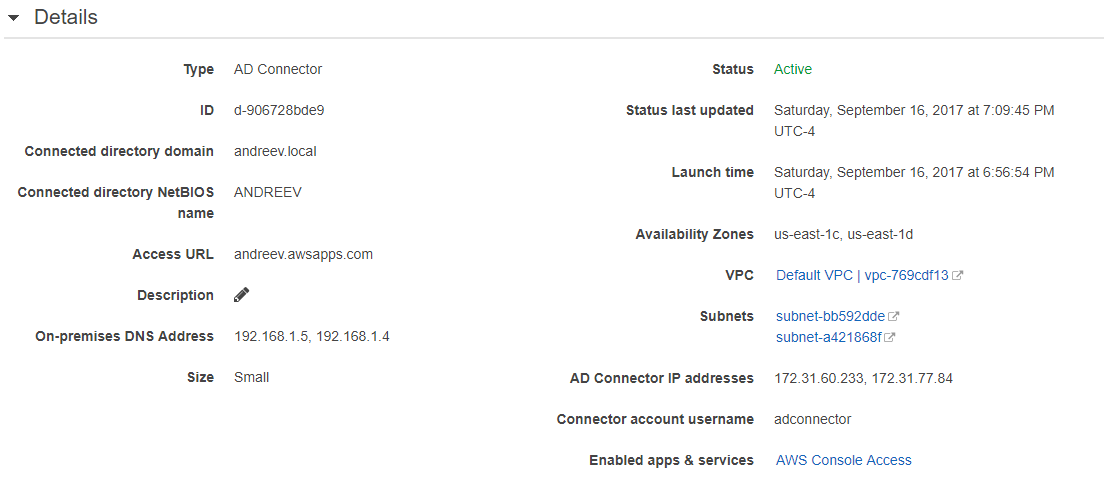
Click Next, review and click on Create. Wait for about 10 mins until the status turns from Pending to Active. The price of small AD Connector is about $288 a month which is quite expensive for me, so I’ve deleted the connector right after I finished my lab.
This is how it will look like after 10 mins and if everything is OK.

AWS Console use case
As I said earlier, AD Connector can be use for many cases, but I’ll demonstrate the AWS Console access only and how to join a server to the domain. Click on the AD Connector ID and you’ll see this.
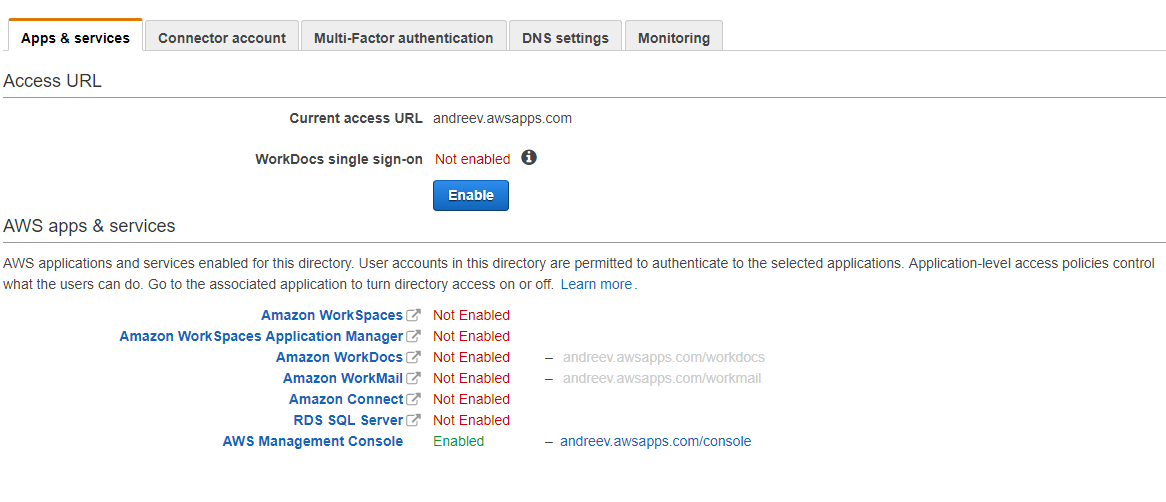
All the way at the bottom, click on AWS Management Console and enable access. You’ll be prompted to enter an URL so that’s how you will access your AWS console. In my case, I chose andreev.awsapps.com. If you click on the AWS Management Console link again, it will prompt you to select a Role and assign some users.

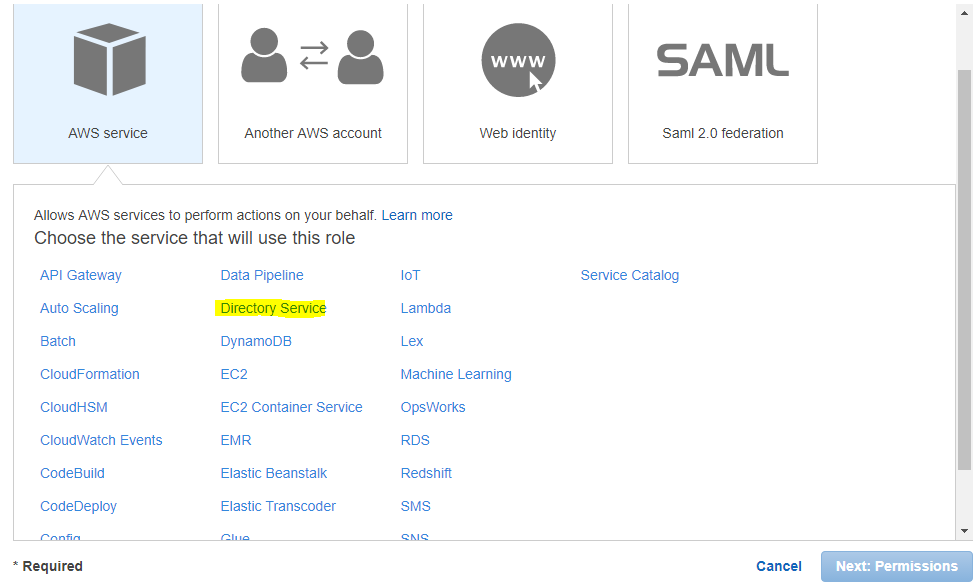
Most likely, you don’t have any roles or AD users ready, so go ahead and create a new AD user or AD group that will have access to Glacier only. Then, open a new tab in your browser and log to your AWS console and go to IAM. Create a new Role. Choose Directory Services as shown.
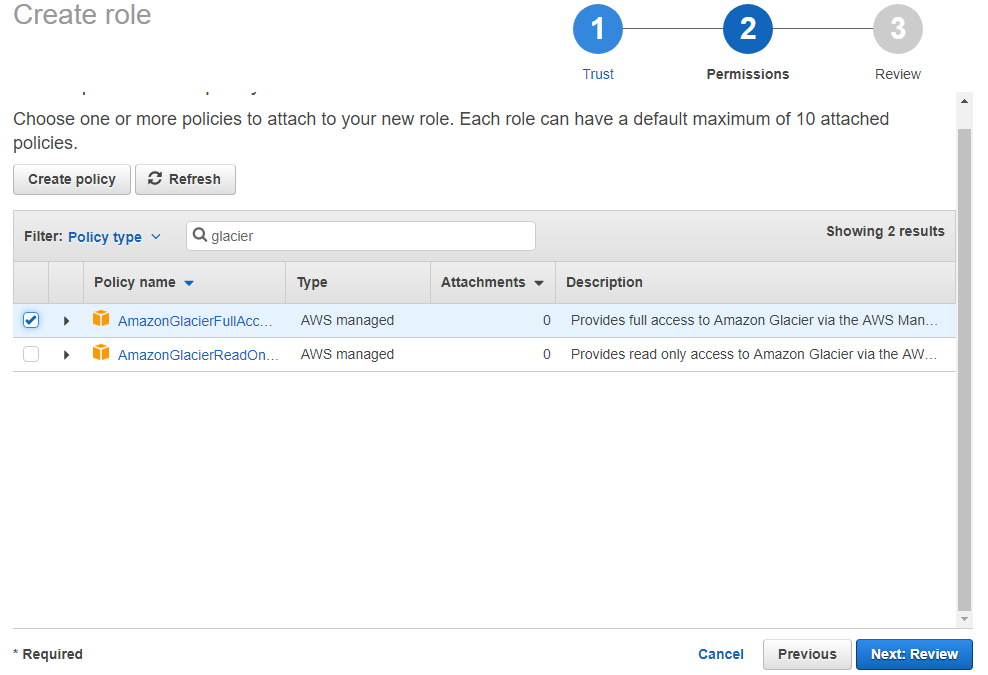
On the next screen, type glacier and select the first policy (AmazonGlacierFullAccess).
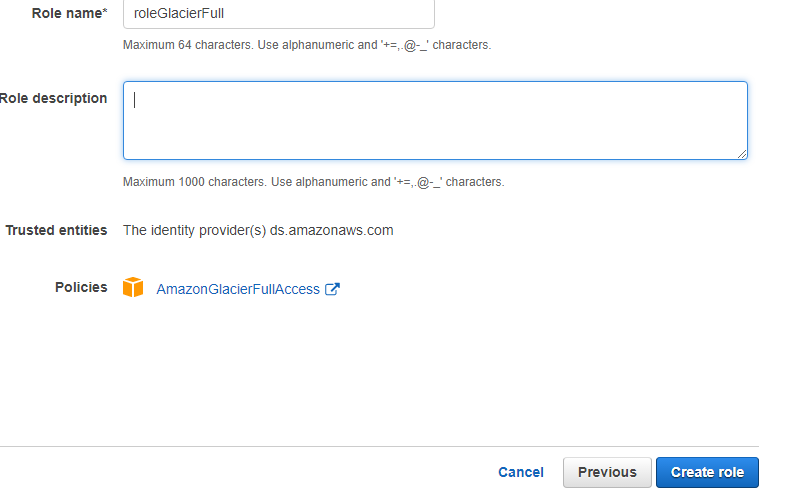
Name the role and click Create.
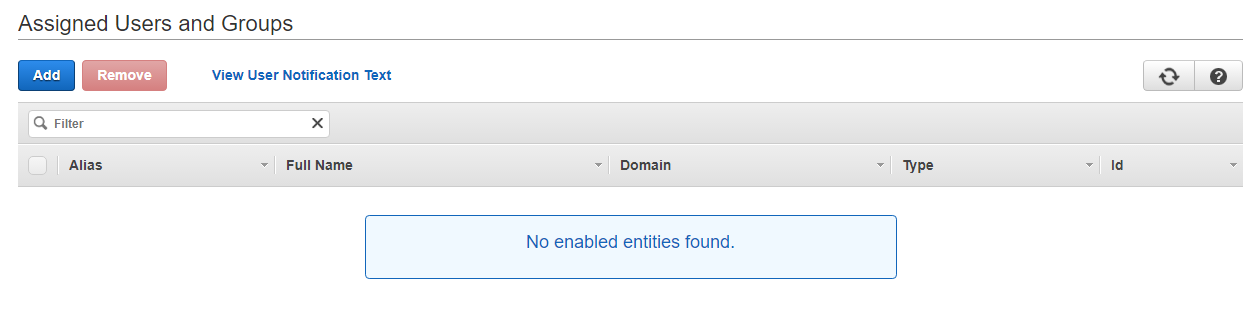
Go back to the other tab with the AD Connector and click Refresh on the right so the new role shows up.
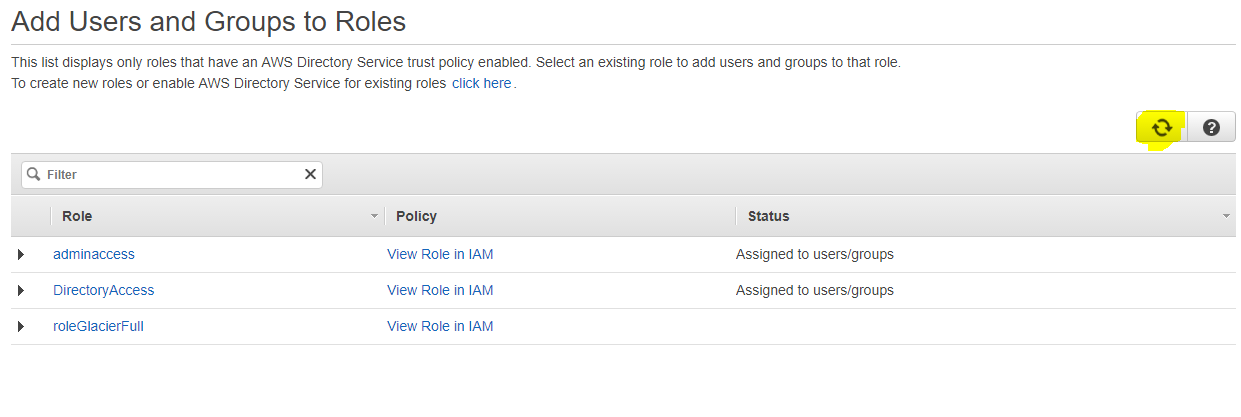
Click on the newly created role, then click Add when this screen shows up.
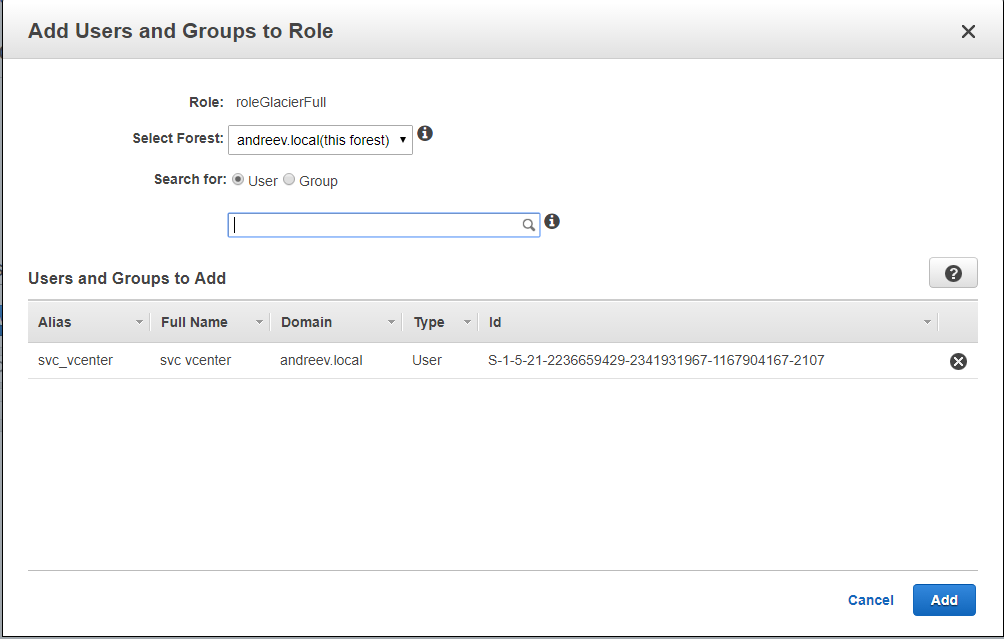
Start typing the AD user or group that you just created for Glacier access and click Add.
Now, you can open a new tab in your browser, go to your new AWS console access URL (e.g. andreev.awsapps.com/console) and log with your AD credentials. No need to type your domain name. Just use your AD account and password.
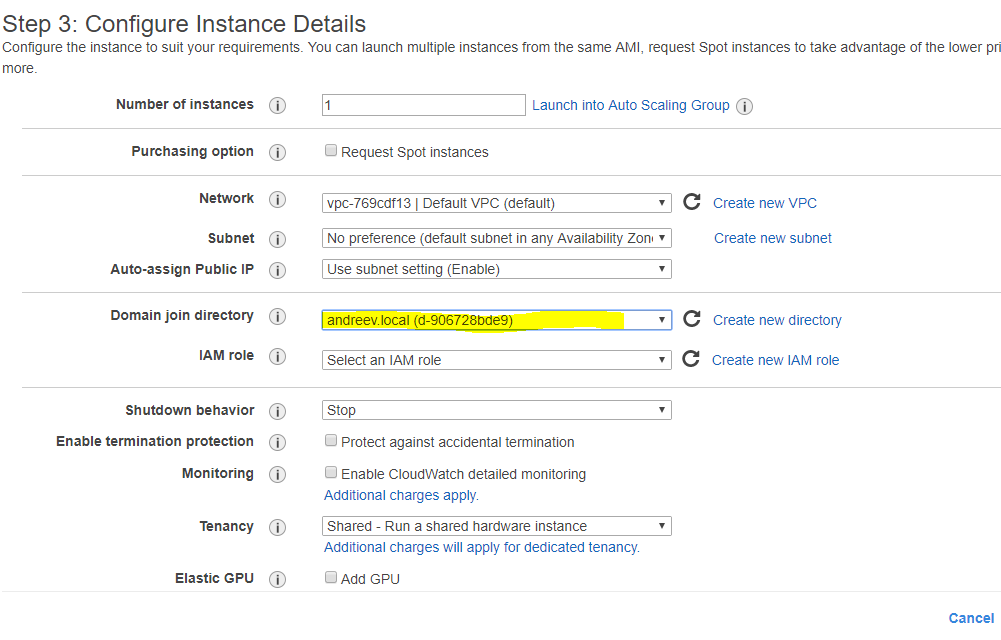
Another useful case that you already have by configuring AD Connector is that when you provision a new Windows instance, you can automatically join it to the domain. Just select the domain name when it prompts for the other settings.
2 comments
Hi – Thanks for the above info. I have been trying for DAYS to create an AD connector pointing to an AD that I stood up on AWS EC2, but am still failing. The error I usually get is that it cannot find the DNS server (connectivity error), but I have run the directory test tool and that is fine.
I think I have a theory what might be going wrong. In the page where you enter the details, you enter the IPs of the two ADs, right? In your example above, you had 192.168.1.4 and 192.168.1.5, right?
I do that also (enter the IP of my AD machines).
However, when I submit the form, then it changes from “Requested” to “Creating” and I look at the info in the page, the IPs are not the ones that I entered for the IPs of the DNS server. Instead, the IPs appear to be completely RANDOM!!
I don’t know WHY they are random, but they are definitely NOT what I entered.
Do you (or does anyone else) have any idea why those IPs would be different from the IPs that I entered?
Thanks,
Jim
Mine DCs are 192.168.1.4 and 5 but they are at home, not in AWS. Are you saying that your DCs are in AWS?
I also have a VPN between AWS and home so I can use the internal AWS IPs to reach them.
Also, check if the reverse DNS works for your DCs.