
In this post/howto, I’ll explain how to install Ansible as control and managed node on FreeBSD 12, CentOS 8 and Ubuntu 18. Then, I’ll explain how to create SSH keys so the nodes can communicate and some basic tasks. Then, I’ll show you how to create a playbook to install the latest updates and also install an Apache server with the default settings. Finally, I’ll show an example of how to use variables.
Table of Contents
Control and managed nodes
A control node is where you execute all of your Ansible commands and eventually keep your playbooks, configs, inventory etc. It’s pretty much your workstation. A managed node is where the actual playbooks are executed. These are the main concepts and the terminology.
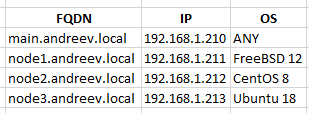
In my case, I have 4 VMs/instances. The main one which is the control node and 3 managed nodes.
CentOS 8
If you want to install Ansible on the control node, you have to install Python 3.x first.
sudo dnf install python3
This will also install pip. Type python3 to test, CTRL-D to exit and then install ansible.
sudo pip3 install ansible
Type ansible to test.
Ubuntu
Ubuntu comes with python installed, but not with pip. Install pip with:
sudo apt install python3-pip
Then install ansible with:
sudo pip3 install ansible
Type ansible to test.
FreeBSD
FreeBSD comes with python installed but pip is not. Check the version and then install the same pip version.
ls -l /usr/local/bin/python*
If your output is for example python37, install the same pip version.
pkg install py37-pip
Then install ansible.
pip install ansible
Type ansible to test.
SSH keys
While Ansible can use standard *nix username/password authentication, it’s recommended that you use SSH keys to communicate from control node to the managed nodes. For that, you’ll have to create your SSH keys. Let’s say you have an account on your control node and the username is admin. You also want to use the user ansible on the managed nodes. It really doesn’t matter what usernames you are going to choose. You can always override the keys to use, but in this case, I’ll create a key on the control node and send it to all managed nodes.
On the control node, regardless of your OS, do:
ssh-keygen -b 4096
This will create a subfolder .ssh with two files: id_rsa and id_rsa.pub. The former is your private key and the later is your public key.
Copy the key to your managed nodes.
ssh-copy-id [email protected]
This will copy my key for the user admin to the node X under the ansible user. Then test the passwordless connection.
ssh [email protected]
Mind that the use of FQDN (nodex.andreev.local) vs. hostname (nodex) is important. For SSH these two are different. Once you log to the managed node, the node will be added to the list of known hosts in the file .ssh/known_hosts.
Inventory and the config file
Ansible uses the inventory files to execute an action against using the options and parameters specified in the config file. The config file is /etc/ansible/ansible.cfg for CentOS and Ubuntu and /usr/local/etc/ansible/ansible.cfg for FreeBSD. You can also put the inventory file in the same directory and name it as you wish, but you have to specify the inventory as a parameter on the command line or an entry in the config file. In addition, you can have your config file in your current directory or under the .ansible directory in your home folder. ansible.cfg in the current directory has a precedence over .ansible.cfg in the home directory which has a precedence over /etc/ansible/ansible.cfg. Here is how that looks.
Let’s list all the inventory.
ansible --list-hosts all
You’ll get a message that there is no inventory file. Let’s create one, we’ll name it inventory.txt.
[freebsd]
node1.andreev.local
[centos]
node2.andreev.local
[ubuntu]
node3.andreev.local
[bsd]
node1.andreev.local
[linux]
node2.andreev.local
node3.andreev.local
If we specify the inventory file, we’ll get this.
ansible --list-hosts all -i inventory.txt
  hosts (3):
    node1.andreev.local
    node2.andreev.local
    node3.andreev.local
If we create a config file, we can tell ansible where to look for the inventory. Create a file ansible.cfg in the same directory.
[defaults]
inventory=/home/<somewhere>/inventory.txt
If you do ansible –list-hosts all now, you’ll get the same result as before, but without specifying the inventory file.
Or something like this.
ansible all -m shell -a "uname -a"
node1.andreev.local | CHANGED | rc=0 >>
FreeBSD node1.andreev.local 12.1-RELEASE FreeBSD 12.1-RELEASE r354233 GENERIC  amd64
node2.andreev.local | CHANGED | rc=0 >>
Linux node2.andreev.local 4.18.0-193.14.2.el8_2.x86_64 #1 SMP Sun Jul 26 03:54:29 UTC 2020 x86_64 x86_64 x86_64 GNU/Linux
node3.andreev.local | CHANGED | rc=0 >>
Linux node3.andreev.local 4.15.0-129-generic #132-Ubuntu SMP Thu Dec 10 14:02:26 UTC 2020 x86_64 x86_64 x86_64 GNU/Linux
By default, ansible runs on the managed node with the currently logged user that executes the playbook on the control node. If you get an error saying that the previous command cannot connect to the host, you have to specify the same user that you used when you test the connection with ssh -user-@managednode. So, edit ansible.cfg and add this line.
remote_user=<user>
We can target only the group linux which consists of Linux hosts only in the inventory file.
ansible linux -m shell -a "date"
node3.andreev.local | CHANGED | rc=0 >>
Fri Jan  8 15:23:40 UTC 2021
node2.andreev.local | CHANGED | rc=0 >>
Fri Jan  8 10:23:40 EST 2021
Playbooks
The playbooks are the blueprints of the automation tasks. Instead of running the ansible command to execute each task separately, we combine these tasks in a YAML file and execute them sequentially. Here are 3 playbooks that update each of our managed nodes. There is no update module for FreeBSD, so we use the shell command.
# freebsd-update.yml
---
  - hosts: freebsd
    become: yes
    tasks:
      - name: Fetch all packages
        shell: freebsd-update fetch
      - name: Install FreeBSD updates
        shell: freebsd-update install
      - name: Reboot
        reboot:
For CentOS we’ll use yum.
# centos-update.yml
---
  - hosts: centos
    become: yes
    tasks:
      - name: Update all packages
        yum: name=* state=latest
      - name: Reboot
        reboot:
…and for Ubuntu we’ll use apt.
# ubuntu-update.yml
---
  - hosts: ubuntu
    become: yes
    tasks:
      - name: Update all packages
        apt: name=* state=latest
      - name: Reboot
        reboot:
Save these files with a YAML extension and you can execute them with the following command.
ansible-playbook <filename>
All of them will probably fail. That’s because your ansible user on the managed nodes is required a password when executing a sudo command. In order to fix that, you’ll have to add a line in the sudoers file. Edit this file using the visudo command.
visudo
…and then add this line right before the @includedir <...> which is the last line in the file.
ansible ALL=(ALL) NOPASSWD:ALL
Where ansible is the user that runs the playbooks on the managed nodes. FreeBSD doesn’t come with sudo preinstalled, so you’ll have to install it first on the managed node.
pkg install sudo
These playbooks will update the OS and the packages for the Linux. For FreeBSD, it will update only the OS. Here is another example of playbooks that will install Apache server in a default configuration and change the ServerName and ServerAdmin lines. We’ll also install PHP and test our server.
If you have a firewall enabled, make sure you open it up first on CentOS. Ubuntu and FreeBSD do not come with the firewall enabled.
firewall-cmd --zone=public --permanent --add-service=http
firewall-cmd --reload
For FreeBSD, the playbook looks like this.
# freebsd-apache.yml
---
  - hosts: freebsd
    become: yes
    tasks:
      - name: Install apache and php
        pkgng:
          name:
            - apache24
            - php74
            - mod_php74
          state:  present
      - name: Start on reboot
        service: name=apache24 enabled=yes
      - name: Copy index.php
        copy:
          src: ../files/index.php
          dest: /usr/local/www/apache24/data
          mode: 0755
      - name: Copy mod_php.conf
        copy:
          src: ../files/mod_php.conf
          dest: /usr/local/etc/apache24/modules.d
          mode: 0755
      - name: Start apache now
        service: name=apache24 state=started
For CentOS, it looks like this.
# centos-apache.yml
---
  - hosts: centos
    become: yes
    tasks:
      - name: Install apache and php
        yum:
          name:
            - httpd
            - php
          state:  present
      - name: Start apache now and on reboot
        service: name=httpd state=started enabled=yes
      - name: Copy index.php
        copy:
          src: ../files/index.php
          dest: /var/www/html
          mode: 0755
…and for Ubuntu it looks like this.
# ubuntu-apache.yml
---
  - hosts: ubuntu
    become: yes
    tasks:
      - name: Install apache and php
        apt:
          name:
            - apache2
            - php
          state:  present
      - name: Start apache now and on reboot
        service: name=apache2 state=started enabled=yes
      - name: Copy index.php
        copy:
          src: ../files/index.php
          dest: /var/www/html
          mode: 0755
You will also need these two files in a directory called files. In my case it’s one level above the directory where I keep my playbooks.
index.php
<?php
  phpinfo();
?>
001_mod-php.conf
<IfModule dir_module>
    DirectoryIndex index.php index.html
    <FilesMatch "\.php$">
        SetHandler application/x-httpd-php
    </FilesMatch>
    <FilesMatch "\.phps$">
        SetHandler application/x-httpd-php-source
    </FilesMatch>
</IfModule>
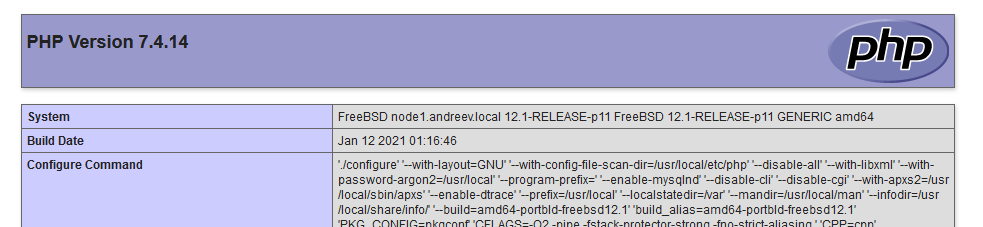
The index.php file is the standard test file to test the PHP distributions and the 001_mod-php.conf is needed for FreeBSD only. As you can see the playbooks differ quite a bit for these three OSes. Once you deploy the playbooks, you can test the result by going to http://[nodeX]/index.php.
Looks like this.
Service handlers
Service handlers are used only when a change is made on the managed node. For example, we can restart a service only if the config file was changed. If the file is not changed, then there is no need to restart. Here is an example of a service handler. We’ll restart postfix service only if the main.cf file was changed.
# service-handler.yml
---
- hosts: centos
  become: yes
  tasks:
  - name: Configure main.cf
    lineinfile:
      path: /etc/postfix/main.cf
      regexp: ^#mydomain
      line: 'mydomain = example.com'
    notify: restart postfix

  handlers:
  - name: restart postfix
    service: name=postfix state=restarted
Make sure that the name for the handler is the same (lines 11 and 14), so Ansible knows what service handlers is referred.
Variables
When ansible runs a playbook on a managed node, the first task is to gather info about the managed node. The info is a bunch of settings that we can use in our playbooks. For example, if you execute the following command, you can see the IP address, the CPU model, python version etc.
ansible -m setup <node>
We can use these settings and use them as variables if we need them. For example, this playbook displays the hostname and the IP.
# showip.yml
---
  - hosts: freebsd
    become: yes
    tasks:
      - name: Show the IP address
        debug:
          msg: "The hostname is {{ inventory_hostname}}  and the IP is {{ansible_default_ipv4.address }}"
And if you run the playbook, you’ll see something like this.
TASK [Show the IP address] *********************************************************************************************
ok: [node1.andreev.local] => {
    "msg": "The hostname is node1.andreev.local  and the IP is 192.168.1.211"
}
Here is another example of using variables. In this case, we’ll specify a file and change the ownership and the mode.
# owner.yml
---
  - hosts: centos
    become: yes
    vars:
      filename: "/var/www/html/index.php"
    tasks:
      - name: Change the owner of the file
        file:
          path: "{{ filename }}"
          owner: apache
          group: apache
          mode: '0755'
In case we want to assign an output to a variable, we’ll have to use the keyword register. Here is an example of how to get the output from a command and print it on the screen with the keyword debug.
# variables.yml
---
  - hosts: freebsd

    tasks:
    - name: Get the uptime manually
      command: uptime
      register: var_uptime

    - name: Print the uptime
      debug:
        msg: The uptime is "{{ var_uptime }}"
Roles
Roles let you automatically load related vars_files, tasks, handlers, and other Ansible artifacts based on a known file structure. Once you group your content in roles, you can easily reuse them and share them with other users. The idea is to separate the tasks, handlers and vars in different files. Let’s see this playbook for example. It changes a line in main.cf file, restarts postfix and copies a file under the postfix main directory.
# roles.yml
---
  - hosts: centos
    become: yes

    vars:
      filevd: "/etc/postfix/virtual_domains"
      cfgpostfix: "/etc/postfix/main.cf"


    tasks:
    - name: Configure main.cf
      lineinfile:
        path: "{{ cfgpostfix }}"
        regexp: ^#mydomain
        line: 'mydomain = example.com'
      notify: restart postfix
    - name: Copy virtual_domains
      copy:
        src: ../files/virtual_domains
        dest: "{{ filevd }}"
        mode: 0755

    handlers:
    - name: restart postfix
      service: name=postfix state=restarted
We can rewrite this file by separating the tasks, variables, files and handlers. Run this command.
ansible-galaxy role init postfix
If you look at the file/directory structure of the newly created directory postfix, it looks like this.
tree postfix
postfix
├── defaults
│   └── main.yml
├── files
├── handlers
│   └── main.yml
├── meta
│   └── main.yml
├── README.md
├── tasks
│   └── main.yml
├── templates
├── tests
│   ├── inventory
│   └── test.yml
└── vars
    └── main.yml
Create a file virtual_domains under the files directory.
echo "mydomain.com" > postfix/files/virtual_domains
Move the config for vars, handlers and tasks in the separate main.yml files. For example, this is how my files look like.
postfix/vars/main.yml
---
# vars file for postfix

  filevd: "/etc/postfix/virtual_domains"
  cfgpostfix: "/etc/postfix/main.cf"
As you can see the keyword vars: does not exists. Ansible knows that this file is for vars so there is no need to enter the vars keyboard.
postfix/tasks/main.yml
---
# tasks file for postfix

  - name: Configure main.cf
    lineinfile:
      path: "{{ cfgpostfix }}"
      regexp: ^#mydomain
      line: 'mydomain = example.com'
    notify: restart postfix
  - name: Copy virtual_domains
    copy:
      src: ../files/virtual_domains
      dest: "{{ filevd }}"
      mode: 0755
postfix/handlers/main.yml
---
# handlers file for postfix

  - name: restart postfix
    service: name=postfix state=restarted
Finally, create a file called something.yml that will be your main file. This file has to be outside the postfix directory structure.
In my case it looks like this.
something.yml
# something.yml
---
  - hosts: centos
    become: yes
    roles:
      - postfix
Now, if you execute this playbook, ansible will automatically execute the rest of the dependant playbooks as well.
ansible-playbook something.yml
Error handling
Sometimes we want certain changes to be ignored. Sometimes, we know the behavior of certain commands and we know that they might return non-zero code and we want that ignored. For example, consider this part of a playbook.
- hosts: centos
  tasks:
  - name: Type something that will fail
    command: thiscommanddoesntexist
    ignore_errors: yes

  - name: Run command remotely
    command: /usr/local/bin/somecommand
    register: cmd_result
    changed_when: cmd_result == 2
Ansible would report a task as changed as long as the command (or) script gives zero return code.
In the first part, we know that the task will fail, but we decide to ignore it using the keyword ignore_errors. No matter what the command returns, ignore_errors: yes will never report to ansible that the command failed.
In the second command we can ignore the error based on the output of the command. For example, if the output is 2, the the error will be ignored. If cmd_result is not equal to 2, the task will be marked as changed.
So whenever this condition is true, the task will be marked as changed.
Tags
Tags are used when you have a playbook with several tasks and you need to run only specific parts of it instead of running the entire playbook. You use tags to execute or skip selected tasks. Let’s say we have this playbook that installs Docker on Centos and has multiple tasks. As you can notice in lines 12, 24, 37 and 45 we have a new line with a keyword tags that we use to tag certain tasks. The purpose of this is to include or exclude these tasks from the playbook.
# centos-docker.yml
---
- name: Install docker
  hosts: centos
  become: true

  tasks:
    - name: Install yum utils
      yum:
        name: yum-utils
        state: latest
      tags: install

    - name: Install device-mapper-persistent-data
      yum:
        name: device-mapper-persistent-data
        state: latest
      tags: install

    - name: Install lvm2
      yum:
        name: lvm2
        state: latest
      tags: install

    - name: Add Docker repo
      get_url:
        url: https://download.docker.com/linux/centos/docker-ce.repo
        dest: /etc/yum.repos.d/docer-ce.repo
      become: yes

    - name: Install Docker
      package:
        name: docker-ce
        state: latest
      become: yes
      tags: install

    - name: Start Docker service
      service:
        name: docker
        state: started
        enabled: yes
      become: yes
      tags: start
Now, with the command below, we can execute the playbook and only the tasks tagged with install will be executed.
ansible-playbook centos-docker.yaml --tags install
We can also tell ansible to NOT run those tasks tagged with install.
ansible-playbook centos-docker.yaml --skip-tags install
You can add multiple tags per task, e.g.
tags:
  - cleanup_app
  - cleanup_web
Ansible reserves two tag names for special behavior: always and never. If you assign the always tag to a task or play, Ansible will always run that task or play, unless you specifically skip it (–skip-tags always). If you assign the never tag to a task or play, Ansible will skip that task or play unless you specifically request it (–tags never).
Ansible Vault
Ansible Vault encrypts variables and files so you can protect sensitive content such as passwords or keys rather than leaving it visible as plaintext in playbooks or roles.
First, you have to create a vaulted file where we’ll store the passwords. When you run this command it will ask you to create a password and then an empty file will show up.
ansible-vault create secrets.yml
Add some passwords there and save the file.
mysql_pwd: "DifficultPassword"
ht_pwd: "PasswordXYZ"
If you look at the file now, you’ll see that it’s encrypted and you can’t see the passwords anymore.
If you want to edit the file do ansible-vault edit secrets.yaml and enter the vault password.
Create a small playbook that displays the password.
# centos-vault.yml
---
- hosts: centos
  vars_files:
    - secrets.yml

  tasks:
  - name: Show mysql pwd
    debug:
      msg: "{{ mysql_pwd }}"
If you run the playbook now, ansible will throw an error saying ERROR! Attempting to decrypt but no vault secrets found. You have to specify the parameter –ask-vault-pass and enter the vault password when prompted.
Prompts
In case you need to pause the playbook execution and ask the user for some input such as confirmation or password, use prompts.
If you want the output to echo, use private: no, otherwise what you type won’t show up on the screen. Here is an example of a playbook that asks you to confirm if a file needs to be copied to the node. If you type yes and hit enter, the file will be copied, otherwise it won’t.
# centos-prompt.yml
---
- hosts: centos
  become: yes

  vars_prompt:
    name: upload
    private: no
    prompt: "Do you want to upload xyz.txt?"

  tasks:
  - name: Upload xyz.txt
    copy:
      src: xyz.txt
      dest: /var/log
    when: upload == "yes"
Useful options
ansible-playbook <name> --syntax-check # checks the syntax of the playbook
ansible-playbook <name> --check # does a dry run, reports the will-be changes, but the playbook is not executed
ansible-playbook <name> --step # ask to confirm each-step