
In this post I’ll explain how to use AWS DataSync service. Per AWS, AWS DataSync makes it simple and fast to move large amounts of data online between on-premises storage and Amazon S3, Amazon Elastic File System (Amazon EFS), or Amazon FSx for Windows File Server.
You can used this service when you migrate your on-prem shares to Win FSx or EFS. In my case, I’ll migrate a Windows share that I have at home to an S3 bucket. In the first scenario, I’ll use the straight public Internet to migrate data and the second scenario, I’ll use a VPN connection. The config for VPN transfer is pretty much what you’ll have if you use Direct Connect instead. In both cases you’ll need a VM instance on-prem. I have a vCenter running, so I’ll download an OVA file from AWS, but they also offer VMs for KVM, Hyper-V even EC2.
Table of Contents
Install a VM
No matter if you use public Internet or VPN/Direct Connect, you’ll need an on-prem VM that will act as a proxy between your on-prem data and AWS. There is no need to install any agents on any servers. For example, I’ll have a Windows share and the only thing this VM requires is access to that share with a domain or a workgroup user. Go to AWS DataSync service and click to download the image for your hypervisor.

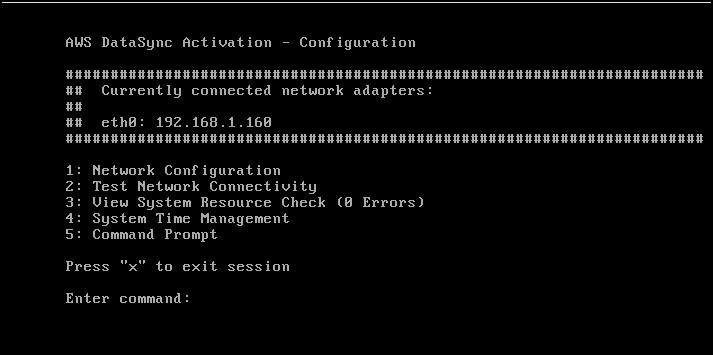
The OVA file is about 600+ MBs compressed. Once downloaded, deploy it as with any OVA file. Specify the details for your vCenter, network, host, cluster… By default, the VM needs 80GB disk and eats up 4CPUs and 16GB RAM. Once deployed, open the console, log with admin/password which is admin and password and change the IP to static if you need and/or change the default password or whatever you want. The console looks like this, some modified Linux distro.
AWS DataSync over public Internet
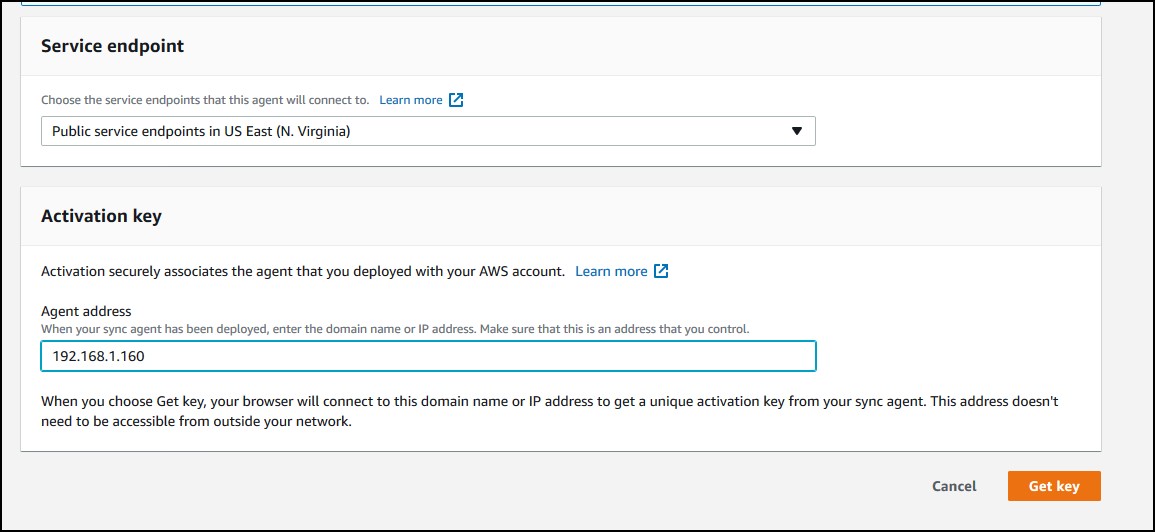
Now, go back to AWS DataSync and enter the IP of the appliance. But before you click Get key, make sure you have selected the public service endpoint for the Service endpoint as in the screenshot below. This means we’ll use public Internet. No, worries, the traffic is encrypted. Click Get key.
Probably you wonder, wait – how can AWS access my internal IP when I don’t have any VPN or Direct Connect. Well, AWS doesn’t care about your internal IP. Your browser have access to the internal IP on port 80 to the VM appliance. AWS doesn’t initiate the traffic, the appliance does.
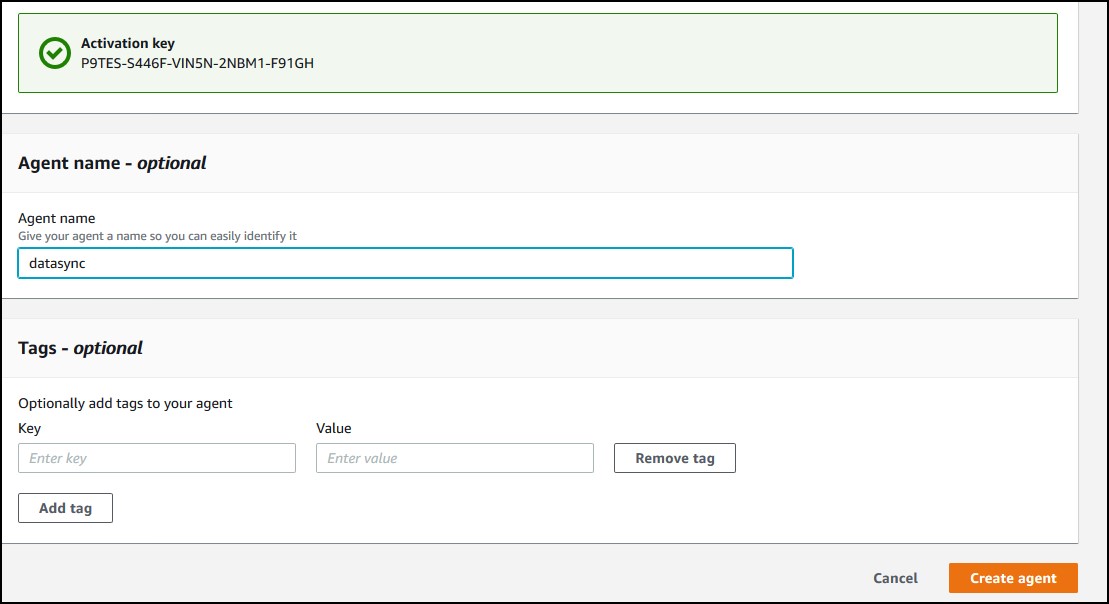
So, you have the appliance activated now. Name the agent and tag it if you want. Click Create agent.
Creating a task
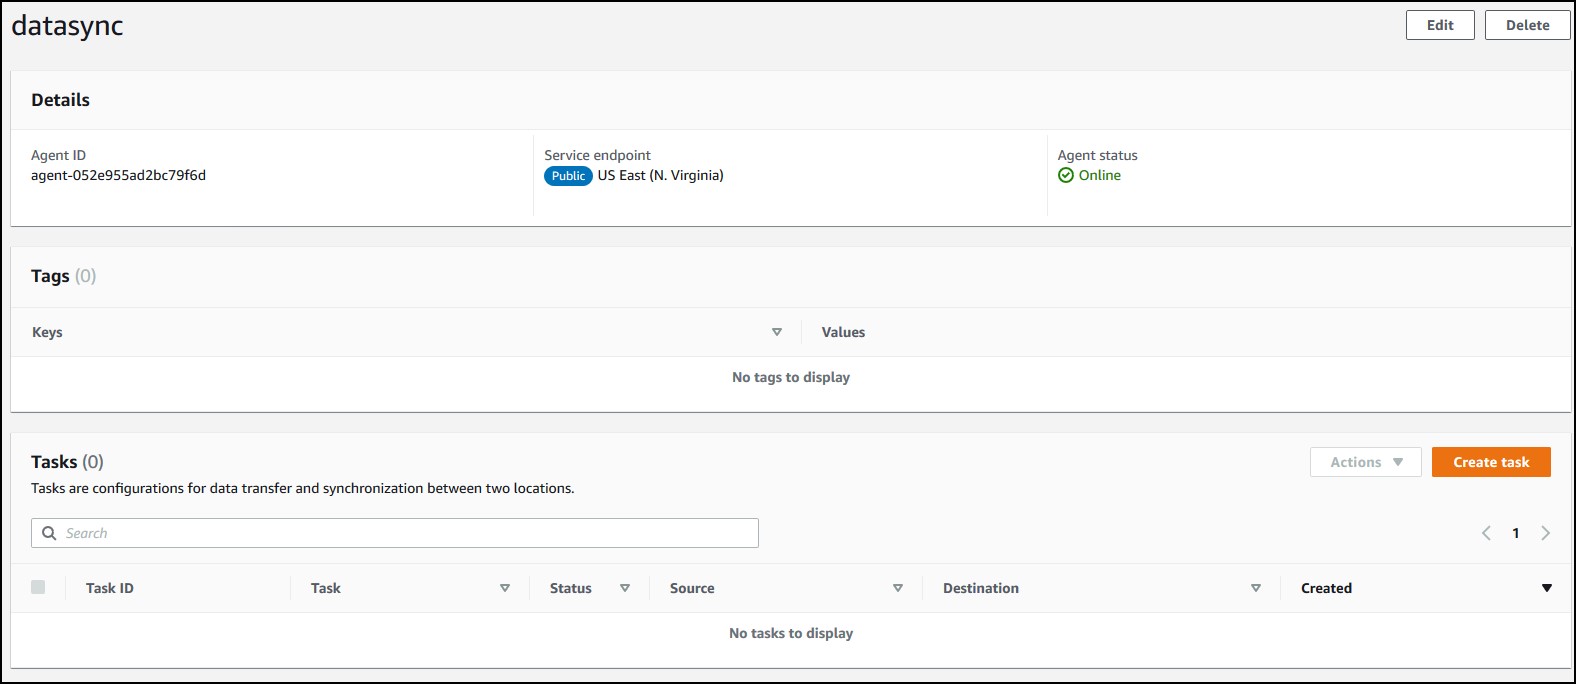
You’ll see you agent online. Click on the Agent ID.

Now, you have to create a task. For each share, you need a task. Click on Create task.
Configure the source location on-prem.
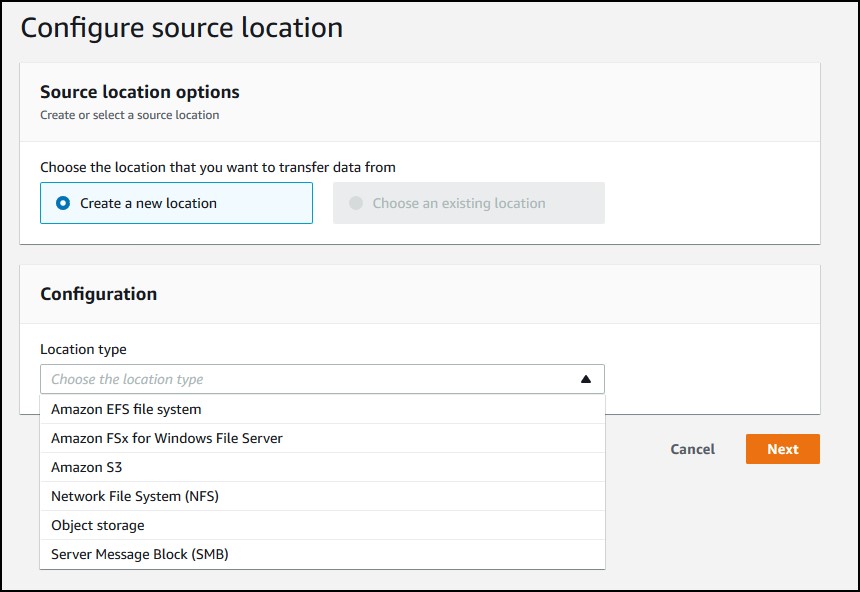
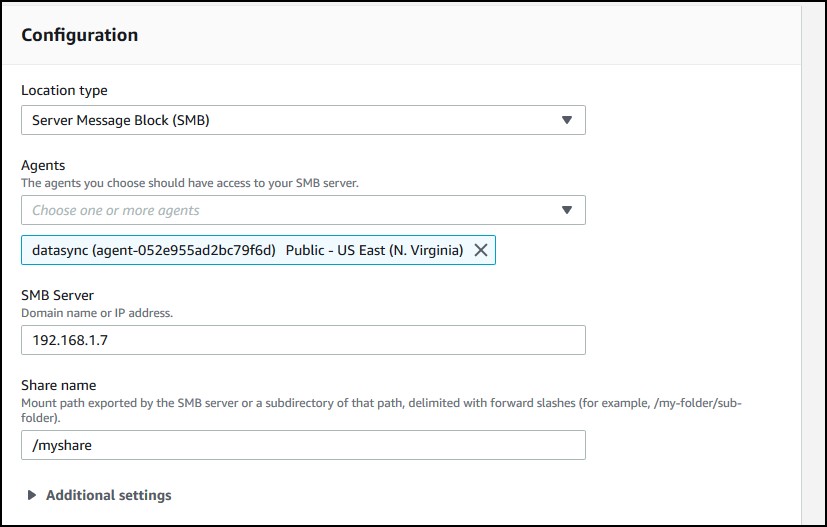
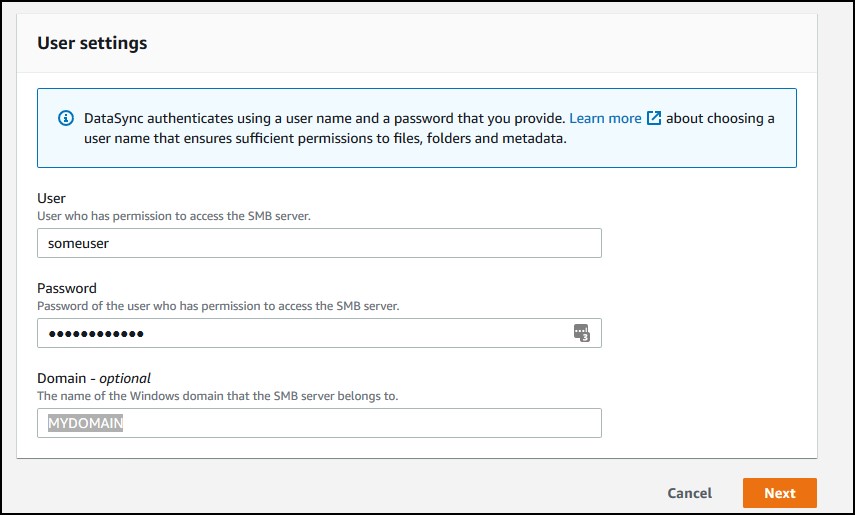
I chose SMB which is a Windows share. Specify the agent, the server IP, the share name with “/” prefix and the username, password, domain (optional) in case the share is restricted, which probably is.
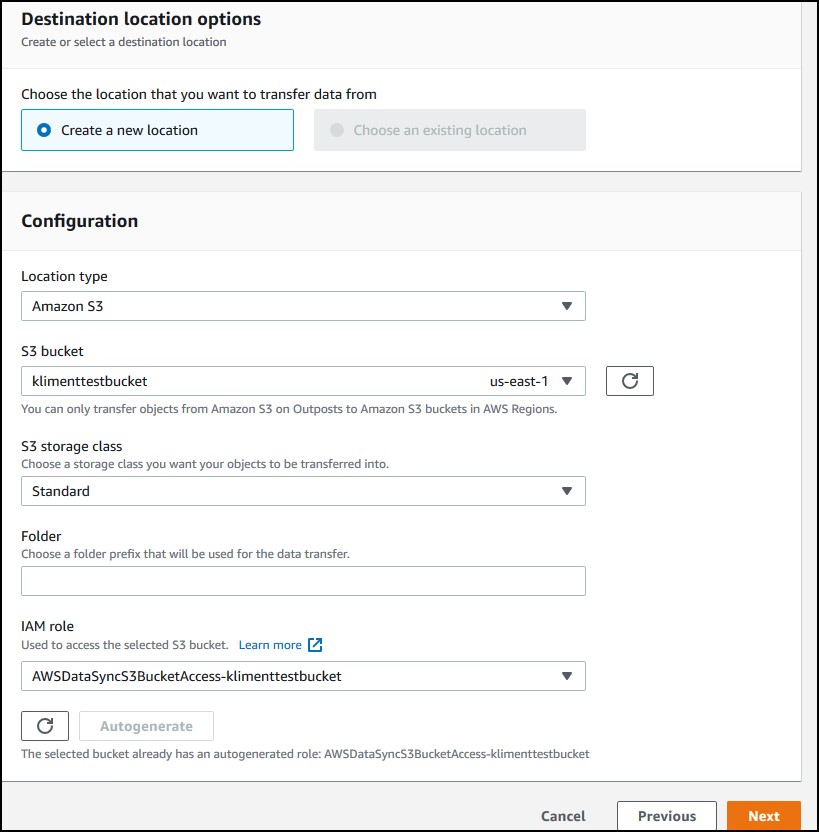
Click Next. Now, choose a destination. I am using some S3 bucket and choose to Autogenerate a role that will allow access to that bucket. Click Next again.
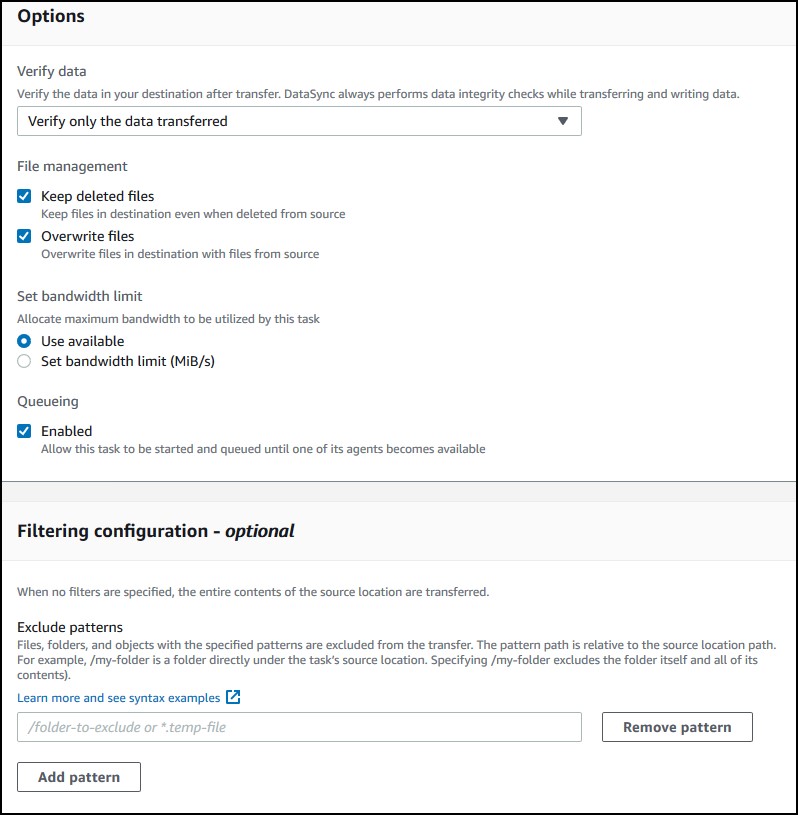
On this screen, you can choose options that suit your needs. If you scroll down, you can enable detailed logging in CloudWatch. Click Next.
Check if everything is OK and click to Create task.
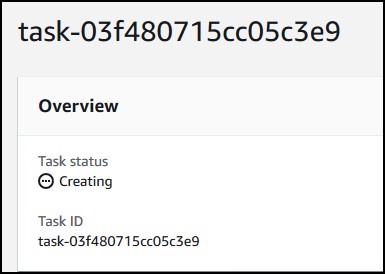
You’ll see the task creating. It takes about 10-15 secs.
Click on Start in the upper right corner.

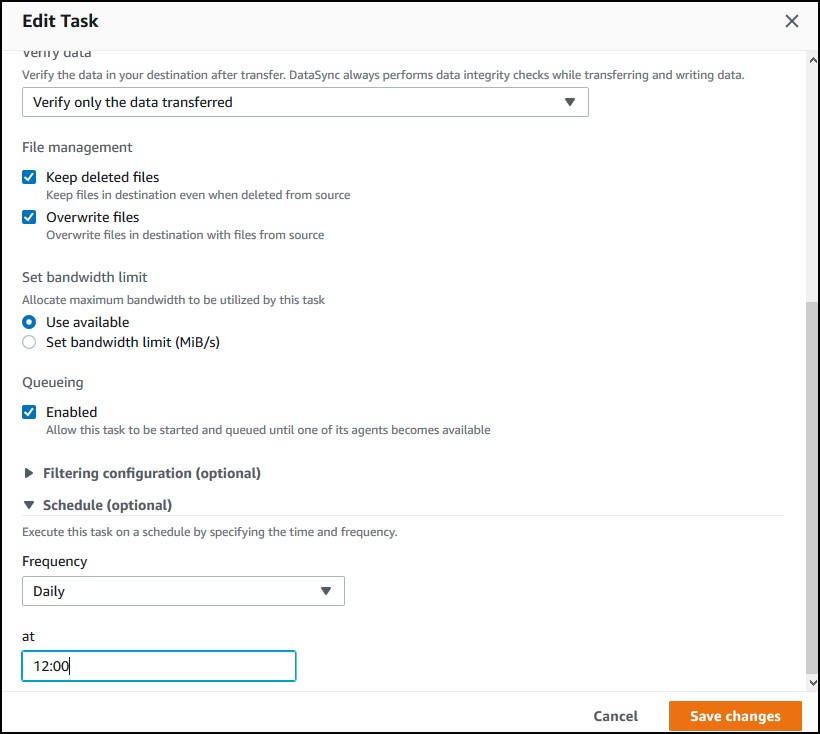
I put a single 10KB file in my share. After some init work, it took about… maybe 2-3 mins and the task status said “available”. I checked the bucket and it was there. Most likely, if you are migrating a share that’s changing on a daily basis, you want to schedule the transfer. If you edit the task, you can change the schedule.
AWS DataSync over VPN and Direct Connect
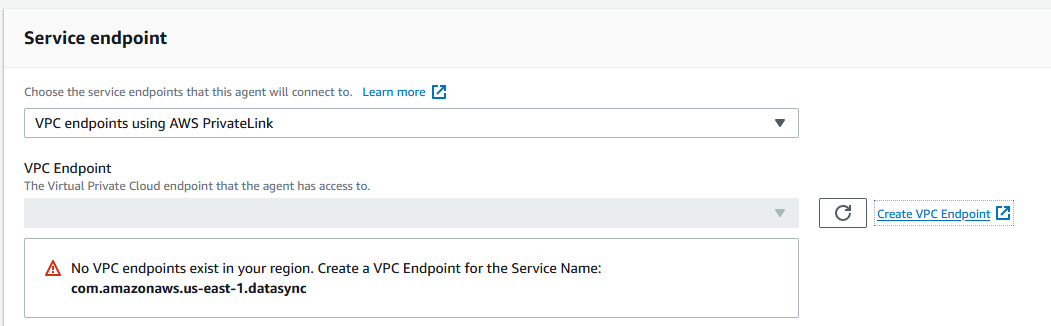
For DataSync to work over VPN and Direct Connect, you need a new endpoint and a new appliance. You can’t use the existing agent and appliance that was configured for public Internet. The endpoint allows you to privately connect to an AWS service. The traffic won’t go over direct Internet. Actually, with VPN it will, but the traffic will be tunneled. With Direct Connect, the traffic from on-prem to your endpoint is going over dedicated links.
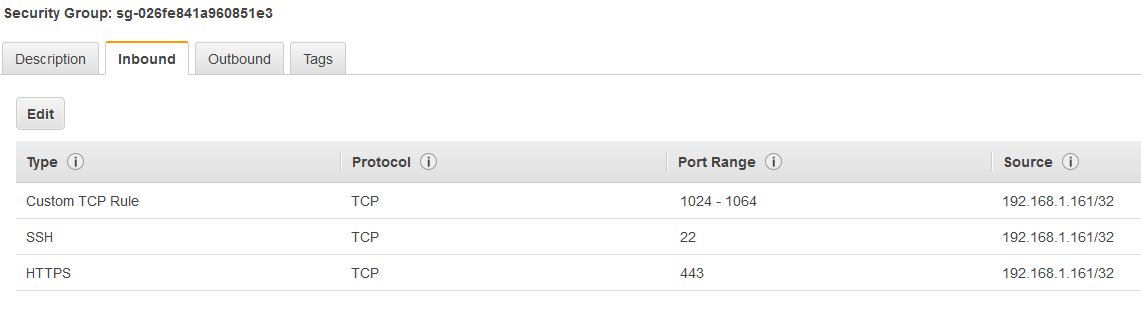
Follow the first section above on how to deploy a new OVA appliance. Once completed, we need to create an endpoint now. But before doing that, create a new security group that allows TCP ports 22, 443 and 1024-1064 range from your appliance.
In AWS DataSync console, click to create a new agent, but this time choose VPC endpoints using PrivateLink and then click on Create VPC endpoint.
I’ll create a VPC endpoint for DataSync in a VPC that’s connected to my VPN. I have only one public subnet there and I’ll choose a security group that allows TCP 443, 1024–1064, and port 22.
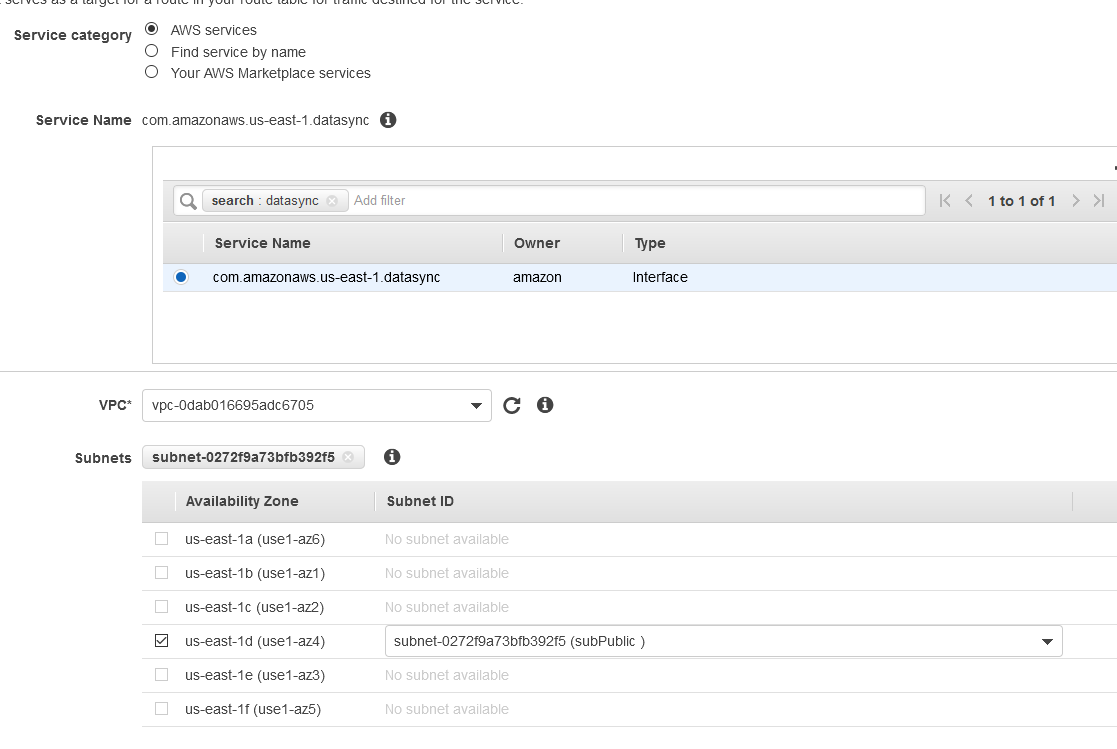
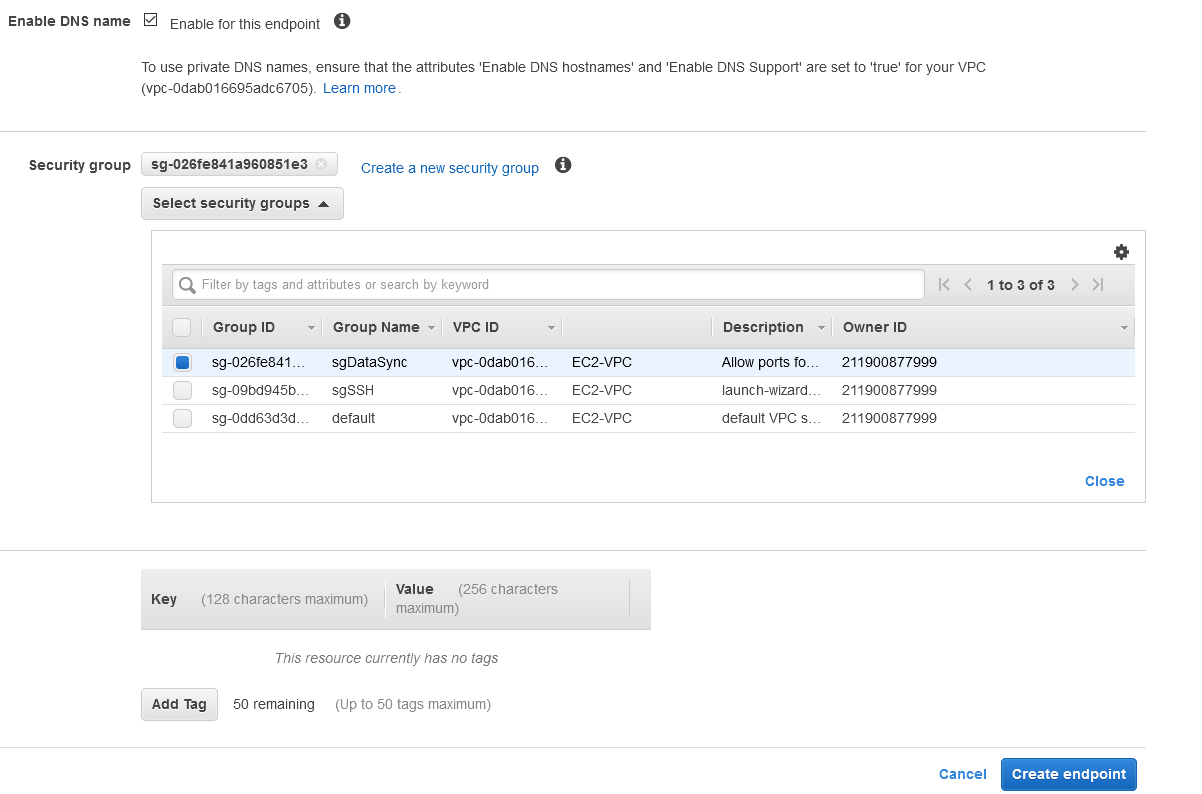
Click on Create endpoint. It takes about 3-5 minutes for the endpoint to be created.
Go back to DataSync screen and you’ll see the parameters populated. Enter the IP of the VM appliance and click on Get Key.
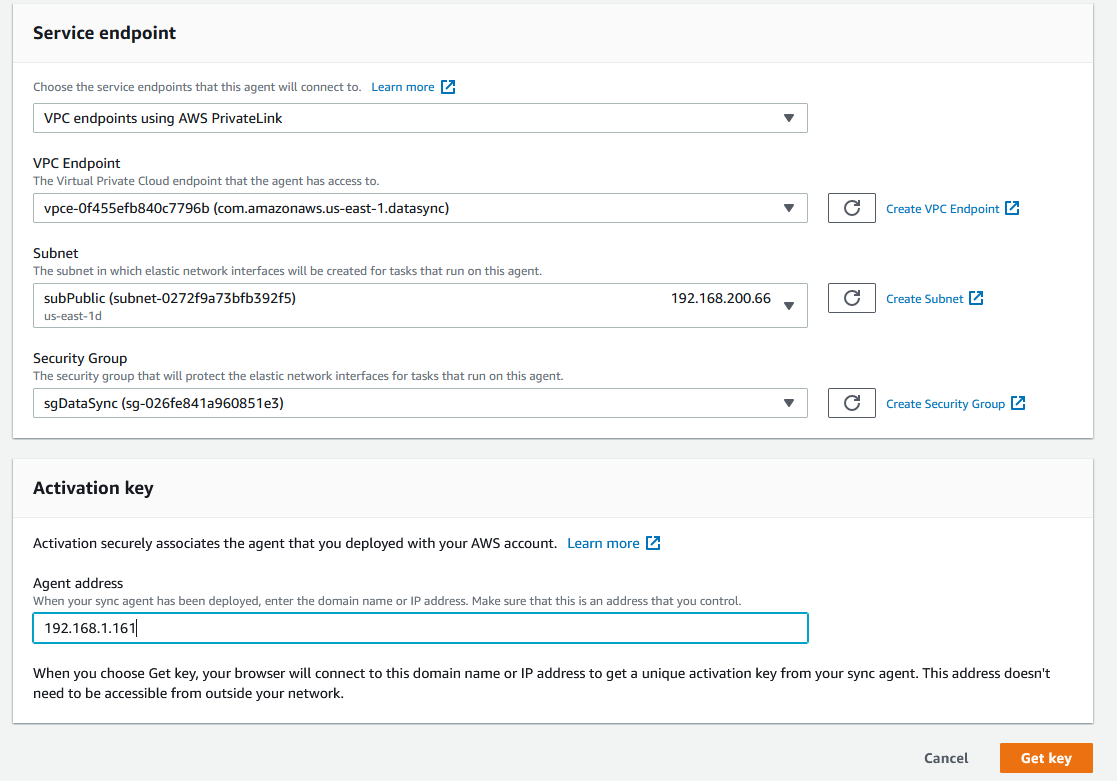
Once you see the appliance activated, you can create the agent and follow the instructions in Creating a task section above.
NOTE: I created a task to transfer a 2GB file from my share to S3. When I checked my pfSense IPSec tunnel, I saw these values, which means that the transfer goes over the private link.
