
As the title says, I’ll create two web servers in a private subnet, put an Application Load Balancer in front and protect the content with Web Application Firewall (WAF). In addition, I’ll create a bastion host so I can access the web servers using SSH. Web Servers are not reachable from the Internet.
Table of Contents
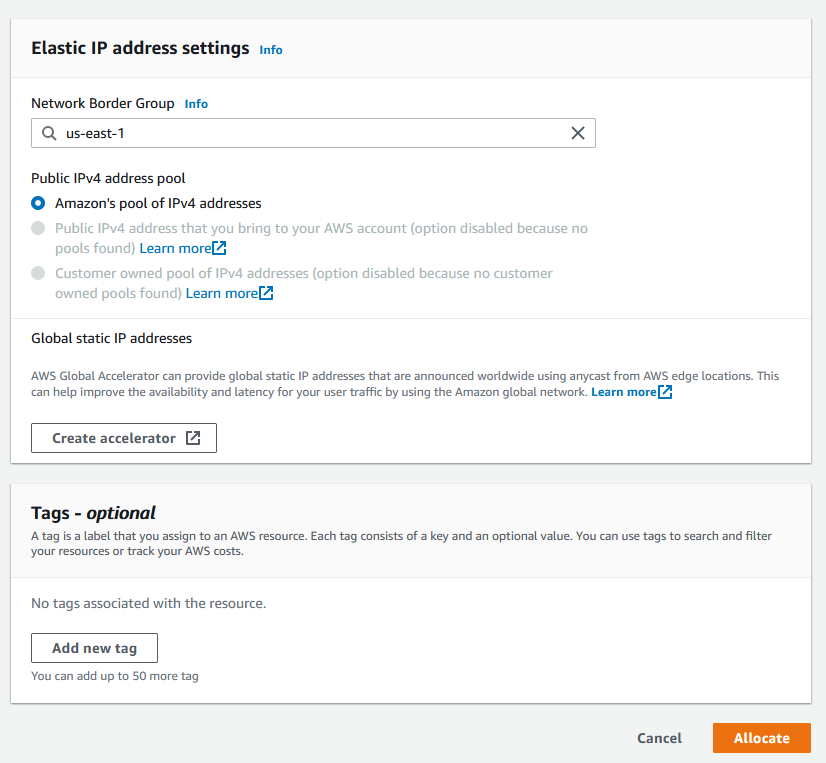
Elastic IP
First thing to do is to create an Elastic IP for the NAT gateway. NAT gateway is needed if you want to give the Web Servers Internet access so they can be patched. Go to Elastic IPs under Network & Security in EC2 menu and click on Allocate Elastic IP address in the top right corner. Accept the defaults and click Allocate.
VPC
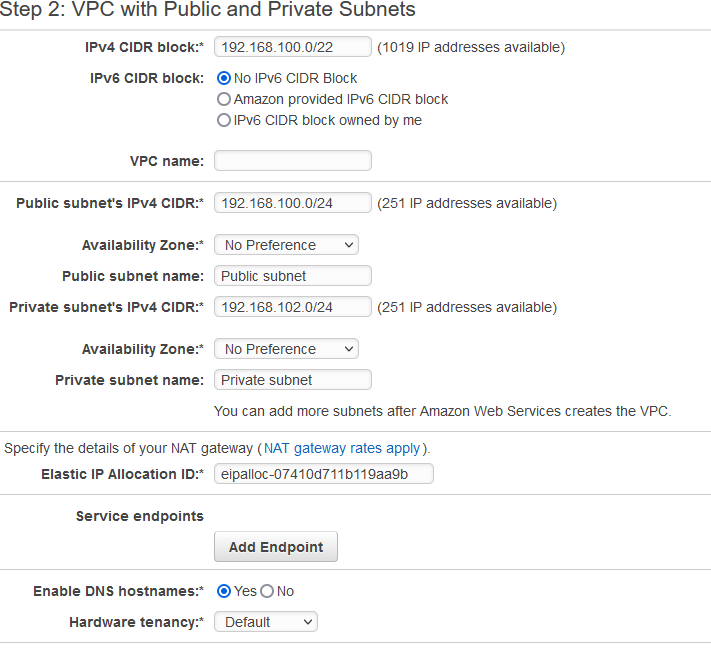
We’ll create a VPC with two public and two private subnets. Minimum two public subnets are needed for the Application Load Balancer. You can’t create an ALB with one public subnet.
Click on Launch VPC Wizard in the VPC menu and select VPC with Public and Private Subnets. I’ll use this CIDR (192.168.100.0/22) which gives me 1024 hosts enough for 4 Class C /24 subnets, you can use whatever CIDR you want. As you can see I’ll use 192.168.100.0/24 for the first public subnet and 192.168.102.0/24 for the first private subnet. I’ll create the other public and private subnet later. You’ll have to associate the Elastic IP that you created in the previous step to the NAT gateway. Click Create VPC in the bottom right corner.
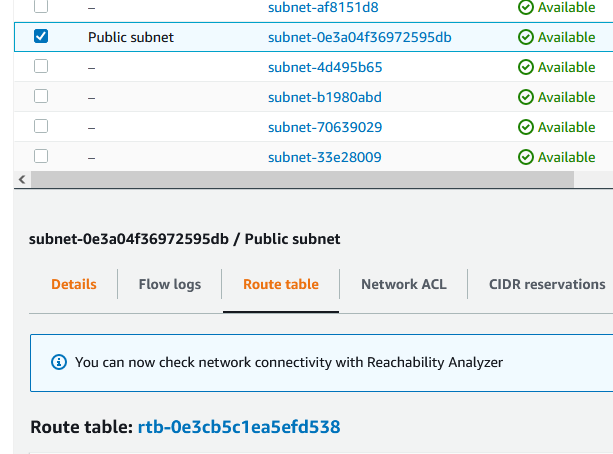
Go to Subnets menu click on the public subnet and look at the Availability Zone.

When you create the next subnet, you have to put it on another zone.
Click on the Route table tab. Remember/write-down the route table id (rtb-0e3cbsomething). It will be different for you.
Then click on Create subnet in the upper right corner. Choose your VPC, name the subnet (in my case subPublic2), assign an Availability Zone (e.g. us-east-1a) and add the CIDR 192.168.101.0/24. Make sure that your 2nd public Availability Zone is different than the 1st Availability Zone. Click Create subnet.
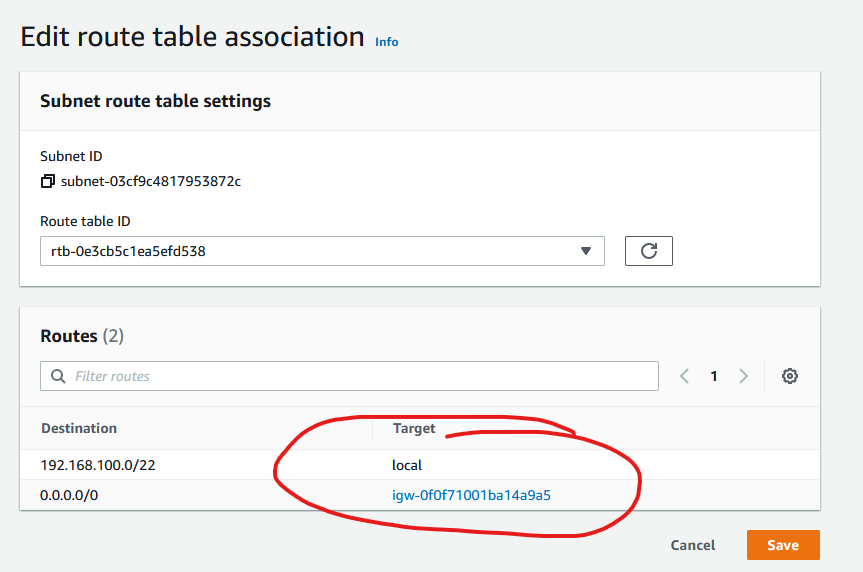
If you click on the new subnet now and then click on the Route table tab, you’ll see that AWS created a route table for you. But as you can notice below, the destination 0.0.0.0/0 goes through the NAT gateway.

We don’t want that. We want the public subnet to use the Internet gateway, not the NAT gateway. So click on the Edit route table association on the right. From the drop down choose the other route table, that’s the Internet gateway, that’s the one that you have wrote down earlier. When you change to the other route table, you’ll see that the destination for 0.0.0.0/0 changes to igw which is the Internet gateway. Click Save.
Now, do the same for the other private subnet. Click on the private subnet and look at the Availability Zone. In my case it’s us-east-1b. This means, I have to create my 2nd private subnet in another zone.

So, I am creating the 2nd private subnet within my VPC and I named my subnet subPvt2 in us-east-1a and 192.168.103.0/24 CIDR.

Check the route table for this new private subnet. The route table for 0.0.0.0/0 should be the NAT gateway which is correct, but just in case…
So these are my subnets now.

Bastion host
You use a bastion host as a jump server to get to the web servers. If you have any other means to get to them such as VPN or Systems Manager, then go for it. This is just an example of how to get to the web servers.
I’ll use the AWS Linux for this. It really doesn’t matter as long you have a SSH client installed on the bastion host. Launch a simple t2.micro instance in any public subnet. Make sure the bastion host has a public IP. Also make sure that this bastion host is accessible from a single IP or some dedicated subnet. You don’t want this bastion host to be exposed to the world. In my case, the security group for the bastion host is restricted to my home IP only on port 22 for SSH.
Web Servers
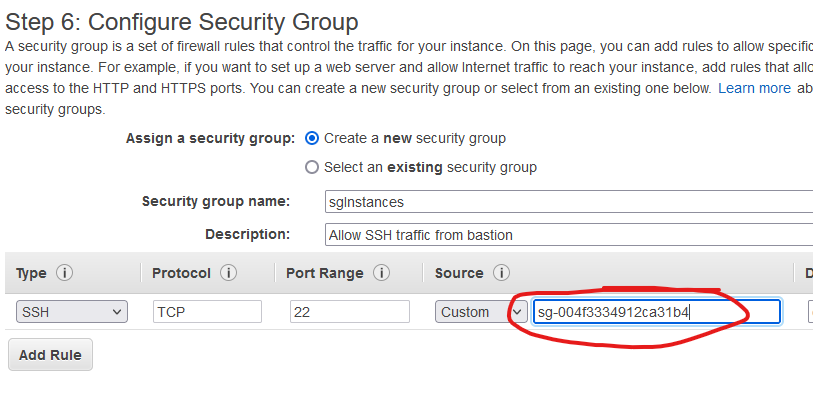
I’ll use two AWS Linux instances deployed in the private subnets. Do not assign a public IP for these. That’s what the bastion host is for. Create a security group that allows traffic for SSH from the security group that you created for the bastion host. In my case it looks like this. Start typing sg in the circled field and choose the security group that you create earlier. If you named it properly, you’ll see it. If not, go get the security group ID for the bastion host.
Launch two instances in two different private subnets.
Test connection
Log to the bastion host using the key you created. Now, we’ll connect to the web servers from the bastion host. If you used the same key for bastion host and web servers, copy and paste the PEM certificate in a file called key.pem or whatever. If you used different keys, it doesn’t matter, just make sure you have the keys as a file on the bastion host. I used the same key, which is not the best practice, but for the sake of simplicity, I have a file called key.pem on the bastion host. Log to each web server using ssh [email protected] -i key.pem where ec2-user is the user for the AWS Linux (it differs for different Linux distros), 192.168.102.176 is the IP of the first web server and the parameter -i tells which key file certificate to use. Make sure you do chmod 600 key.pem so you can log in. You should be able to log in to both web servers.
Install Apache web server
Log to each web server and execute these commands to install Apache web server, start it and enable to start on boot.
sudo yum -y install httpd
sudo systemctl start httpd
sudo systemctl enable httpd
Switch to root.
sudo su
Then on each server do this. Do Server 2 on the second server. This is just an example. You need the same code on both web servers. The difference is because we’ll test the ALB later and see how the page changes.
echo "Server 1" > /var/www/html/index.html
For the 2nd server.
echo "Server 2" > /var/www/html/index.html
Application Load Balancer
Now, we are moving to the ALB. Before we create the ALB, let’s create a security group that will allow port 80 from everywhere. Looks like this. Create the security group from the EC2 menu. This is a security group that we’ll assign to the load balancer.

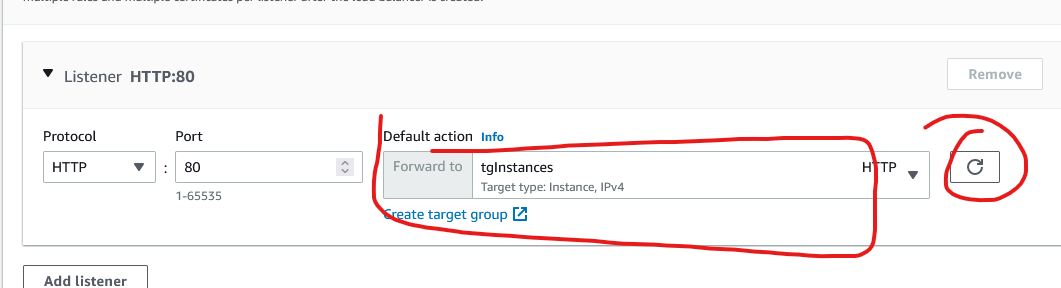
From the EC2 menu on the left side, go to Load Balancing and click on Load Balancers. Click on Create Load Balancer. Choose Application Load Balancer. Make sure you choose the public subnets and for the security group use the one that we created earlier for the load balancer.

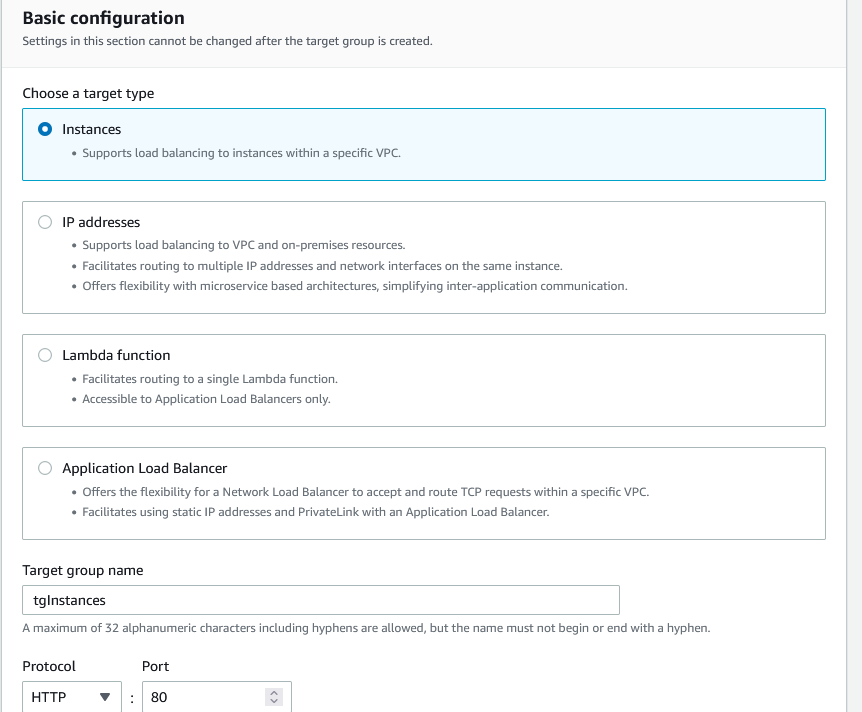
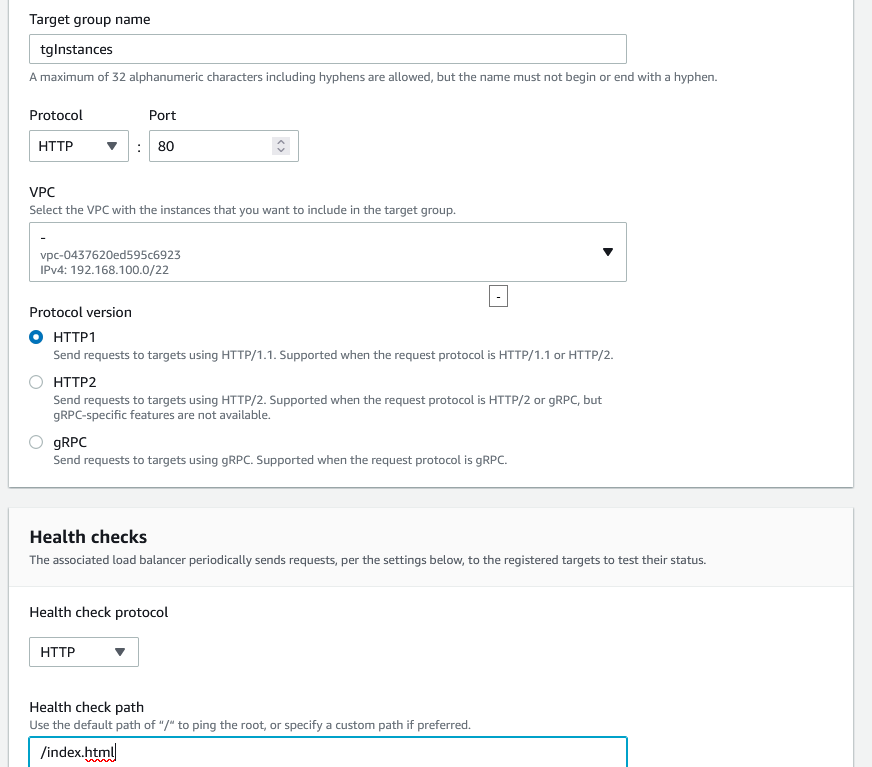
If you scroll down, you’ll see that you need to create a target group for the ALB. The target is our web servers. Click on Create target group. It will open up a new browser window. Choose Instances, name the target group, leave HTTP1 for protocol and for the Health checks type /index.html. Remember, we created these files earlier.
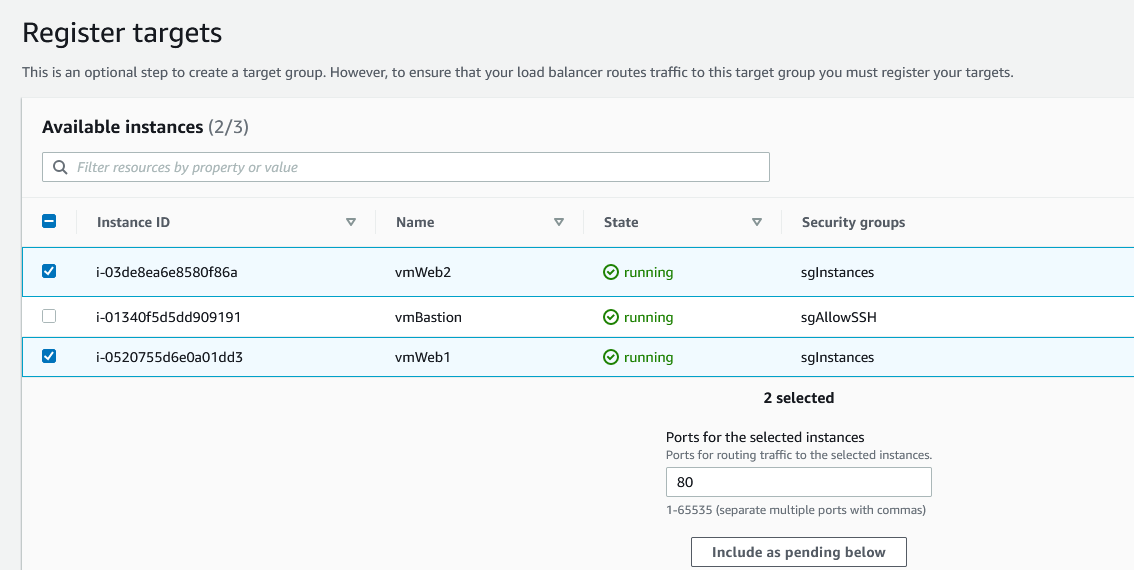
Click Next, select the web servers and click on Include as pending below.
Finally, click on Create target group.
Go back to the original tab when you created the load balancer, click on the refresh button and choose the target group you just created.
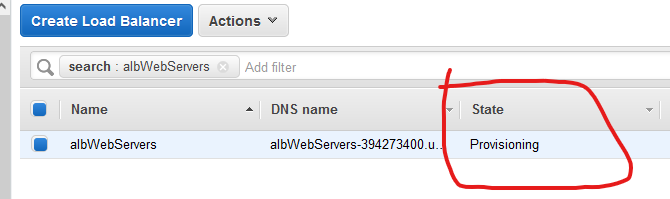
Scroll down and click on Create load balancer.
Wait for a couple minutes until you see that the state changes to Active. Click Refresh on the right side.
While you are waiting, if you click on the Description tab for the load balancer and scroll a little bit down, you’ll see the security group that we create for the load balancer.

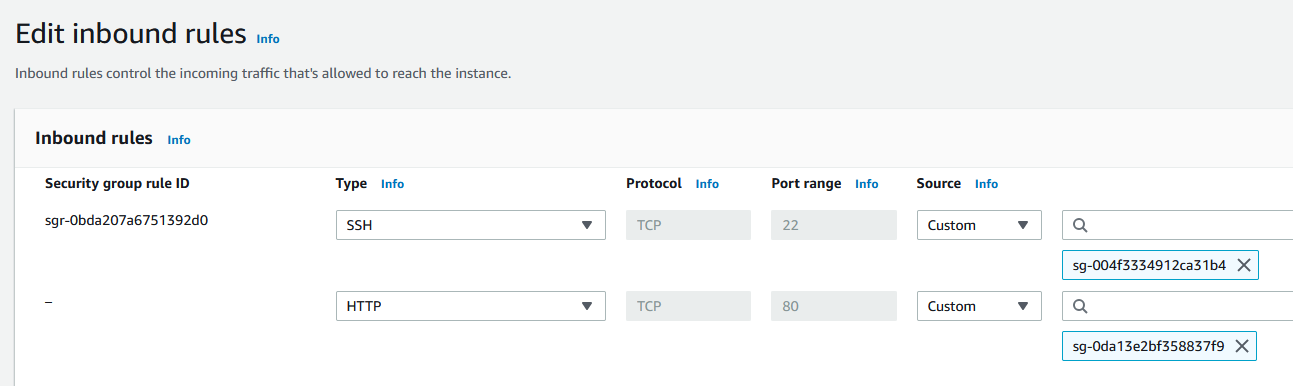
We need to add this security group to the web servers. Right now, the web servers are configured to accept traffic from the bastion host only, but we need for the web servers to accept HTTP traffic as well. Now, the security group for the load balancer allows HTTP from everywhere, but that doesn’t matter. When we add this security group to the web servers they’ll also allow HTTP request from everywhere. But the web servers have no public access so it really doesn’t matter. Does this mean that any other server in these public/private subnets will have access to HTTP to the web servers? Yes. If I create another server in the private/public subnet, it will have access to HTTP to the web servers.
Let’s add the ALB security group to the instances. In my case it looks like this where the bottom security group is the security group for allowing HTTP from everywhere, the one that we assigned to the ALB.
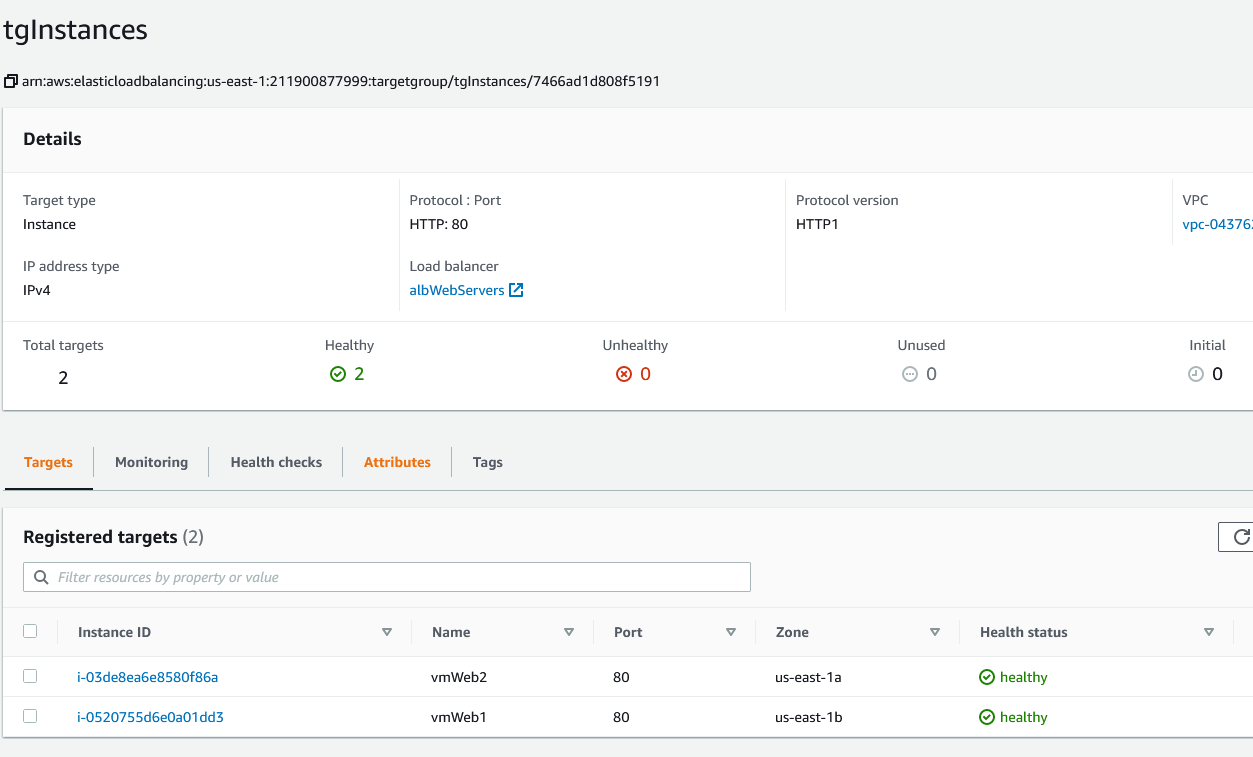
Before you do anything, go to the Target Groups menu under Load Balancing. You should see both instances as healthy.
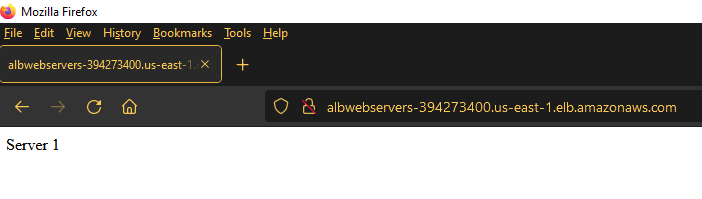
If this looks good, go back to the load balancer and get the URL.

Open up a new browser window and go to that URL. Click refresh in your browser several times. You’ll see how it changes from Server 1 to Server 2.

If everything is OK, proceed further.
Web Application Firewall
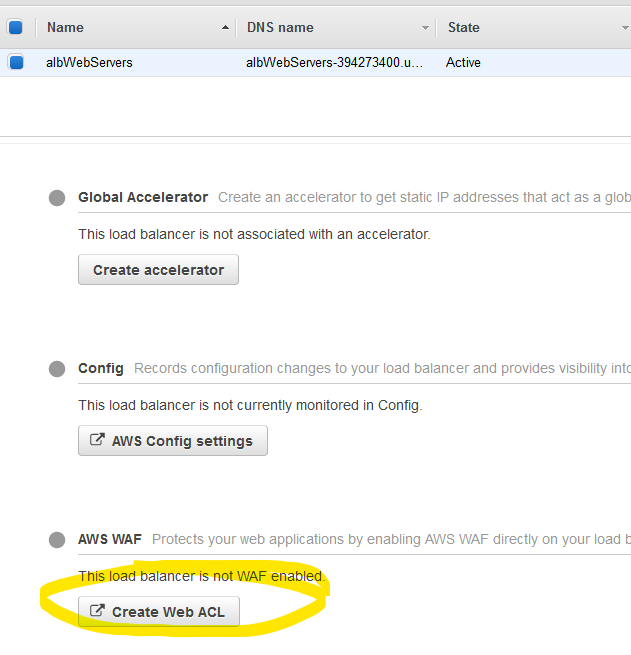
The good news is that you can directly create your rules from the ALB. Click on the load balancer you created and click on the Integrated services tab. Click on Create Web ACL.
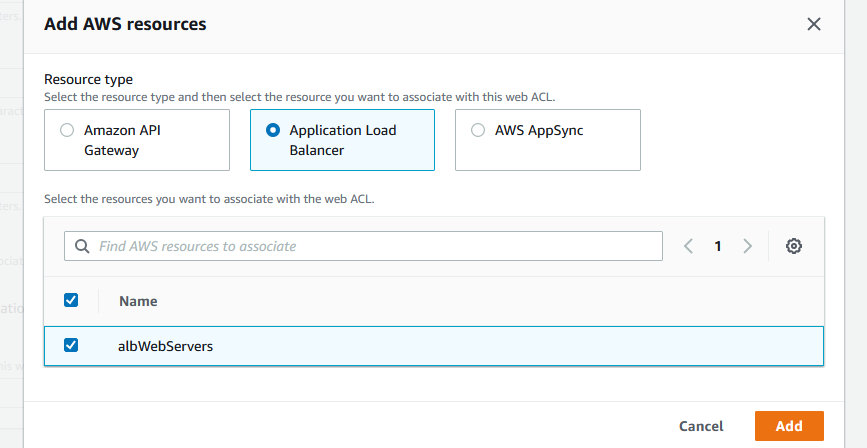
Name the ACL and click on Add AWS resources where we gonna add the ALB.
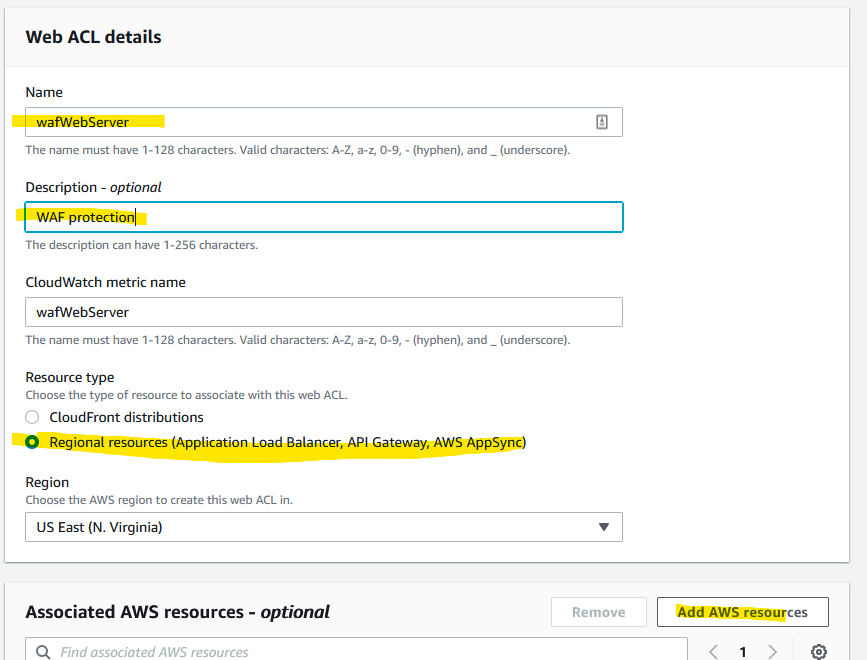
Here we are. Click Next after.
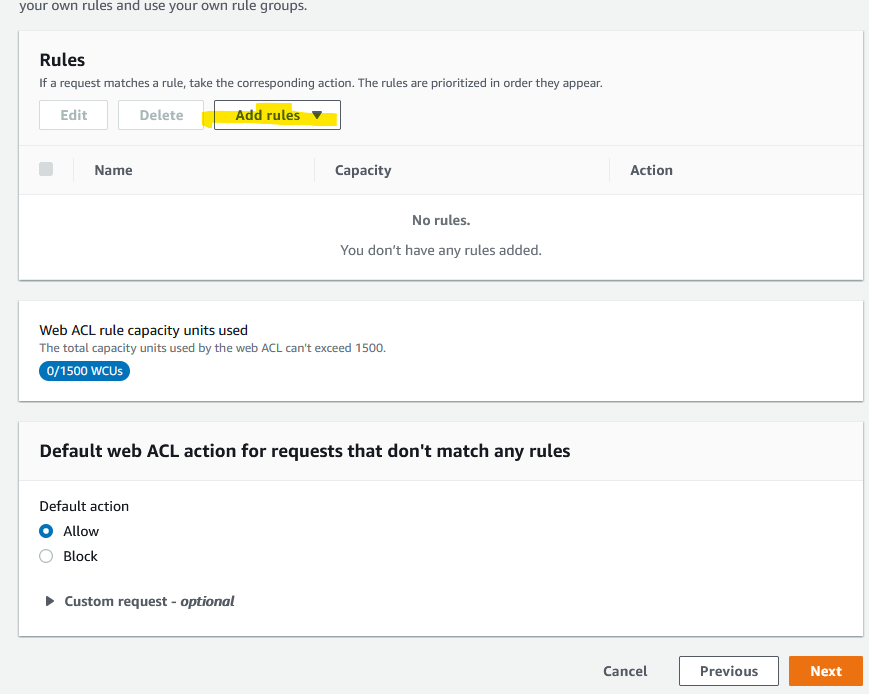
And now you are on your own. You have to add rules. There are some that are templated and there are some that you can buy from the AWS Marketplace.
Once you add these rules, you can see what’s blocked and what’s not under Cloud Watch | All metrics | WAFV2.