
I needed to move some VMs from my home lab (vCenter 5.5) to my Amazon AWS cloud account. This is what I did.
First, you have to prepare the VM. If you have any vmxnet* network card, you have to delete it from the properties of the VM in vCenter. Second, make sure that you have RDP or SSH enabled on the VM and third, uninstall the VMware tools. Shut down the VM, add an E1000 NIC and power it up again. Make sure that the TCP/IP and DNS settings for the new NIC are set for DHCP. Verify that all these requirements apply and then shut down the VM again.
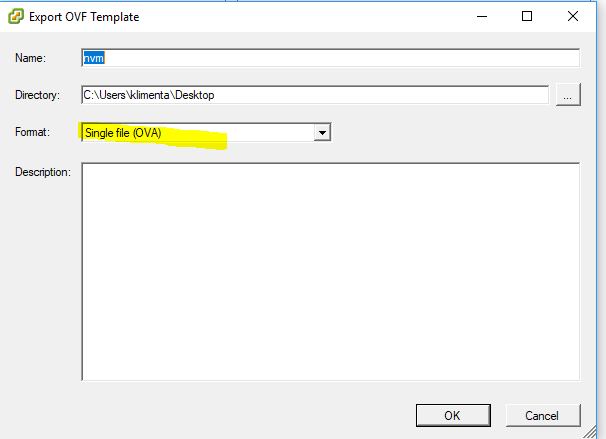
In vCenter, select the VM for export, click on File | Export and then Export OVF template. Choose Single file (OVA).
Once the export is completed, you have to upload the OVA file to a S3 bucket. I created a new bucket for this, called uploadvmstuff with the default settings. You’ll have to pick a unique name for the bucket, but you probably know that. Upload your OVA file to S3. It might take a while depending how big the file is.
I am using my admin account in AWS to import the VM, but I still have to assign some policies. So, when the upload is complete, go to the command prompt or PowerShell on your desktop. Make sure you have AWS CLI installed. You can check my other blog post on how to do this. Very simple.
Create these three files in Notepad and save them on the desktop. The first file is called trust-policy.json. See this link for more info.
{
   "Version": "2012-10-17",
   "Statement": [
      {
         "Effect": "Allow",
         "Principal": { "Service": "vmie.amazonaws.com" },
         "Action": "sts:AssumeRole",
         "Condition": {
            "StringEquals":{
               "sts:Externalid": "vmimport"
            }
         }
      }
   ]
}
Execute this command from the command prompt. Make sure that you are in the same folder in the command prompt where you saved your files, e.g. cd c:\users\whatever\desktop.
aws iam create-role --role-name vmimport --assume-role-policy-document file://trust-policy.json
Create the 2nd file called role-policy.json so it looks like this. Replace the two occurrences of disk-image-file-bucket with your bucket name, in my case it was uploadvmstuff.
{
   "Version": "2012-10-17",
   "Statement": [
      {
         "Effect": "Allow",
         "Action": [
            "s3:ListBucket",
            "s3:GetBucketLocation"
         ],
         "Resource": [
            "arn:aws:s3:::disk-image-file-bucket"
         ]
      },
      {
         "Effect": "Allow",
         "Action": [
            "s3:GetObject"
         ],
         "Resource": [
            "arn:aws:s3:::disk-image-file-bucket/*"
         ]
      },
      {
         "Effect": "Allow",
         "Action":[
            "ec2:ModifySnapshotAttribute",
            "ec2:CopySnapshot",
            "ec2:RegisterImage",
            "ec2:Describe*"
         ],
         "Resource": "*"
      }
   ]
}
Execute this command from the command prompt.
aws iam put-role-policy --role-name vmimport --policy-name vmimport --policy-document file://role-policy.json
The third file is called containers.json and it looks like this. Change the lines so it matches your settings. For Description use whatever you want, change the S3Bucket line and the S3Key. The S3Key is the name of the ova file that you’ve exported from vCenter.
[
  {
    "Description": "Windows 2008R2 Import",
    "Format": "ova",
    "UserBucket": {
        "S3Bucket": "uploadvmstuff",
        "S3Key": "nvm.ova"
    }
}]
Now, you are ready to import the file from S3 to EC2. Execute this line from the command prompt.
aws ec2 import-image --description "Windows 2008R2 VMDKs" --license-type BYOL --disk-containers file://containers.json
You should get your prompt back after 2-3 seconds. But, this means that the import started, not that it finished. To check the status, execute this line.
aws ec2 describe-import-image-tasks
It takes some time, for my OVA file that was created from a 40GB disk and 3.7GB OVA file it took about 20-25 mins. You will see the Status change to completed once everything is OK. Make sure that your AWS CLI is configured to do the output in JSON so it’s easy to see.
Once completed, you will see your import in the AMI section of EC2. Go to EC2 section, click Launch New Instance and choose the AMI that you just created. Follow the standard prompts for the type of the instance, security groups, volumes, etc… and once your instance is launched you can RDP to it. You will use the same admin password as before to RDP.