
I got an invitation to attend an event in NYC for the Alibaba cloud, so I decided to play a little bit with their cloud offering. I was actually surprised to see that they are doing a really good job. While many features are still not there, the ease and simplicity of Alibaba cloud is a plus. If you are familiar with AWS, it won’t take you more than 5 minutes to feel comfortable. The interface, although different is very intuitive. You can get a free trial (a credit card and phone verification are needed) and start playing. Visit this link to start. Once you open an account and verify it, you’ll be presented with a console.
I’ve decided to demonstrate how to start in Alibaba Cloud by building a WordPress site running on two instances behind a load balancer. The database will be a MySQL RDS offering from Alibaba. They still don’t offer NFS filesystem, so I had to create an instance for that. First thing first.
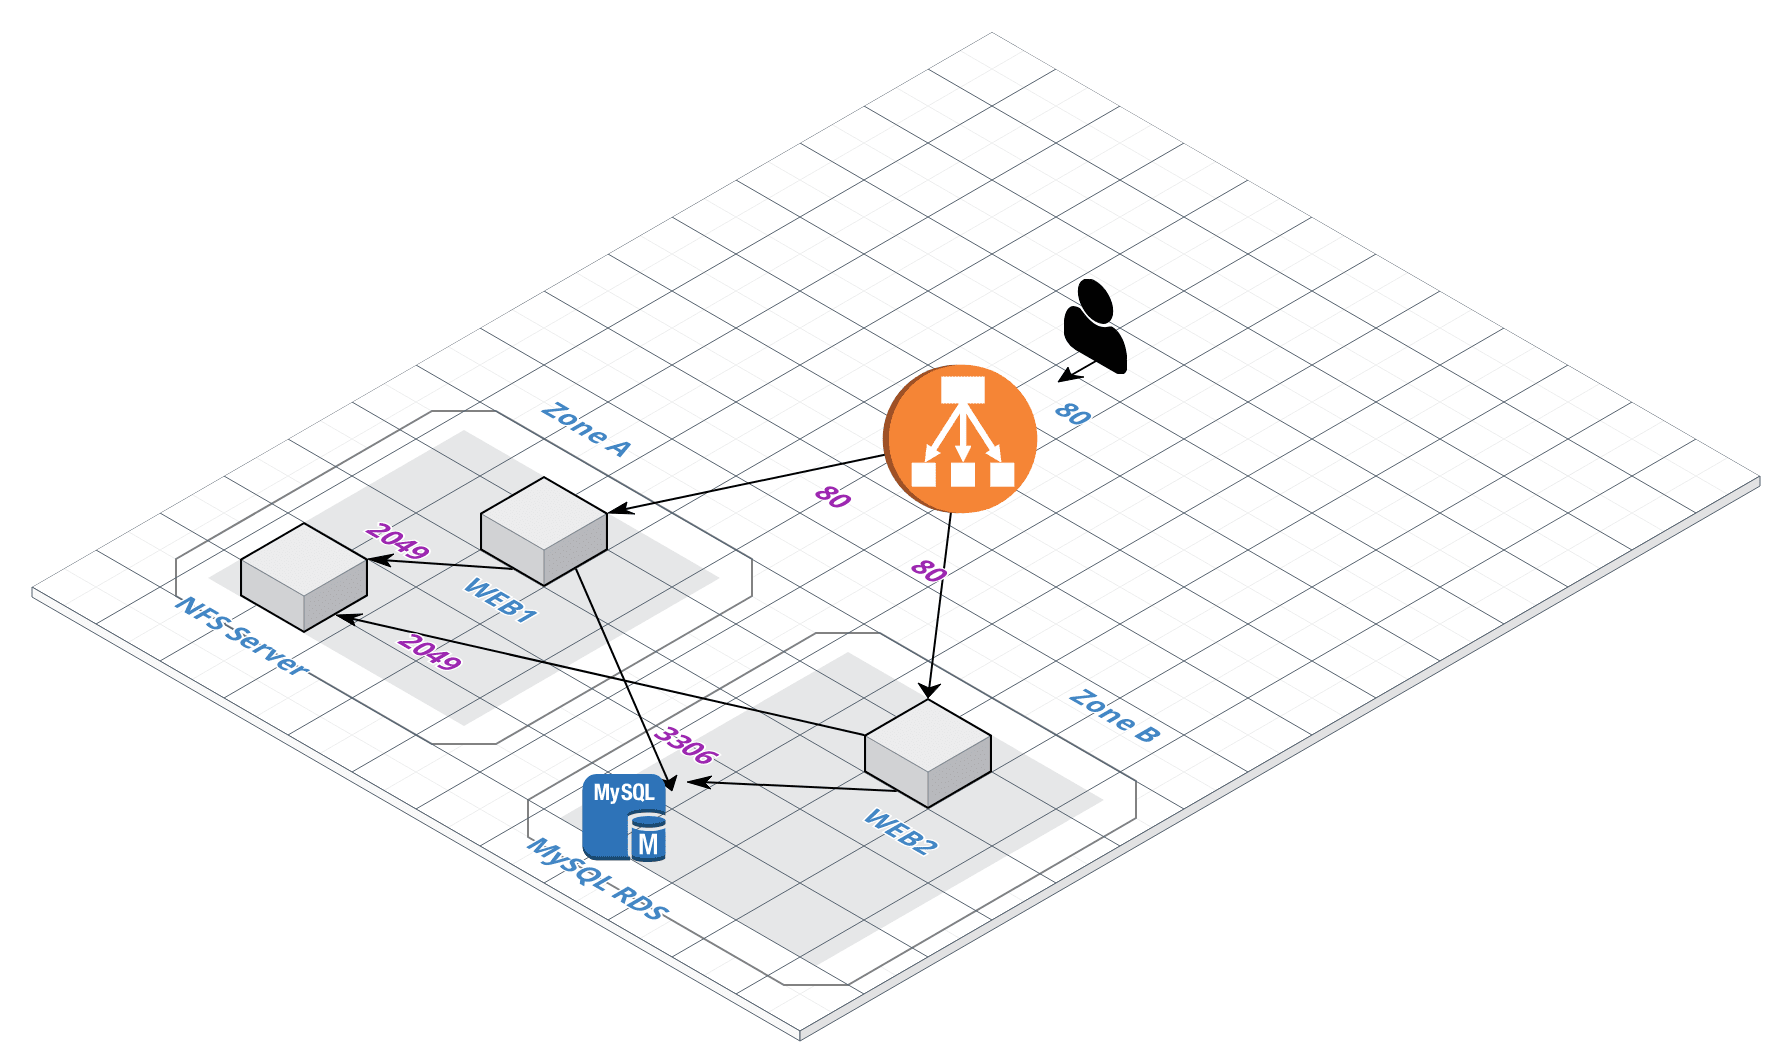
Table of Contents
VPC
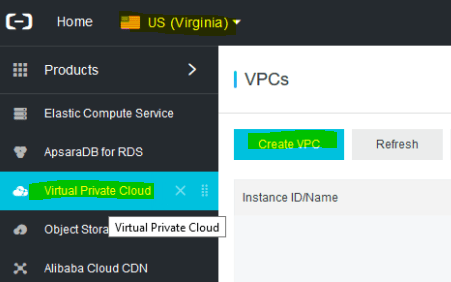
The ubiquitous VPCs from AWS are named the same in Alibaba and they serve the same purpose. From the top menu choose a region, from the left click on Virtual Private Cloud and then click on Create VPC.
I’ll name my VPC, TestVPC and the CIDR (size of the VPC in terms of available IPs and subnets) is going to be 192.168.0.0/16 (which is default).

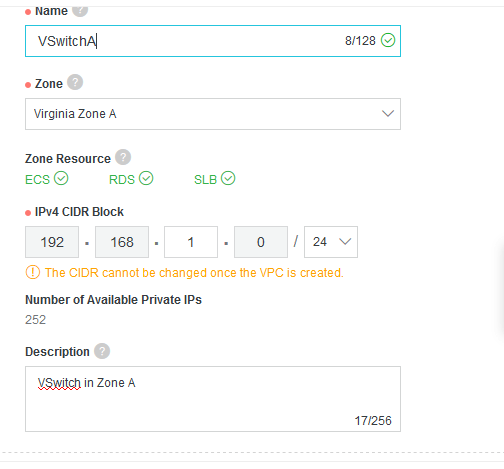
If you scroll down, you’ll see that you’ll also have to create a VSwitch. A VSwitch is nothing by a subnet or availability zone (AZ) in AWS terms. My first one will be called VSwitchA in Virginia Zone A and I’ll carve a smaller subnet 192.168.1.0/24 for that.
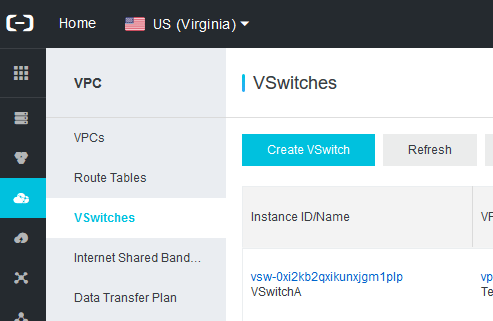
Let’s create another one, but this time in a different zone. The subnets can’t overlap. On the left side, you’ll see the menu for VSwitches, so click there and then click on Create VSwitch.
Do pretty much the same as previously. Choose the right VPC this time, name the VSwitch, choose the second zone and choose a different subnet. In my case it’s 192.168.2.0/24.

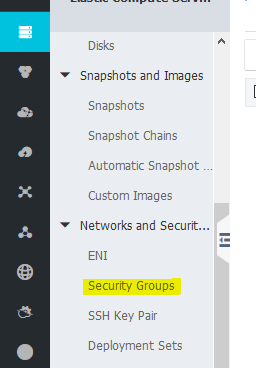
Security Groups
We’ll need several Security Groups. From the top left menu, click on Security Groups and the click on Create Security Group from the top right.
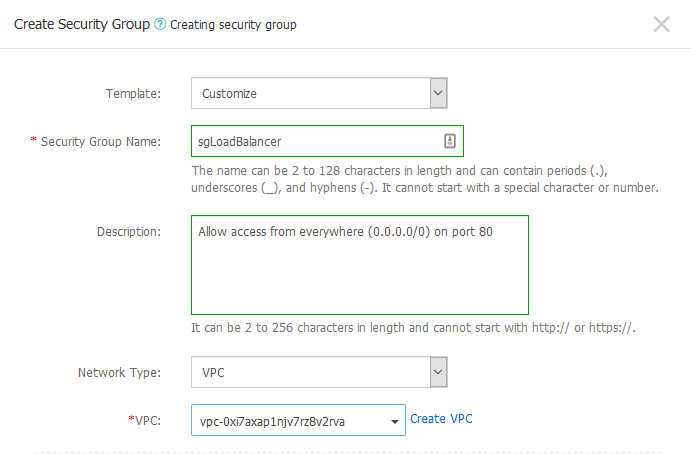
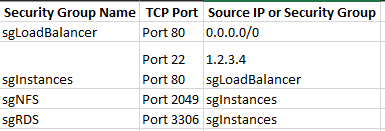
For the Load Balancer, we’ll need a security group that will allow port 80 from everywhere (0.0.0.0/0). For the two instances that will run Apache and PHP, we’ll allow port 22 only from specific addresses and port 80 allowed from the load balancer only. We don’t want the actual instances to be exposed on port 80 on the Internet. For the RDS instance, we’ll create a security group that allows port 3306 (MySQL) from the two instances only. Finally, for the NFS server, we’ll also allow access from the two instances only on port 2049 (TCP).
Here is an example of what I did for the first security group. I choose a custom template, named it sgLoadBalancer, added a description and chose my TestVPC.
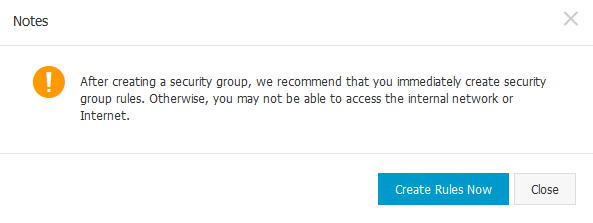
You can’t create the rules like you do in AWS, but once you create the security group, you’ll see a pop-up reminding you to create the rules. Click on Create Rules Now.
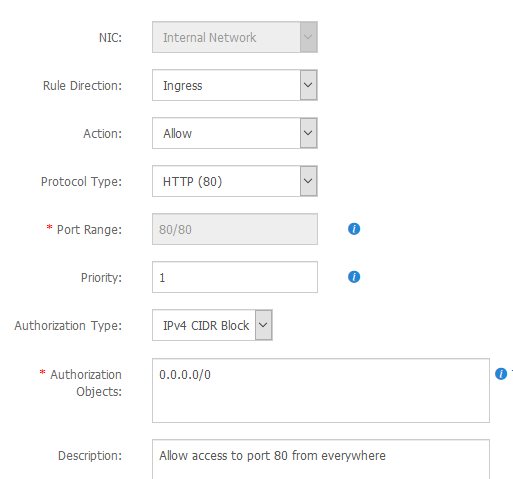
This is how my rule for HTTP traffic looks like.
Name the second security group sgInstances, but before you create the group copy the security group ID for the first group that you created.

When you add the rules for the 2nd security group for the instances, make sure that you change the Authorization Type parameter to Security Group instead of IPv4 CID Block. This way you can specify that another security group has access to a specific port, not an IP. We don’t know the IP of the load balancer and it probably changes from time to time.
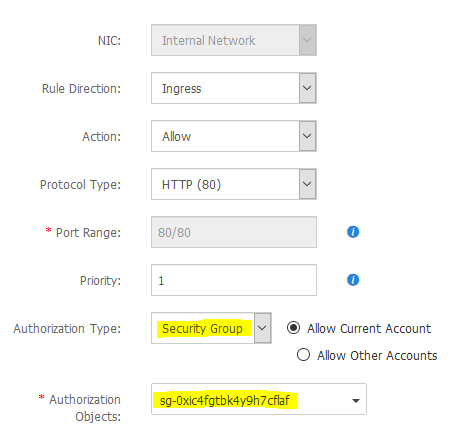
You have to create another rule for the instances. This time for the port 22. I chose to restrict port 22 to my home IP only. This is how those rules actually look like once created.
For the next two security group, copy the security group ID of the newly created group sgInstances.
Create two new security groups, sgRDS and sgNFS. For sgRDS allow port 3306 from the security group ID of sgInstances and for sgNFS allow port 2049 for the same security group ID of sgInstances.
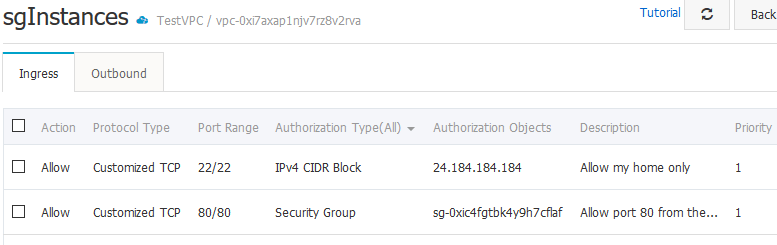
At the end you should have 4 security groups: sgLoadBalancer, sgInstances, sgRDS and sgNFS. These are the rules.
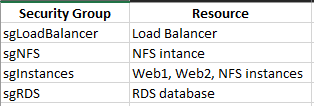
And these security groups should be assigned to these resources.
SSH Keys
Before we start provisioning the servers, let’s create a SSH key pair so we can access them. The menu for the creation of SSH keys is bellow Security Groups.
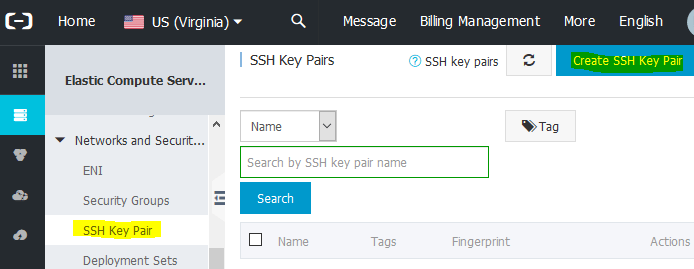
Click on Create SSH Key Pair in the top right corner. You can import or create your own key pair. I chose to create the key pair.
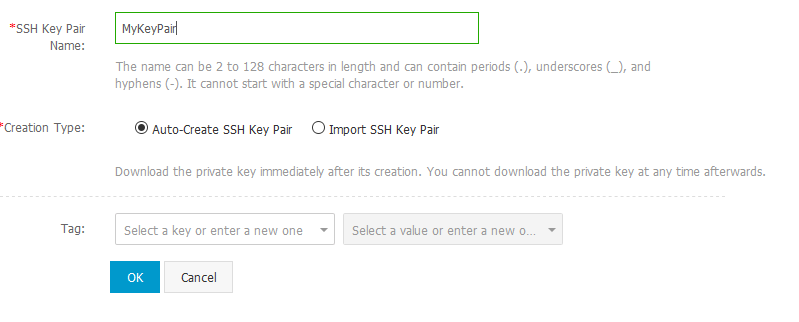
As a result you’ll get a certificate file (.pem). Keep this file somewhere safe. If you use putty to connect to your instances, you’ll have to convert this file to ppk using puttygen.
NFS instance
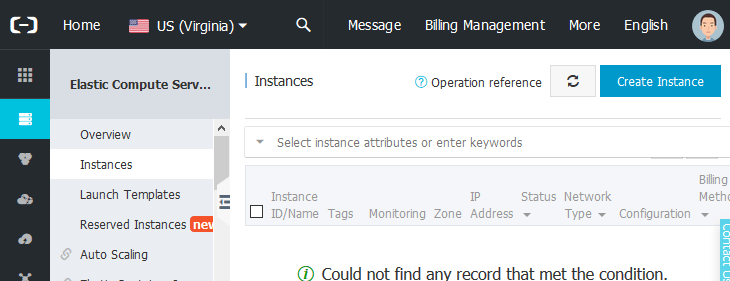
From the menu, go to Instances and then from the top right, click Create Instance.
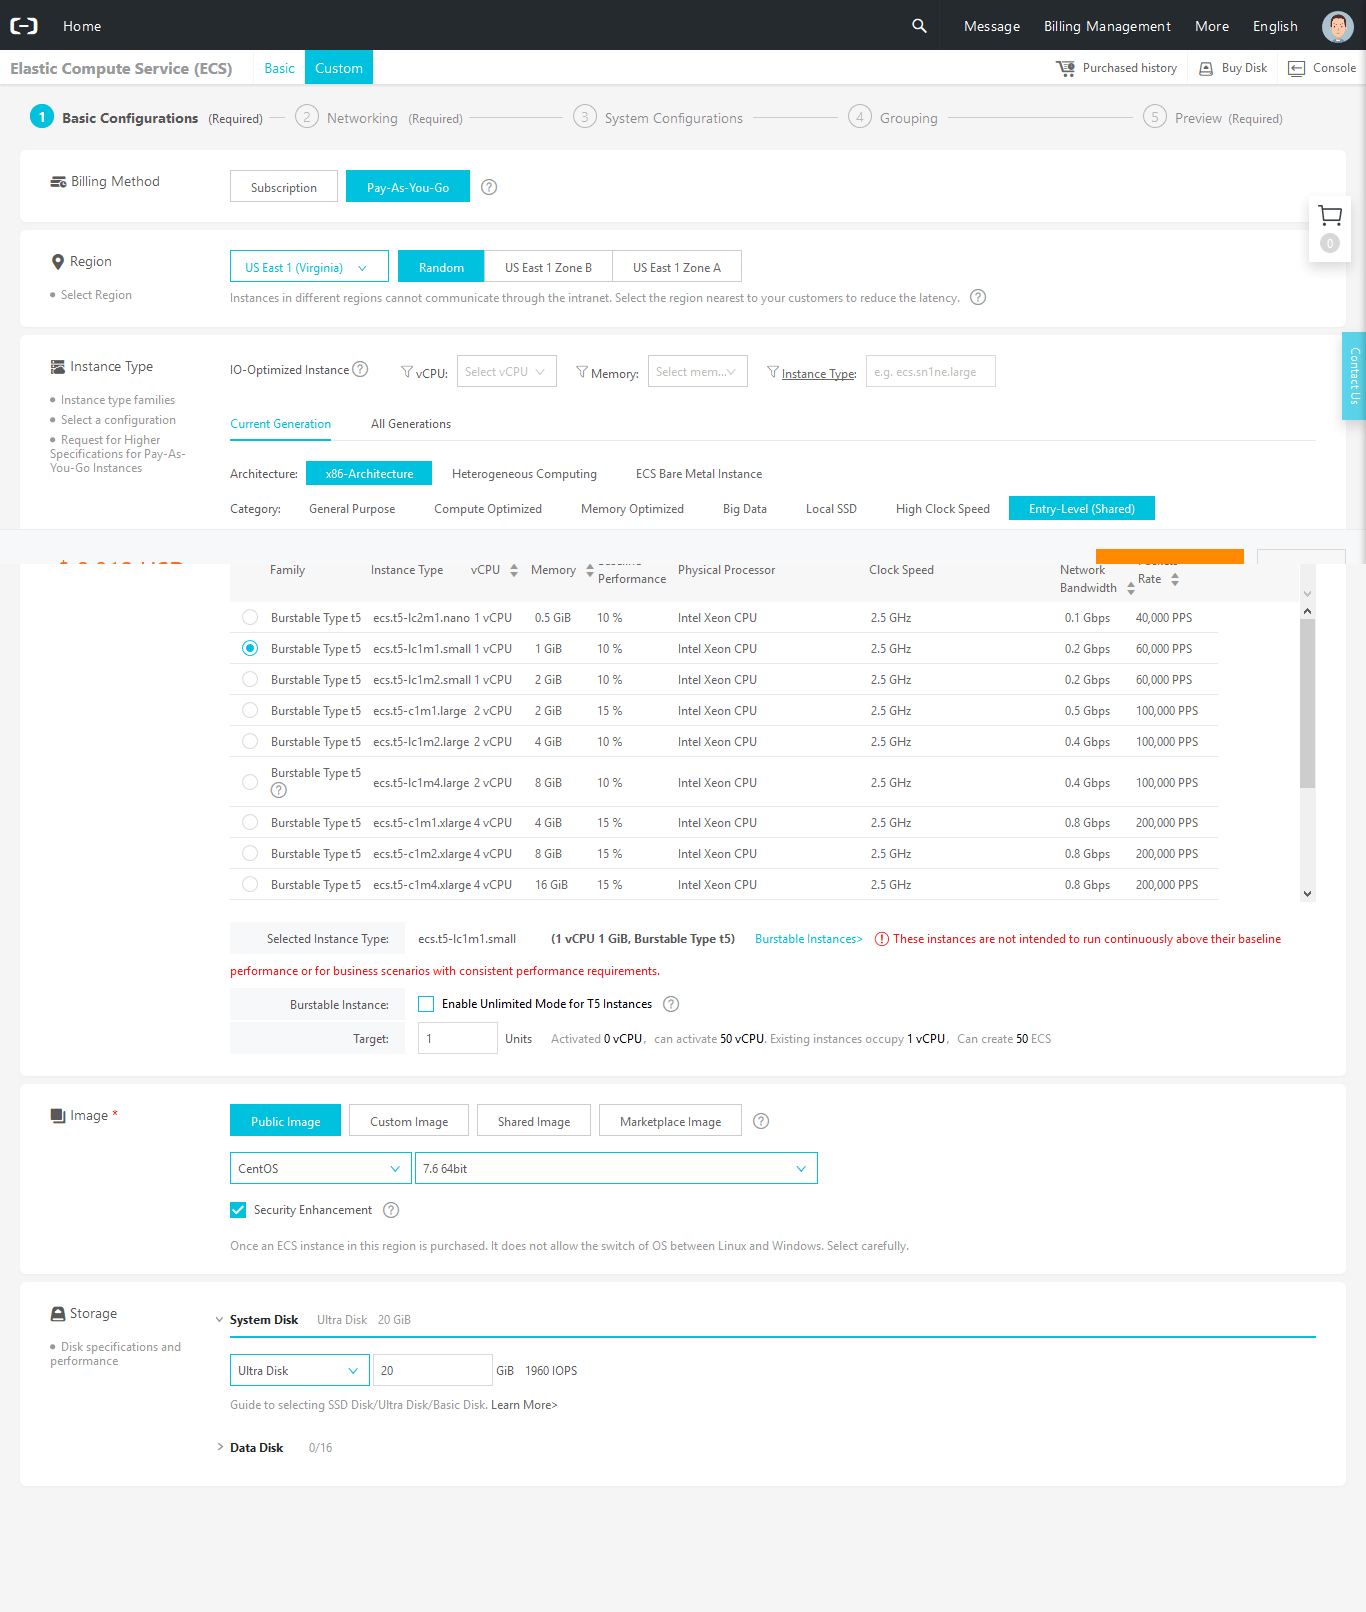
I am going with Pay-As-You-Go model and Random zone. Choose your instance type. The cheapest are under Entry-Level (Shared). I went with 1 CPU and 1GB RAM and 20GB disk on CentOS 7.6 x-64. Looks like 20GB is minimum, I couldn’t choose anything below 20GB for the disk. Click Next: Networking when you are done here.
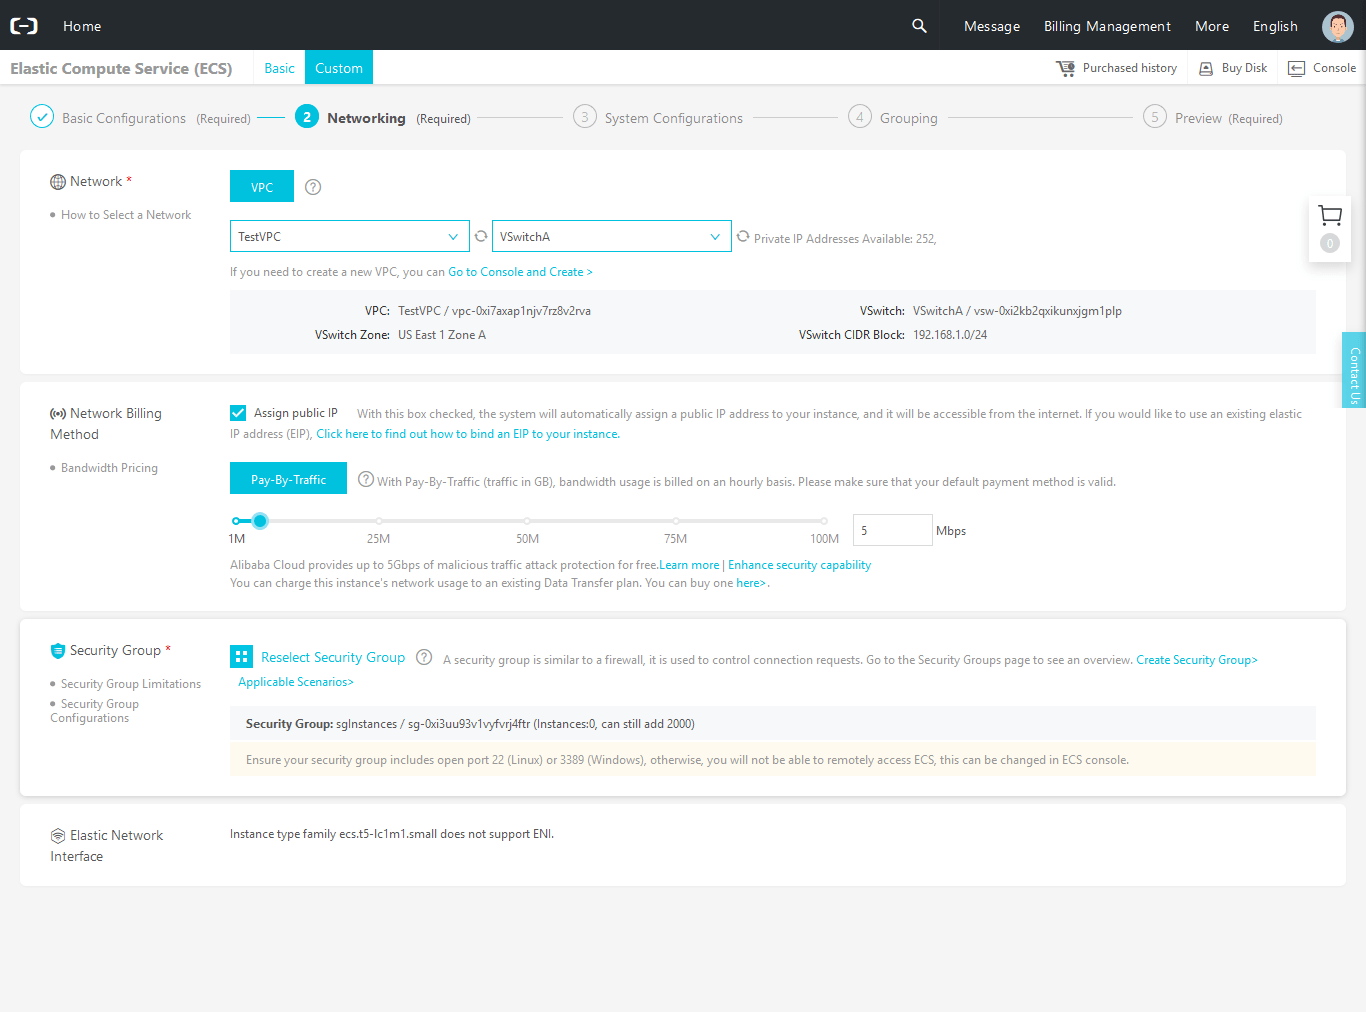
On the Networking screen, I have these settings. The defaults for the VPC and the zone, click to Assign public IP and click to select a security group. For some reason, I was able to select only one security group, so select sgInstances as a security group.
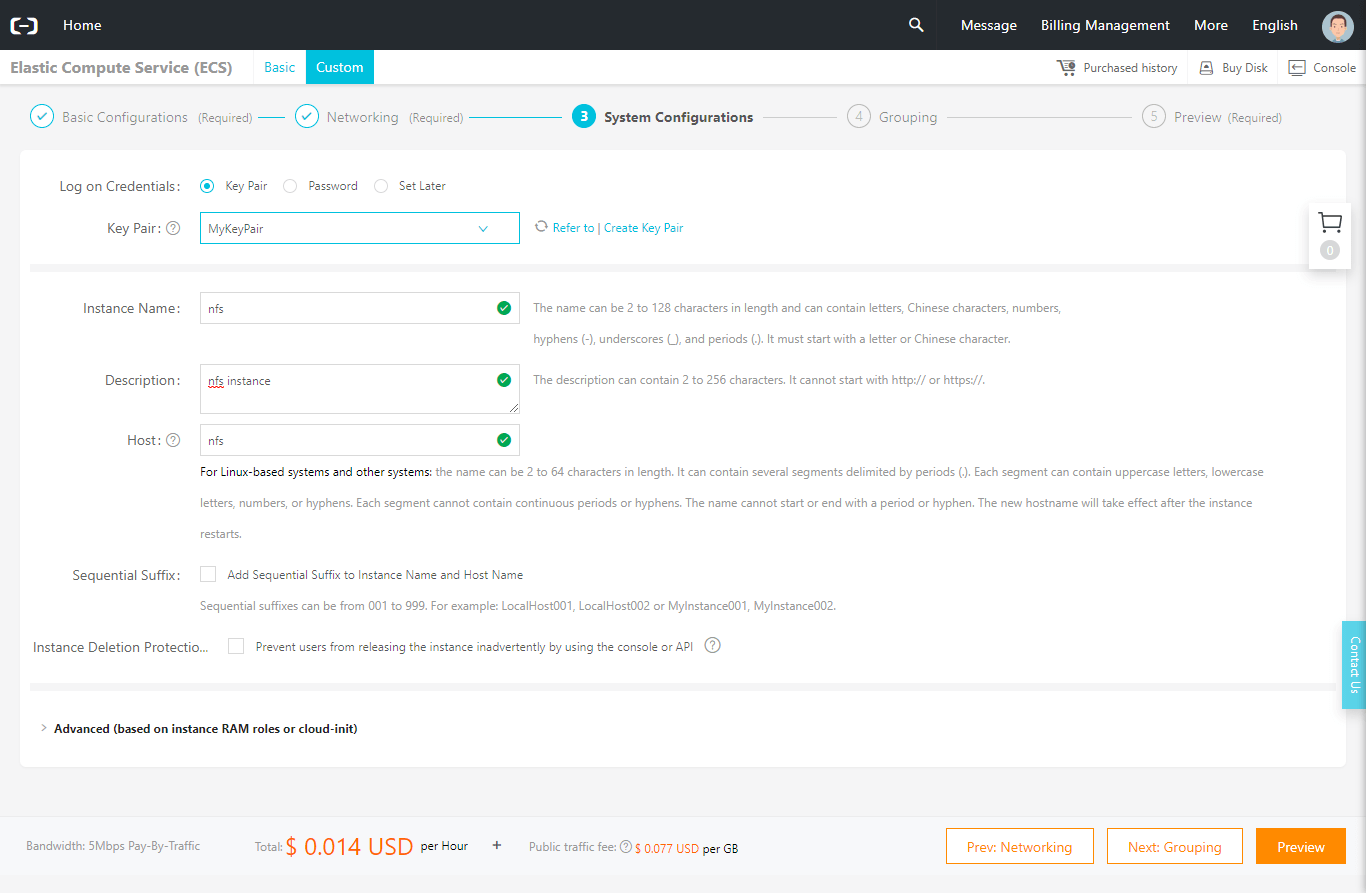
If you click next, you’ll see the System Configuration page. Specify the key that you’ve selected, name the instance so it shows up properly in the console, add a description if you want and enter the hostname (optional). From here, you can accept the default and next-through all the way to the end. Alibaba will create the instance for you in 1-3 minutes.
After the instance is create, go back to the Security Groups menu and find the sgNFS group. Click on Manage Instances.

From the top right, click on Add Instance and add the nfs instance. This way, we’ll have both sgInstances and sgNFS securty groups attached to the nfs server.
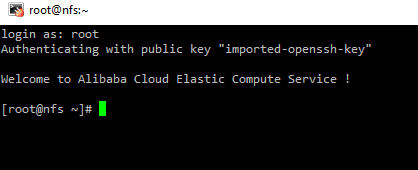
Go back to your instances and you’ll see the instance is up and running. SSH to its public IP and specify the SSH key to log in. Your username is root and the ppk file is your password.

Once you are in, you’ll be greeted with the Alibaba banner.
Now you are ready to install the NFS filesystem that will be used as a shared disk for both WordPress instances. I already have a small tutorial for this, so go to this link and do the server part. You can skip the part for the firewall (last two commands). The firewall is not enabled by default on Alibaba CentOS. SELinux is also disabled. Once you are done, we have to download WordPress and extract it under the nfs share. Then, we we build the webservers we’ll mount this directory and point our webserver there.
cd /nfs
wget https://www.wordpress.org/latest.tar.gz
tar xzvf latest.tar.gz --strip 1
RDS
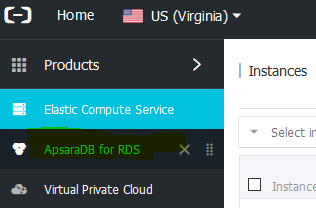
We’ll use the PaaS offering from Alibaba for our MySQL database. From the menu on the left, click AsparaDB for RDS.
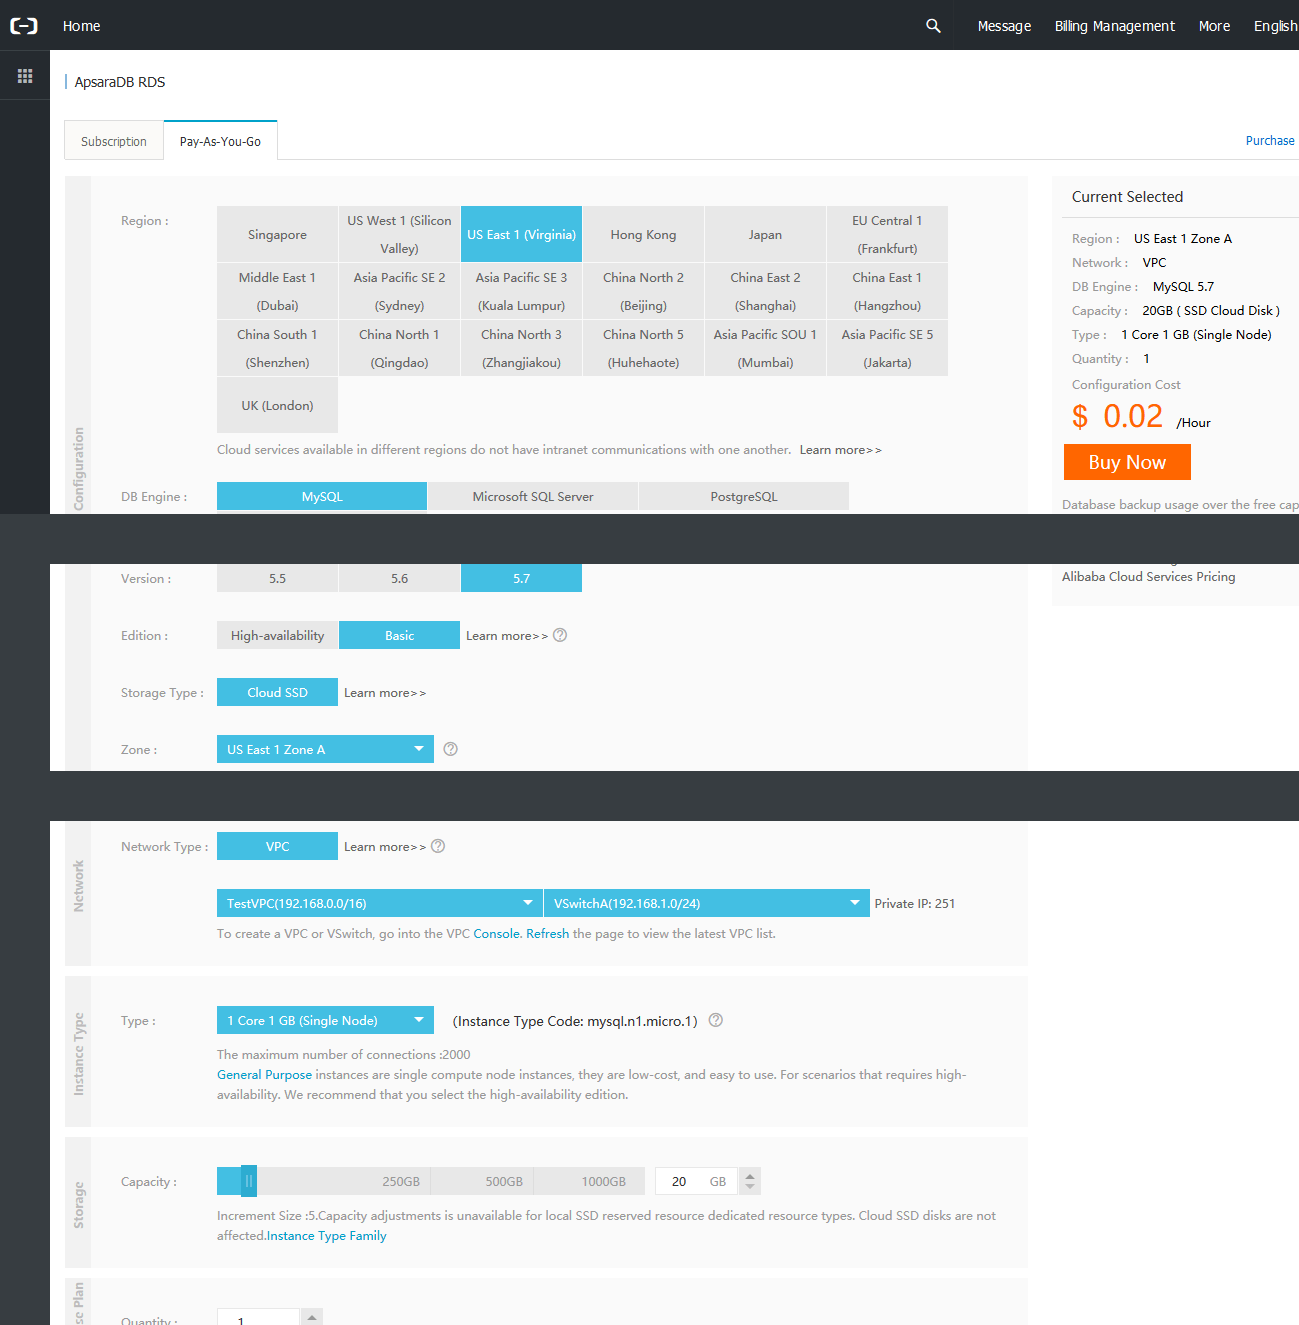
Click Create Instance in the top right corner. This is what I chose for my database. Make sure Pay-As-You-Go is selected and then choose the RDS instance in the same region as your other instances. The engine is MySQL 5.7 with no HA. I chose a small 1 CPU/1GB DB instance with 20GB storage.
Click Buy Now and then Pay Now when you are done. If you go to the console, you won’t see your database. Just wait for a minute or two and it will show up with a status of Creating. After 3-5 mins, once the status changes to Running, click on the database. Let’s assign a security group first. Click on Basic Infomation on the left and then click on Set Whitelist.

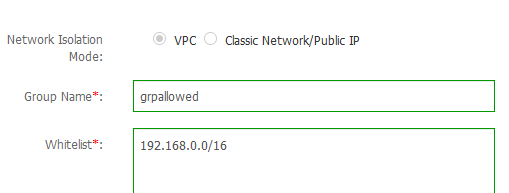
Look at the bottom right, where it says Add to Security Group. The names won’t show up, so get your security group ID for sgRDS from the Security Groups menu first. Unlike AWS, you can assign only one security group per DB instance. If you get an error that this operation is not supported, do not assign a security group. Just whitelist the VPC subnet. Click Add a Whitelist Group and add the VPC subnet 192.168.0.0/16.

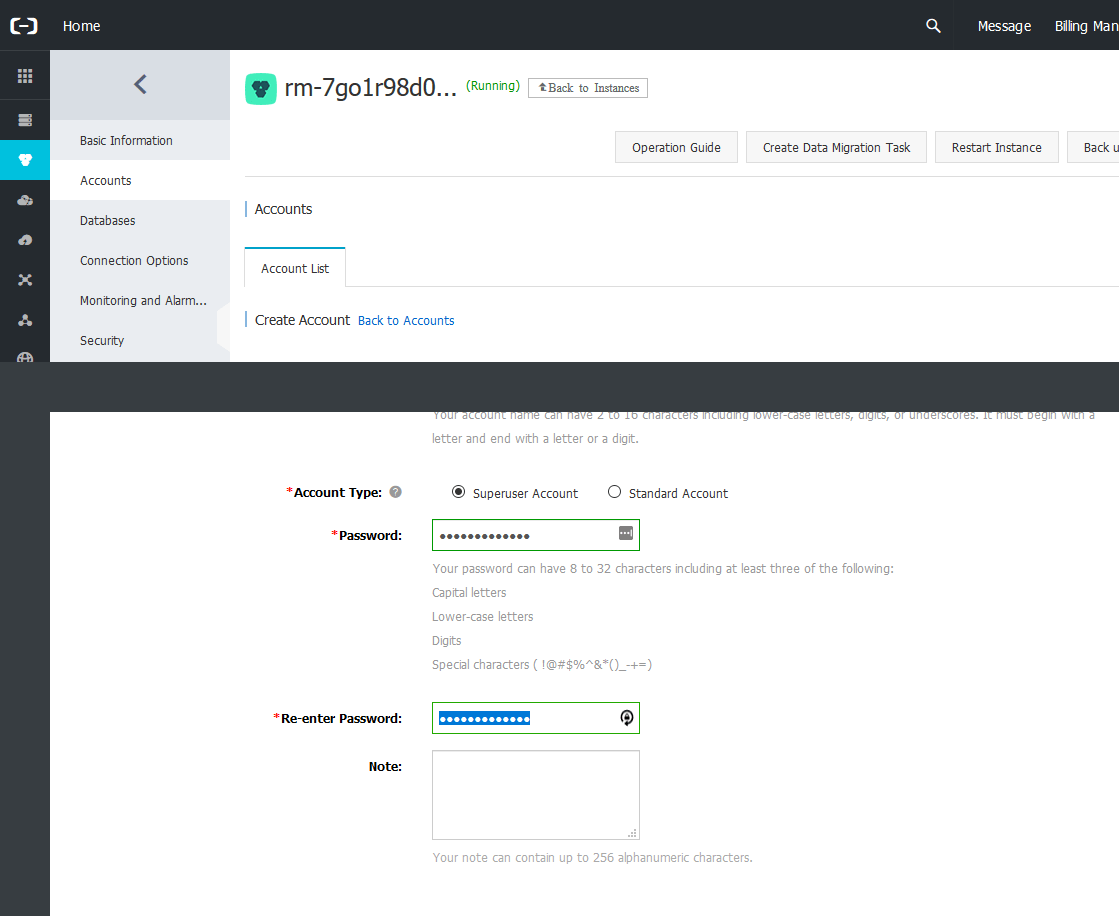
Now, go to the Accounts menu on the left and click Create Account on the right. I’ve created a superuser called dbmaster.
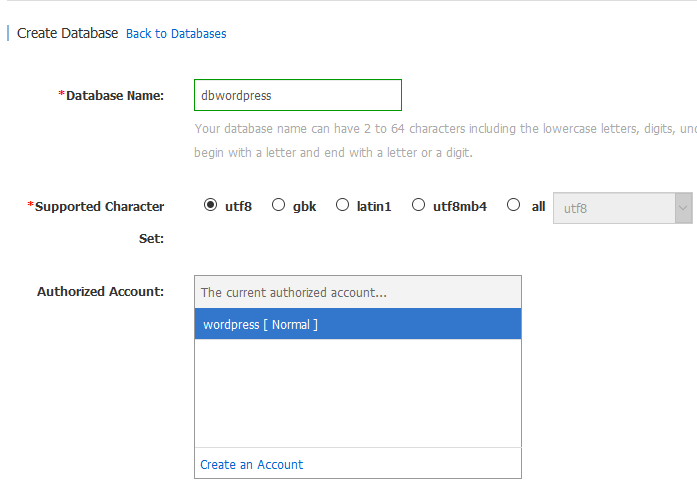
Again, go to Databases menu on the left and click Create Database on the right. Type the name of the database dbwordpress and click to create a new account. You’ll be back at the accounts menu. This time create a user called wordpress and make it a standard user. It’s kind of kludgy, but now you have to go back to the Databases menu, click Create Database again, fill the name dbwordpress again, but this time you can choose the account that you just created.
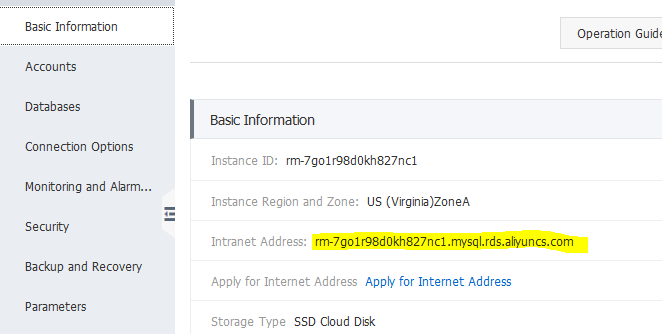
Finally, go to the Basic Information menu and choose the menu next to Intranet address. Here you have to create a whitelist group of IPs that can access the database. By default, only 127.0.0.1 is allowed. We have to enter our VPC CIDR.
Once you do that, you’ll see your RDS hostname.
WordPress instances
We’ll create two instances, install Apache + PHP, mount the NFS system and configure the web server. First, create two instances, each in a different zone. Use the section above for the NFS server. Name the servers web1 and web2 and assign the sgInstances security group to both of them. Make sure you choose Pay-As-You-Go model and assign public IPs so you can log in. And choose the SSH key pair that we created. Log to both of the instances.
First, mount the NFS system. Replace the IP with the IP of your NFS server in the mount command.
yum -y install nfs-utils
mount 192.168.1.91:/nfs /var/www/html
echo "192.168.1.91:/nfs       /var/www/html    nfs     defaults 0 0" >> /etc/fstab
chown -R apache:apache /var/www/html
Then, check if you can reach the RDS MySQL server. You should receive some garbage.
yum -y install telnet
telnet rm-2evrh4h3aq9tk800z.mysql.rds.aliyuncs.com 3306
Trying 172.16.1.41...
Connected to rm-2evrh4h3aq9tk800z.mysql.rds.aliyuncs.com.
Escape character is '^]'.
N
5.7.20-log▒F5;I!]:p]H3R[^mysql_native_password
Second, install Apache and all PHP modules on both servers. I’ll install PHP 5.4 because it’s already in the default repo. You should install PHP 7.x, it’s a little bit more work.
yum -y install httpd php php-common php-mysql php-gd php-xml php-mbstring php-mcrypt
systemctl enable httpd
systemctl start httpd
Now, we have to configure the Apache server. It’s a simple change in /etc/httpd/conf/httpd.conf file. You’ll probably want to use virtual hosts, but in interest of keeping this short, I’ll use a single site config. Find the directive that says #ServerName www.example.com:80 and remove the comment.
sed -i '/ServerName www/s/^#//g' /etc/httpd/conf/httpd.conf
Load Balancer
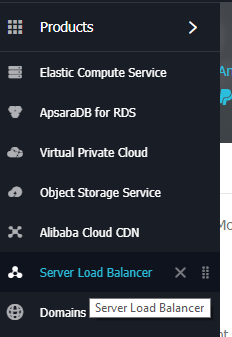
From the menu on the left, click on Server Load Balancer.
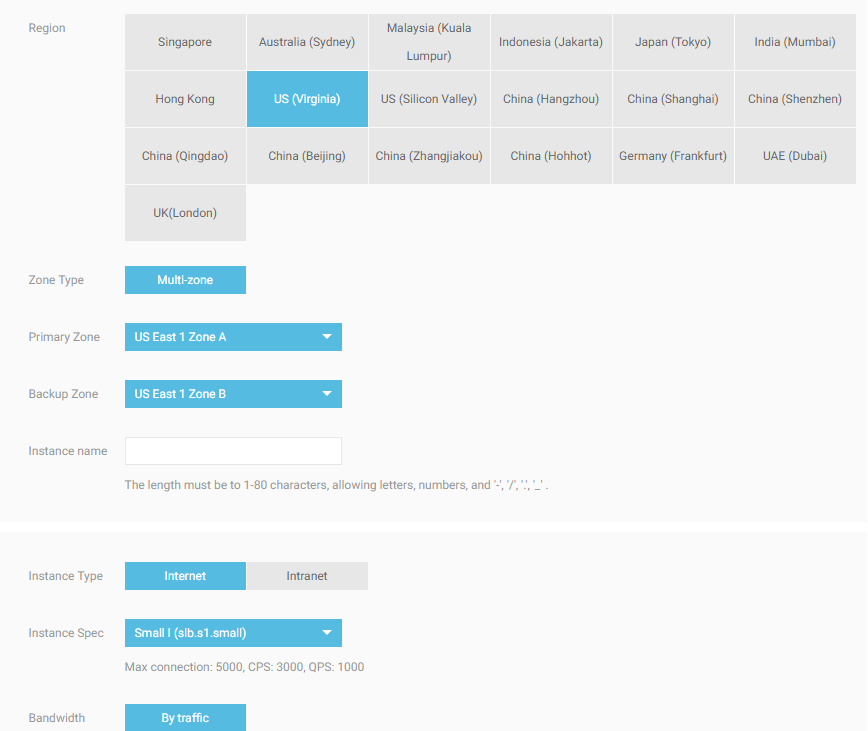
Once the screen shows up, click on Create SLB Instance. Then choose the specs. Make sure it is in the same region with your instances and in the same zones (VSWitches). Name the load balancer too, e.g. lbWordPress.
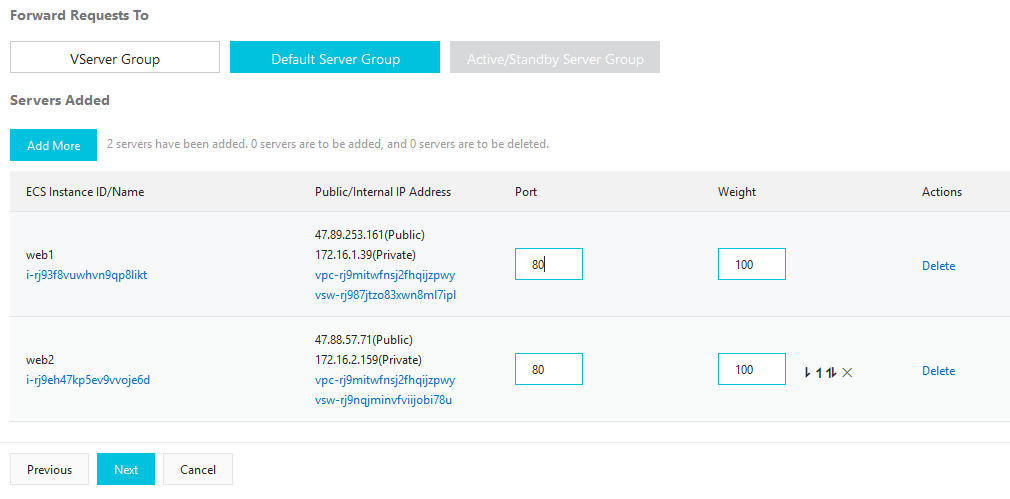
Once it’s ready, click on Add Backend Servers.

From the list of the available servers, choose web1 and web2 in the Default Server Group.

Click on Next: Set Weight and Port button and click OK to accept the defaults. Go back to the load balancer and this time click Configure Listener (above Add Backend Servers).

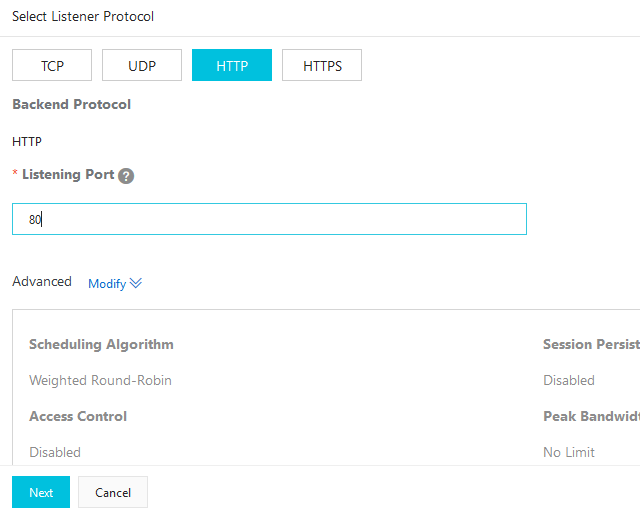
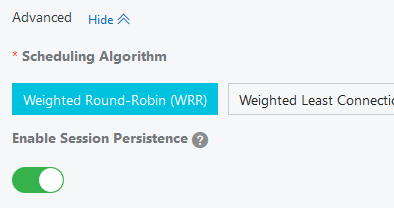
Choose HTTP traffic, port 80, click Modify next to Advanced and Enable Session Persistence. Click Next.
On this screen click on Default Server Group, type port 80 for the servers and click Next. You can accept the defaults in the next screen or make a change if you like.
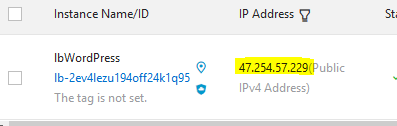
Open a browser and go to your load balancer IP. It might take up a minute for the LB to configure so be patient if your browser is just sitting there.
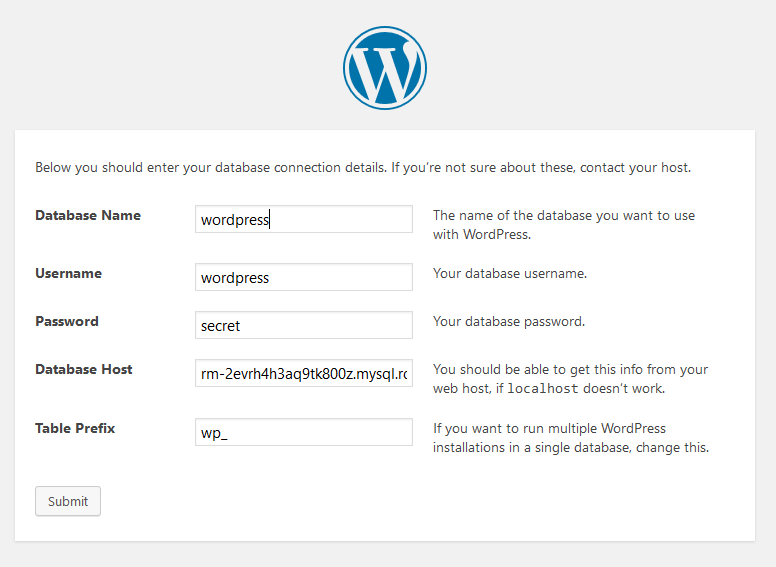
If you used my username and database names, fill out the config page like this.
…and pretty much that’s it.