
In this post I’ll show how to install Atlassian Jira on FreeBSD. This is just a proof of concept. I wouldn’t recommend running this in production as it’s not supported. I would also recommend to have a dedicated FreeBSD server for this. There are a lot of non-standard changes in order this to work.
Jira runs on Java and OpenJDK is not supported, so we’ll have to use Oracle Java on FreeBSD and according to the port maintainers, this is not a stable port. These are the prerequisites.
- FreeBSD 10.3 or greater
- Atlassian Jira 7.2.4
- Oracle JRE 8u112
- MySQL-Connector for Java 5.1.40
Table of Contents
Download
None of the software can be downloaded directly using fetch or wget, so you’ll have to use some GUI browser to accept the terms of use and download. I’ll put my software under /tmp.
Java
Go to this website and download the version highlighted.You have to accept the license agreement first.

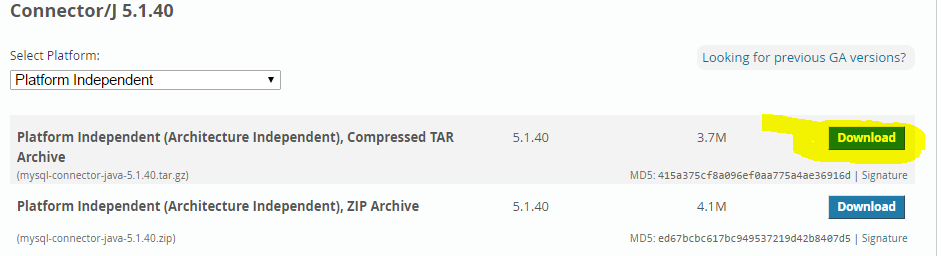
Java JDBC connector for MySQL
Go to this web site and download the version highlighted.
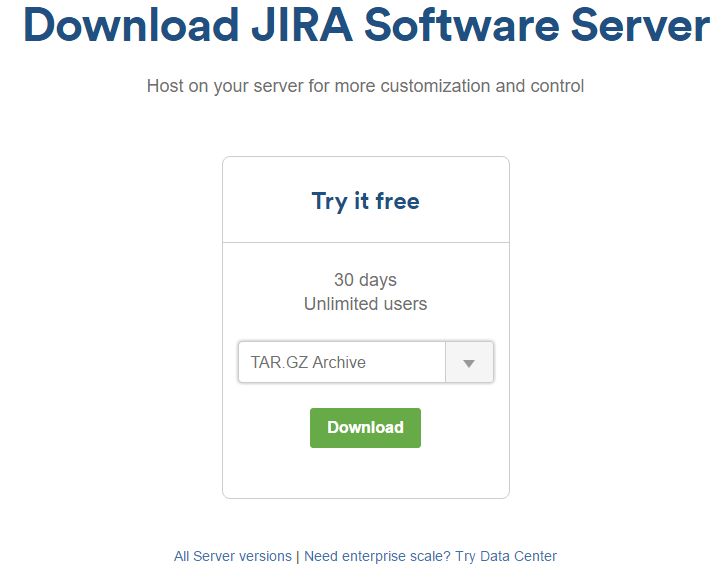
Atlassian Jira
Go to this web site and download the generic tarball.
This is what I have under /tmp
ls -l *.tar.gz
root@ip-172-31-18-146:/tmp # ls -l *.tar.gz
-rw-r--r--  1 ec2-user  ec2-user  264894180 Dec  3 00:48 atlassian-jira-software-7.2.4.tar.gz
-rw-r--r--  1 ec2-user  ec2-user   76262744 Dec  3 00:23 jre-8u112-linux-i586.tar.gz
-rw-r--r--  1 ec2-user  ec2-user    3911557 Dec  3 00:01 mysql-connector-java-5.1.40.tar.gz
Enable Linux compatibility
I’ll use the 64-bit Linux kernel module and I need FreeBSD 10.3 for that. You can use the 32-bit if you want and any version of FreeBSD if you want. Instead of linux64, use linux.
kldload linux64
Check if the module loaded correctly.
kldstat
You should see something like this.
2 1 0xffffffff81c11000 382bd linux64.ko
Execute these three lines.
printf "compat.linux.osrelease=2.6.18\n" >> /etc/sysctl.conf
sysctl compat.linux.osrelease=2.6.18
pkg install –y linux_base-c6
Then edit /etc/rc.conf and enable the Linux module to start on each boot.
linux_enable="YES"
Java, bash and Linux module require some special file systems, so edit /etc/fstab and add these lines.
linprocfs   /compat/linux/proc   linprocfs   rw   0  0
tmpfs    /compat/linux/dev/shm  tmpfs   rw,mode=1777    0       0
fdesc   /dev/fd         fdescfs         rw      0       0
Finally install bash, create a symbolic link and reboot.
pkg install –y bash
cd /bin
ln -s /usr/local/bin/bash
reboot
Install Java from ports
cd to /usr/ports. If you don’t have the ports installed, do portsnap fetch && portsnap extract first.
cd /usr/ports
If it fails do
portsnap fetch && portsnap extract
Create the /usr/ports/distfiles if you don’t have that folder.
mkdir /usr/ports/distfiles
cd /usr/ports/distfiles
Copy the Java tarball from the /tmp directory and install Java
cp /tmp/jre-8u112-linux-i586.tar.gz .
cd /usr/ports/java/linux-oracle-jre18
make all install clean
You’ll see this warning
Warning: This JRE may be unstable. You are advised to use the native
FreeBSD 1.8 JDK, in ports/java/openjdk8.
As I said earlier, Jira does not support OpenJDK.
Add user
You don’t want to run Jira as root, so we’ll create an user for that.
Type adduser and accept the defaults for everything except the lines below.
adduser
Username: jirauser
Full Name: Atlassian Jira
Shell: bash
Enter password:
Re-enter password:
OK? Yes
Add another user? no
Now log as the jirauser
su - jirauser
Edit the .profile file, uncomment the PATH directive and add the bin directory for Jira. In addition, create two variables for JAVA_HOME and JIRA_HOME. My .profile looks like this.
PATH=/sbin:/bin:/usr/sbin:/usr/bin:/usr/games:/usr/local/sbin:/usr/local/bin:$HOME/bin:/usr/local/linux-oracle-jre1.8.0/bin; export PATH
# BLOCKSIZE=K;  export BLOCKSIZE

JAVA_HOME=/usr/local/linux-oracle-jre1.8.0; export JAVA_HOME
JIRA_HOME=/usr/local/etc/jirasoftware-home; export JIRA_HOME
Once completed, exit from the jirauser session by typing exit. You should be back as root.
As root execute these commands to create the directory for Jira, copy the tarball there, extract the tarball, delete it and own the directory structure by the jirauser.
cd /usr/local
mkdir jirasoftware && cd jirasoftware
cp /tmp/atlassian-jira-software-7.2.4.tar.gz .
tar xzvf atlassian-jira-software-7.2.4.tar.gz
rm atlassian-jira-software-7.2.4.tar.gz
chown -R jirauser:jirauser atlassian-jira-software-7.2.4-standalone/
chmod -R u=rwx,go-rwx atlassian-jira-software-7.2.4-standalone/
Create another directory for Jira, this is where some settings are stored.
cd /usr/local/etc
mkdir jirasoftware-home
chown -R jirauser /usr/local/etc/jirasoftware-home
chmod -R u=rwx,go-rwx /usr/local/etc/jirasoftware-home
MySQL
Install MySQL by executing
pkg install -y mysql56-server
Edit /etc/rc.conf and add this line.
mysql_enable="YES"
Start the MySQL service.
service mysql-server start
Then do some initial configurations for the root password.
mysql_secure_installation
Accept the defaults for everything except when you change your root password (for the DB sys owner, not the OS root password).
Then create the database for Jira.
mysql –u root –p
Enter the MySQL root password and execute these commands under mysql prompt.
create database jiradb character set utf8 collate utf8_bin;
GRANT SELECT,INSERT,UPDATE,DELETE,CREATE,DROP,ALTER,INDEX on jiradb.* TO 'jirauser'@'localhost' IDENTIFIED BY 'yourjirapassword';
flush privileges;
exit
Log to MySQL as the jirauser database user.
mysql -u jirauser -p
Type this.
SHOW GRANTS FOR jirauser@localhost;
exit
You should see the same result as the grant command above. Log back to MySQL as root.
mysql -u root -p
Type this.
show variables like 'default_storage_engine'; //DO NOT TYPE THIS: InnoDB is OK
show variables like 'max_allowed_packet'; //DO NOT TYPE THIS: 4194304 is default
show variables like 'innodb_log_file_size';  //DO NOT TYPE THIS: 50331648 is default
show variables like 'sql_mode'; //DO NOT TYPE THIS: STRICT_TRANS_TABLES,NO_ENGINE_SUBSTITUTION  is default
exit
Jira requires different values for max_allowed_packet and innodb_log_file_size, so we’ll change that.
Edit /usr/local/my.cnf and add these two lines at the end.
max_allowed_packet=256M
innodb_log_file_size=2G
Restart MySQL with
service mysql-server restart
JDBC connector
We’ll have to extract the tarball first.
cd /tmp
tar xzvf mysql-connector-java-5.1.40.tar.gz
Then copy the jar archive to the lib folder under Jira.
cd /usr/local/jirasoftware/atlassian-jira-software-7.2.4-standalone/lib
cp /tmp/mysql-connector-java-5.1.40/mysql-connector-java-5.1.40-bin.jar .
chown jirauser:jirauser mysql-connector-java-5.1.40-bin.jar
Start Jira
Log as jirauser with su – jirauser and then start Jira.
cd /usr/local/jirasoftware/atlassian-jira-software-7.2.4-standalone/bin
./start-jira.sh
It’s gonna tell you something like Server startup logs are located in /usr/local/jirasoftware/atlassian-jira-software-7.2.4-standalone/logs/catalina.out
In a browser go to : http://yourserver:8080
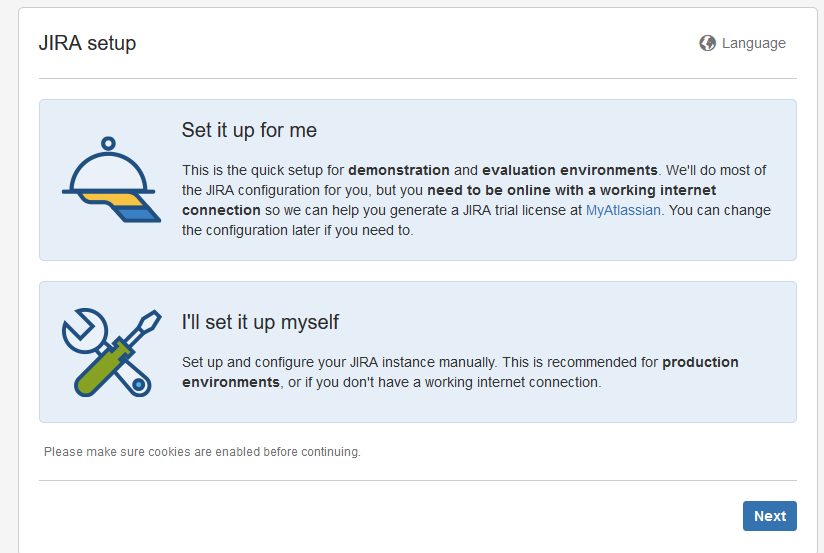
Choose the second option “I’ll set it up myself”
Fill up the form with the values that you’ve specified when you created the database.
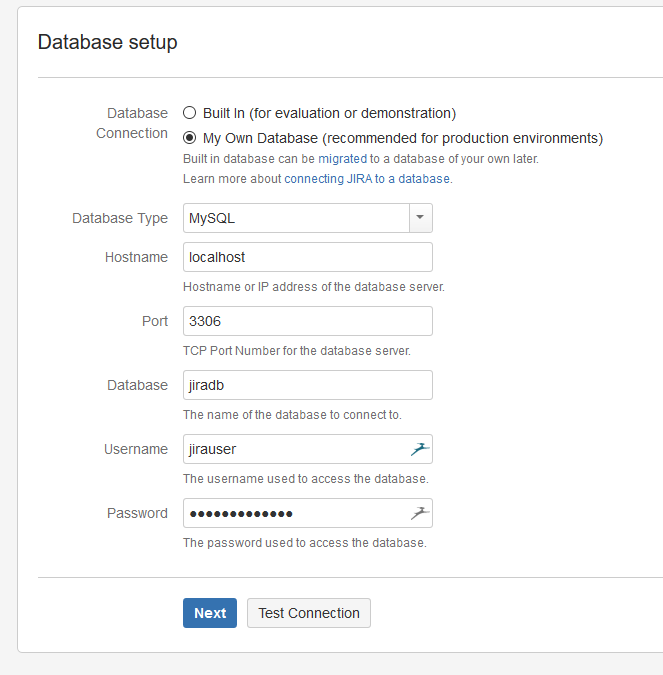
Click on Test Connection and make sure it says it’s OK.

Once the DB connections is OK, click Next. You’ll see a lot of activity in the catalina.out log file.

After 2-5 mins, you’ll see this screen. Fill up the form to suit your needs.

Jira requires a license key. I don’t have one so I’ll generate a trial one. Click on the link where it says “generate a JIRA trial license”. You’ll be redirected to their site. Create an account or you can use a Google account.
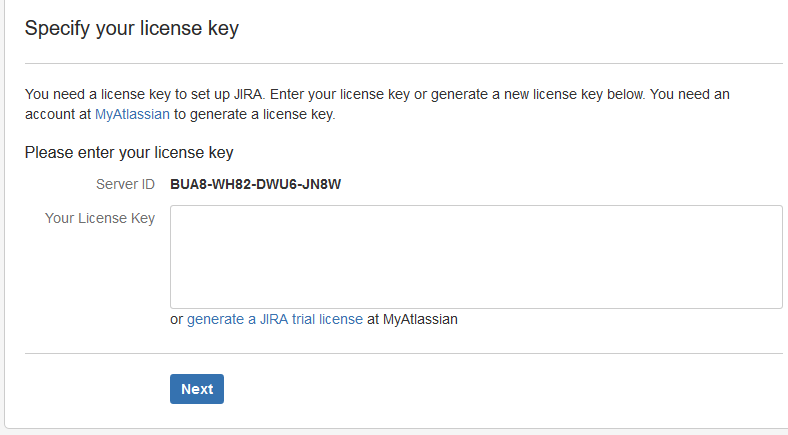
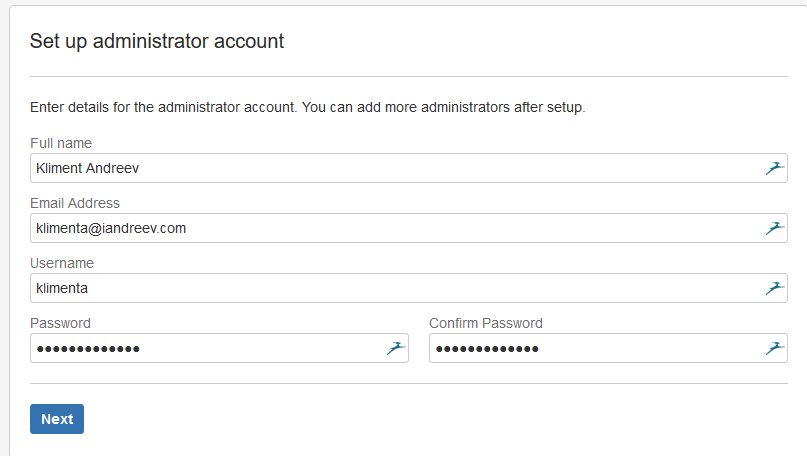
Once you generate a trial license key, you’ll see the license in the license text box. Click Nex to setup the admin account.
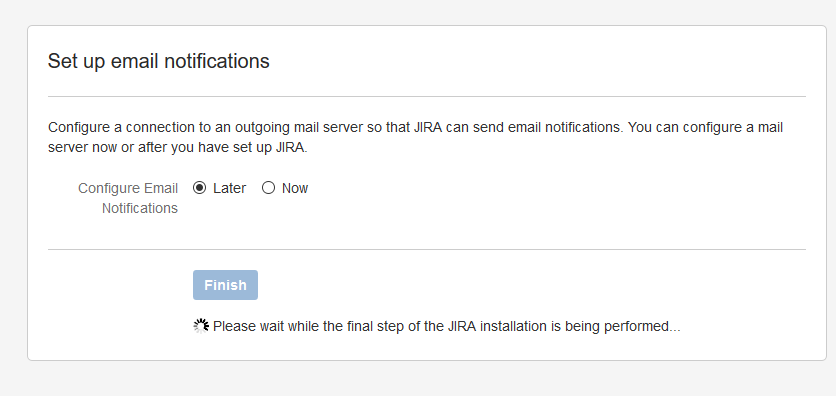
I am not interested in the e-mail notifications at this time, so I’ll choose “Later”.
A couple of some more questions…

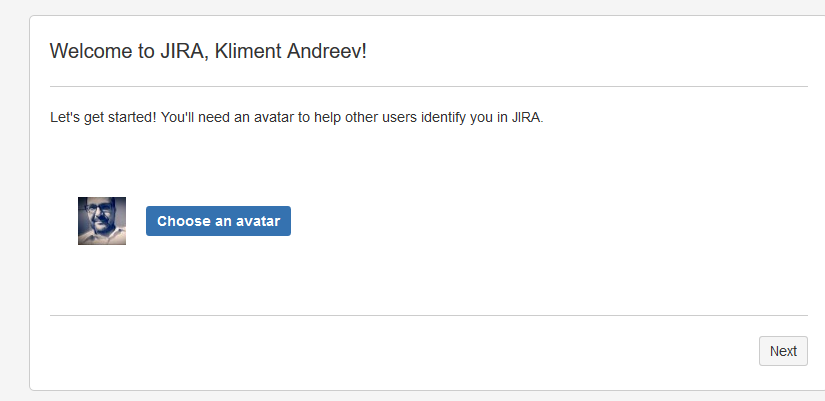
And you are all set!
4 comments
Thanks a lot for such detailed instruction! However I have some updates if you don’t mind :)
First of all when I’ve used kldload linux64 I’ve got following error:
ELF binary type “0” not known.
exec: /usr/local/linux-oracle-jre1.8.0/bin/java: Exec format error
My environment is:
1) FreeBSD x64 11.1
2) Jira 7.5.1
3) JRE 8u152 (x86)
4) MySQL Connector Java 5.1.44
So I’ve used ‘kldload linux’ instead. But then I’ve got error:
/usr/local/linux-oracle-jre1.8.0/bin/java: error while loading shared libraries: libjli.so: cannot open shared object file: No such file or directory
One way to fix it is to make symlink: ln -s /usr/local/YOUR_JRE_DIRECTORY/lib/i386/jli /compat/linux/usr/lib
Really great instllation guide! Found another one, here are pros and cons of using Jira cloud vs Jira server (on-premises) and the work scope for Jira server installation: https://polontech.com/atlassian-consulting-support/jira-consulting/jira-installation/
Awesome article. I’m just curious, now that Atlassian are moving to OpenJDK, could the standard OpenJDK pkg (specically java/openjdk11) could now be used with FreeBSD. Seems do-able based off Atlassian’s article: https://community.atlassian.com/t5/Agile-articles/Java-11-OpenJDK-support-update-for-Server-and-Data-Center/ba-p/967836
I’ve never tested it, but I don’t see why it wouldn’t work.