
In this post I’ll describe how to install and configure a streaming radio station with two separate streams. This means, you can have two or multiple radio stations running on the same port. For this, you’ll need a FreeBSD 10 server and some Ogg Vorbis music files. MP3 is not supported with ices2 client (licensing issues), but it’s easy to overcome that.
Before going any further, this is what you need to know.
- icecast is the streaming server
- ices is the client that supplies the music files to icecast
- you are the listener, not a client
Install icecast
icecast can be easily installed from the packages or the ports. There is no need for any configurations, so we’ll do the packages.
pkg install icecast2
icecast comes up with a startup script, so we have to enable it on boot. Add the following line to /etc/rc.conf.
icecast_enable="yes"
icecast also comes up with a sample config script, so let’s modify it. The configuration parameters are described in the official document and this post will highlight only the necessary changes that you have to make.
cd /usr/local/etc/
cp icecast.xml.sample icecast.xml
Change the location, the admin email, change the passwords for source-password, relay-password and admin-password under authentication. It’s a good practice to change the default admin user as well. In addition, change the log directory under logdir and uncomment the user and the group that will run icecast daemon.
This is how my icecast.xml looks like.
<icecast>
<!-- location and admin are two arbitrary strings that are e.g. visible
on the server info page of the icecast web interface
(server_version.xsl). -->
<location>NJ</location>
<admin>[email protected]</admin>
<limits>
<clients>10</clients>
<sources>2</sources>
<threadpool>5</threadpool>
<queue-size>524288</queue-size>
<client-timeout>30</client-timeout>
<header-timeout>15</header-timeout>
<source-timeout>10</source-timeout>
<!-- If enabled, this will provide a burst of data when a client
first connects, thereby significantly reducing the startup
time for listeners that do substantial buffering. However,
it also significantly increases latency between the source
client and listening client. For low-latency setups, you
might want to disable this. -->
<burst-on-connect>1</burst-on-connect>
<!-- same as burst-on-connect, but this allows for being more
specific on how much to burst. Most people won't need to
change from the default 64k. Applies to all mountpoints -->
<burst-size>65535</burst-size>
</limits>
<authentication>
<!-- Sources log in with username 'source' -->
<source-password>password1</source-password>
<!-- Relays log in username 'relay' -->
<relay-password>password2</relay-password>
<!-- Admin logs in with the username given below -->
<admin-user>username</admin-user>
<admin-password>password3</admin-password>
</authentication>
<!-- set the mountpoint for a shoutcast source to use, the default if not
specified is /stream but you can change it here if an alternative is
wanted or an extension is required
<shoutcast-mount>/live.nsv</shoutcast-mount>
-->
<!-- Uncomment this if you want directory listings -->
<!--
<directory>
<yp-url-timeout>15</yp-url-timeout>
<yp-url>http://dir.xiph.org/cgi-bin/yp-cgi</yp-url>
</directory>
-->
<!-- This is the hostname other people will use to connect to your server.
It affects mainly the urls generated by Icecast for playlists and yp
listings. -->
<hostname>localhost</hostname>
<!-- You may have multiple <listener> elements -->
<listen-socket>
<port>8000</port>
<!-- <bind-address>127.0.0.1</bind-address> -->
<!-- <shoutcast-mount>/stream</shoutcast-mount> -->
</listen-socket>
<!--
<listen-socket>
<port>8001</port>
</listen-socket>
-->
<!--<master-server>127.0.0.1</master-server>-->
<!--<master-server-port>8001</master-server-port>-->
<!--<master-update-interval>120</master-update-interval>-->
<!--<master-password>hackme</master-password>-->
<!-- setting this makes all relays on-demand unless overridden, this is
useful for master relays which do not have <relay> definitions here.
The default is 0 -->
<!--<relays-on-demand>1</relays-on-demand>-->
<!--
<relay>
<server>127.0.0.1</server>
<port>8001</port>
<mount>/example.ogg</mount>
<local-mount>/different.ogg</local-mount>
<on-demand>0</on-demand>
<relay-shoutcast-metadata>0</relay-shoutcast-metadata>
</relay>
-->
<!-- Only define a <mount> section if you want to use advanced options,
like alternative usernames or passwords
<mount>
<mount-name>/example-complex.ogg</mount-name>
<username>othersource</username>
<password>hackmemore</password>
<max-listeners>1</max-listeners>
<dump-file>/tmp/dump-example1.ogg</dump-file>
<burst-size>65536</burst-size>
<fallback-mount>/example2.ogg</fallback-mount>
<fallback-override>1</fallback-override>
<fallback-when-full>1</fallback-when-full>
<intro>/example_intro.ogg</intro>
<hidden>1</hidden>
<no-yp>1</no-yp>
<authentication type="htpasswd">
<option name="filename" value="myauth"/>
<option name="allow_duplicate_users" value="0"/>
</authentication>
<on-connect>/home/icecast/bin/stream-start</on-connect>
<on-disconnect>/home/icecast/bin/stream-stop</on-disconnect>
</mount>
<mount>
<mount-name>/auth_example.ogg</mount-name>
<authentication type="url">
<option name="mount_add" value="http://myauthserver.net/notify_mount.php"/>
<option name="mount_remove" value="http://myauthserver.net/notify_mount.php"/>
<option name="listener_add" value="http://myauthserver.net/notify_listener.php"/>
<option name="listener_remove" value="http://myauthserver.net/notify_listener.php"/>
<option name="headers" value="x-pragma,x-token"/>
<option name="header_prefix" value="ClientHeader."/>
</authentication>
</mount>
-->
<fileserve>1</fileserve>
<paths>
<!-- basedir is only used if chroot is enabled -->
<basedir>/usr/local/share/icecast</basedir>
<!-- Note that if <chroot> is turned on below, these paths must both
be relative to the new root, not the original root -->
<logdir>/var/log/icecast</logdir>
<webroot>/usr/local/share/icecast/web</webroot>
<adminroot>/usr/local/share/icecast/admin</adminroot>
<!-- <pidfile>/usr/local/share/icecast/icecast.pid</pidfile> -->
<!-- Aliases: treat requests for 'source' path as being for 'dest' path
May be made specific to a port or bound address using the "port"
and "bind-address" attributes.
-->
<!--
<alias source="/foo" destination="/bar"/>
-->
<!-- Aliases: can also be used for simple redirections as well,
this example will redirect all requests for http://server:port/ to
the status page
-->
<alias source="/" destination="/status.xsl"/>
</paths>
<logging>
<accesslog>access.log</accesslog>
<errorlog>error.log</errorlog>
<!-- <playlistlog>playlist.log</playlistlog> -->
<loglevel>3</loglevel> <!-- 4 Debug, 3 Info, 2 Warn, 1 Error -->
<logsize>10000</logsize> <!-- Max size of a logfile -->
<!-- If logarchive is enabled (1), then when logsize is reached
the logfile will be moved to [error|access|playlist].log.DATESTAMP,
otherwise it will be moved to [error|access|playlist].log.old.
Default is non-archive mode (i.e. overwrite)
-->
<!-- <logarchive>1</logarchive> -->
</logging>
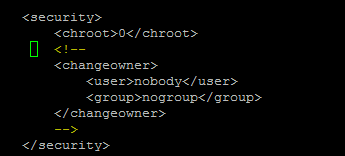
<security>
<chroot>0</chroot>
<changeowner>
<user>nobody</user>
<group>nogroup</group>
</changeowner>
</security>
</icecast>
Create the log directory and change the ownership.
mkdir /var/log/icecast
chown -R nobody:nogroup /var/log/icecast
Start the icecast and check the log file.
service icecast2 start
tail /var/log/icecast/error.log
If everything is OK you’ll see something like this.
[2014-09-13  23:34:13] INFO main/main Icecast 2.4.0 server started
[2014-09-13  23:34:13] INFO connection/get_ssl_certificate No SSL capability on any configured ports
[2014-09-13  23:34:13] INFO yp/yp_update_thread YP update thread started
Go to http://yourserver.com:8000 and you should see this.
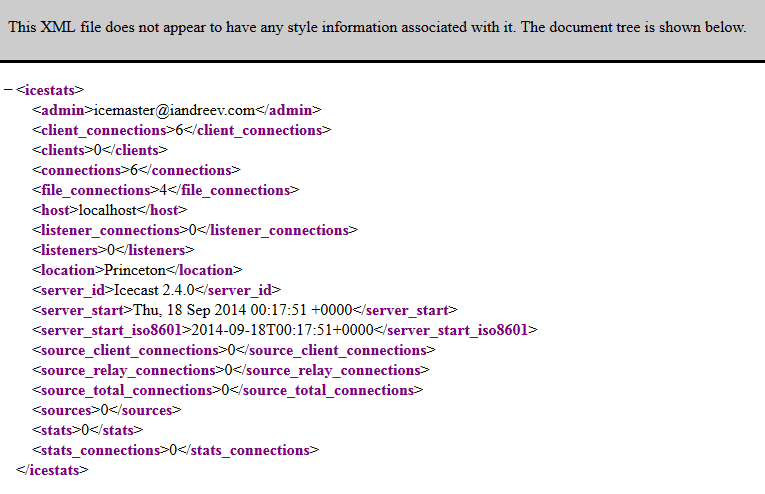
Then go to http://yourserver.com:8000/admin/stats.xml and you should see this.
Install ices
We’ll install ices from the packages and create a separate user and group called radio that will run the ices client. Ices client doesn’t come up with a startup script, so we’ll create one for each stream. In case you reboot, the streaming server and the clients will start automatically. We’ll also create a log directory.
pkg install ices
pw groupadd radio && pw useradd radio -g radio –m
mkdir /var/log/ices
chown –R radio:radio /var/log/ices
Switch to the radio user and create the folders for the configuration files and the two radio stations that you want to run. If you want more streams, just follow the pattern described bellow. In my case, I’ll have two radio stations, trance and liquid.
su - radio
mkdir conf liquid trance
cd ~radio/conf
cp /usr/local/share/ices/ices-playlist.xml liquid-playlist.xml
Let’s configure the first radio station and you’ll see how easy is to configure the the second one.
- Edit the configuration file for the first stream (liquid-playlist.xml) and change the following values: background, logpath, logfile and pidfile.
- Under stream section, change the name, genre and description.
- Under the input section, change the param name=”file” parameter. This value should point to a file that contains each Ogg file in a separate line.
- Under the instance section, change the password and the mount. The password supplied here must match the same source-password that was used to configure icecast (see line 31 in my example of icecast config). The mount parameter is how you are going to access the stream (e.g. http://yourserver.com:8000/station_name.ogg). Always end it up with .ogg.
- I also change the nominal-bitrate to 128000, which means, ices will encode the streams as 128kbps streams.
Make sure you have enough bandwidth to support this. Use the following link to determine your needs.
Finally, here is my liquid-playlist.xml file.
<?xml version="1.0"?>
<ices>
    <!-- run in background -->
    <background>1</background>
    <!-- where logs, etc go. -->
    <logpath>/var/log/ices</logpath>
    <logfile>liquid.log</logfile>
    <!-- 1=error,2=warn,3=info,4=debug -->
    <loglevel>4</loglevel>
    <!-- set this to 1 to log to the console instead of to the file above -->
    <consolelog>0</consolelog>

    <!-- optional filename to write process id to -->
    <pidfile>/home/radio/liquid.pid</pidfile>

    <stream>
        <!-- metadata used for stream listing (not currently used) -->
        <metadata>
            <name>Liquid radio</name>
            <genre>Liquid D'n'B genre</genre>
            <description>Commercial Free Liquid D'n'B radio stream</description>
        </metadata>

        <!-- input module

            The module used here is the playlist module - it has
            'submodules' for different types of playlist. There are
            two currently implemented, 'basic', which is a simple
            file-based playlist, and 'script' which invokes a command
            to returns a filename to start playing. -->

        <input>
            <module>playlist</module>
            <param name="type">basic</param>
            <param name="file">/home/radio/conf/liquid-playlist.txt</param>
            <!-- random play -->
            <param name="random">0</param>
            <!-- if the playlist get updated that start at the beginning -->
            <param name="restart-after-reread">0</param>
            <!-- if set to 1 , plays once through, then exits. -->
            <param name="once">0</param>
        </input>

		<!-- Stream instance
            You may have one or more instances here. This allows you to
            send the same input data to one or more servers (or to different
            mountpoints on the same server). Each of them can have different
            parameters. This is primarily useful for a) relaying to multiple
            independent servers, and b) encoding/reencoding to multiple
            bitrates.
            If one instance fails (for example, the associated server goes
            down, etc), the others will continue to function correctly.
            This example defines two instances as two mountpoints on the
            same server.  -->
        <instance>
            <!-- Server details:
                You define hostname and port for the server here, along with
                the source password and mountpoint.  -->
            <hostname>localhost</hostname>
            <port>8000</port>
            <password>password1</password>
            <mount>/liquid.ogg</mount>

            <!-- Reconnect parameters:
                When something goes wrong (e.g. the server crashes, or the
                network drops) and ices disconnects from the server, these
                control how often it tries to reconnect, and how many times
                it tries to reconnect. Delay is in seconds.
                If you set reconnectattempts to -1, it will continue
                indefinately. Suggest setting reconnectdelay to a large value
                if you do this.
            -->
            <reconnectdelay>2</reconnectdelay>
            <reconnectattempts>5</reconnectattempts>

            <!-- maxqueuelength:
                This describes how long the internal data queues may be. This
                basically lets you control how much data gets buffered before
                ices decides it can't send to the server fast enough, and
                either shuts down or flushes the queue (dropping the data)
                and continues.
                For advanced users only.
            -->
            <maxqueuelength>80</maxqueuelength>

            <!-- Live encoding/reencoding:
                Currrently, the parameters given here for encoding MUST
                match the input data for channels and sample rate. That
                restriction will be relaxed in the future.
                Remove this section if you don't want your files getting reencoded.
            -->
            <encode>
                <nominal-bitrate>128000</nominal-bitrate> <!-- bps. e.g. 64000 for 64 kbps -->
                <samplerate>44100</samplerate>
                <channels>2</channels>
            </encode>
        </instance>

	</stream>
</ices>
At this point, we need to put some Ogg files that we want to stream. In my case, I’ve put them under /home/radio/liquid for the first stream. Now, go to:
cd ~radio/conf
ls -d /home/radio/liquid/*.ogg > liquid-playlist.txt
cat liquid-playlist.txt
This will generate the playlist for you from all Ogg files. If you have your files separated in sub directories, then do:
cd ~radio/genre
find /home/radio/genre -name "*.ogg" -print > /home/radio/conf/genre-playlist.txt
At this point, start the station with ices liquid-playlist.xml. If everything is OK, you shouldn’t see anything. Ices will start in the background. Do a simple check:
ps -waux | grep ices
tail /var/log/ices/liquid.log
Check your radio with http://yourserver.com:8000/liquid.ogg. Now that you have the first radio ready, it’s very easy to configure the 2nd one. First, let’s create the configuration file as a copy from the first station.
cd ~radio/conf
cp liquid-playlist.xml trance-playlist.xml
I use vi to replace everything in trance-playlist.xml that says liquid as trance. Use :%s/liquid/trance/g.
Put some Ogg file for the 2nd station under ~radio/trance and create the playlist text file.
cd ~radio/conf
ls -d /home/radio/trance/*.ogg > trance-playlist.txt
cat trance-playlist.txt
Start the station with ices trance-playlist.xml and test it with http://yourserver.com:8000/trance.ogg.
Configure ices startup
Once you make sure that everything works fine, let’s create the ices startup files in case the server reboots.
Log as root and do:
cd /usr/local/etc/rc.d
Create the first startup script called ices_liquid and add everything from here.
#!/bin/sh
#
# PROVIDE: ices_liquid
# REQUIRE: DAEMON icecast2
# BEFORE:  LOGIN
# KEYWORD: shutdown

. /etc/rc.subr

name="ices_liquid"
rcvar=ices_liquid_enable

command="/usr/local/bin/ices"
extra_commands="reload"
pidfile="/home/radio/liquid.pid"
sig_reload="USR1"

load_rc_config "$name"
: ${ices_liquid_enable="NO"}
: ${ices_liquid_config="/home/radio/conf/liquid-playlist.xml"}
: ${ices_liquid_flags="${ices_liquid_config}"}
: ${ices_liquid_user="radio"}
required_files="${ices_liquid_config}"

run_rc_command "$1"
Save it and do chmod 555 ices_liquid to make sure it’s executable on start. Add ices_liquid_enable=”YES” in /etc/rc.conf. Follow the same pattern for the second startup script. Copy ices_liquid as ices_trance and replace every occurrence of liquid as trance. Then add ices_trance_enable=”YES” in /etc/rc.conf. Now you can control the streams with the standard FreeBSD daemon command service. E.g.
service ices_liquid start
service ices_liquid stop
service ices_liquid status
OK. At this point you have a streaming station(s) but they all run on port 8000. As we stated above, you can access a station by accessing this URL: http://genre.domain.com:8000/genre.ogg, speaking in general terms. Read further to see how can you bypass this restriction in order to access your radio behind a firewall.
Firewall
icecast runs on port 8000 and in many corporate environments only ports 80 and 443 are allowed inbound through various proxies. I tried to run icecast on port 80, but icecast refused to run. Mind that you can’t run icecast using a non-root account on port 80. Actually, you can. apache runs on port 80 as www user, but it’s parent process runs as root and then forks the processes. But most importantly, if you somehow make icecast to run as root, you can’t run apache on that port. The easiest way is to use mod_proxy. This module will do the heavy lifting for you. It will redirect port 8000 to port 80. This is how we are going to accomplish that using two virtual hosts in Apache.
First, create two DNS aliases, e.g. genre.domain.com and genrefw.domain.com. They should point to the same IP of your icecast server. In Apache, make sure you have mod_proxy and mod_proxy_html modules built in and loaded in httpd.conf. See my other post on how to run virtual hosts under Apache.
LoadModule proxy_module libexec/apache24/mod_proxy.so
LoadModule proxy_http_module libexec/apache24/mod_proxy_http.so
LoadModule cgi_module libexec/apache24/mod_cgi.so
or if you have the prefork/worker config file, you might also see this.
<IfModule mpm_prefork_module>
        LoadModule cgi_module libexec/apache24/mod_cgi.so
</IfModule>
The virtual hosts directives in httpd-vhosts.conf should look like this.
<VirtualHost *:80>
    ServerAdmin [email protected]
    DocumentRoot "/usr/local/www/genre.domain.com"
    ServerName genre.domain.com
    ErrorLog "/var/log/genre.domain.com-error_log"
    CustomLog "/var/log/genre.domain.com-access_log" common
    <Directory "/usr/local/www/genre.domain.com">
        Options All
        AllowOverride All
        Require all granted
   </Directory>
   ScriptAlias /cgi-bin/ "/usr/local/www/genre.domain.com/cgi-bin/"
   <Directory "/usr/local/www/genre.domain.com/cgi-bin">
        Options +ExecCGI
        Order allow,deny
        Allow from all
        AddHandler cgi-script .cgi
   </Directory>
</VirtualHost>
<VirtualHost *:80>
    ServerAdmin [email protected]
    DocumentRoot "/usr/local/www/genrefw.domain.com"
    ServerName genrefw.domain.com
    ErrorLog "/var/log/genrefw.domain.com-error_log"
    CustomLog "/var/log/genrefw.domain.com-access_log" common
    ProxyRequests Off
    ProxyPass / http://genre.domain.com:8000/genre.ogg
    ProxyPassReverse / http://genre.domain.com:8000/genre.ogg
    <Directory "/usr/local/www/genrefw.domain.com">
        Options All
        AllowOverride All
        Require all granted
    </Directory>
</VirtualHost>
Now, you have to create two virtual web sites, genre.domain.com and genrefw.domain.com. The genrefw.domain.com site will be an empty site. Read further and see how I built two web sites. You can make it much simpler or even more complex. I also enabled cgi-bin in order to run some scripts. The step below is optional. If you just want to bypass the firewall, create the two virtual hosts as described above and for regular users use http://genre.domain.com:8000/genre.ogg and for the users behind a firewall use http://genrefw.domain.com/genre.ogg.
Optional
I’ll create a web page that embeds the player and shows some info. There is a HTML5 menu and one of the options will tell you what track is currently playing. That’s why we needed cgi-bin. Here are my HTML and CSS files. Make sure you have 10 background images in the same directory, from background0.jpg to background9.jpg. They will rotate every 90 seconds. It looks cool! :) First, let’s create the cgi-bin folder under the virtual host destination.
cd /usr/local/www/genre.domain.com
mkdir cgi-bin
Then create a file called info.cgi that contains the following:
#!/bin/sh
echo "Content-type: text/html"
echo ""

echo '<html>'
echo '<head>'
echo '<meta http-equiv="Content-Type" content="text/html; charset=UTF-8">'
echo '<title>Currently Playing </title>'
echo '</head>'
echo '<body>'
grep "INFO playlist" /var/log/ices/genre.log | tail -n 1 | sed 's/ INFO playlist-builtin\/playlist_read//' | sed 's/"//g' | sed 's/\/home\/radio\/genre\///'
echo '</body>'
echo '</html>'
exit 0
Then change permissions.
chmod 755 info.cgi
What this script does? It creates a simple HTML file from the output of the grep command. It just looks for the last appearance of the current playing track in the ices log.
Here is the HTML file.
<html>
<head>
<title>Genre Radio</title>
<link rel="stylesheet" href="styles.css" />
<script>
function run(interval, frames) {
var int = 0;
function func() {
document.body.id = "bg"+int;
int++;
if(int == frames) { int = 0; }
}
var swap = window.setInterval(func, interval);
}
run(90000, 10); //milliseconds, frames
</script>
</head>
<body id="bg">
<!-- http://red-team-design.com/css3-dropdown-menu/ -->
<BR> <BR>
<ul id="menu">
<li><a href="/" onclick="window.open('http://genre.domain.com/cgi-bin/info.cgi', 'newwindow', 'width=300, height=100'); return false;">INFO</a></li>
<li>
<a href="#">Radio</a>
<ul>
<li><a href="#">Classical</a></li>
<li><a href="http://genre2.domain.com/" target="_blank">Other Genre</a></li>
</ul>
</li>
<li><a href="https://www.andreev.it/" target="_blank">About</a></li>
<li><a href="https://www.linkedin.com/in/klimenta/" target="_blank">Contact</a></li>
</ul>
<footer>
<audio controls>
<source src="http://genre.domain.com:8000/genre.ogg" type="audio/ogg">
Your browser does not support the audio element.
</audio>
<a class="tzine1" href="/" onclick="window.open('http://genrefw.iandreev.com', 'newwindow', 'width=300, height=100'); return false;">No sound? Click <i><b>here!</b></i></a>
<a class="tzine" href="https://blog.andreev.it/">Commercial Free Genre Radio: <i>Kliment Andreev<b> 2015</b></i> (c)</a>
</footer>
</body>
</html>
And the CSS file.
*{
    margin: 0;
    padding: 0;
}

body#bg0 {
  background: url('background0.jpg') no-repeat 50% 50% fixed;
  background-size: cover;
  -moz-background-size: cover;
  -o-background-size: cover;
  -webkit-background-size: cover;
}
body#bg1 {
  background: url('background1.jpg') no-repeat 50% 50% fixed;
  background-size: cover;
  -moz-background-size: cover;
  -o-background-size: cover;
  -webkit-background-size: cover;
}
body#bg2 {
  background: url('background2.jpg') no-repeat 50% 50% fixed;
  background-size: cover;
  -moz-background-size: cover;
  -o-background-size: cover;
  -webkit-background-size: cover;
}
body#bg3 {
  background: url('background.jpg') no-repeat 50% 50% fixed;
  background-size: cover;
  -moz-background-size: cover;
  -o-background-size: cover;
  -webkit-background-size: cover;
}
body#bg4 {
  background: url('background4.jpg') no-repeat 50% 50% fixed;
  background-size: cover;
  -moz-background-size: cover;
  -o-background-size: cover;
  -webkit-background-size: cover;
}
body#bg5 {
  background: url('background5.jpg') no-repeat 50% 50% fixed;
  background-size: cover;
  -moz-background-size: cover;
  -o-background-size: cover;
  -webkit-background-size: cover;
}
body#bg6 {
  background: url('background6.jpg') no-repeat 50% 50% fixed;
  background-size: cover;
  -moz-background-size: cover;
  -o-background-size: cover;
  -webkit-background-size: cover;
}
body#bg7 {
  background: url('background7.jpg') no-repeat 50% 50% fixed;
  background-size: cover;
  -moz-background-size: cover;
  -o-background-size: cover;
  -webkit-background-size: cover;
}
body#bg8 {
  background: url('background8.jpg') no-repeat 50% 50% fixed;
  background-size: cover;
  -moz-background-size: cover;
  -o-background-size: cover;
  -webkit-background-size: cover;
}
body#bg9 {
  background: url('background9.jpg') no-repeat 50% 50% fixed;
  background-size: cover;
  -moz-background-size: cover;
  -o-background-size: cover;
  -webkit-background-size: cover;
}

a, a:visited {
        outline:none;
        color:#1c4f64;
}

a:hover{
        text-decoration:none;
}

section, footer, header{
        display: block;
}


footer{
        background-color: #111111;
        bottom: 0;
        box-shadow: 0 -1px 2px rgba(0,0,0,0.4);
        height: 45px;
        left: 0;
        position: fixed;
        width: 100%;
        z-index: 100000;
}

footer h2{
        color: #EEEEEE;
        font-size: 14px;
        font-weight: normal;
        left: 50%;
        margin-left: -400px;
        padding: 13px 0 0;
        position: absolute;
        width: 540px;
}
footer h2 i{
        font-style:normal;
        color:#888;
}

footer a.tzine,a.tzine:visited{
        color: #999999;
        font-size: 12px;
        left: 50%;
        margin: 16px 0 0 110px;
        position: absolute;
        text-decoration: none;
        top: 0;
}

footer a.tzine1,a.tzine1:visited{
        color: #999999;
        font-size: 12px;
        left: -5%;
        margin: 16px 0 0 110px;
        position: absolute;
        text-decoration: none;
        top: 0;
}

footer a i{
        color:#ccc;
        font-style: normal;
}

footer a i b{
        color:#c92020;
        font-weight: normal;
}


body{
        /* Workaround for some mobile browsers */
  background: url('background9.jpg') no-repeat 50% 50% fixed;
  background-size: cover;
  -moz-background-size: cover;
  -o-background-size: cover;
  -webkit-background-size: cover;

        font:14px/1.3 'Segoe UI',Arial, sans-serif;
}

/* Main */
/* Original width e 100% a ne 30%"*/
#menu {
    width: 30%;
    margin: 0;
    padding: 10px 0 0 0;
    list-style: none;
    background-color: #111;
    background-image: linear-gradient(#444, #111);
    border-radius: 50px;
    box-shadow: 0 2px 1px #9c9c9c;
}

#menu li {
    float: left;
    padding: 0 0 10px 0;
    position: relative;
}

#menu a {
    float: left;
    height: 25px;
    padding: 0 25px;
    color: #999;
    text-transform: uppercase;
    font: bold 12px/25px Arial, Helvetica;
    text-decoration: none;
    text-shadow: 0 1px 0 #000;
}

#menu li:hover > a {
    color: #fafafa;
}

*html #menu li a:hover { /* IE6 */
    color: #fafafa;
}

#menu li:hover > ul {
    display: block;
}

/* Sub-menu */
#menu ul {
    list-style: none;
    margin: 0;
    padding: 0;
    display: none;
    position: absolute;
    top: 35px;
    left: 0;
    z-index: 99999;
    background-color: #444;
    background-image: linear-gradient(#444, #111);
    -moz-border-radius: 5px;
    border-radius: 5px;
}

#menu ul li {
    float: none;
    margin: 0;
    padding: 0;
    display: block;
    box-shadow: 0 1px 0 #111111,
                0 2px 0 #777777;
}

#menu ul li:last-child {
    box-shadow: none;
}

#menu ul a {
    padding: 10px;
    height: auto;
    line-height: 1;
    display: block;
    white-space: nowrap;
    float: none;
    text-transform: none;
}

*html #menu ul a { /* IE6 */
    height: 10px;
    width: 150px;
}

*:first-child+html #menu ul a { /* IE7 */
    height: 10px;
    width: 150px;
}

#menu ul a:hover {
    background-color: #0186ba;
    background-image: linear-gradient(#04acec, #0186ba);
}

#menu ul li:first-child a {
    border-radius: 5px 5px 0 0;
}

#menu ul li:first-child a:after {
    content: '';
    position: absolute;
    left: 30px;
    top: -8px;
    width: 0;
    height: 0;
    border-left: 5px solid transparent;
    border-right: 5px solid transparent;
    border-bottom: 8px solid #444;
}

#menu ul li:first-child a:hover:after {
    border-bottom-color: #04acec;
}

#menu ul li:last-child a {
    border-radius: 0 0 5px 5px;
}

/* Clear floated elements */
#menu:after {
    visibility: hidden;
    display: block;
    font-size: 0;
    content: " ";
    clear: both;
    height: 0;
}

* html #menu             { zoom: 1; } /* IE6 */
*:first-child+html #menu { zoom: 1; } /* IE7 */
Convert mp3 to ogg
You can use the sox utility that comes in the ports.
pkg install sox
Check the man page for detailed syntax, but I use simple conversion.
sox filename.mp3 filename.ogg
You can check the properties of any audio file with:
soxi filename
For batch conversion, create this script called mp32ogg.sh and execute it against all files in the folder. It will convert all mp3 files to ogg. Add sox parameters if needed.
#!/bin/sh
for i in *.mp3; do
        sox ./"$i" ./"${i%.mp3}.ogg"
done