
Recently I needed to analyze one of my ancient C programs that was running under MS DOS. I had some problems converting it to gcc or Visual C++, because this program was written in Borland Turbo C 2.0, which uses quite non-standard procedures. So, I’ve decided to build a DOS VM and install Turbo C 2.0 which is a free download from here. In addition, I’ve decided to connect this VM box to the network. In order to do that, I needed:
- VMware Workstation (VirtualBox might also work)
- MS DOS 6.22 install files (you have to find these somehow)
- MS Network Client 3.0 for DOS (free download from here and here)
- MS DOS driver for AMDPCNet network card (attached as AMD.zip)
- WinImage (shareware version, you can use it for 30 days for free, download here)
- DOS CD driver (attached as DOSCDDRV.ZIP)
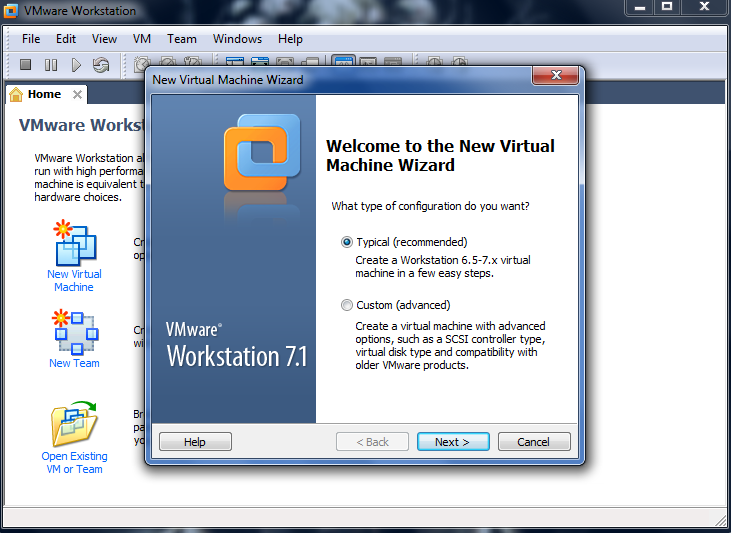
First, click on “New Virtual Machine” and select “Typical” settings. Click Next.
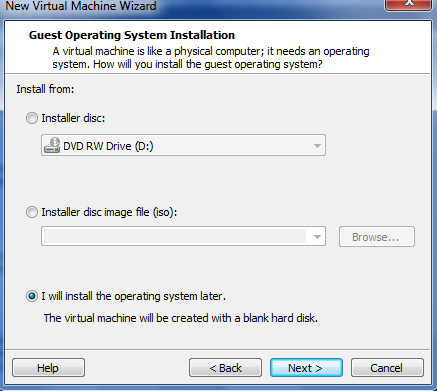
Choose to “Install the operating system later”
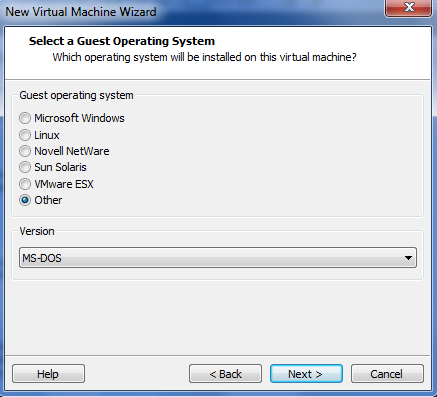
Select “Other” and “MS-DOS“, then click “Next“.
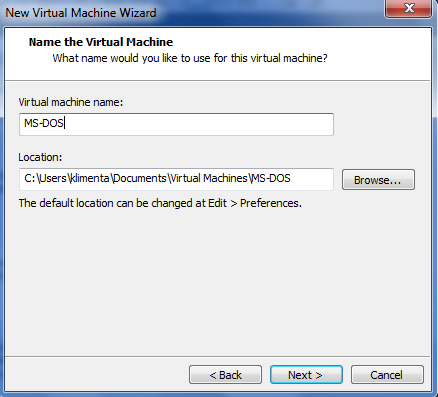
Type a name for the virtual machine, in my case it was “MS-DOS”
Select the size of the hard drive for DOS, in my case 8GB is more than enough.
NOTE: Use 2GB, DOS won’t see more than this.
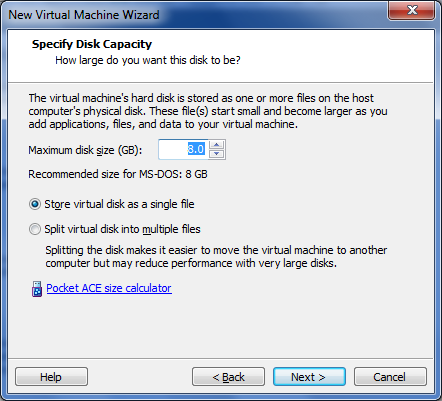
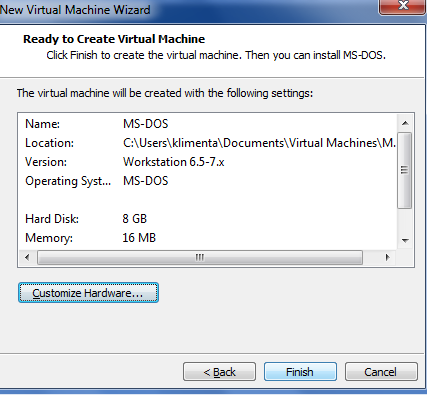
Finally, click “Next” and “Finish“.
NOTE: If you have your MS-DOS files on a physical floppy, you can tell VMware Workstation to use them directly. If not, make sure that these virtual floppy files are in IMG format. Use this link to see how to make an IMG file, but pretty much, just use WinImage.
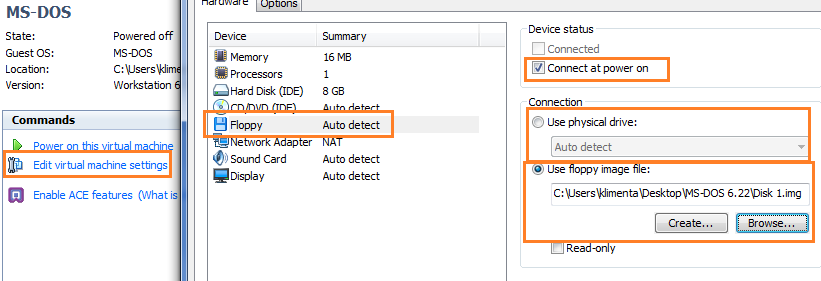
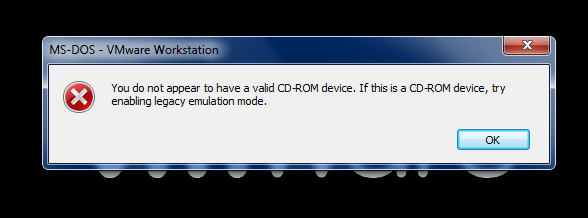
Click on “Edit virtual machine settings”, select the Floppy drive, make sure that “Connect at power on” is checked, and then select one of the two options: Use physical drive or use floppy image file. Click “OK” and click “Power on this virtual machine”, just above “Edit virtual machine settings”. You can ignore this message; you can even remove the CD/DVD and Sound Card from the list of devices so you don’t get this error.
If everything is OK, you should see this menu.
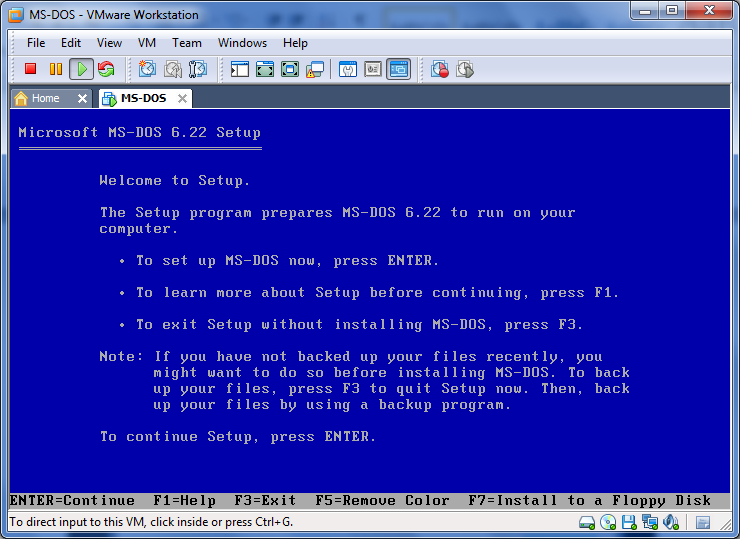
Hit Enter, accept the default to configure the disk and hit Enter again.

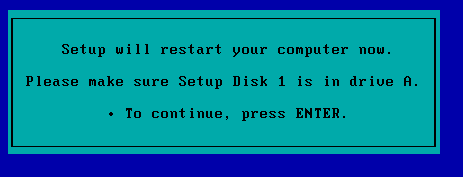
Hit Enter when prompted to reboot.
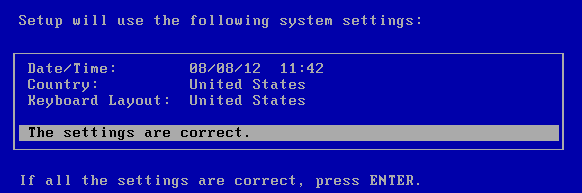
The install will format the drive and then prompt you to change these system settings. Hit Enter if you are OK with these settings.
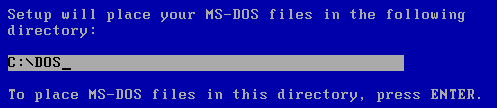
Select the destination folder for the MS-DOS OS and hit Enter.
When the install requests the 2nd disk, right-click the floppy icon in the lower-right corner of the VM, choose Settings,….
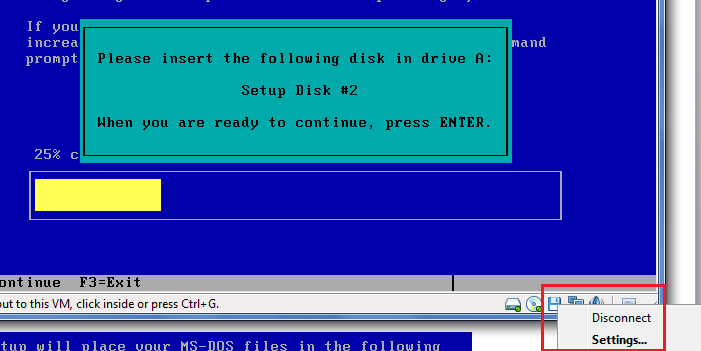
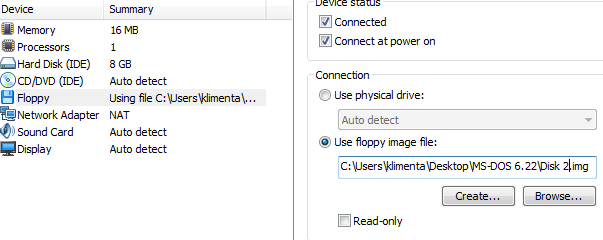
…and select the 2nd floppy image file.
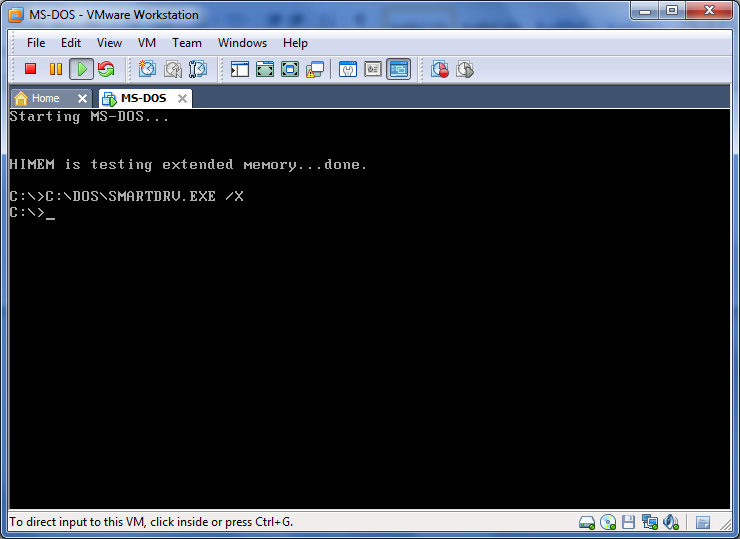
Do the same when you are prompted for the 3rddisk. When finished, MS-DOS will tell you to remove the floppy from the drive. As you did before, right-click the floppy icon in the lower-right corner and choose Disconnect. Hit Enter twice and once the OS reboots, you’ll be greeted with plain old MS-DOS 6-22.
Now, let’s do the networking part. We need to copy MS Network Client files to MS-DOS. Both these files are self-extracting images. Start WinImage, select File | New and accept the default settings.

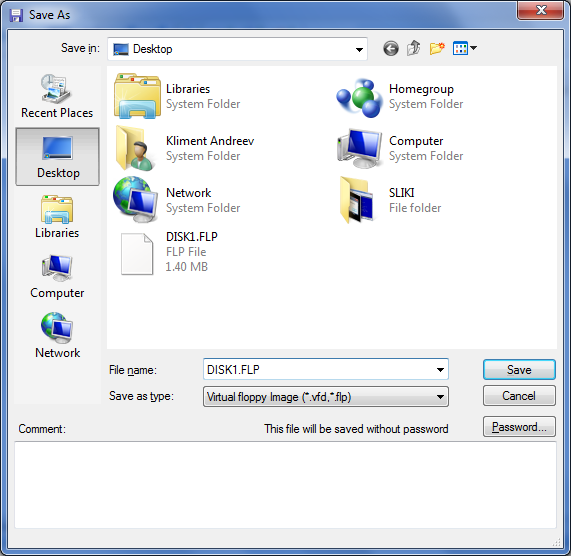
In the menu, click Image | Inject, select the dsk3-1.exe file, and click Yes when prompted. Then, click File | Save As, and from the drop-down menu select Virtual Floppy Image, type DISK1.FLP for the file name and click Save.
Go back to DOS VM and mount this virtual floppy as previously described. In DOS type:
C:\>A:
A:\>dir
You should see that DSK3-1.EXE is there.
A:\>mkdir c:\temp\d1
A:\>dsk3-1 c:\temp\d1
Go back to WinImage and create a virtual floppy for the second file DSK3-2.EXE. Mount the DISK2.FLP in VMware Workstation and again:
A:\>mkdir c:\temp\d2
A:\>dsk3-2 c:\temp\d2
Now, extract AMD.zip somewhere on your desktop, open the archive and create another virtual floppy. This time instead of injecting three files, just choose the option to inject the NICdrv folder. Finally, mount the virtual floppy under DOS. In DOS start typing:
A:\>cd c:\temp\d1
A:\>C:
C:\temp\d1\>setup
When prompted hit Enter, choose the default directory C:\NET and after 10-15 seconds, select *Network adapter not shown on list below.
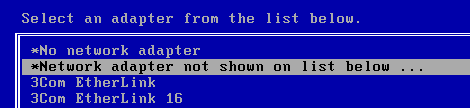
The installer will prompt you for the path to the drivers, so just delete the default C:\temp\d1 and replace it with A:\
Hit enter twice until you are prompted to enter the username. Put whatever you want. DOS will use your username and make it also the computer name. When you reach to this screen…
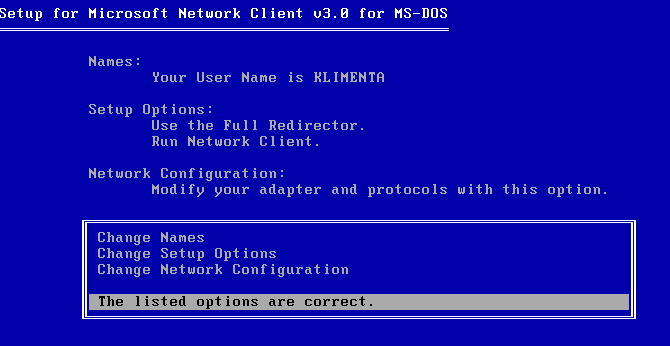
… scroll up to “Change Names” and change the computer name to something else if you want. The most important thing is to change the network configuration. By default, TCP/IP is not installed, so go to “Change Network Configuration”, select “Add Protocol”…
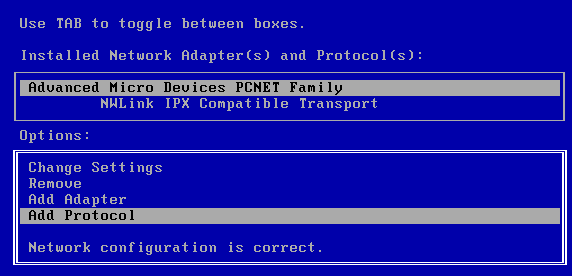
… and select “Microsoft TCP/IP” protocol.

Use TAB between the two boxes, select the NWLink IPX protocol, TAB to the other box, and choose Remove.
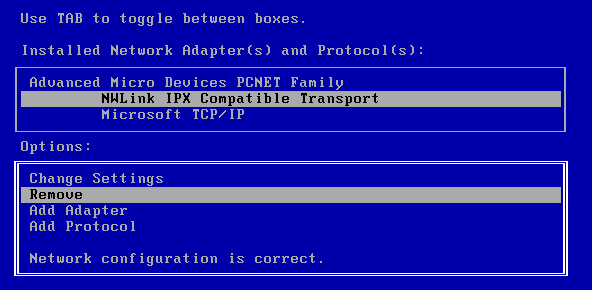
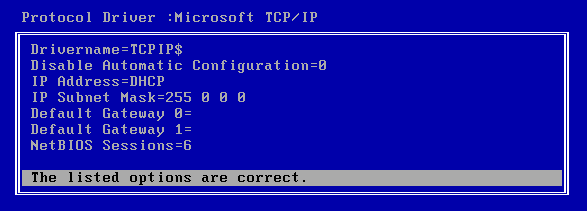
Finally, select “Microsoft TCP/IP”, TAB to “Change Settings”, and use “DHCP” for the IP or you can put a static IP if needed.
Hit ENTER twice, type C:\temp\d2 when prompted for the second disk and finally, after DOS reboots log with your username. At this point, you can create a password.

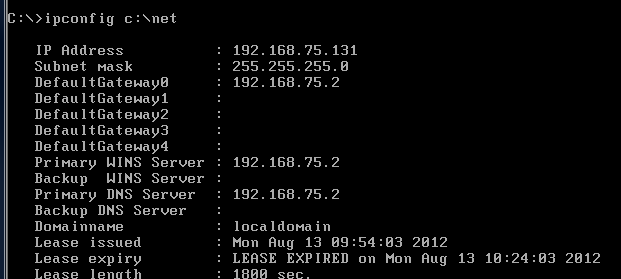
To test your network settings, do ipconfig c:\net. Remember the syntax, it’s not just ipconfig.
Ping your gateway IP.

If it works you are all set. If there are any problems, you may refer to this link for troubleshooting.
If you want to add a CD-ROM to your DOS install, download the DOSCDDRV.ZIP. The link is all the way up.
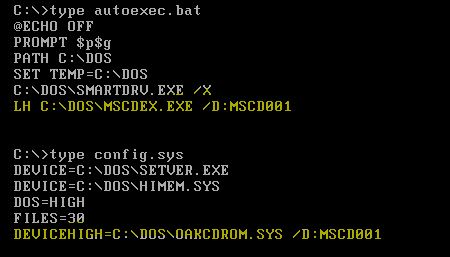
Unzip it and you’ll have an IMG file. Mount the IMG file as you did with the DOS IMG floppies, copy the oakcdrom.sys file to C:\DOS folder and then add the highlighted lines to config.sys and autoexec.bat.
8 comments
This is a very good guide. I am able to follow the guide all the way to one of the very last steps. After you select Microsoft TCP/IP and change the IP to DHCP, you are then supposed to continue on with the installation. When I select “The listed options are correct” and hit ENTER, I get this prompt:
http://i1280.photobucket.com/albums/a493/blixel/Misc/Aug-03-201312-12-22PM_zps5bf62ffe.jpg
I am stuck at that point. I tried changing the path to A:\ but it doesn’t work. I can’t continue past that point. I have to press F3 to exit.
Please email me if you know what I should do. Thank you for your great guide.
From the screenshot that you’ve sent, I see that you typed C:\temp\d1. Did you try with c:\temp\d2? It’s asking for the OEM driver disk, so I am not sure if this refers to the 2nd disk or something else, but try with c:\temp\d2 anyway. I also assume that you removed NWLink IXP. Let me know.
Thanks for the reply. I did try C:\temp\d2, c:\temp\d1, and of course A:\
I did remove NWLINK IPX
Here’s a video I just made showing what I’m doing step by step.
http://www.youtube.com/watch?v=RBqVprBnf0o
I just noticed you are using VMware Workstation. I just have VMware Player. Do you suppose that is the problem?
I went through the whole process from the beginning and figured out what I did wrong. I somehow extracted DSK3-1 to both \temp\d1 and \temp\d2.
Once I extracted DSK3-2 to \temp\d2, I was able to go on.
I am glad it worked for you.
Thanks
How do you configure what IP address is used for DNS? When I type net c:\net, it’s using the wrong IP for DNS but I don’t see anywhere to change it.
I mean when I type ipconfig c:\net
Are you using DHCP? If you are getting a wrong DNS entry when using DHCP, it might be that something is wrong with your DHCP server. If you are using static IP, look at the setup again. When setting up the NIC, there is an option for DHCP or static. The Ipconfig.exe utility provides DHCP configuration information only (from http://technet.microsoft.com/en-us/library/cc750214.aspx). Also, check the INI files. I bet the info is stored somewhere in the INI files.