In this post, I’ll describe how to create a Chef cookbook for deploying WordPress. The blog engine will run on CentOS 7 using MariaDB and PHP. The website will be created as a virtual host and you can leave the firewall and SELinux as is. There are probably better WordPress cookbooks at the Chef Supermarket, but I decided to go with my own. Before you go further, make sure that you have a Chef server/workstation environment ready, otherwise you won’t be able to deploy the code. Check my other post on how to do that. Also, make sure you have a CentOS 7 client powered up and that you are able to log in with some username and that the DNS/hostnames is already in place. In my case, I’ll have a CentOS 7 server named centostest.andreev.local and a username klimenta that’s able to login.
Table of Contents
Chef
OK, so log to your Chef workstation and go to your cookbooks directory. Create the wordpress cookbook.
chef generate cookbook wordpress
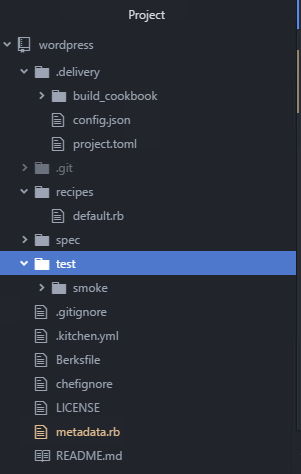
The directory structure looks like this.
Edit the metadata.rb file in the root directory and change it so it suit your needs. This is completely optional. You don’t have to change anything here.
name 'wordpress'
maintainer 'Kliment Andreev'
maintainer_email '[email protected]'
license 'Simplified BSD License'
description 'Installs/Configures wordpress'
long_description 'Installs/Configures wordpress'
version '0.1.0'
chef_version '>= 12.1' if respond_to?(:chef_version)

# The `issues_url` points to the location where issues for this cookbook are
# tracked.  A `View Issues` link will be displayed on this cookbook's page when
# uploaded to a Supermarket.
#
# issues_url 'https://github.com/<insert_org_here>/wordpress/issues'

# The `source_url` points to the development repository for this cookbook.  A
# `View Source` link will be displayed on this cookbook's page when uploaded to
# a Supermarket.
#
# source_url 'https://github.com/<insert_org_here>/wordpress'
Our next step is to create the default attributes. These are the values that we can change and modify the behavior of the installed packages or change the usernames, passwords, directory locations etc.
cd wordpress
chef generate attribute default
The commands above will create a new directory called attributes and a file called default.rb. Copy and paste the following into that file. As you can see, my blog will be reachable as http://centostest.andreev.local, the WordPress files will be under /var/www/centostest.andreev.local folder, the default httpd file is /etc/httpd/conf/httpd.conf etc…
# The name of your site
default['wordpress']['server_name'] ='centostest.andreev.local'
# The root directory of your site, it will be /var/www/yoursitename.com
default['wordpress']['document_root'] = "/var/www/#{node['wordpress']['server_name']}"
# The default config file
default['wordpress']['default_conf'] = '/etc/httpd/conf/httpd.conf'
# e-mail for the server admin
default['wordpress']['server_admin'] ='[email protected]'
# log dir for the site
default['wordpress']['log_dir'] = '/var/log/www'
# Error log for the site, it will be /var/log/wwwyoursitename-error.log
default['wordpress']['error_log'] = "#{node['wordpress']['log_dir']}/""#{node['wordpress']['server_name']}-error.log"
# Access log for the site, it will be /var/log/wwwyoursitename-access.log
default['wordpress']['custom_log'] = "#{node['wordpress']['log_dir']}/""#{node['wordpress']['server_name']}-access.log"
# The root password for MySQL
default['wordpress']['mysql_password'] = 'MySQLP4ssw0rd$'
# The name of the WordPress database
default['wordpress']['wordpress_database'] = 'wordpress'
# The default username for the WordPress database
default['wordpress']['wordpress_username'] = 'wp_user'
# The default password for the WordPress database
default['wordpress']['wordpress_password'] = 'W0rdPr3$$PWD'
Now, let’s move to the recipes. In order to install WordPress, we’ll have to install Apache web-server, install PHP and its modules so WordPress as a PHP program can run, then install MySQL database server and finally download WordPress and extract it under the Apache root directory that we specified in the default attributes. We’ll create a recipe for each of these steps.
Apache recipe
Create the recipe first. This will create a file apache.rb under the recipes directory.
chef generate recipe apache
This is how to recipe looks like. You can see from the comments what each block does. It’s very simple and straightforward. We install the Apache server, create the document root and the logs directory, we’ll copy the httpd.config file from a template, make sure that Apache starts on boot and we’ll poke a hole in the firewall so the HTTP port is allowed inbound.
# Install Apache server
package 'httpd' do
  action :install
end

# Create the root directory and set the permissions and owners
directory node['wordpress']['document_root'] do
  owner 'apache'
  group 'apache'
  mode '0755'
  recursive true
end

# Create the Apache log directory
directory node['wordpress']['log_dir'] do
  recursive true
end

# Create the default httpd.conf file
template node['wordpress']['default_conf'] do
  source "httpd.conf.erb"
end

# Enable start on boot and start Apache
service 'httpd' do
  action [:enable, :start]
end

# Allow HTTP to pass on the firewall
execute 'httpd_firewall' do
  command '/usr/bin/firewall-cmd  --permanent --zone public --add-service http'
  ignore_failure true
end

# Reload the firewall rules
execute 'reload_firewall' do
  command '/usr/bin/firewall-cmd --reload'
  ignore_failure true
end
One of the steps here says to create the default config file for the Apache web server and that the template for that is a file called httpd.conf.erb. So, let’s create that template. This command will create a directory called templates and a file httpd.conf.erb.
chef generate template httpd.conf
This is how our default config looks like. Copy and paste the following into the httpd.conf.erb file.
Listen 80
Include conf.modules.d/*.conf
User apache
Group apache
<IfModule mime_module>
    TypesConfig /etc/mime.types
    AddType application/x-compress .Z
    AddType application/x-gzip .gz .tgz
    AddType text/html .shtml
    AddOutputFilter INCLUDES .shtml
</IfModule>

<VirtualHost *:80>
  ServerName <%= node['wordpress']['server_name'] %>
  ServerAdmin <%= node['wordpress']['server_admin'] %>
  DocumentRoot <%= node['wordpress']['document_root'] %>
  <Directory "/">
          Options FollowSymLinks
          AllowOverride None
  </Directory>
  <Directory <%= node['wordpress']['document_root'] %> >
          Options Indexes FollowSymLinks MultiViews
          AllowOverride None
          Require all granted
  </Directory>
  ErrorLog <%= node['wordpress']['error_log'] %>
  CustomLog <%= node['wordpress']['custom_log'] %> combined
  AddType application/x-httpd-php .php
  AddType application/x-httpd-php-source .phps
  DirectoryIndex index.php index.html
</VirtualHost>
PHP
Same as with the Apache recipe, we’ll have to generate a recipe for PHP and it’s modules.
chef generate recipe php
Edit the newly created file php.rb and copy and paste the following.
# Install PHP and its modules
%w{php php-fpm php-mysql php-xmlrpc php-gd php-pear php-pspell}.each do |pkg|
  package pkg do
    action :install
    notifies :reload, 'service[httpd]', :immediately
  end
end
MySQL
Same here, let’s generate a recipe for the installation of MySQL.
chef generate recipe mysql
This is the recipe to install MySQL.
# Install MySQL client and server<strong>
%w{mariadb mariadb-server}.each do |pkg|
  package pkg do
    action :install
  end
end

# Enable start on boot and start the MySQL server
service 'mariadb' do
  action [:enable, :start]
end

# Location of the initial MySQL script
template '/tmp/mysql.sql' do
  source "mysql.conf.erb"
end

# Execute the initial setup of MySQL
execute 'mysql_server' do
  command '/usr/bin/mysql -sfu root < /tmp/mysql.sql && ls /tmp/mysql.sql'
  ignore_failure true
end
As you can see from the recipe, we need a template with some SQL commands to run before we can use MySQL. This is equivalent of running mysql_secure_installation when you first install MySQL. In addition, I’ll use the SQL script to create the wordpress database as well.
chef generate template mysql.conf
This template contains what we need for an initial installation. Any subsequent runs will fail because we changed the MySQL password which is good. That means that we won’t mess up anything if we run this recipe more than once. So, edit the newly create file under templates called mysql.conf and copy and paste the following.
UPDATE mysql.user SET Password=PASSWORD('<%= node['wordpress']['mysql_password'] %>') WHERE User='root';
DELETE FROM mysql.user WHERE User='';
DELETE FROM mysql.user WHERE User='root' AND Host NOT IN ('localhost', '127.0.0.1', '::1');
DROP DATABASE IF EXISTS test;
DELETE FROM mysql.db WHERE Db='test' OR Db='test\\_%';
FLUSH PRIVILEGES;
CREATE DATABASE <%= node['wordpress']['wordpress_database'] %>;
GRANT ALL PRIVILEGES ON <%= node['wordpress']['wordpress_database'] %>.*
TO "<%= node['wordpress']['wordpress_username'] %>"@"localhost"
IDENTIFIED BY "<%= node['wordpress']['wordpress_password'] %>";
FLUSH PRIVILEGES;
Download WordPress
We have to create a recipe to download and extract WordPress.
chef generate recipe download
Edit the file and copy and paste the following. Pretty much it executes a bunch of bash commands to download the tarball, unzip it under the root directory and change the ownership. The recipe will stop if wp-settings.php exists, this means that WordPress is already installed.
ruby_block "download_wordpress" do
  block do
    require 'fileutils'
    FileUtils.cd node['wordpress']['document_root']
    system 'curl -o latest.tar.gz https://wordpress.org/latest.tar.gz'
    system 'tar xzvf latest.tar.gz --strip-components=1 && rm latest.tar.gz'
    system 'chown -R apache:apache *'
  end
  not_if { ::File.exist?(File.join(node['wordpress']['document_root'], 'wp-settings.php')) }
  action :create
end
Wrap up
Now that we have all recipes in place, we can tell Chef in what order to execute them. Edit the default recipe (default.rb file under recipes) and add these lines.
include_recipe 'wordpress::apache'
include_recipe 'wordpress::php'
include_recipe 'wordpress::mysql'
include_recipe 'wordpress::download'
The best practice is to create a role for each cookbook, so let’s create one.
knife role create wordpress
Edit the json file so it looks like this.
{
  "name": "wordpress",
  "description": "Role to install WordPress (apache, php, mysql)",
  "json_class": "Chef::Role",
  "default_attributes": {

  },
  "override_attributes": {

  },
  "chef_type": "role",
  "run_list": [
    "recipe[wordpress::apache]",
    "recipe[wordpress::php]",
    "recipe[wordpress::mysql]",
    "recipe[wordpress::download]"
  ],
  "env_run_lists": {

  }
}
Upload the cookbook to the server and execute it against a node.
knife cookbook upload wordpress
knife bootstrap centostest --ssh-user klimenta --sudo -N centostest.andreev.local -r 'role[wordpress]'
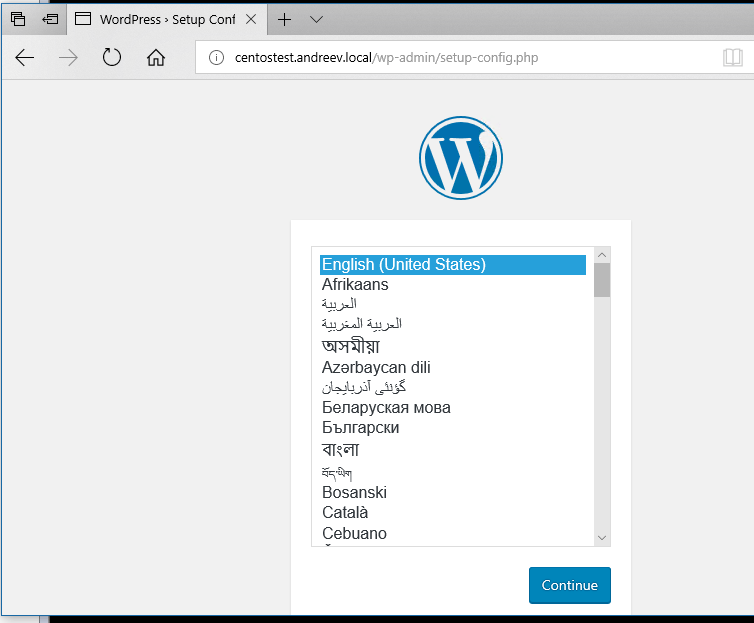
In my home lab it took about 1m to install everything on a 1 CPU, 1GB RAM virtual CentOS. Once completed go to your website (http://centostest.andreev.local in my case). If you have SELinux, you’ll have to manually create the config as per WordPress instructions, otherwise – you are all set.