In my previous articles I’ve described how to configure FreeBSD/CentOS to use self-signed certificates. The goal of this article is to show you how to work with commercial certificates, so your web browser doesn’t get that nagging prompt that the connection is not safe. The procedure is pretty much the same for FreeBSD and CentOS. The only difference are some configuration files that are located at different places. I won’t bother with how SSL works, you can read about it here.
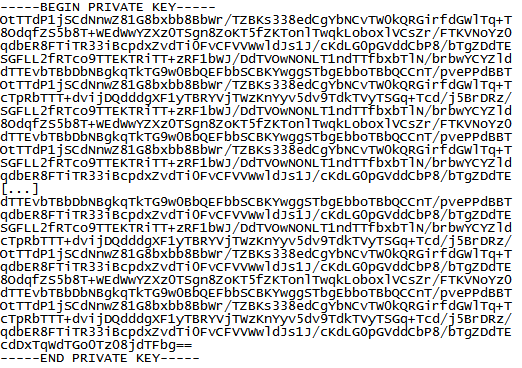
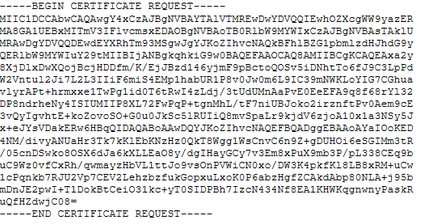
In simplified terms, you need a private key that you generate on the server. This is for your eyes only. Never share this key. Based on this key, you also create a Certificate Signing Request (CSR). Both of these keys are files that look like this.

… and this

These are not mine, of course. I just googled them.
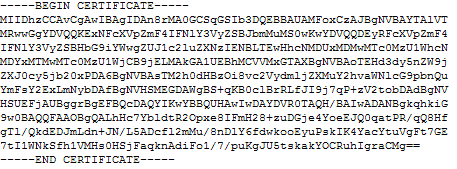
So, we have two files, one is the private key (don’t share) and the 2nd one is the certificate signing request key. You need to sign your CSR key and only valid certification authorities (CA) can do this. Of course, you can also sign your request, but because you are not a CA, nobody will trust your certificate. These are self-signed certificates. When you are ready to buy the certificate, you need to share your CSR file. Again, your private key is for you only. I buy my certificates from namecheap.com, they are resellers for Comodo, a known CA. At the time of this writing, a certificate for one domain is $9 and for a single domain and unlimited subdomains (AKA wildcard certificate), the price is $49. So, if you have more than 5 subdomains, it’s cheaper to get a wilcard certificate. E.g. a wildcard certificate for iandreev.com will cover all of my subdomains (q.iandreev.com, z.iandreev.com, whatever.iandreev.com). Once you buy your certificate, they’ll sign the certificate and send you a file with the signed key certificate. The file looks exactly the same, note the different 1st and last line.

Let’s start with step by step instructions. You will need a working Apache server, SSL and virtual hosts configured. Check this link for FreeBSD and this one for CentOS.
Table of Contents
FreeBSD
First thing to do is to decide where to store certificates. Always store them outside of your Apache DocumentRoot. A good place is to create a folder called certificates or certs under /usr/local/etc.
So, in FreeBSD do this:
cd /usr/local/etc/ && mkdir certs && cd certs
openssl genrsa -out server.domain.key 2048
The openssl line will create your private 2048 bit key. Did I say, never share this key? The output is a file named server.domain.key. You can name this whatever you want, even the extension .key is not mandatory. The file name doesn’t matter, you can name it www.google.com.key if you want. But, for management purposes you want to name it as your domain, so in my case, I’ll name it blog.iandreev.com.key.
Now that we have the key, we need to create the CSR file. This is the public key that’s based on my private key (server.domain.key). You can’t have a CSR file without a private key.
Let’s create the CSR key/file.
openssl req -new -key server.domain.key -out server.domain.csr
This will create a file which represents your public key or Certificate Signing Request (CSR) key. Again, the name is irrelevant. Here comes what’s relevant. When you execute the command above, it will ask you several questions. If you make a mistake, just re-run the command again. This is what it looks like.
You are about to be asked to enter information that will be incorporated
into your certificate request.
What you are about to enter is what is called a Distinguished Name or a DN.
There are quite a few fields but you can leave some blank
For some fields there will be a default value,
If you enter '.', the field will be left blank.
-----
Country Name (2 letter code) [AU]:US
State or Province Name (full name) [Some-State]:NJ
Locality Name (eg, city) []:Allentown
Organization Name (eg, company) [Internet Widgits Pty Ltd]:iAndreev
Organizational Unit Name (eg, section) []:
Common Name (e.g. server FQDN or YOUR name) []:blog.iandreev.com
Email Address []:[email protected]

Please enter the following 'extra' attributes
to be sent with your certificate request
A challenge password []:
An optional company name []:
It’s self explanatory. The most important line is the Common Name. That’s where you put your domain name that you need a certificate for. If you need to enter the challenge password, remember it. If you need to reinstall the certificates, you’ll need the password.
At this point you can buy your certificate. Head to your favorite certificate authority and copy and paste or upload your CSR file, the one that you just generated. You will receive a ZIP file with two files, the signed certificate and the bundle file.
“CA bundle is a file that contains root and intermediate certificates. The certificate issued for your domain constitutes the certificates’ chain with a CA bundle.The chain is required to improve compatibility of the certificates with web browsers and other kind of clients so that browsers recognize your certificate and no security warnings appear.”
Once you receive this file, unzip it in the same folder where you have your private key and the CSR. You’ll have 4 files, the private key (.key), the CSR public key (.csr), the signed certificate (.crt) and the bundle file (-bundle).
[root@www certs]# ls -l
-rw-rw-rw- 1 root root 4103 Feb 12  2014 blog_iandreev_com.ca-bundle
-rw-rw-rw- 1 root root 1899 Nov 24 00:00 blog_iandreev_com.crt
-rw-r--r-- 1 root root 1041 Nov 24 17:07 blog.iandreev.com.csr
-rw------- 1 root root 1675 Nov 24 17:06 blog.iandreev.com.key
Now, we need to tell Apache to use the certificates. As I said earlier, you’ll need a working Apache and virtual hosts, which means your server.domain.com already serves some content. You’ll have to edit /usr/local/etc/apache24/extra/httpd-vhosts file and replace the line items for your domain that was running on port 80.
So, if you followed my article about FreeBSD and virtual hosts (see link above), you probably have something like this.
<VirtualHost *:80>
    ServerAdmin [email protected]
    DocumentRoot "/usr/local/www/blog.iandreev.com"
    ServerName blog.iandreev.com
    ErrorLog "/var/log/blog.iandreev.com-error_log"
    CustomLog "/var/log/blog.iandreev.com-access_log" combined
    <Directory "/usr/local/www/blog.iandreev.com">
        Options All
        AllowOverride All
        Require all granted
    </Directory>
</VirtualHost>
That will have to turn into this. :)
<VirtualHost *:80>
    ServerName blog.iandreev.com
    Redirect permanent / https://blog.iandreev.com/
</VirtualHost>
You are permanently redirecting http to https and we need a new entry for that.
Add the following at the end of the httpd-vhosts.conf
<VirtualHost *:443>
    SSLEngine On
    SSLCertificateFile /usr/local/etc/certs/blog_iandreev_com.crt
    SSLCertificateKeyFile /usr/local/etc/certs/blog.iandreev.com.key
    SSLCertificateChainFile /usr/local/etc/certs/blog_iandreev_com.ca-bundle
    ServerAdmin [email protected]
    DocumentRoot "/usr/local/www/blog.iandreev.com"
    ServerName blog.iandreev.com
    ErrorLog "/var/log/blog.iandreev.com-error_log"
    CustomLog "/var/log/blog.iandreev.com-access_log" combined
    <Directory "/usr/local/www/blog.iandreev.com">
        Options All
        AllowOverride All
        Require all granted
    </Directory>
</VirtualHost>
Finally, protect your certs. Make sure that your certs directory has the right permissions.
chmod 700 /usr/local/etc/certs
cd /usr/local/etc/certs
chmod 600 *
Restart apache with apachectl restart and you are good to go.
CentOS
This works for both CentOS 6 and 7.
First thing to do is to decide where to store certificates. Always store them outside of your Apache DocumentRoot. A good place is to create a folder called certificates or certs under /etc.
So, in CentOS do this:
cd /etc/ && mkdir certs && cd certs
openssl genrsa -out server.domain.key 2048
The openssl line will create your private 2048 bit key. Did I say, never share this key? The output is a file named server.domain.key. You can name this whatever you want, even the extension .key is not mandatory. The file name doesn’t matter, you can name it www.google.com.key if you want. But, for management purposes you want to name it as your domain, so in my case, I’ll name it blog.iandreev.com.key.
Now that we have the key, we need to create the CSR file. This is the public key that’s based on my private key (server.domain.key). You can’t have a CSR file without a private key.
Let’s create the CSR key/file.
openssl req -new -key server.domain.key -out server.domain.csr
This will create a file which represents your public key or Certificate Signing Request (CSR) key. Again, the name is irrelevant. Here comes what’s relevant. When you execute the command above, it will ask you several questions. If you make a mistake, just re-run the command again. This is what it looks like.
You are about to be asked to enter information that will be incorporated
into your certificate request.
What you are about to enter is what is called a Distinguished Name or a DN.
There are quite a few fields but you can leave some blank
For some fields there will be a default value,
If you enter '.', the field will be left blank.
-----
Country Name (2 letter code) [AU]:US
State or Province Name (full name) [Some-State]:NJ
Locality Name (eg, city) []:Allentown
Organization Name (eg, company) [Internet Widgits Pty Ltd]:iAndreev
Organizational Unit Name (eg, section) []:
Common Name (e.g. server FQDN or YOUR name) []:blog.iandreev.com
Email Address []:[email protected]

Please enter the following 'extra' attributes
to be sent with your certificate request
A challenge password []:
An optional company name []:
It’s self explanatory. The most important line is the Common Name. That’s where you put your domain name that you need a certificate for. If you need to enter the challenge password, remember it. If you need to reinstall the certificates, you’ll need the password.
At this point you can buy your certificate. Head to your favorite certificate authority and copy and paste or upload your CSR file, the one that you just generated. You will receive a ZIP file with two files, the signed certificate and the bundle file.
“CA bundle is a file that contains root and intermediate certificates. The certificate issued for your domain constitutes the certificates’ chain with a CA bundle.The chain is required to improve compatibility of the certificates with web browsers and other kind of clients so that browsers recognize your certificate and no security warnings appear.”
Once you receive this file, unzip it in the same folder where you have your private key and the CSR. You’ll have 4 files, the private key (.key), the CSR public key (.csr), the signed certificate (.crt) and the bundle file (-bundle).
[root@www certs]# ls -l
-rw-rw-rw- 1 root root 4103 Feb 12  2014 blog_iandreev_com.ca-bundle
-rw-rw-rw- 1 root root 1899 Nov 24 00:00 blog_iandreev_com.crt
-rw-r--r-- 1 root root 1041 Nov 24 17:07 blog.iandreev.com.csr
-rw------- 1 root root 1675 Nov 24 17:06 blog.iandreev.com.key
Now, we need to tell Apache to use the certificates. As I said earlier, you’ll need a working Apache and virtual hosts, which means your server.domain.com already serves some content. You’ll have to edit /etc/httpd/conf.d/httpd-vhosts.conf file and replace the line items for your domain that was running on port 80.
So, if you followed my article about CentOS and virtual hosts (see link above), you probably have something like this.
<VirtualHost *:80>
    ServerAdmin [email protected]
    DocumentRoot "/var/www/blog.iandreev.com"
    ServerName blog.iandreev.com
    ErrorLog "/var/log/httpd/blog.iandreev.com-error_log"
    CustomLog "/var/log/httpd/blog.iandreev.com-access_log" combined
    <Directory "/var/www/blog.iandreev.com">
        Options All
        AllowOverride All
        Require all granted
    </Directory>
</VirtualHost>
That will have to turn into this. :)
<VirtualHost *:80>
    ServerName blog.iandreev.com
    Redirect permanent / https://blog.iandreev.com/
</VirtualHost>
You are permanently redirecting http to https and we need a new entry for that.
Add the following at the end of the /etc/httpd/conf.d/ssl.conf.
<VirtualHost *:443>
    SSLEngine On
    SSLCertificateFile /etc/certs/blog_iandreev_com.crt
    SSLCertificateKeyFile /etc/certs/blog.iandreev.com.key
    SSLCertificateChainFile /etc/certs/blog_iandreev_com.ca-bundle
    ServerAdmin [email protected]
    DocumentRoot "/var/www/blog.iandreev.com"
    ServerName blog.iandreev.com
    ErrorLog "/var/log/httpd/blog.iandreev.com-error_log"
    CustomLog "/var/log/httpd/blog.iandreev.com-access_log" combined
    <Directory "/var/www/blog.iandreev.com">
        Options All
        AllowOverride All
        Require all granted
    </Directory>
</VirtualHost>
If your ssl.conf comes with the default virtual host on 443, you have to remove it.
If you see this line
<VirtualHost _default_:443>
delete everything until the end of
Finally, protect your certs. Make sure that your certs directory has the right permissions.
chmod 700 /etc/certs
cd /etc/certs
chmod 600 *
Restart apache with apachectl restart and you are good to go.

