
In this post I’ll explain how to create a Node.js chat program, put the source on Github and then using Jenkins we’ll deploy the code to Docker Hub and from there to Docker containers that are managed by Kubernetes. There are many prerequisites for this.
-
– Linux workstation with Node.js and git installed (I’ll use CentOS 7)
– Valid GitHub account. Create a repo called chitchat.
– Valid DockerHub account. Create a repo called chitchat.
– Jenkins server with a public IP, git and Docker installed (I’ll use CentOS 7)
– Kubernetes cluster running Docker
See my other posts on how to install Jenkins and Kubernetes cluster.
Table of Contents
The chat program
For this purpose I’ve found a simple Node.js chat program that uses Express framework. The program can be found here, but we’ll modify it a bit. On a Linux workstation (I use CentOS, so some commands might differ), log as your regular user and create some necessary directories, a directory called chitchat and two subdirectories, public and test and two subdirectories for public, called js and css.
mkdir -p chitchat/test
mkdir -p chitchat/public/{js,css}
cd chitchat
Create the source files for the chat program. First, let’s create the HTML. Click the (+) sign to expand. Just copy and paste everything. The first line (cat) will take care of the file creation.
cat << EOF > index.html
<!DOCTYPE html>
<html>
    <head>
        <title>Chit Chat App</title>
        <link href="css/styles.css" rel="stylesheet" type="text/css" media="screen">
        <meta name="viewport" content="width=device-width,minimum-scale=1,initial-scale=1">
    </head>
    <body>
        <ul class="messages"></ul>
        <form>
            <input type="text" class="input" autocomplete="off" autofocus />
            <button>Send</button>
        </form>
        <script src="https://cdnjs.cloudflare.com/ajax/libs/socket.io/2.2.0/socket.io.dev.js"></script>
        <script src="js/app.js"></script>
    </body>
</html>
EOF
Then, the Node.js code.
cat << EOF > index.js
var express = require('express');
var app = express();
var http = require('http').Server(app);
var io = require('socket.io')(http);
var port = process.env.PORT || 4141;
var path = require('path');

app.get('/', function(req, res){
    res.sendFile(__dirname + '/index.html');
});

app.use(express.static(path.join(__dirname + '/public')));


io.on('connection', function(socket) {

    socket.on('user_join', function(data) {
        this.username = data;
        socket.broadcast.emit('user_join', data);
    });

    socket.on('chat_message', function(data) {
        data.username = this.username;
        socket.broadcast.emit('chat_message', data);
    });

    socket.on('disconnect', function(data) {
        socket.broadcast.emit('user_leave', this.username);
    });
});

http.listen(port, function() {
    console.log('Listening on *:' + port);
});
EOF
Then, the actual code for the app.
cat << EOF > public/js/app.js
const form = document.querySelector("form");
const input = document.querySelector(".input");
const messages = document.querySelector(".messages");
const username = prompt("Please enter a nickname: ", "");
const socket = io();

form.addEventListener("submit", function(event) {
        event.preventDefault();

        addMessage(username + ": " + input.value);

        socket.emit("chat_message", {
                        message: input.value
        });

        input.value = "";
        return false;
}, false);

socket.on("chat_message", function(data) {
        addMessage(data.username + ": " + data.message);
});

socket.on("user_join", function(data) {
        addMessage(data + " just joined the chat!");
});

socket.on("user_leave", function(data) {
        addMessage(data + " has left the chat.");
});

addMessage("You have joined the chat as '" + username  + "'.");
socket.emit("user_join", username);

function addMessage(message) {
        const li = document.createElement("li");
        li.innerHTML = message;
        messages.appendChild(li);
        window.scrollTo(0, document.body.scrollHeight);
}
EOF
And finally the CSS stylesheet.
cat << EOF > public/css/styles.css
body {
    margin: 0;
    font-family: sans-serif;
}

form {
    position: fixed;
    bottom: 0;
    left: 0;
    width: 100%;
    display: flex;
    box-sizing: border-box;
    padding: 0.25rem;
}

form input {
    border: 0;
    padding: 0.5rem;
    width: 100%;
    outline: 0;
    margin-right: 0.5rem;
    border-radius: 0.25rem;
    background: #ccc;
}

form button {
    width: 6rem;
    background-color: #1b8c00;
    color: white;
    border: none;
    padding: 0.5rem;
    cursor: pointer;
    border-radius: 0.25rem;
    text-transform: uppercase;
}

form button:hover {
    background-color: #166d01;
}

.messages {
    margin: 0;
    padding: 0;
    margin-bottom: 3rem;
}

.messages li {
    padding: 0.5rem;
}

.messages li:nth-child(odd) {
    background: #eee;
}
EOF
If you don’t have Node.js installed, then install it. If you already have Node.js, skip this step. While still logged as the regular user, sudo to install Node.js and npm and check the versions. Make sure you are in chitchat directory.
curl -sL https://rpm.nodesource.com/setup_10.x | sudo bash -
sudo yum -y install nodejs
node -v && npm -v
Initiate a new project. Make sure you are in chitchat directory.
npm init
Answer the questions for the initialization. Just hit Enter for every question, we’ll replace this file later. Then install Express and socket.io.
npm install -save express
npm install -save socket.io
Finally, start the program. If you have a firewall enabled, you have to poke a hole.
sudo firewall-cmd --add-port=4141/tcp --zone=public --permanent
sudo firewall-cmd --reload
node index.js
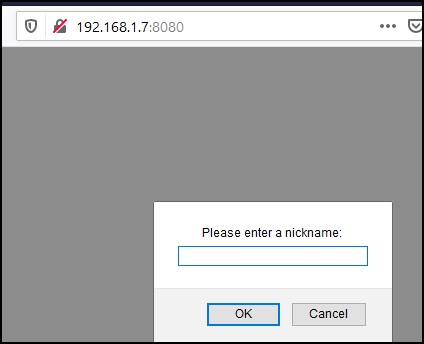
The program should listen on port 4141. Open up a browser and access the Node.js app. (http://workstation_ip:4141).
I’ve opened two windows and logged as UserA and UserB to test the functionality. It looks like this.

The GitHub repository
Now that we have the program ready, let’s upload it on GitHub. Log with your account and create a new repository. In my case, I’ll name it chitchat.
On your workstation, initiate the git repo, add the files, do the first commit and push the files to GitHub. It should look like this. Replace your username and the repo name in line 5.
cd chitchat
git init
git add .
git commit -m "First commit."
git remote add origin https://github.com/<your_username>/<your_repo>
git push -u origin master
Jenkins
Install Node.js plugin, Git and Docker
If you installed Jenkins with the default settings, the Git and Docker plugins are probably installed. Node.js plugin is not installed by default so we’ll have to take care of that. Go to Manage Jenkins from the menu and then Manage Plugins. From the Available tab, find the NodeJS plugin and install it.

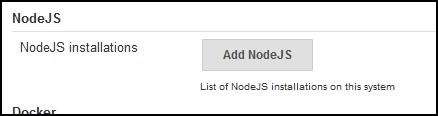
Again, go to Manage Jenkins, Global Tool Configuration and click on Add NodeJS.
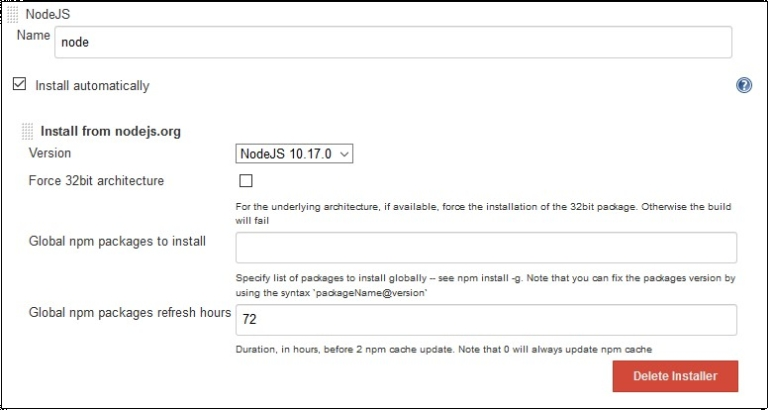
Enter a name and choose the the latest 10.x version. Make sure that the Install automatically is checked. Also, I named my Node.js installation “node” and I’ll reference it as “node” further in the pipeline script. If you name your installation differently, you’ll have to change that in line 4 in the script below.
Again, go to Manage Jenkins and then Manage Plugins in the center. Click on the Installed tab and look for Docker Pipeline plugin and Git plugin. They should be there and already installed (see the grayed checkmark on the left).
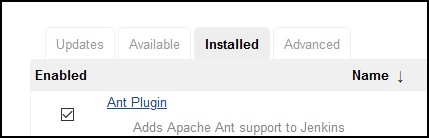


If not, click on the Available tab, search for these plugins and install them similarly to what you did with Node.js plugin. Once installed, SSH to the Jenkins server and install Git first. We’ll install it from the source. This is for CentOS 7 only.
yum -y groupinstall "Development Tools"
yum -y install gettext-devel openssl-devel perl-CPAN perl-devel zlib-devel wget
wget https://github.com/git/git/archive/v2.23.0.tar.gz -O /tmp/git.tgz
cd /tmp
tar xzvf git.tgz
cd git*
make configure
./configure
make install
cd /tmp
rm -Rf git*
Run git ‐‐version to check if it works properly.
Then, install Docker.
yum install -y yum-utils device-mapper-persistent-data lvm2
yum-config-manager --add-repo https://download.docker.com/linux/centos/docker-ce.repo
yum -y install docker-ce
systemctl enable docker
systemctl start docker
usermod jenkins -g docker
systemctl restart jenkins
Now, Jenkins can execute Docker commands.
Jenkins pipeline
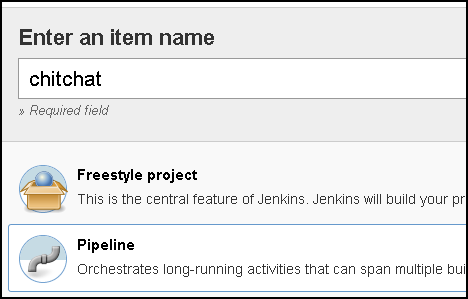
Once installed from the main menu, in the upper-left corner, click on New Item. Enter the project name and choose Pipeline.
Scroll down until you find the Pipeline script and paste this code. We just want to test pulling the repo from Github. Make sure you replace your username and repo name in line 10.
pipeline {
    agent any

    tools {nodejs "node"}

    stages {

        stage('Cloning Git') {
            steps {
                git 'https://github.com/<your_name>/<your_repo>'
            }
        }
    }
}
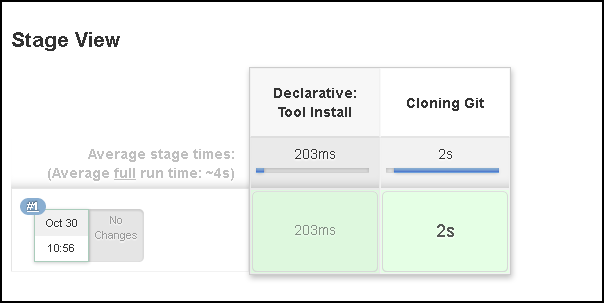
It looks like this.

Click on Save and once back, click on Build Now from the menu.
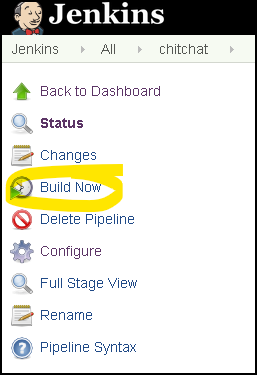
Once completed, you’ll see that everything is running OK.
Click on Console Output to see the actual logs from git.
Now, that we have everything verified, we want to add another step of testing the application. We’ll have to install the pre-requisites for the Node.js and create a test scenario. On the workstation where your project is, create a test scenario. We’ll use mocha and chai for this.
cat << EOF > test/test.js
var chai = require('chai');
var io = require('socket.io-client')
var app = require('../index');
var client = io('http://localhost:4141');

console.log('Server started...Waiting for client connection...');
it('Client connected...', function(done) {
  client.on('connect', function (data) {
    done();
  });
});
EOF
We also need to define the pre-requisites. Change some of the lines here to suit your needs. This is the file that we are replacing, the one that npm init creates.
cat << EOF > package.json
{
  "name": "chitchat",
  "version": "1.0.0",
  "description": "A simple chat program",
  "main": "index.js",
  "scripts": {
    "start": "node index.js",
    "test": "mocha -R spec test/test.js --exit"
  },
  "author": "Kliment Andreev",
  "license": "ISC",
  "dependencies": {
    "express": "^4.17.1",
    "socket.io": "^2.3.0"
  },
  "devDependencies": {
    "chai": "^4.2.0",
    "mocha": "^5.2.0"
  }
}
EOF
As you can see the first file goes under chitchat/test directory and the package.json file is in the root of chitchat directory. Don’t forget to push these files to GitHub.
git add .
git commit -m "Added package.json and test unit"
git push -u origin master
Now, go back to your project in Jenkins (click Configure on the left) and replace the pipeline script with this one. Make sure you change your name and repo in line 10.
pipeline {
    agent any

    tools {nodejs "node"}

    stages {

        stage('Cloning Git') {
            steps {
                git 'https://github.com/<your_name>/<your_repo>'
            }
        }

        stage('Install dependencies') {
            steps {
                sh 'npm install'
            }
        }

        stage('Test') {
            steps {
                sh 'npm test'
            }
        }
    }
}
Click on Build Now and you’ll see that all stages completed fine. But, we want to go a step further and automate the build process anytime we make a change in the source code. In order to do that we need a webhook between GitHub and our Jenkins server. Make sure your Jenkins server is publicly available, otherwise this integration won’t work.
But before we do that, let’s add the script above as a file under our source code for the chat program. Make sure you change your name and repo in line 11. This file goes in the root of the chitchat directory.
cat << EOF > Jenkinsfile
pipeline {
    agent any

    tools {nodejs "node"}

    stages {

        stage('Cloning Git') {
            steps {
                git 'https://github.com/<your_name>/<your_repo>'
            }
        }

        stage('Install dependencies') {
            steps {
                sh 'npm install'
            }
        }

        stage('Test') {
            steps {
                sh 'npm test'
            }
        }
    }
}
EOF
Add this file to Github.
git add .
git commit -m "Added Jenkinsfile"
git push -u origin master
GitHub integration with Jenkins
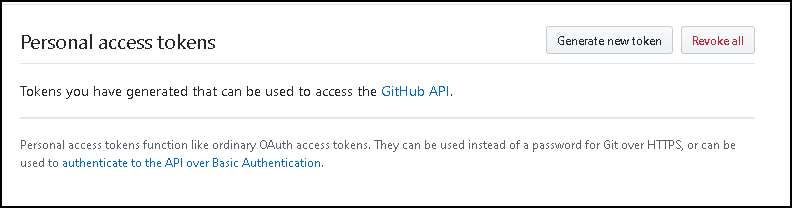
Log in to Github and from the upper right corner, click on your avatar and click on Settings. Then on the menu on the left side, all the way to the bottom click on Developer settings. Click on Personal access tokens and click on Generate new token.
Give a name to your token (I’ll name mine Jenkins Token) and click on admin:repo_hook.
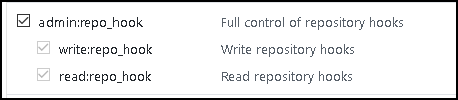
Click on Generate token after. You’ll get a hex token, click on the clipboard icon next to it. You’ll need this token for the Jenkins configuration.
Go to Jenkins and click on Manage Jenkins on the left followed by Configure System in the middle. Scroll down to the Git section, click on Add GitHub server, type GitHub for Name and next to Credentials click on Add, then Jenkins.

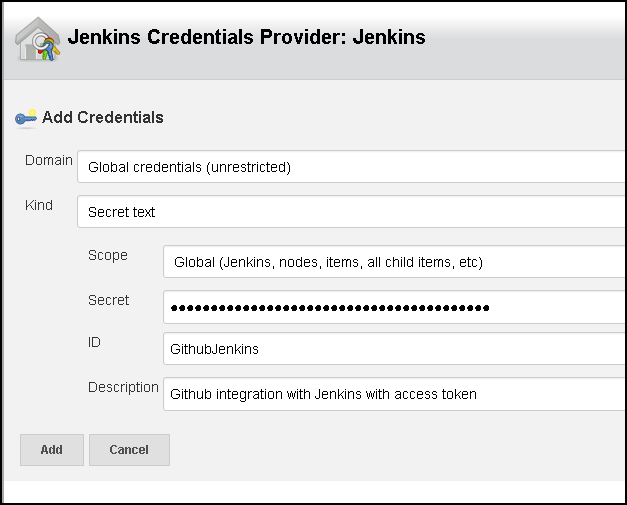
When this window shows up, change the Kind to Secret text. Paste the token under Secret and enter something for ID and Description. Click Add.
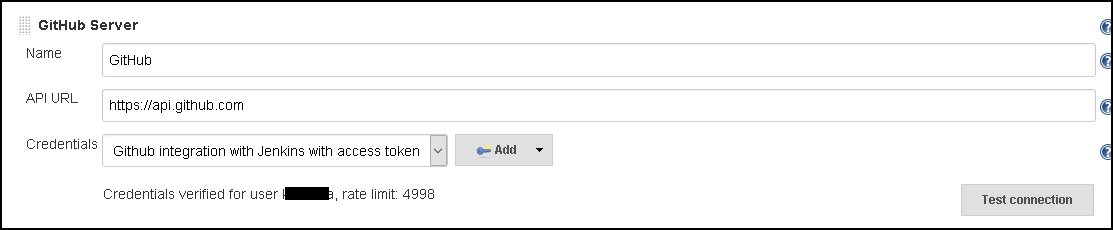
Once back, select the credential that we just created and click on Test connection on the right. You should get a message that the connection is fine. Make sure that Manage hooks is checked. Click on Save at the bottom once everything is OK.
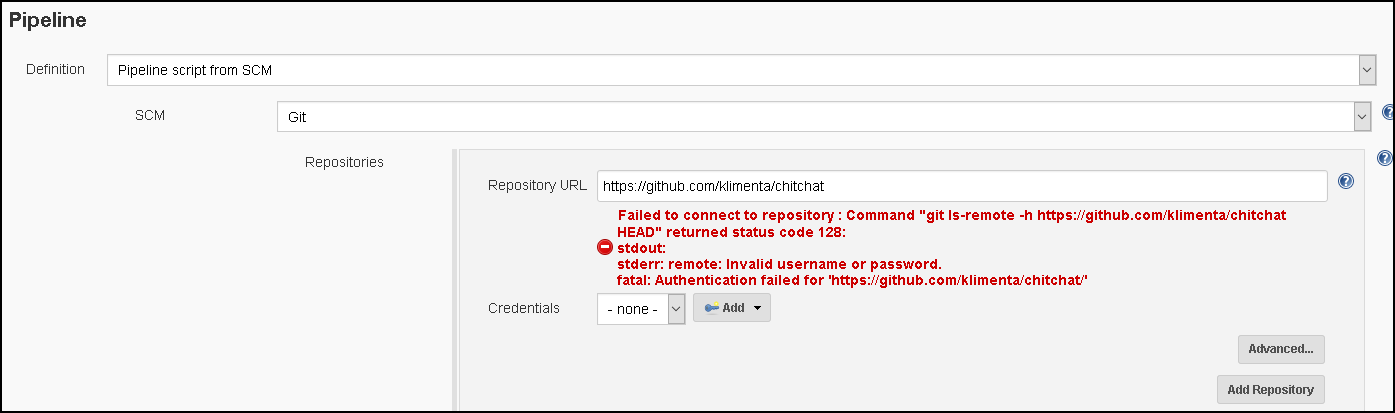
Go back to your project in Jenkins and click Configure on the left. Scroll down where the Pipeline is and change the Definition from Pipeline script to Pipeline script from SCM. SCM means Source Code Management. Change SCM to Git, enter the repo URL under Repositories . If your repo is not public, you’ll have to specify some credentials under Credentials. If your repo is public, you can leave them as none.
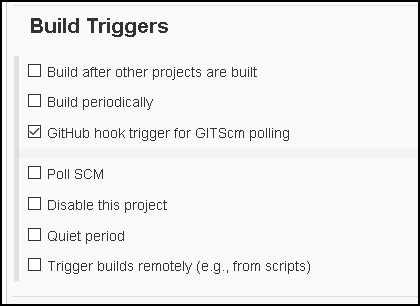
Then scroll up a bit and check GitHub hook trigger for GitScm polling and then click Save.
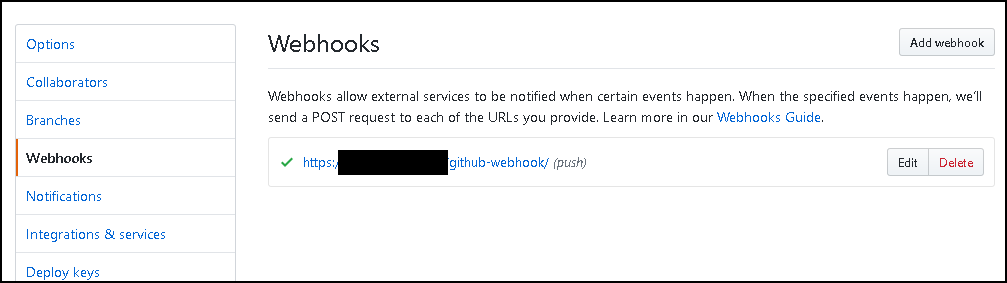
If you go back to GitHub, click on your project and all the way on the right click on Settings.

Then click on Webhooks and you’ll see a green checkmark next to your Jenkins URL.
Go to your workstation and edit the index.html file. Change the line 4 for example so instead of Chit Chat App, replace the blank with a hyphen. e.g. Chit Chat to Chit-Chat. Save it and push to GitHib.
git add .
git commit -m "Minor change in index.html"
git push -u origin master
If you go back to Jenkins, you’ll see that there is a build there triggered automatically. This part is CI (Continous Integration). But, let’s go further and expand our CI with creating a Docker image.
Docker image and Docker Hub
In order to create a Docker image, we need a Dockerfile. I won’t explain the meaning of each line in the Dockerfile, so just copy & paste the following snippet in the chitchat directory.
cat << EOF > Dockerfile
FROM node:10
WORKDIR /usr/src/app
COPY package*.json ./

RUN npm install
COPY . .

EXPOSE 4141
CMD [ "npm", "start" ]
EOF
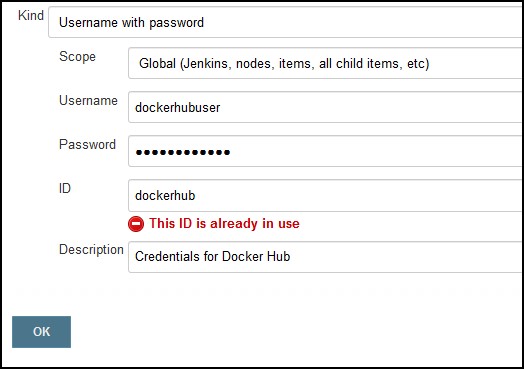
This file will tell Docker exactly what to do when creating the image. But, we also have to tell Jenkins that we need to build the image, test the image and deploy it to Docker Hub. So, your new Jenkinsfile will look like this. Change the URLs in lines 6 and 7 to suit your needs. Before you deploy the script, go to Jenkins, click on Credentials on the left, click on System below, click on Global credentials (unrestricted) in the middle and then Add Credentials on the left. Fill out the form with your Docker Hub credentials. Whatever you put as ID for these username/password pair is what you have to put in line 8 in the script.
And, now copy & paste the script in the chitchat directory. If everything goes well, you’ll see your image deployed in Docker Hub and tagged as whatever your latest build was and the tag latest too.
cat << 'EOF' > Jenkinsfile
pipeline {

    environment {
        dockerregistry = 'https://registry.hub.docker.com'
        dockerhuburl = "klimenta/chitchat"
        githuburl = "klimenta/chitchat"
        dockerhubcrd = 'dockerhub'
    }

    agent any

    tools {nodejs "node"}

    stages {

        stage('Clone git repo') {
            steps {
                git 'https://github.com/' + githuburl
            }
        }

        stage('Install Node.js dependencies') {
            steps {
                sh 'npm install'
            }
        }

        stage('Test App') {
            steps {
                sh 'npm test'
            }
        }

        stage('Build image') {
          steps{
            script {
              dockerImage = docker.build(dockerhuburl + ":$BUILD_NUMBER")
            }
          }
        }

        stage('Test image') {
            steps {
                sh 'docker run -i ' + dockerhuburl + ':$BUILD_NUMBER npm test'
            }
        }

        stage('Deploy image') {
          steps{
            script {
              docker.withRegistry(dockerregistry, dockerhubcrd ) {
                dockerImage.push("${env.BUILD_NUMBER}")
                dockerImage.push("latest")
              }
            }
          }
        }

        stage('Remove image') {
          steps{
            sh "docker rmi $dockerhuburl:$BUILD_NUMBER"
          }
        }
    }
}
EOF
Of course, you’ll have to tell GitHub that there is a change is a file.
git add .
git commit -m "Added Jenkinsfile for Docker"
git push -u origin master
Deployment to Kubernetes using Jenkins
Now that we are finished with the CI (Continuous Integration), it’s time for the CD (Continuous Deployment). We’ll use the existing Docker image that we put on Docker Hub. First thing first, we’ll have to install a plugin for a Kubernetes integration. Go to Manage Jenkins on the left, then click on Manage plugins in the center and click on Available tab. Install the Kubernetes Continuous Deploy plugin.

Once installed and Jenkins is restarted, click on Credentials on the left, then System just below and then click on Global credentials (unrestricted) in the middle. Click on Add Credentials on the left. When this window pops up, change the Kind to Kubernetes configuration (kubeconfig), enter an ID, in my case it’s k8s. Remember the ID, you’ll reference it in the Jenkinsfile later, type a description and select Enter directly. Before you click OK, we’ll have to go to our Kubernetes cluster and log to it.
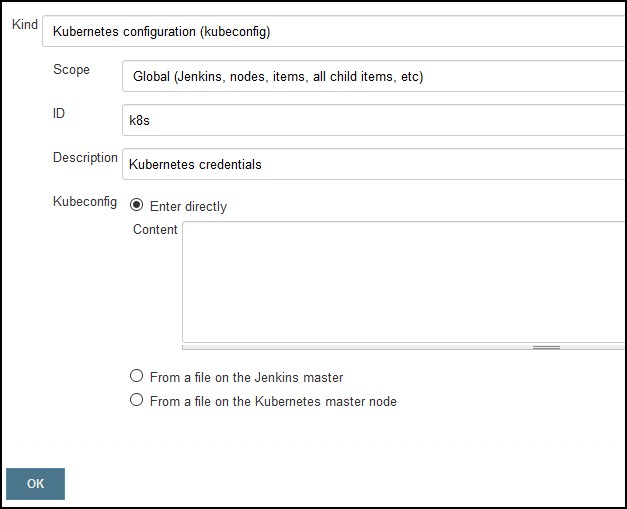
Once you are logged to your master node, log as the user that you use to manage the k8s cluster and run this command.
cat .kube/config
You’ll get a long list of text. Paste this back in the Jenkins window under Content and click OK. This is how Jenkins will communicate with your Kubernetes cluster. We also need to tell Kubernetes how we want our app deployed. As you know this is done with a YAML file. So, we have to add that YAML file under the chitchat directory.Change the IP in line 25 to match your master k8s node IP. I am deploying a load balancer that will listen on port 8080 and 2 pods in a deployment.
cat << 'EOF' > k8s.yaml
apiVersion: apps/v1beta1
kind: Deployment
metadata:
  name: chitchat
spec:
  replicas: 2
  template:
    metadata:
      name: chitchat
      labels:
        app: chitchat
    spec:
      containers:
      - image: $dockerhuburl:$BUILD_NUMBER
        name: nodejs
---
apiVersion: v1
kind: Service
metadata:
  name: loadbalancer
spec:
  type: LoadBalancer
  externalIPs:
  - 192.168.1.7
  selector:
    app: chitchat
  ports:
  - port: 8080
    targetPort: 4141
EOF
And we also want to tell Jenkins that we are adding an extra step to deploy it to the cluster, so the final Jenkins file looks like this.
cat << 'EOF' > Jenkinsfile
pipeline {

  environment {
    dockerregistry = 'https://registry.hub.docker.com'
    dockerhuburl = 'klimenta/chitchat'
    githuburl = 'klimenta/chitchat'
    dockerhubcrd = 'dockerhub'
    dockerImage = ''
  }

  agent any

  tools {nodejs "node"}

  stages {

    stage('Clone git repo') {
      steps {
         git 'https://github.com/' + githuburl
      }
    }

    stage('Install Node.js dependencies') {
      steps {
        sh 'npm install'
      }
    }

    stage('Test App') {
        steps {
            sh 'npm test'
        }
    }

    stage('Build image') {
      steps{
        script {
          dockerImage = docker.build(dockerhuburl + ":$BUILD_NUMBER")
        }
      }
    }

    stage('Test image') {
      steps {
        sh 'docker run -i ' + dockerhuburl + ':$BUILD_NUMBER npm test'
      }
    }

    stage('Deploy image') {
      steps{
        script {
          docker.withRegistry(dockerregistry, dockerhubcrd ) {
            dockerImage.push("${env.BUILD_NUMBER}")
            dockerImage.push("latest")
          }
        }
      }
    }

    stage('Remove image') {
      steps{
        sh "docker rmi $dockerhuburl:$BUILD_NUMBER"
      }
    }

    stage('Deploy k8s') {
      steps {
        kubernetesDeploy(
          kubeconfigId: 'k8s',
          configs: 'k8s.yaml',
          enableConfigSubstitution: true
        )
      }
    }
  }
}
EOF
Trigger the change.
git add .
git commit -m "Added Jenkinsfile for kubernetes and yaml"
git push -u origin master
After a minute or so, you’ll see your pods running and if you go to your master node on port 8080 you’ll see the app happily running.
4 comments
HI ANDREEV,
I followed all steps mentioned on blog, application is up ans running. when i send my username it showing no responce.
i remember during npm init you said “according to blog post we’ll replace this file later” what does this mean , you haven’t mentioned anything about the file in the post.
When you run npm init, it creates a package.json file. I’ve replaced that file later. I also updated the section to make it clear.
Check the firewall and SELinux config. Try disabling them both and see if the same happens. If you are using different version of CentOS, node.js or something else, that might be the problem too.
Hi
My App is running but not getting desired respnce from . i can’t attach screen shot in reply, so I’m sharing URL and page information in text format.
http://192.168.231.75:4041/ ( Header : Chit Chat App)
|——————————-|
| | Send
|——————————-|
When i type Any Name or anything string, i don’t get any response.
HI Andreev,
I suspect VS Code is causing the above issue. when I’m running app Directly from Ubuntu O/S 20.04 it’s giving desired response.
Thanks for your response.