
Recently, I was trying to find a way on how to create a site-to-site connection between my Azure VMs and a FreeBSD VPS that I run with another provider. I wasn’t able to find anything, but I’ve found an article on how to create a site-to-site VPN between pfSense and Azure using IPsec VPN. Mind that Azure does not support this type of site-to-site VPN. At this time, they support only limited sets of Cisco ASA and Juniper devices.
pfSense is basically heavily modified FreeBSD with PHP front-end, so I’ve decided to spin a new pfSense VM as a VPS with public IP, I’ve created a site-to-site pfSense<->Azure and then analyzed (reverse engineered) the configuration files. The result is a fully working site-to-site connection between Azure and FreeBSD 10.0 box.
Table of Contents
Requirements
You will need:
This is how my implementation looks like. I have a FreeBSD box with two NICs (one external facing the Internet with a public IP and one internal NIC with a subnet that was assigned by my VPS provider. I can’t change this subnet). Make sure that you have a public IP on the BSD box. IPsec won’t work if you don’t have a public IP on the BSD box. I won’t hide the external IPs. These are test boxes and they will be long gone when you read this.

Enable IPsec on FreeBSD
In order for FreeBSD to run an IPsec tunnel, you’ll have to use a custom kernel. In my case, the FreeBSD box that I got provisioned came with 10.0-RELEASE-p12. You can easily check this with:
uname –a
The output should look like.
FreeBSD freebsd2 10.0-RELEASE-p12 FreeBSD 10.0-RELEASE-p12 #0: Tue Nov 4 05:07:17 UTC 2014 [email protected]:/usr/obj/usr/src/sys/GENERIC amd64
Which means I am running 10.0-RELEASE-p12 with GENERIC kernel on a 64-bit platform.
The VPS came without the source files installed (necessary to build a custom kernel), so I had to do the following:
pkg install subversion
svn co svn://svn.freebsd.org/base/release/10.0.0 /usr/src
freebsd-update fetch
svn update /usr/src
Then I made a copy of the GENERIC kernel file:
cd /usr/src/sys/amd64/conf
cp GENERIC MYKERNEL-20141227
And I’ve added these lines at the end
options   IPSEC
device    crypto
options   IPSEC_DEBUG
Then I compiled the kernel and rebooted it (takes about 10-20 mins).
cd /usr/src
make buildkernel KERNCONF=MYKERNEL-20141227
make installkernel KERNCONF=MYKERNEL-20141227
If for some reason your kernel compilation crashes with an error like this.
m.o pci_bus.o qpi.o busdma_machdep.o  dump_machdep.o intr_machdep.o io_apic.o legacy.o local_apic.o  mca.o msi.o nexus.o tsc.o hvm.o xen_intr.o config.o env.o hints.o vnode_if.o hack.So vers.o

*** Signal 9
Stop.
make[2]: stopped in /usr/obj/usr/src/sys/MYKERNEL-20141224
*** Error code 1
This means you messed up the compiler/make tools, so do:
make kernel-toolchain
make buildkernel KERNCONF=MYKERNEL-20141227
make installkernel KERNCONF=MYKERNEL-20141224
Once the server comes up, install the IPsec tools.
pkg install ipsec-tools
Check if ipsec is supported in the kernel.
sysctl -a | grep ipsec
You should see a bunch of ipsec properties.
Azure virtual network configuration
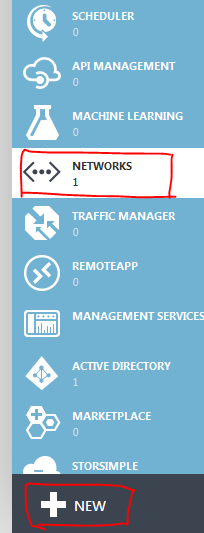
Log in to Azure portal and create a new virtual network.
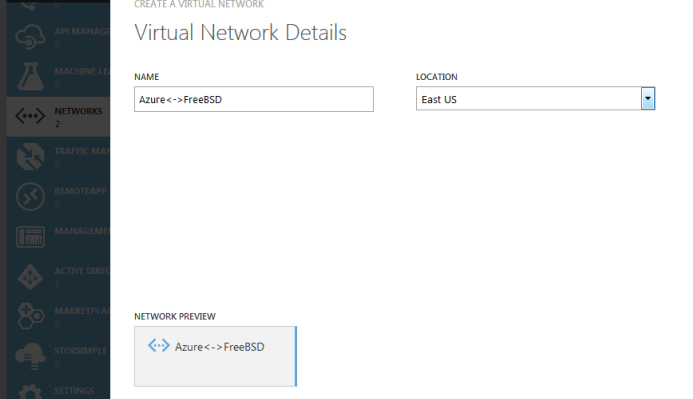
Name the network however you want, in my case it’s Azure<->FreeBSD. Also, choose the location, in my case East US.
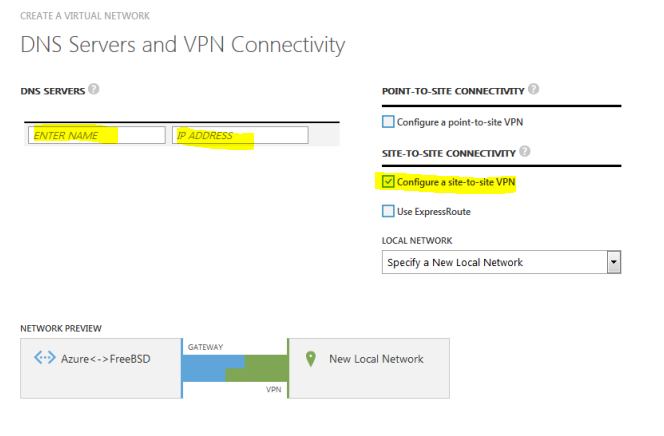
Enter the IP of the DNS server. You can specify multiple DNS servers if you want. If you don’t specify a DNS server, Azure will use one of its own. If you specify a server that’s on the network that’s behind the FreeBSD box, use the internal IP, not the external IP. Click Configure a site-to-site VPN.
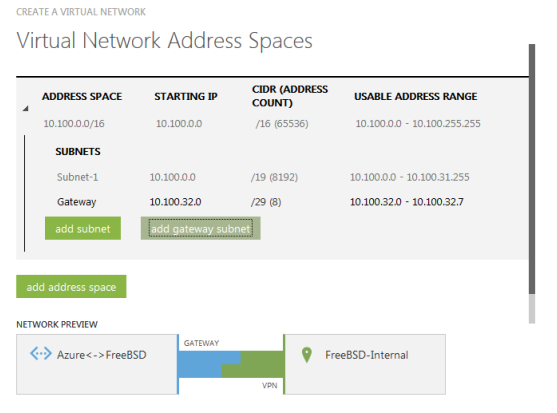
On the next screen, enter the name of the FreeBSD’s internal network (e.g. FreeBSD-local, FreeBSD-internal) and the external IP of your BSD box. For the address space, enter the subnet of your internal FreeBSD network in CIDR format. In my case, my VPS provided me with 10.99.0.0/16 subnet.
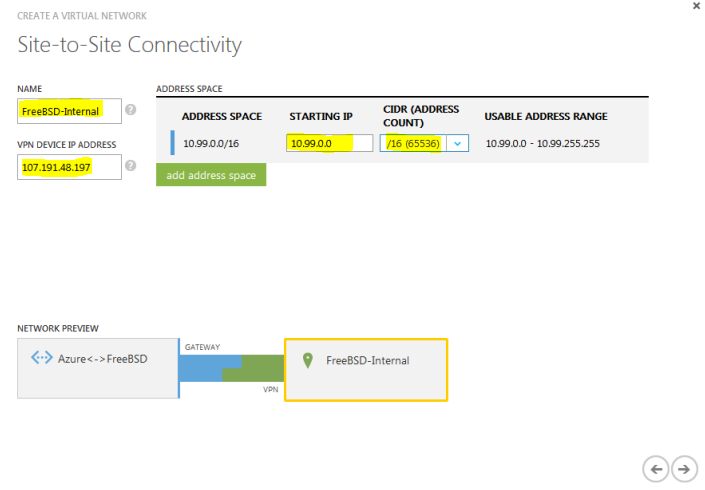
On the next screen, Azure will automatically assign a network for your Azure VMs that’s in a different subnet, in this case it’s 10.100.0.0/16. Feel free to change this to 192.168.1.0/24 or whatever you want your Azure VMs to have their IPs assigned.
IMPORTANT
Internal networks on both sides have to be in different subnets. You can’t have a tunnel across same subnets.
I’ll accept the defaults. /16 is a huge subnet, you will probably want a /24 subnet, but this is just an example anyway. At the end, click on add gateway subnet. This is needed for Azure.
It will take 3-5 seconds for the network to be created.
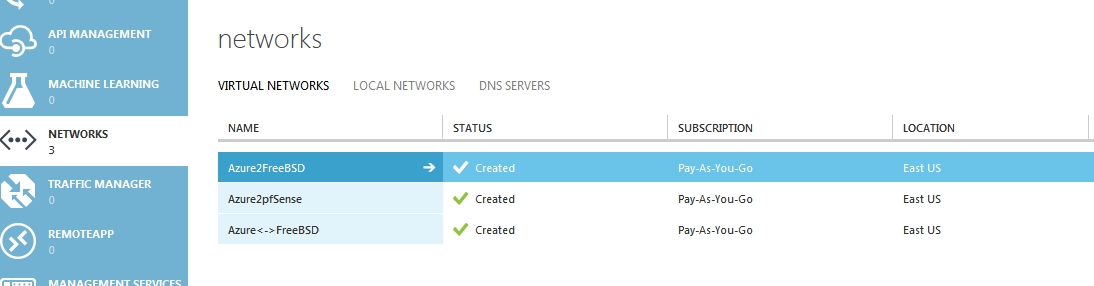
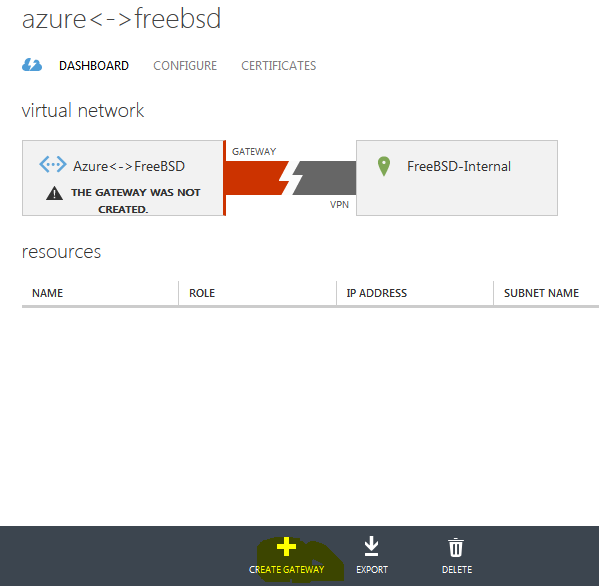
Click on the network you just created and then click on Create Gateway.
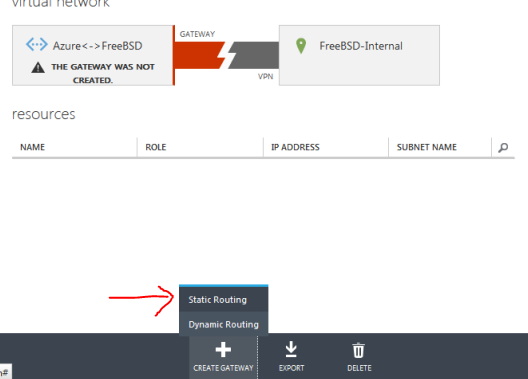
IMPORTANT
Click on Static Routing.
Now wait 10-12 minutes. While I was testing my solution, I’ve created at least 10 gateways. It always takes 10-12 minutes no matter where you choose your network (East US, West Europe, etc..)
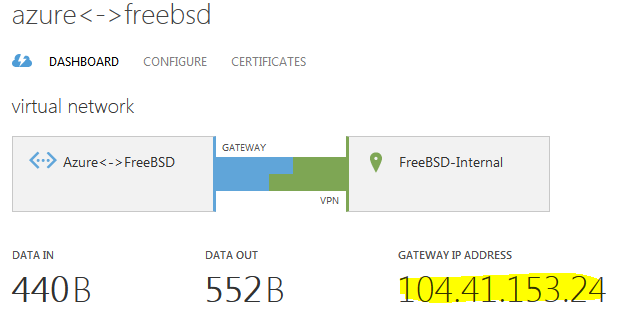
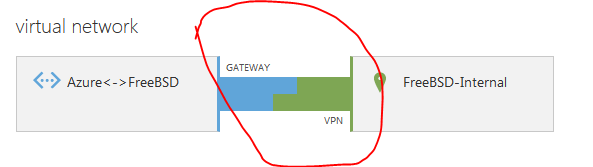
Once the gateway creation finishes, click on the NETWORKS and you’ll see this. That’s the external IP of the Azure’s gateway.
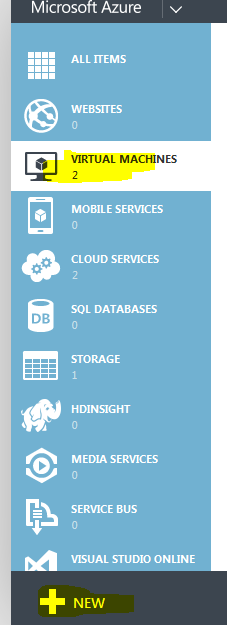
Create Azure VM
While you are waiting, go ahead and spin a new VM for testing. Use the minimum defaults.
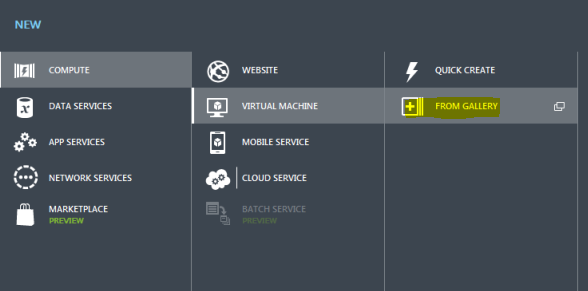
Do not use Quick Create option, you won’t be able to select your network. Go ahead and choose From Gallery.
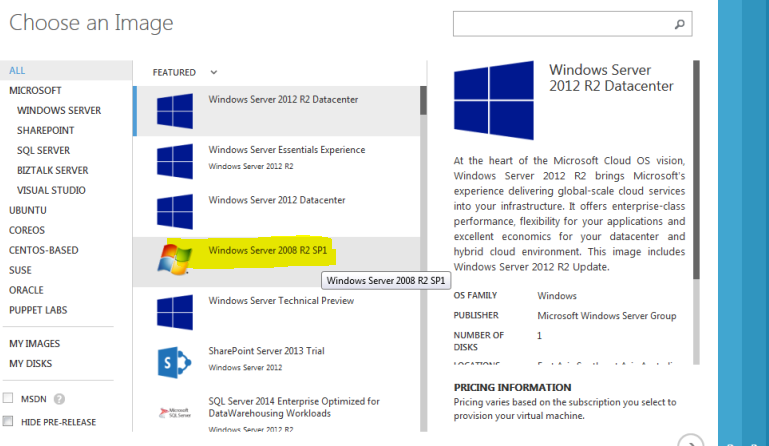
Choose the OS, in my case it’s Windows 2008 R2.
I used the minimum config for test. It’s dog slow but it does the work for testing.
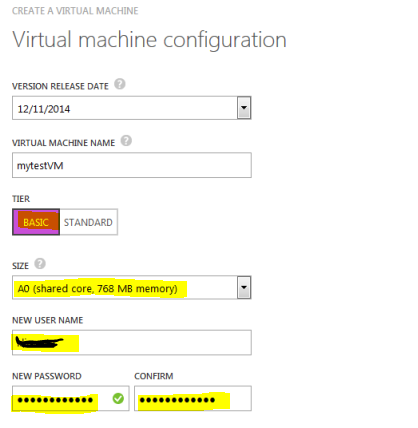
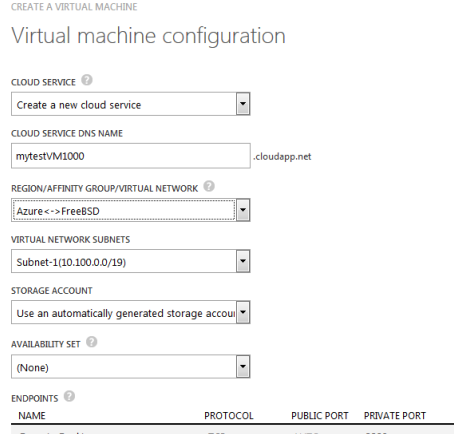
At this point, you have to specify the network.

Accept the defaults and finish the VM creation.
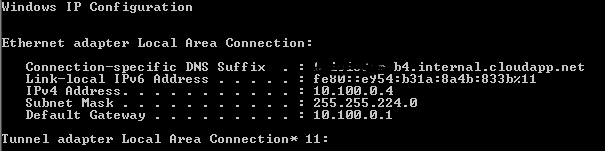
Once completed, connect to the VM and get the internal IP.

Get the shared key
Select the Azure<->FreeBSD network again and then click on Manage key.
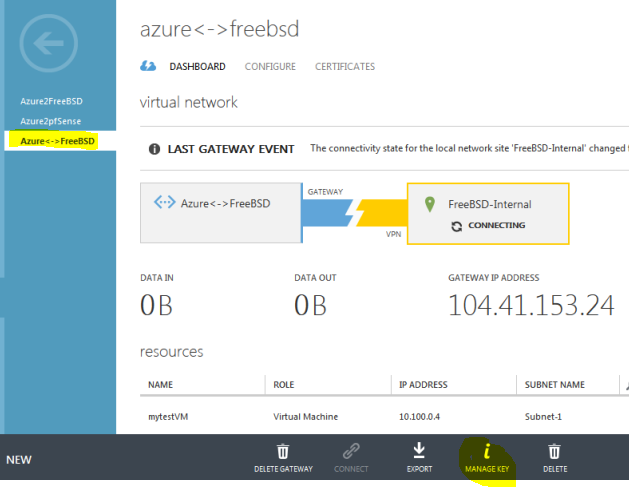
This is your shared key. You will need this, so copy it on the clipboard.

Check up
When I was testing the solution, I was able to establish a site-to-site VPN, but I couldn’t reach any of the internal servers on both sides. I tried all sorts of packet capture, analyzing headers and ARP packets and couldn’t figure out why it’s not working. After 3-4 hours I’ve found that I messed up the subnets in spd.conf. It was a small typo. So… this is a recap of what we have by now. Take a moment and make sure you have the proper IPs and subnets.

FreeBSD, first run
OK, so you have IPsec enabled in the custom kernel, you’ve installed the ipsec-tools. It’s time to do the connection. But first we have to create some files. Go to:
cd /usr/local/etc/racoon
and create the psk file which contains the IP of the remote (Azure) gateway and the shared key. In my case it looks similar to this.
cat psk.txt
104.41.153.24 egfy566O98uI9WNog65dcLiVilqlZGkQicK
Next, create the policies. This is a new file spd.conf in the same directory (/usr/local/etc/racoon).
flush;
spdflush;
spdadd -4 10.99.0.10/32 10.99.0.0/16 any -P out none;
spdadd -4 10.99.0.0/16 10.99.0.10/32 any -P in none;
spdadd -4 10.99.0.0/16 10.100.0.0/16 any -P out ipsec esp/tunnel/107.191.48.197-104.41.153.24/unique;
spdadd -4 10.100.0.0/16 10.99.0.0/16 any -P in ipsec esp/tunnel/104.41.153.24-107.191.48.197/unique;
Look above. Make sure all IPs and subnets match. I struggled on this because of a typo.
Set the policy with:
setkey -c -f /usr/local/etc/racoon/spd.conf
And the third file is racoon.conf in the same directory. Again, look for the IPs and subnets (e.g. isakmp under listen is the IP of your FreeBSD external interface, peers_identifier is the Azure gateway, etc…)
path pre_shared_key "/usr/local/etc/racoon/psk.txt";

listen
{
        isakmp 107.191.48.197 [500];
}

remote 104.41.153.24
{
        ph1id 1;
        exchange_mode main;
        my_identifier address 107.191.48.197;
        peers_identifier address 104.41.153.24;

        ike_frag on;
        generate_policy = off;
        initial_contact = on;
        nat_traversal = off;

        dpd_delay = 10;
        dpd_maxfail = 5;
        support_proxy on;
        proposal_check claim;

        proposal
        {
                authentication_method pre_shared_key;
                encryption_algorithm aes 256;
                hash_algorithm sha1;
                dh_group 2;
                lifetime time 28800 secs;
        }
}

sainfo subnet 10.99.0.0/16 any subnet 10.100.0.0/16 any
{
        remoteid 1;
        encryption_algorithm aes 256, aes 192, aes 128;
        authentication_algorithm hmac_sha256;

        lifetime time 3600 secs;
        compression_algorithm deflate;
}
NOTE: pfSense uses NAT-Traversal, but you’ll need to compile it in the kernel (options IPSEC_NAT_T). I am not quite familiar about this, but it’s not needed. You can read about NAT-T here.
So we have all three necessary files, last thing to do is to change the permissions.
cd /usr/local/etc/racoon
chmod 0600 *
Only psk.txt needs these permissions, otherwise it won’t work, but it won’t hurt if you have these permissions for the other files.
Finally, make sure that you have NAT enabled, so the packets can traverse between the external and internal interface on the BSD box.
sysctl net.inet.ip.forwarding=1
At this point you are all set. Let’s fire it up. “-F” means run in foreground, “-v” means to be more verbose and “-ddd” means a lot of debug information.
racoon -F -v -ddd
If everything goes well, you’ll see this as the output.
2014-12-28 01:08:55: DEBUG: pfkey UPDATE succeeded: ESP/Tunnel 107.191.48.197[500]->104.41.153.24[500] spi=70552724(0x4348c94)

2014-12-28 01:08:55: INFO: IPsec-SA established: ESP/Tunnel 107.191.48.197[500]->104.41.153.24[500] spi=70552724(0x4348c94)

2014-12-28 01:08:55: DEBUG: ===

2014-12-28 01:08:55: DEBUG: pk_recv: retry[0] recv()

2014-12-28 01:08:55: DEBUG: got pfkey ADD message

2014-12-28 01:08:55: DEBUG2:

02030003 14000000 d37dd3a1 06070000 02000100 25f4b508 0400050c 00000000

02001300 02000000 00000000 01400000 03000500 ff200000 100201f4 6bbf30c5

00000000 00000000 03000600 ff200000 100201f4 68299918 00000000 00000000

04000300 00000000 00000000 00000000 100e0000 00000000 00000000 00000000

04000400 00000000 00000000 00000000 400b0000 00000000 00000000 00000000

2014-12-28 01:08:55: INFO: IPsec-SA established: ESP/Tunnel 107.191.48.197[500]->104.41.153.24[500] spi=636794120(0x25f4b508)

2014-12-28 01:08:55: DEBUG: ===
If you switch on the Azure side, you won’t see anything. It takes about 3-5 mins for the tunnel to show up. It looks like this.
You don’t have to wait for Azure to show you that the tunnel has been established. As long as you can see something like this, you are OK.
2014-12-28 01:08:55: INFO: IPsec-SA established: ESP/Tunnel 107.191.48.197[500]->104.41.153.24[500] spi=636794120(0x25f4b508)
At this point, you can go to your Azure VM and ping the internal IP of the FreeBSD. You should see a response. But, if you try to ping the Azure VM from FreeBSD, you won’t have any response. And it’s not because Azure Windows VMs have firewall enabled by default. It’s because we are using static routes. Remember when we created the Azure gateway, we choose static routes. So, add a static route.
route add 10.100.0.0/16 10.99.0.10
For FreeBSD this means, if you want to reach any host on 10.100.0.0/16 network (Azure), use 10.99.0.10 (internal FreeBSD NIC) as a gateway. There is no need for routes on the Azure side. The Azure gateway takes care of that.
Now you shouldn’t be able to ping the Azure VM (10.100.0.4) again. What? Well, that’s because the Azure VMs come with Windows firewall enabled. But RDP is enabled, so do:
telnet 10.100.0.4 3389
You should see this.
telnet 10.100.0.4 3389

Trying 10.100.0.4...

Connected to 10.100.0.4.

Escape character is '^]'.
If you made it to this point, congrats. If not, double check everything. I assume that you don’t have a firewall on the BSD box. If you have, read further.
FreeBSD pf firewall
The firewall config can be found here for both pf and IPFW.
pass in quick proto esp from any to any
pass in quick proto ah from any to any
pass in quick proto ipencap from any to any
pass in quick proto udp from any port = 500 to any port = 500
pass in quick on gif0 from any to any
pass out quick proto esp from any to any
pass out quick proto ah from any to any
pass out quick proto ipencap from any to any
pass out quick proto udp from any port = 500 to any port = 500
pass out quick on gif0 from any to any
Remove gif0 lines, we are not using gif0. Works without ah end ipencap lines as well.
Wrapping up
If everything works OK, once you reboot everything will be gone. You’ll have to edit /etc/rc.conf and add these lines.
# IPsec
gateway_enable="YES"
ipsec_enable="YES"
ipsec_program="/usr/local/sbin/setkey"
ipsec_file="/usr/local/etc/racoon/spd.conf"
racoon_enable="yes"
racoon_flags="-l /var/log/racoon.log"
static_routes="azurenet"
route_azurenet="-net 10.100.0.0/16 10.99.0.10"
It’s very self-explanatory. We used the same commands above.