In this post I’ll describe how to install FreeBSD 10.1 and make it available with a public IP on vCloud Air platform. Unlike CentOS, Ubuntu and Windows, FreeBSD doesn’t come as a prepackaged VM in the public catalogs.
Create a VM
First, go to http://vcloud.vmware.com and log in or sign up for a new account. When you log in, select your data center where you want the VM to be provisioned. Then, click on the Virtual Machines tab.
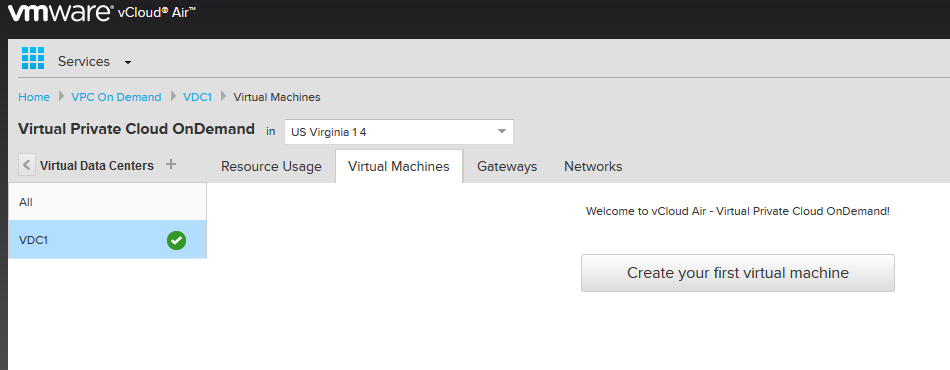
Click Create a VM or Create your first virtual machine button and then choose Create My Virtual Machine from Scratch.
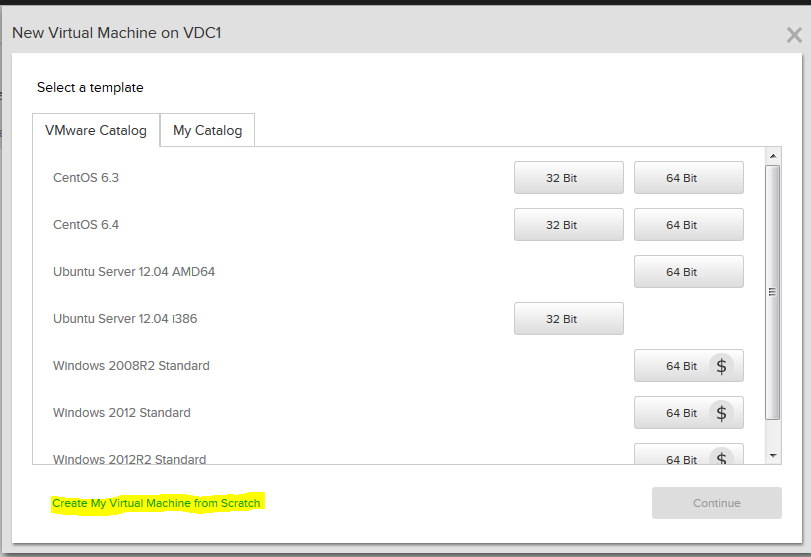
A new tab will open because FreeBSD is not part of the VMware catalog. Once there click on Build New vApp.
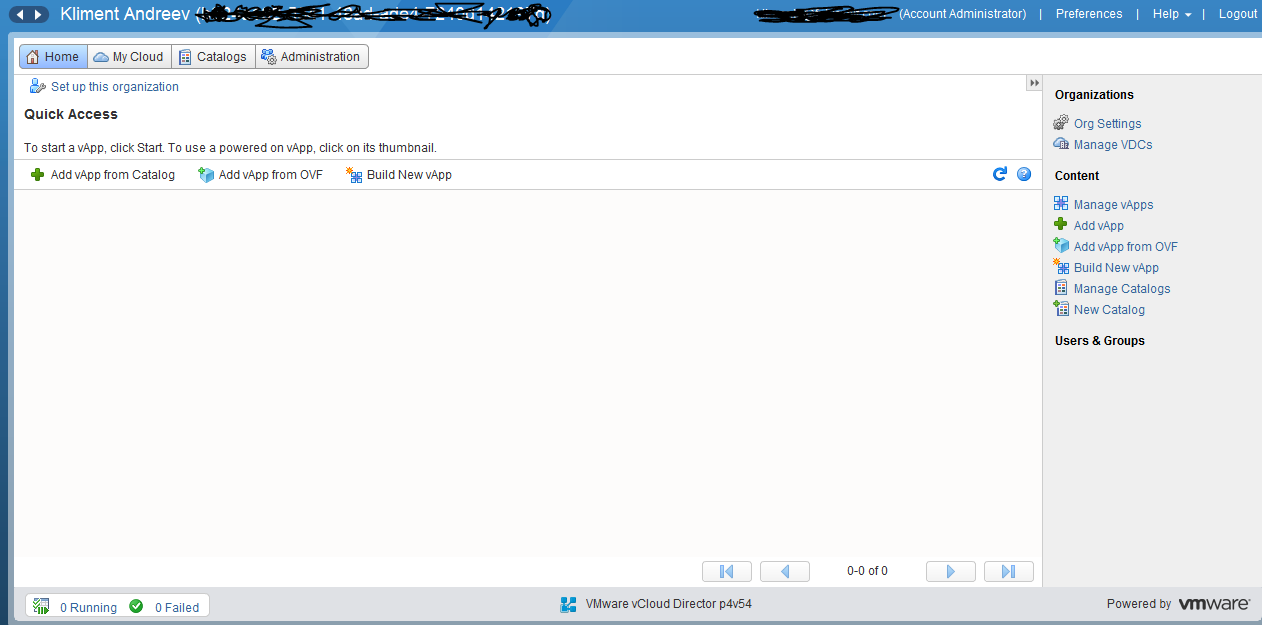
A vApp is a container of VMs. For example, you can create a vApp consisting of two VMs, one database and one web front-end VM. In our case, we’ll have one VM. Enter the name of the vApp and fill out the rest of the form. Most likely, you’ll leave the defaults so click Next.
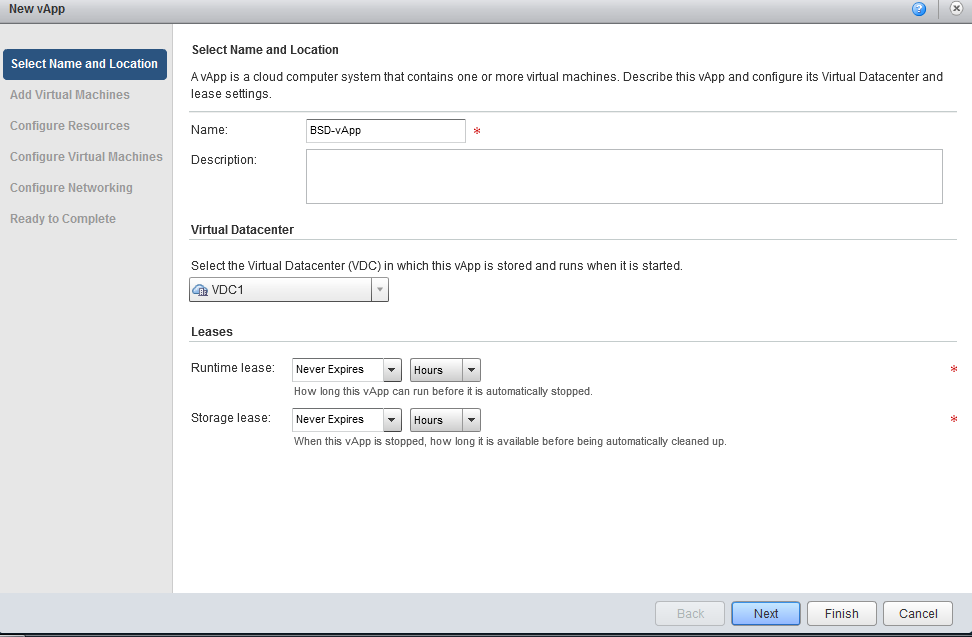
The next screen asks you where are the installation files for the OS. Since we are using FreeBSD and it’s not in the public VMware catalog and we don’t have our catalog yet, we just have to click New Virtual Machine.
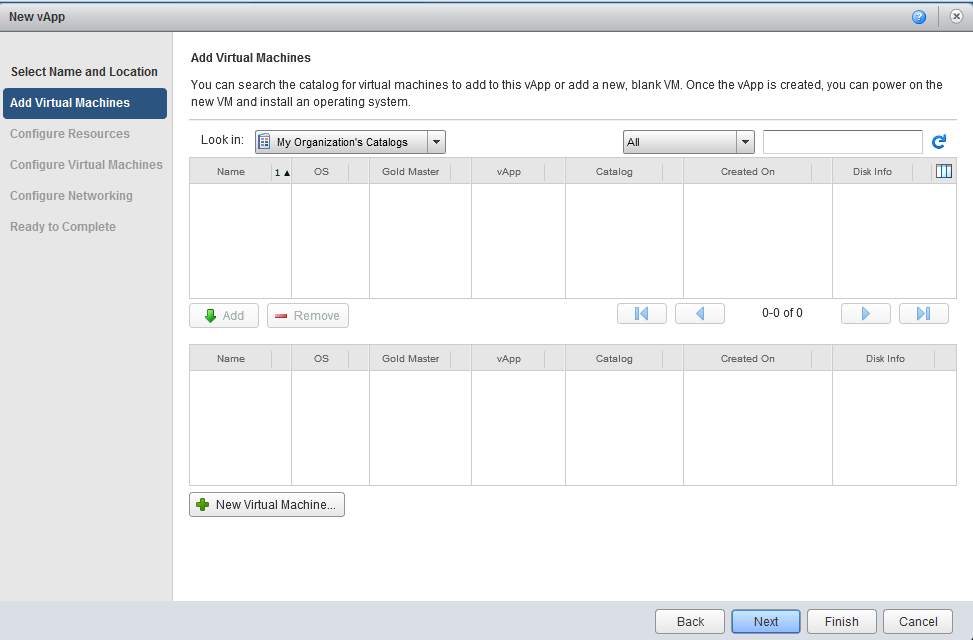
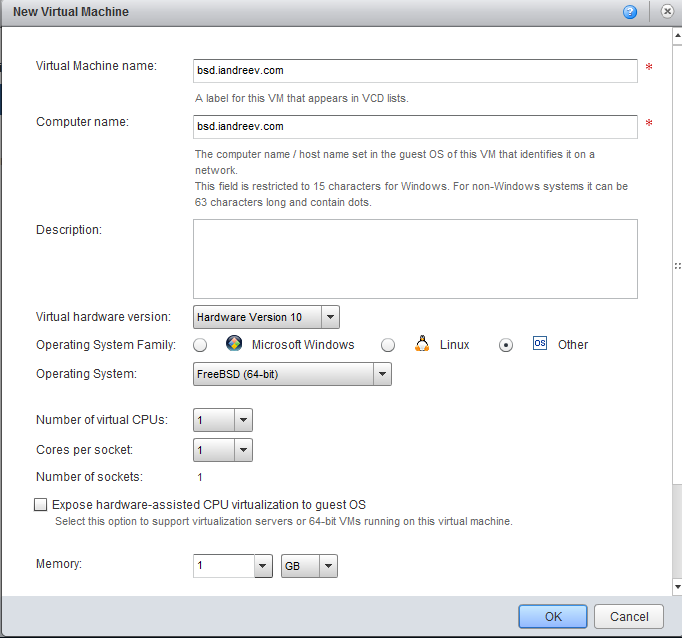
This will bring you to this screen.
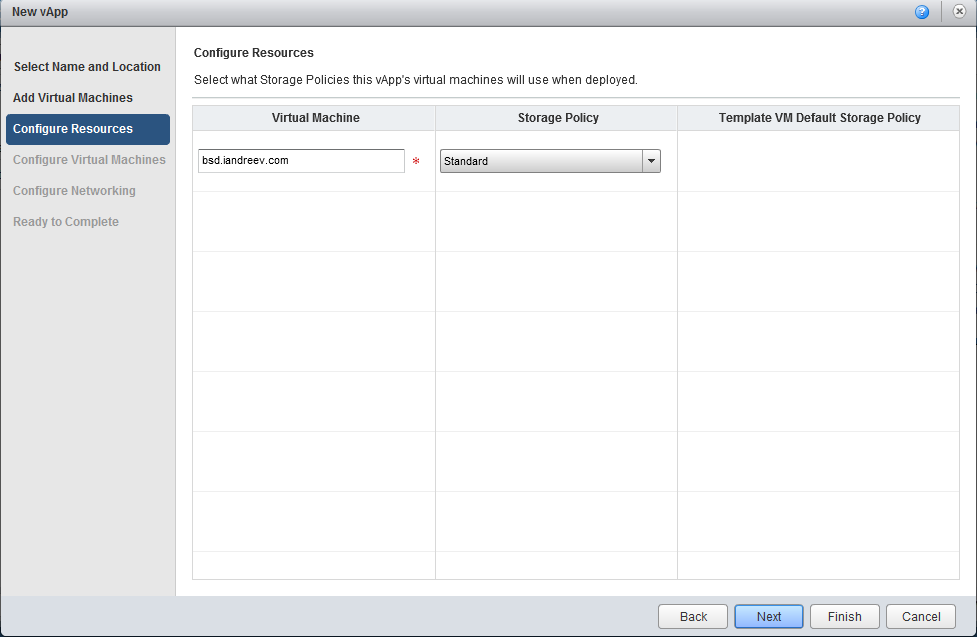
Enter the name of the virtual machine and then the computer name. Both can be random descriptions in this case. If you use a VM from the VMware catalog, you can specify the host name in the computer name field. Click Other for the Operating System Family and specify FreeBSD (64-bit). Choose how many CPUs and RAM you need and click Next. For the storage policy, choose Standard or Standard-SSD.
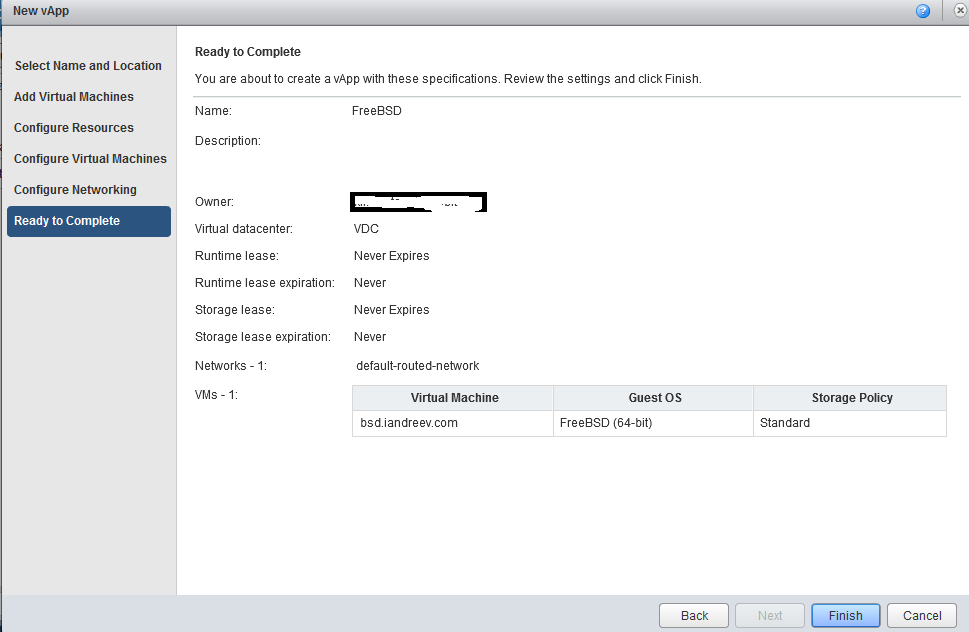
Click Next and select the default-routed-network. For the IP assignment I choose Static – Manual which means I’ll have to specify the IP. If you choose Static – Pool, vCloud will assign an IP from the pool. Your best bet is to use Static – Manual. vCloud can’t interact that well with BSD, so I wasn’t able to assign an IP from the static pool. Click Next, review and then…

…click Finish.
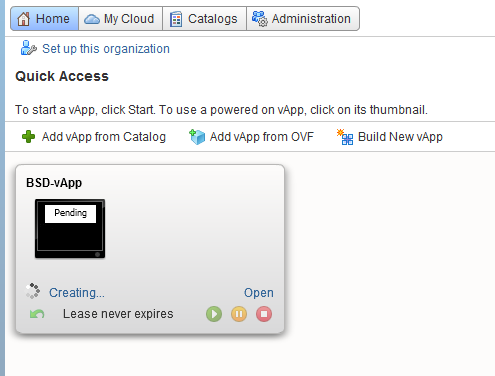
If you click Home, you’ll see that the VM is being created. It takes about a minute or two.
Create a catalog
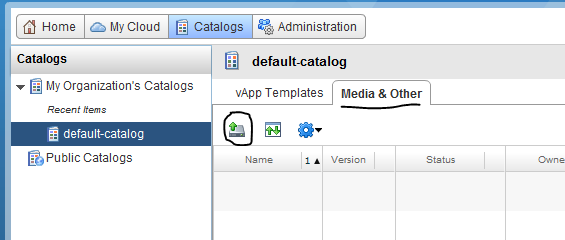
You don’t have to wait for the build to finish. Click Catalogs, then default-catalog, then Media & Other and click the Upload icon. We’ll upload the FreeBSD ISO image so we can install the VM from scratch.
IMPORTANT
If you get an error that your browser is not supported, make sure that Java Deployment Toolkit.

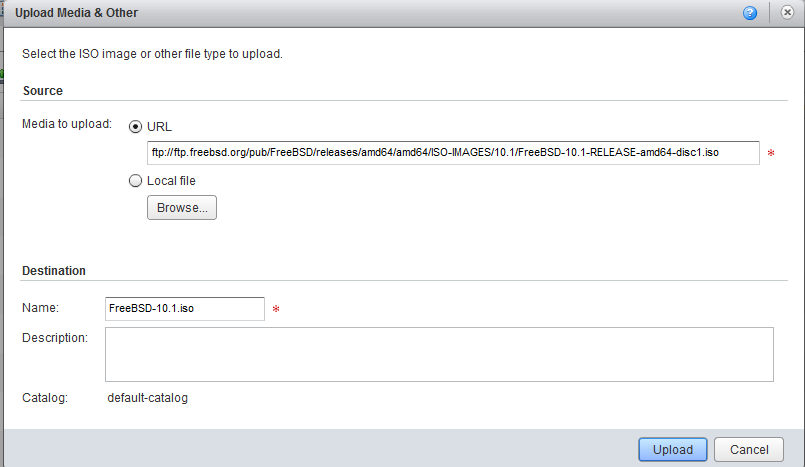
When this box shows up, specify the URL for the BSD iso and give it some description. Paste this in the URL field, then click OK. You will be prompted for your username and password for the vCloud subscription.
ftp://ftp.freebsd.org/pub/FreeBSD/releases/amd64/amd64/ISO-IMAGES/10.1/FreeBSD-10.1-RELEASE-amd64-disc1.iso
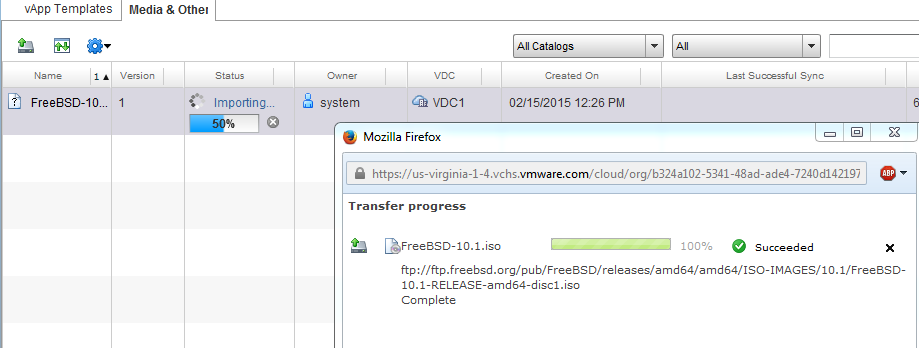
It will take some time, about 10 mins. You can see the progress, but the progress bars are kind of not in sync. You can click refresh but you’ll see no progress. Just wait about 10-15 mins. See below.
You can also use a tool called ovftool which can be downloaded from VMware site. The syntax to upload an ISO image is:
ovftool --sourceType=ISO bsd10.iso "vcloud://[email protected]:[email protected]?org=aebc198-667efde-xy76&vdc=VDC&catalog=My Catalog&media=bsd10.iso"
This will upload the file called bsd10.iso which is in the same folder as ovftool to my subscription that’s in us-California-1-3.vchs.vmware.com, with org identifier aevc198….My datacenter is called VDC and my catalog is called My Catalog. I log as [email protected] with password secret.
Install FreeBSD
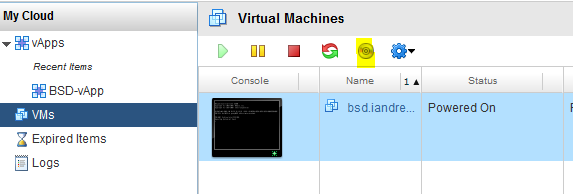
Once the upload completes, go back to My Cloud tab, then VMs, select the VM and map the iso from the toolbar (click the icon that looks like a CD).
Select the ISO and click Insert.
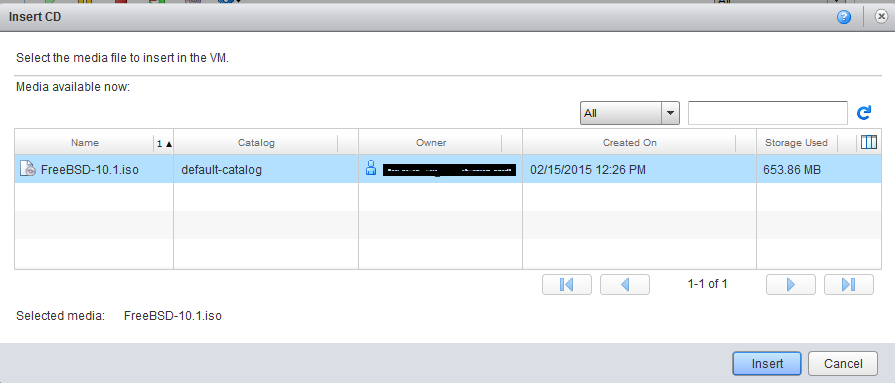
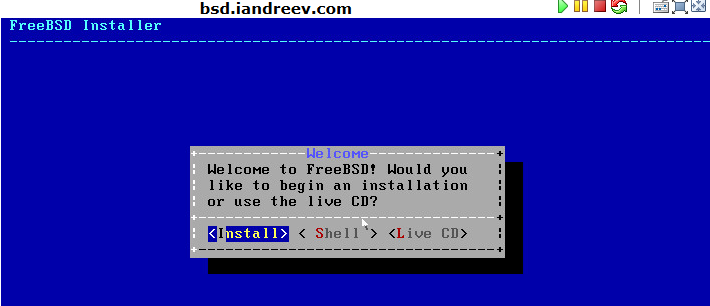
At this point, you can power up the VM and open the console. The installer will kick in and you have to specify the IP manually, gateway IP, enter the hostname, DNS servers, root password, time zone etc… Standard FreeBSD installation.
Once the install completes, reboot, log in as root and verify that you have an IP assigned. Don’t try to ping the gateway, you won’t be able to do so.
Install VMware Tools
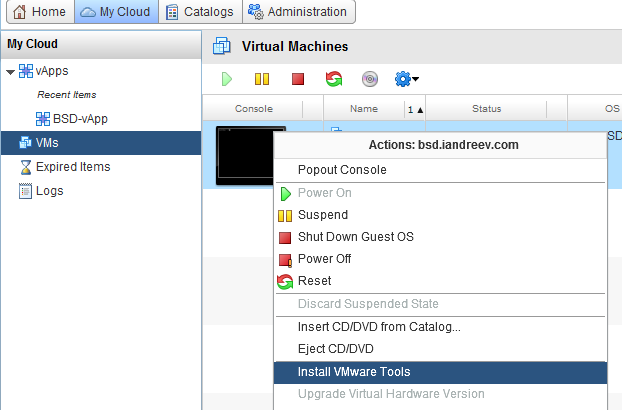
If everything looks OK, we can install the VMware Tools. Right click the VM, and choose to install the tools.
Nothing will happen, but this will map the CD with VMware Tools installation. You’ll have to install the tools manually. Open the console, log as root and type the following.
mount -t cd9660 /dev/cd0 /mnt
cd /tmp
tar xzf /mnt/vmware-freebsd-tools.tar.gz
cd vmware-tools-distrib
./vmware-install.pl
If you receive an error that perl can’t be found, install perl first.
pkg install perl5.16
Reboot after.
Configure the NAT & Firewall for outside access
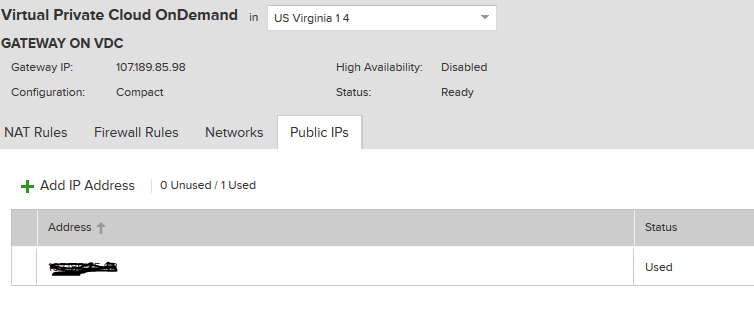
For this you will need an external IP. Each vCloud Air subscription comes with external edge gateway, but this is not your external IP. You’ll have to add one (extra charge). Go back to the vCloud OnDemand portal (not vCloud Director) and click on Gateways. Then click on Public IPs. Add an external IP and copy it to the clipboard.
This will take some time, 3-5 mins. We don’t have to do anything inside our VM. This external IP can serve multiple VMs behind the NAT. Same as your internal network behind one public IP from your internet provider.
For this example, I’ll create the NAT for the internal network and allow the VM to freely communicate with the outside world (access to updates, patches, ports etc.) and then allow port 22 (ssh) to hit our VM.
IMPORTANT
You can create the NAT and Firewall rules at both vCloud OnDemand and vCloud Director portals. The dialog boxes are slightly different, but the information asked is the same. plugin is enabled.
We’ll create the rules in vCloud Director. Anyway, that’s the place where you are going to spend most of the time. Click on Administration tab and then on your datacenter.

Click the Edge Gateway, right-click the gateway and choose Edge Gateway Services.
This box will show up. Click NAT first and then click Add SNAT.
In my case it looks like this. The hidden text is my external IP.
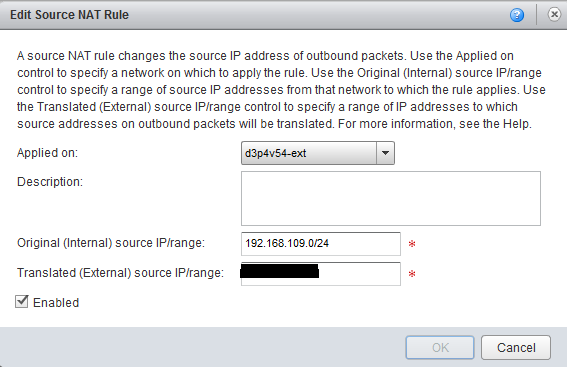
This means that all VMs on my internal subnet will use one external IP for outbound access.
Now, let’s create another rule, this time click Add DNAT. Fill out as below. The hidden part is my external IP.
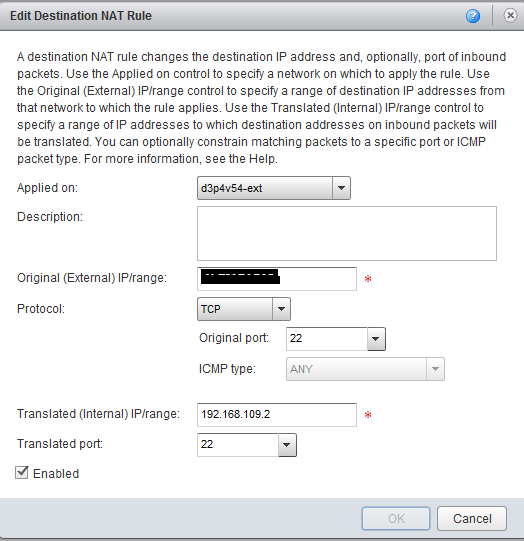
This rule maps port 22 on the external edge interface with my particular VM on 192.168.109.2. Mind that these rules are for the NAT. The ports are still closed on the firewall, so we’ll have to poke some holes there next.
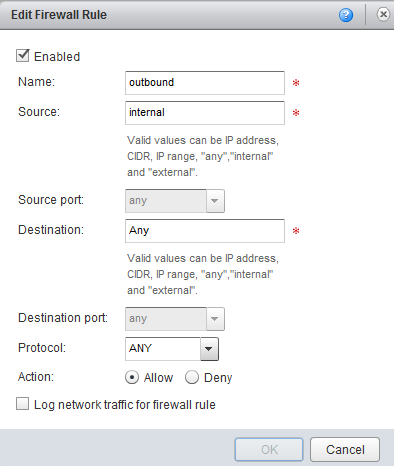
Click on the Firewall tab and then click Add. This rule will allow access to all internal VMs to the outside world.
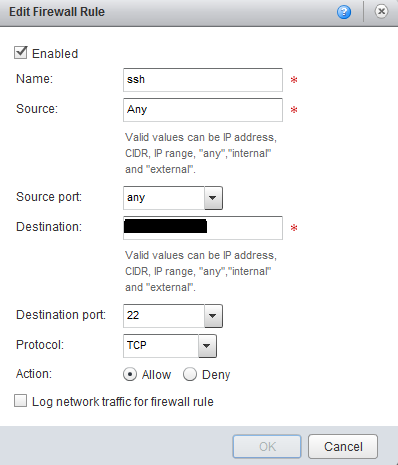
The next rule will open the port 22 (ssh) on the edge gateway. The NAT rule will take care of the destination. Make sure for the destination that you enter the external IP, not the internal one. At this point you are all set and you can access your VM from outside using a ssh client.


