
In this post I’ll describe how to establish a site to site connection with Amazon’s AWS cloud. We’ll use pfSense 2.2, build two instances in the cloud and expand our internal network to Amazon over IPsec tunnel. Make sure that you use pfSense 2.2. They’ve changed the IPsec from racoon to strongswan in this version, so I am not sure if the scenario described below will work with earlier versions. It should, because the parameters are the same, but you never know. In this post, I won’t hide any IPs or shared keys. These instances will be long gone when you read this.
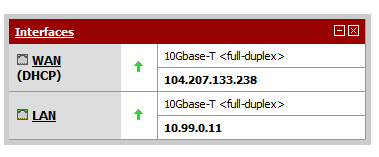
Make sure you have a working pfSense instance with WAN and LAN adapters already configured. You will need this info. The public IP, the local IP and the local subnet. In my case the local subnet for the LAN IP is 10.99.0.0/16.
IMPORTANT
You need a public IP on the pfSense WAN. You can’t use NAT or any type of port forwarding. This won’t work. Also, pfSense should not be placed on AWS, it should go to another cloud provider or at your home.
Table of Contents
AWS
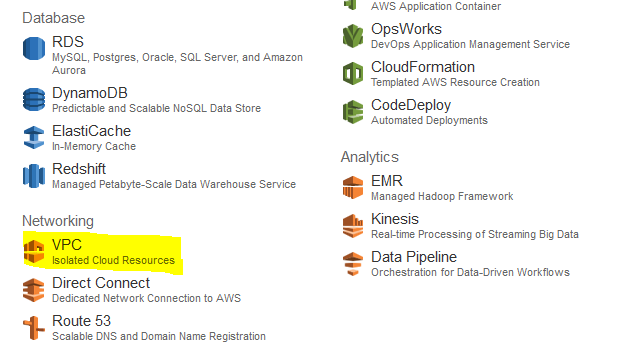
Log on to AWS portal and select VPC.
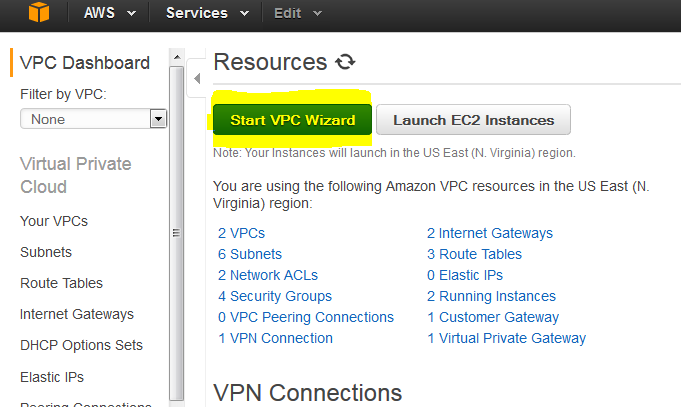
Click on Start VPC Wizard button.
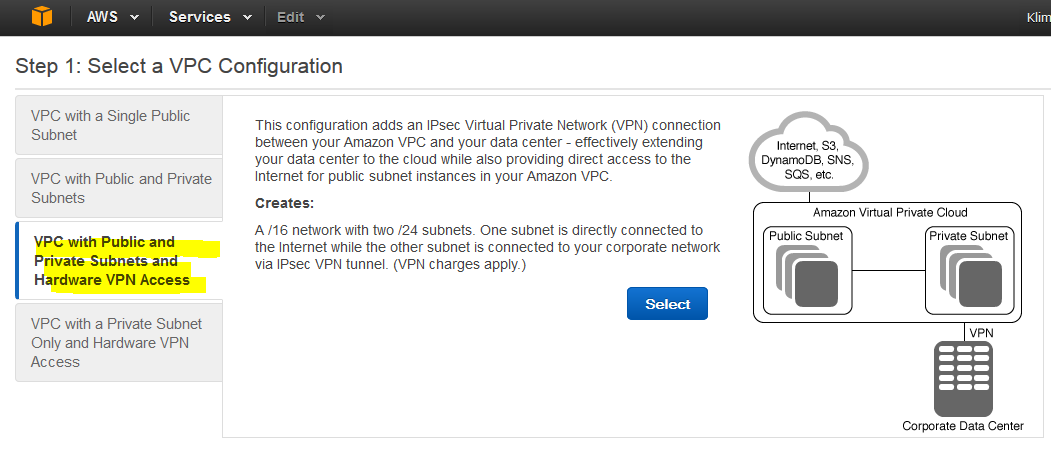
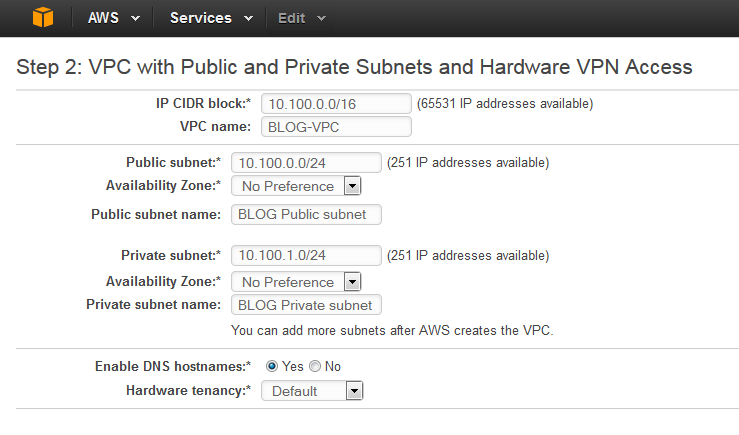
Choose the third option, VPC with Public and Private Subnets and Hardware VPN Access. We’ll build two instances (VMs). One in the public space and one in the private space. The public instance can be reached from outside, but this instance can also reach the private instance. The private instance can reach the public instance and our local network.
IMPORTANT
Make sure that your internal subnet does not overlap with the AWS subnet. IPsec can work only between different subnets.
I’ll use 10.100.0.0/16 as a VPC subnet and then carve two smaller subnets, 100.100.0.0/24 which will be my Public subnet (named BLOG Public subnet) and 10.100.1.0/24 as my Private subnet (named BLOG Private subnet).
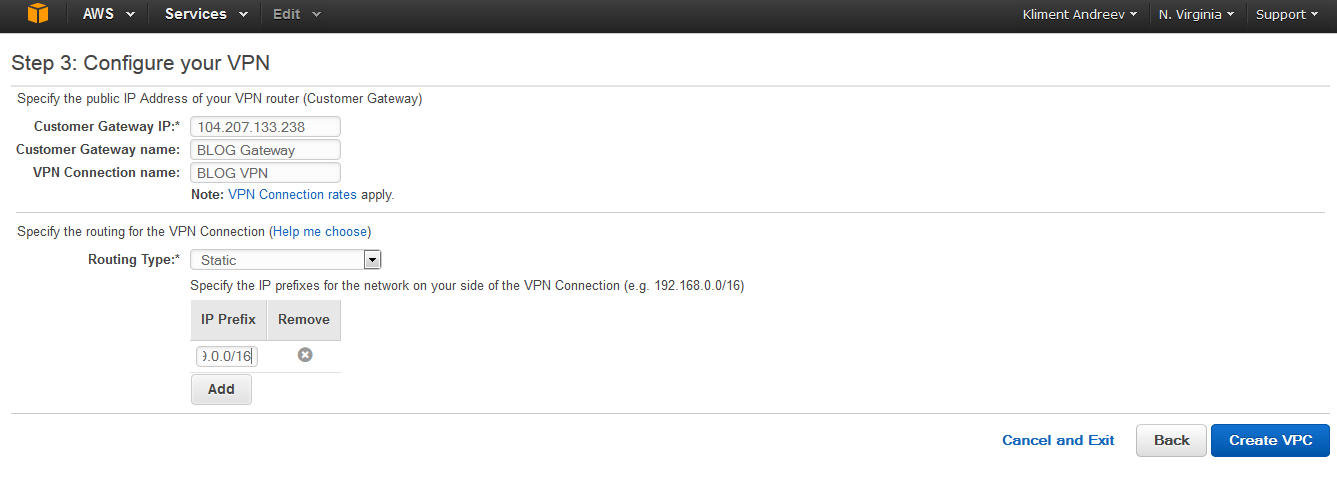
Specify the Customer Gateway IP (that’s the public IP of pfSense), choose Static for Routing Type and enter the LAN subnet on the pfSense side. Name the Customer Gateway and VPN Connection accordingly and click on Create VPC.
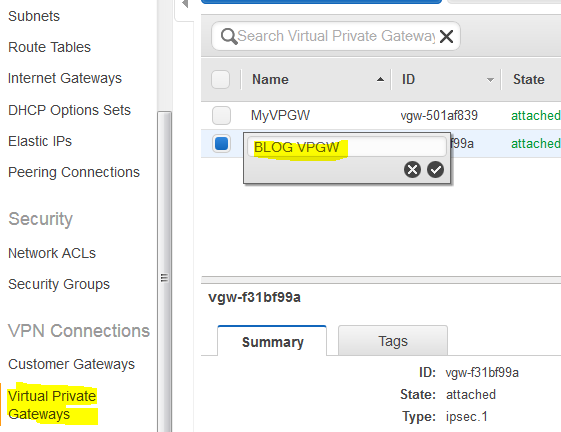
Once completed (after 2-3 minutes), click on Virtual Private Gateways and name your gateway.
Click on Route Tables and rename your routes. You will notice that the route for the public subnet has BLOG Public subnet associated. Name this route as Public Route or however you want. In my case it’s BLOG Public Route.
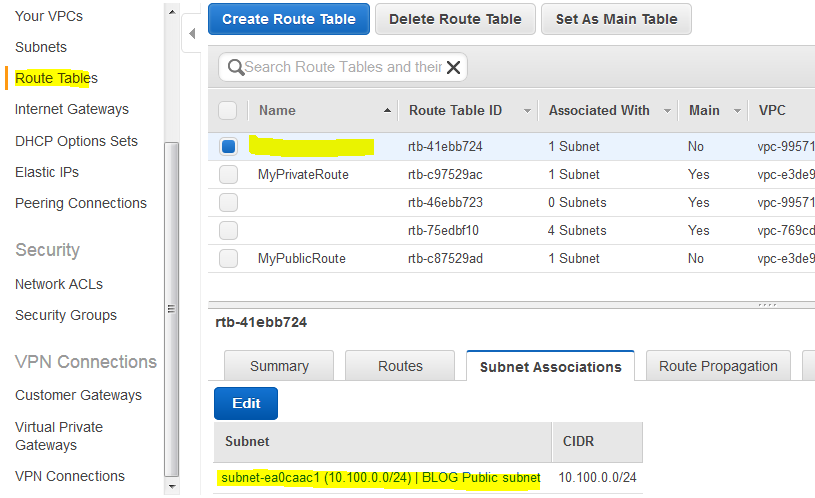
Click on the other route and name it, in my case BLOG Private Route. Then click on Subnet Associations and click Edit.
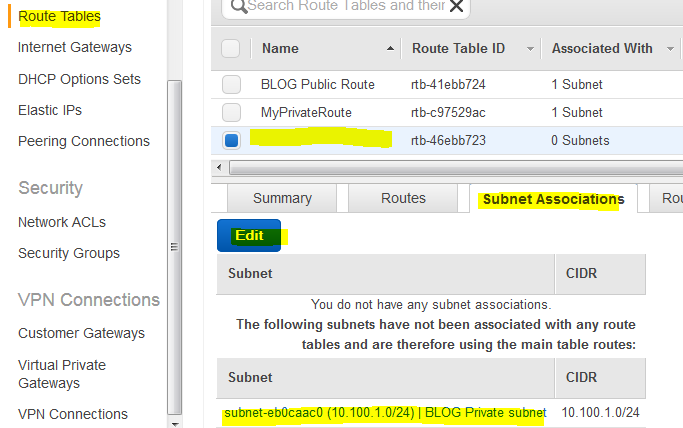
Associate this route with the BLOG Private Subnet and click Save.

At this point, we’ll create two Amazon Linux instances, but let’s see what we have.

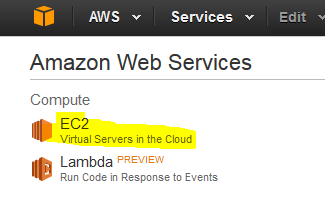
Go back to the home screen and click on EC2.
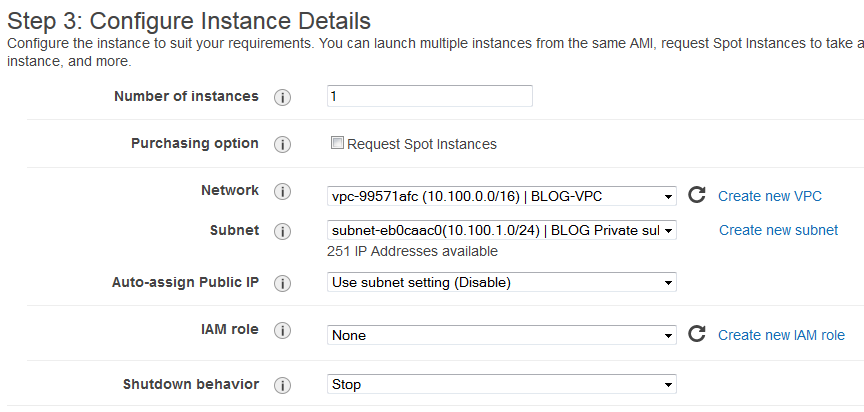
I won’t go into details, but pick Amazon Linux AMI, choose the CPU/RAM resources (micro, small, etc…), and then select the proper VPC, the public subnet and enable auto public IP as below. This is our AMI with public access.
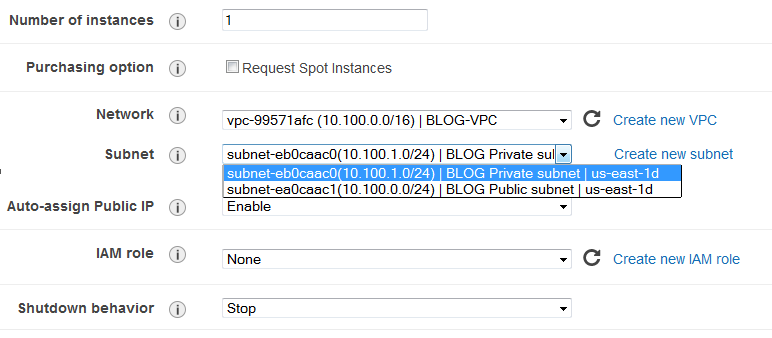
Tag the instance so you know which one is the public.

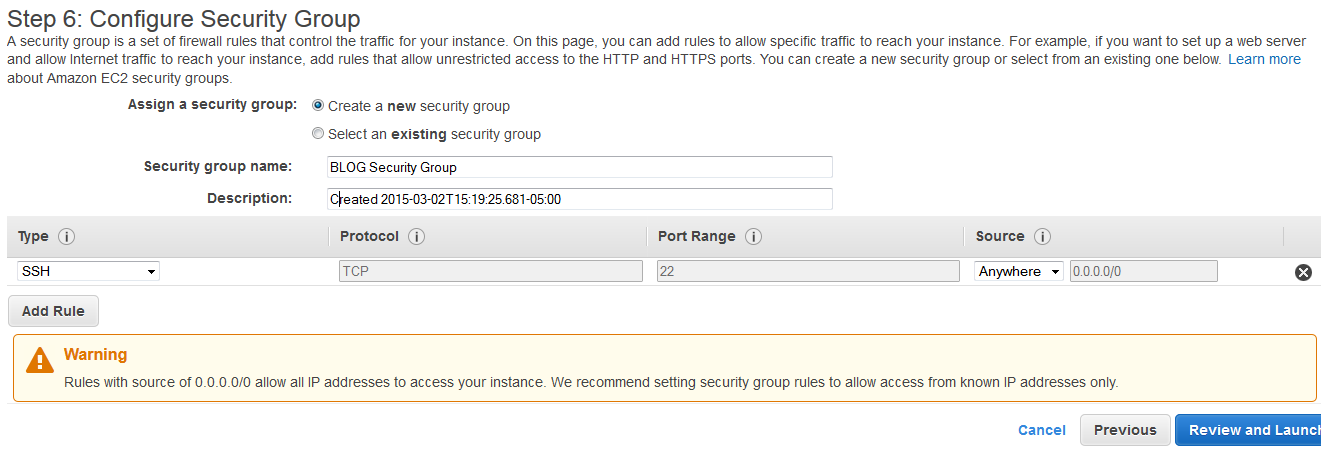
Create or use an existing security group, just make sure SSH is allowed.
And finally create or reuse an existing key pair. It doesn’t matter as long as you know how to use this. Then, create another instance, this time use the private subnet. Name the instance accordingly.
From a public IP, ssh to the public AMI. I won’t go into details (see this link), but copy the key to this AMI and from here, duplicate this session in putty and ssh to the private AMI. It looks like this on my computer. So, the idea is to ssh to the public, copy the ssh key to the public in order to access the private AMI.
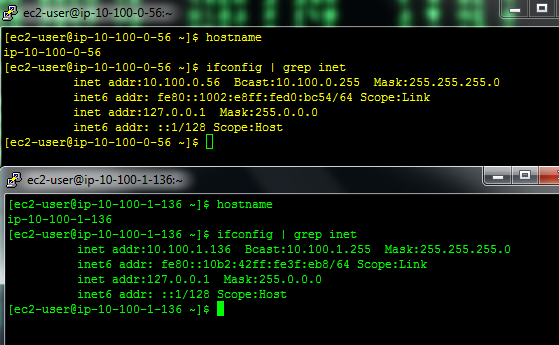
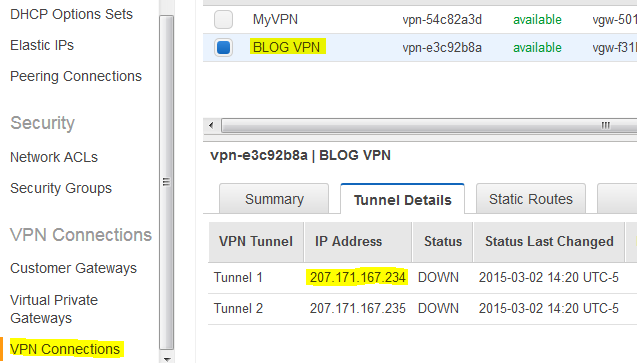
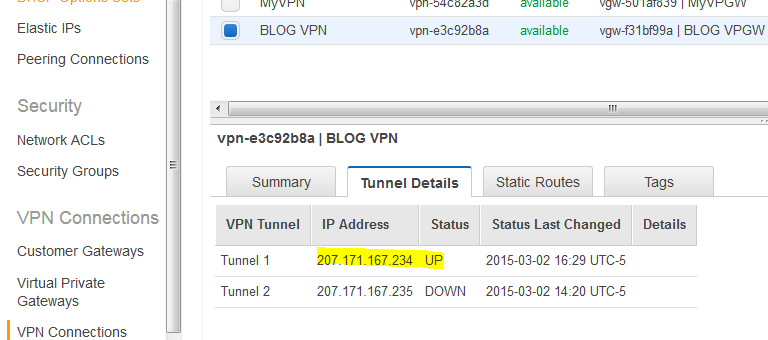
You can use the public AMI as a backdoor to get to the private AMI. Without the tunnel, you won’t be able to log to the private AMI. Before we can create the tunnel, go back to the VPC menu, click on the VPN connections and then Tunnel Details tab. Get the IPs. We’ll use only the first one. You can create two IPsec tunnels in pfSense if you want. It’s the same procedure. AWS uses two IPs for their gateways for redundancy.
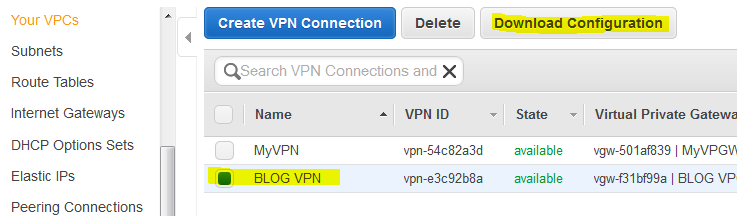
Now that you have the external IPs of the Amazon gateway, click on Download Configuration and choose the generic one. Open this file with Wordpad or Notepad++. Notepad won’t work, there is no support for U*NIX line-endings.
pfSense, IPsec
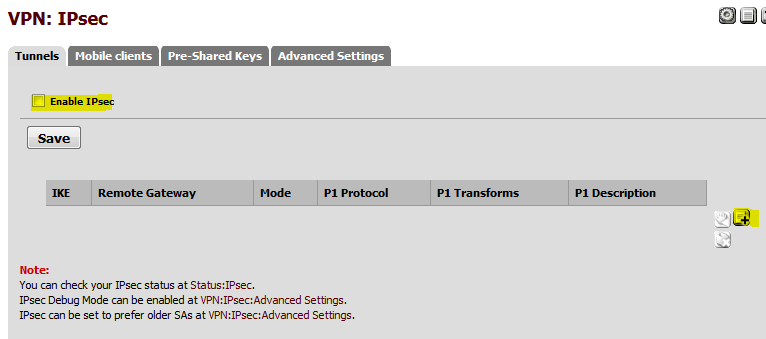
Switch back to pfSense and from the menu, select VPN | IPsec.

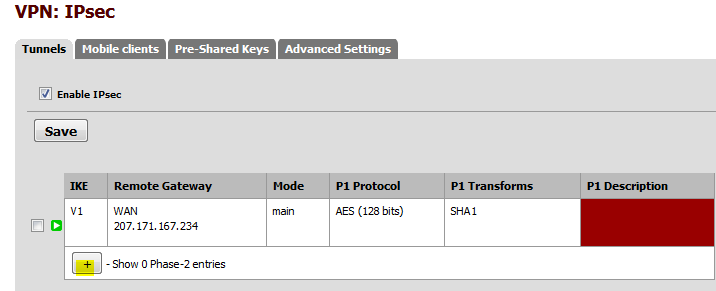
Check Enable IPsec and create the Phase 1 (the plus sign on the right).
In the General Information section, enter the external IP of the Amazon’s gateway. If you open the configuration file that you downloaded, you can find that information there as well. Ignore 169.254. addresses.
The Customer Gateway inside IP address should be configured on your tunnel
interface.

Outside IP Addresses:
  - Customer Gateway 		        : 104.207.133.238
  - Virtual Private Gateway	        : 207.171.167.234

Inside IP Addresses
  - Customer Gateway         		: 169.254.255.38/30
  - Virtual Private Gateway             : 169.254.255.37/30

Configure your tunnel to fragment at the optimal size:
  - Tunnel interface MTU     : 1436 bytes
Make sure that you have a small table like this, so you don’t get confused with subnets and IPs.

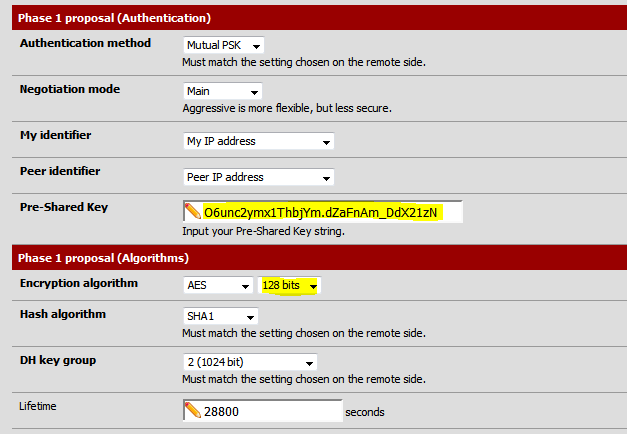
For Phase 1 section, enter the Pre-Shared Key and change the Encryption algorithm to 128 bits.
IMPORTANT
Make sure that you have correct values paired for both gateways. Pre-shared keys are different for the two gateway IPs on Amazon’s side.
Finally, in the Advanced Options section, change the parameter for Dead Peer Detection from 5 to 3 retries and click Save.

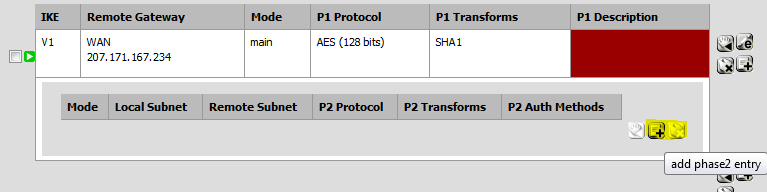
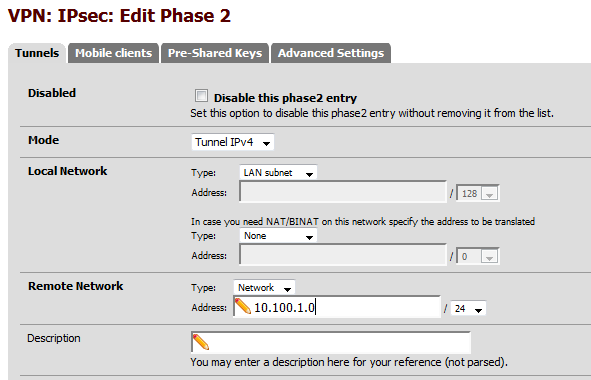
Click the “+” sign for Phase 2.
…and again the “+” sign for Phase 2 entry.
In the first section of Phase 2, add the local subnet on Amazon’s side (10.100.1.0).
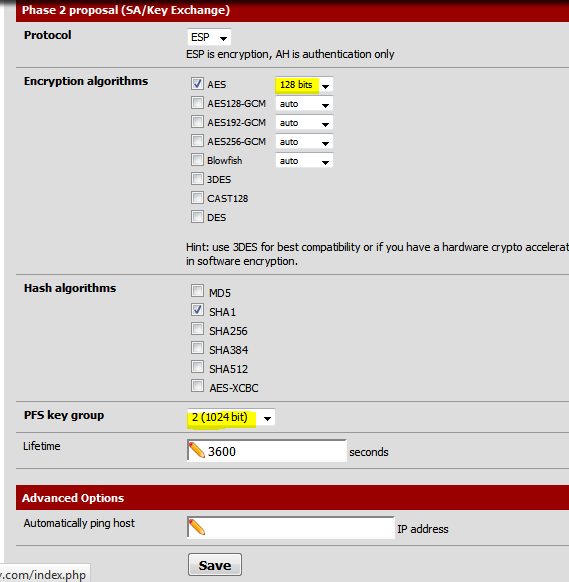
In Phase 2 proposal section, change the value for AES to 128 bits and PFS key group to 2. Click Save.
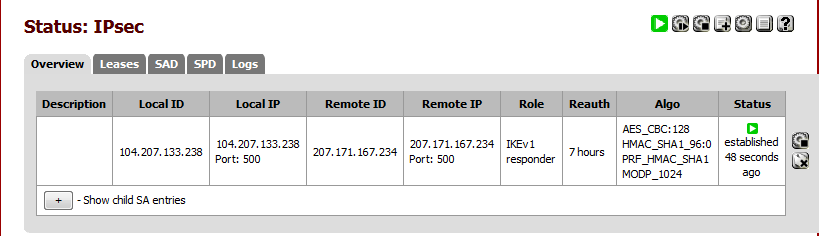
From the menu, go to Status | IPsec.
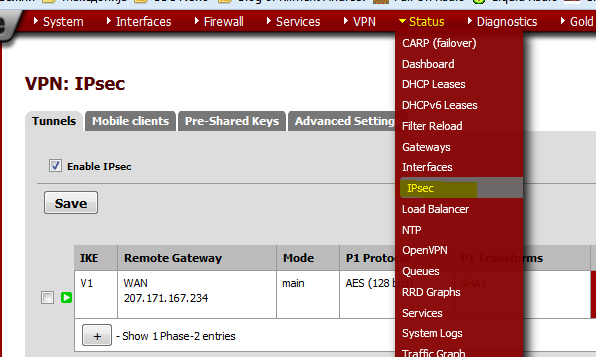
And you should see that the tunnel has been established.
AWS routing
Go on the Amazon side, click VPN Connections and verify that the tunnel is up too.
While there, click on the Route Tables on the right, then select your Private Subnet. Under Routes tab, see if pfSense local subnet is there and that it says Propagated. If not, go back to VPN Connections, then Static Routes and click Edit. Add 10.99.0.0/16. Wait until Pending becomes Available (usually 5-10) seconds.
Then, go to the Route Tables , tab Routes and see if the route propagated successfully for the Private Route (in my case it’s BLOG Private Route).
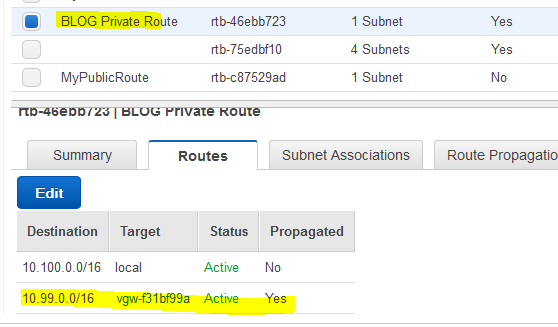
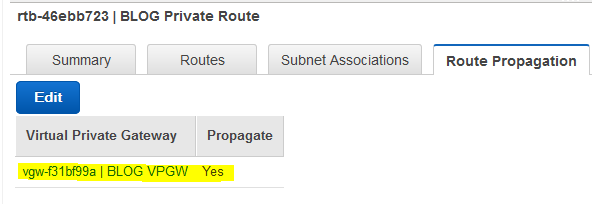
If the 10.99.0.0 (pfSense LAN) route is not there, click on Route Propagation tab and make sure that the setting for route propagation is set to Yes.
pfSense routing
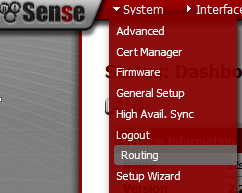
In order to access our instance at Amazon, we have to add a new route. Go back to pfSense and click on System | Routing.
On the Gateway tab, click the “+” sign.
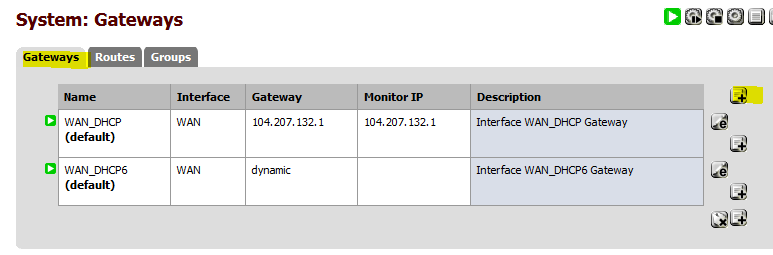
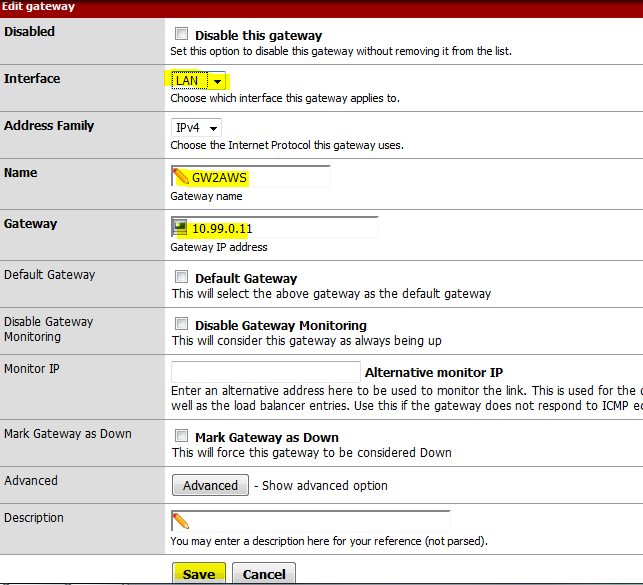
Change the interface to LAN, name the gateway (in my case GW2AWS), enter the GW IP (that’s the local pfSense LAN IP, in my case 10.99.0.11) and click Save.
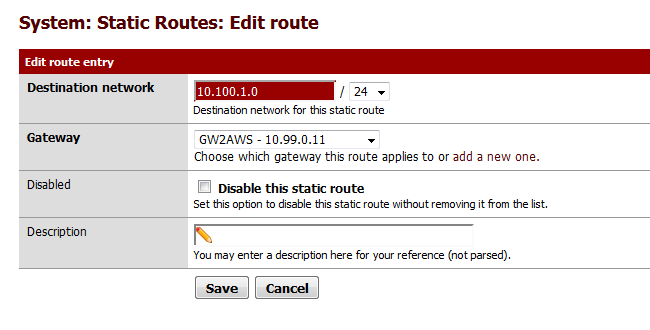
Click the Routes tab and then the “+” sign. Add a new route. Make sure you choose the gateway that we just created. The destination network should be 10.100.1.0/24. Click Save.
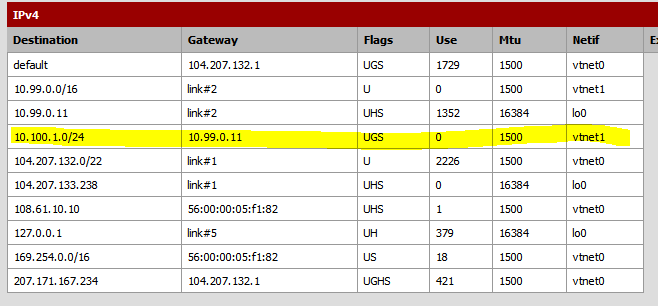
Finally, go to Diagnostics | Routes and wait for the routes to show up. In my case it looks like this. Verify that you have the route between pfSense local subnet and AWS local subnet.
Testing
Since both pfSense and the AMIs are quite locked, we won’t have much choice in the testing scenarios. We know that ssh port is open on the AMIs, so go to the pfSense console and choose option 8 for shell access. There do:
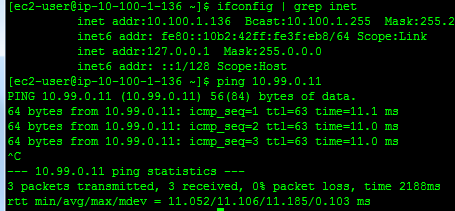
ssh 10.100.1.136
If you receive something like this, you are good.

Now, pfSense is very-very locked by default. It doesn’t accept ssh and https is very limited to specific IPs. But, we can create a temp rule, just for the test. Go to Firewall | Rules, select the IPsec tab and create a rule to pass ICMP traffic as below.

Go back to the Amazon AMI and do:
ping 10.99.0.11
You should get a response from the pfSense box.
If you made it congrats, now you have full site to site connection. It’s up to you how you want to configure the firewall rules on pfSense side or security groups on Amazon’s side.
4 comments
This is pretty cool, but doesn’t amazon charge their VPN rate of $.05/hr?
I’ll check this out.
You are right. $.05/hr plus the data transfer rates applied on top. I am still using their free one year subscription, so I haven’t see any charges yet for the time I was playing with.
Hi Kliment,
Thanks you very much for this clear guide. I have followed it to add the config to both AWS and pfSense. However pfSense doesn’t seem to be able to find it’s configuration. I see this in logs:
Nov 17 05:03:35 charon: 08[CFG] received stroke: initiate ‘con1000’
Nov 17 05:03:35 charon: 08[CFG] received stroke: initiate ‘con1000’
Nov 17 05:03:35 charon: 08[CFG] no config named ‘con1000’
Nov 17 05:03:35 charon: 08[CFG] no config named ‘con1000’
Wondering if you’ve seen this before / have any pointers where to look?
Best,
Simon
Scratch that, I had the wrong interface selected in Phase 1.