
Linux from scratch is a web-site that gives you step-by-step instructions on how to build your own version of Linux. It’s a minimal install, without any GUI even DHCP is not configured by default. The instructions are fairly straightforward but they don’t refer to any type of hardware. In this article I’ll describe how to build a bootable Linux as a VM on VMware Workstation. I strongly suggest that you read through the entire book. I’ll use shortcuts and skip stuff that’s not necessary, so it’s better to have the book in front of you.
You’ll need VMware Workstation (I used version 9.0.2), LiveCD of CentOS version 6.4, putty and the LFS book v7.3. Make sure you can allocate 2GB of RAM, 20GB disk and if you can, add 2 CPUs for faster compilation.
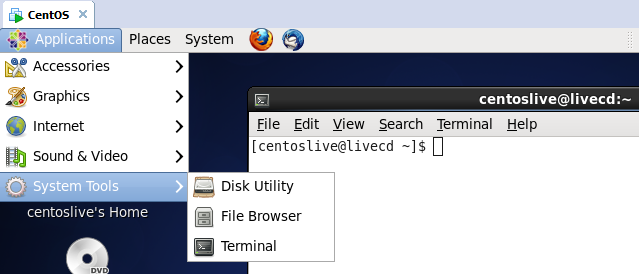
Boot from the LiveCD and once you see the CentOS running, open the terminal from the Applications menu.
Then type:
sudo fdisk -l
If you see /dev/sda at the end of the output, you are OK. In addition do:
sudo ifconfig -a
sudo route -n
Make sure that you have an IP assigned to eth0 interface and that you can actually browse the internet (e.g. ping www.yahoo.com should resolve to some IP). Write down the IP, subnet mask, gateway and the broadcast IP. You’ll need these later. Then log as root.
su -
chkconfig sshd on
service sshd start
chkconfig iptables off
service iptables stop
passwd root
These commands enable and start the ssh daemon and disable and stop the firewall. The last command asks you to change the root password. We’ll use putty instead of the VM console, because it’s easier to copy and paste text from the book. Create a new putty session and log as root using the password that you’ve just changed and IP address that you got from ifconfig output. Now, copy and paste the script on page xviii from the book. Most likely, you’ll see an output like this.

This tells us that we need bison, gcc and texinfo. Install them.
yum install bison
Answer y when prompted.
ln –s /usr/bin/bison /usr/bin/yacc
Install gcc and texinfo.
yum install gcc
yum install texinfo
Mind that you are installing these programs on a RAM disk, not on a drive, so if you decide to take a break, shut down the VM and continue later, you won’t be able to do so. You’ll have to do everything from the beginning.
Now it’s time to create the partitions. We’ll create one root partition and one swap.
fdisk /dev/sda
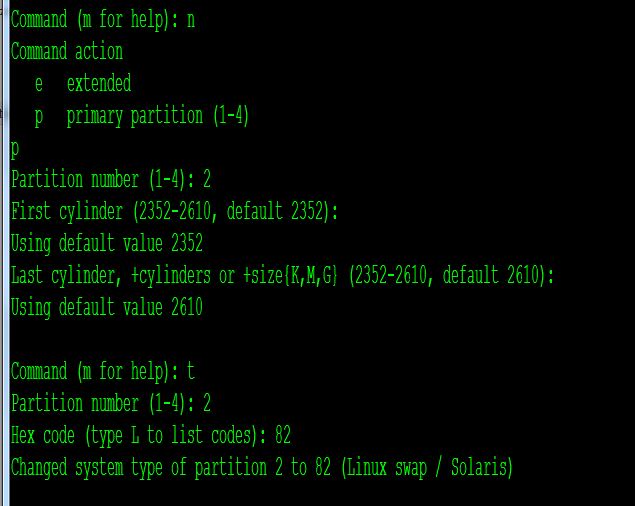
Type n for a new partition, type p for primary, type 1 for first partition, hit enter for default 1 and type +18432M. +18432M means 18432MB or 18GB. That’s because we have 20GB drive and we’ll use 18GB for the Linux partition and 2GB for swap. If you decided to use a bigger or smaller disk, adjust your values.

Create the swap now. Again, use n for a new partition, p for a primary primary partition and use default values afterwards. This will create a swap partition using the rest of the disk. Finally, type t to change the the type of the partition number 2, and use code 82 for swap.
Write the changes using w and then do:
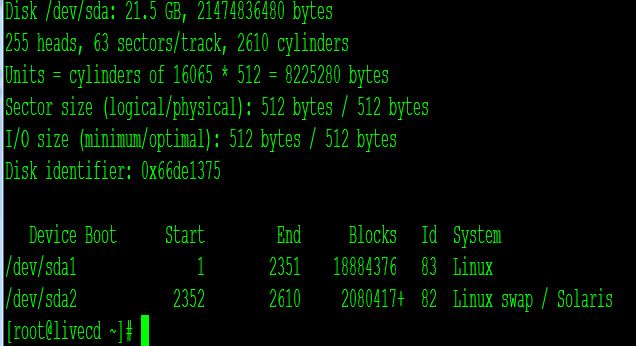
fdisk -l
You should have an output like this at the end.
Create the partitions.
mke2fs -jv /dev/sda1
mkswap /dev/sda2
Look at page 15, paragraph 2.4. Mounting the New Partition and execute those commands. Replace
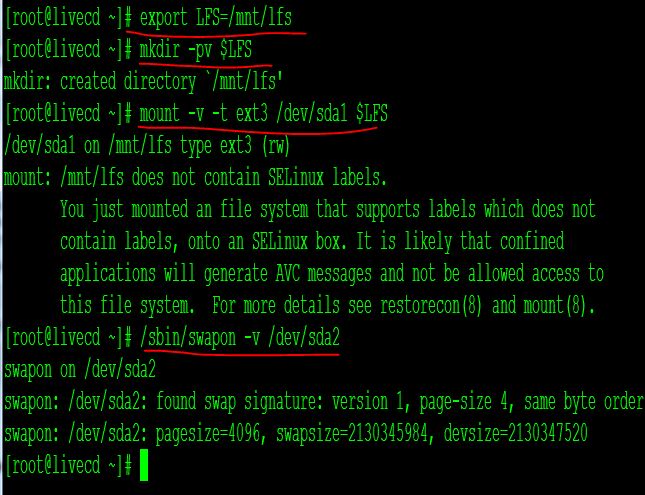
Execute these three commands:
mkdir -v $LFS/sources
chmod -v a+wt $LFS/sources
cd /mnt/lfs/sources
At this point if you want to shut down the VM and continue later, you’ll still have to go through enabling sshd, disabling firewall, installing gcc, bison…and executing the commands for defining the LFS. The only thing that you don’t have to do is the fdisk part and creating partitions.
The next part deals with downloading all of the necessary programs. I made a list with the URL links, so download this file file, once it opens up in a browser, select all, copy, then go back to your putty session. There, type:
vi wget-list
Then hit i key, right-click to paste, hit ESC and then hit :wq to save and quit. You should have a file called wget-list. Type the following command to verify.
ls -l
Make sure that you are actually in sources folder by issuing pwd command.
pwd
Now, execute wget to download all of the sources.
wget -i wget-list -P $LFS/sources
The only program that I had problems downloading it was zlib, so you can execute this command below. Hit ENTER once it completes. In addition, when you start the installation of all these 71 files that you’ve downloaded, some might be missing in case some of the URLs change. In that case, just google e.g. zlib-1.2.tar.bz2 for example and once you found the link, do wget link. Same thing that I did with zlib (command below).
wget http://downloads.sourceforge.net/project/libpng/zlib/1.2.7/zlib-1.2.7.tar.bz2?r=http%3A%2F%2Fsourceforge.net%2Fprojects%2Flibpng%2Ffiles%2Fzlib%2F1.2.7%2F&ts=1376492544&use_mirror=hivelocity
Once all files are downloaded, type:
ls | wc -l
You should have 72 as a result. 71 files + the wget-list file. If the number is not correct, scroll up in putty and see what failed. You might also want to increase the number of scrollback buffer lines in putty.
Finally, execute these commands.
mkdir -v $LFS/tools
ln -sv $LFS/tools /
Look at page 27, 4.3. Adding the LFS user and 4.4. Setting Up the Environment. Do exactly what they say.
Now that we have all the sources downloaded, we need to install them. This is a screenshot from the book. It says that it is very important and it is.
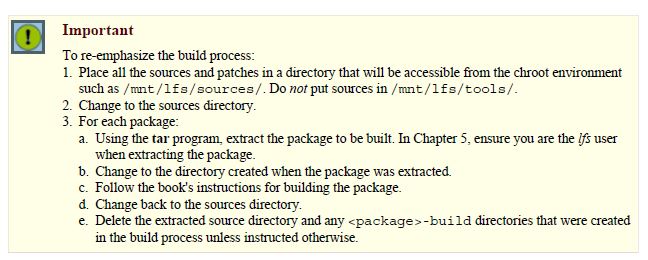
In other words, once you are in /mnt/lfs/sources, you’ll be doing tar xvf

IMPORTANT: make sure that you are in /mnt/lfs/sources, do tar xvf whatever.gz or tar xvf whatever.xz. Once the files are extracted you’ll have to cd to that directory and follow up the instructions for compiling the source. Once you are done, go back using cd .., and then delete the source extract folder with rm -Rf binutils-2.23.1 and any other directories that you were instructed to do so. If you don’t do that, you’ll have problems when compiling these same programs later.
So, for the first program we’ll have to execute:
tar xvf binutils-2.23.1.tar.bz2
cd binutils-2.23.1
follow the instructions on page 35.
mkdir -v ../binutils-build
cd ../binutils-build
../binutils-2.23.1/configure \
--prefix=/tools \
--with-sysroot=$LFS \
--with-lib-path=/tools/lib \
--target=$LFS_TGT \
--disable-nls \
--disable-werror
The book mentions something called SBU (Standard Build Unit). For Binutils, SBU is 1.0 (you’ll see SBU value for all sources in the book). The SBU value depends on your hardware. On my laptop 1 SBU is about 5 mins. To check how much is 1 SBU on your computer, do time make -j2 when compiling binutils. So, when it tells you to do make, do make -j2. If the book says it will take 5 SBUs, it means it takes about 25 minutes.
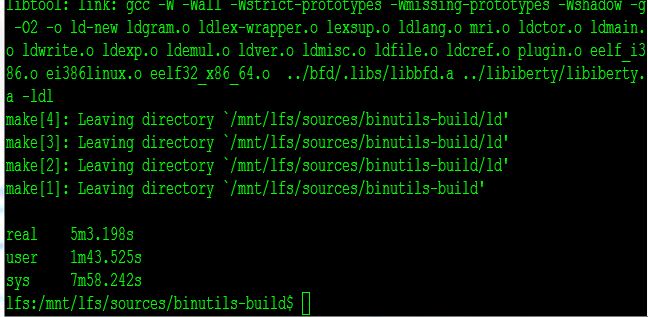
Finally, type:
make install
cd ..
rm -Rf binutils-build
rm -Rf binutils-2.23.1
If you get an error when you do make install, type exit and then:
chown -R lfs tools
su - lfs
cd /mnt/lfs/sources/binutils-build
make install
From now on, everything should be straightforward as described in the book. Follow the instructions to build the rest of the sources and stop once you reach page 74.
Once you have compiled all of the sources, type exit to go back logged as root. Make sure that echo $LFS returns /mnt/lfs. Otherwise, you’ll have to define it and make sure that the /dev/sda1 is mounted. Skip the stripping part at paragraph 5.33 Stripping and proceed with paragraph 5.34 Changing Ownership logged as root. Do:
chown -R root:root $LFS/tools
Then, follow up instructions closely up to page 85. Once you reach page 86, make sure that you are in /sources folder. This is the same /mnt/lfs/sources folder, but this time you are running in chroot environment. At this point, LFS does not have to be defined. The same rules apply here as well: Make sure you are in /sources environment, extract the tarball with tar xvf, cd to that folder and follow up the instructions. For example, for the first tarball, do:
tar xvf linux-3.8.1.tar.xz
cd linux-3.8.1
make mrporper
make headers_check
make INSTALL_HDR_PATH=dest headers_install
find dest/include \( -name .install -o -name ..install.cmd \) -delete
cp -rv dest/include/* /usr/include
cd ..
rm -Rf linux-3.8.1
Similarly to what you did before, just follow up instructions for all tarballs. Pay special attention for the checks especially for binutils, gcc and mpfr. Once you reach page 196, feel free to skip paragraph 6.63 About Debugging Symbols and 6.64 Stripping Again. Now, type:
logout
and re-enter again with:
chroot "$LFS" /usr/bin/env -i \
HOME=/root TERM="$TERM" PS1='\u:\w\$ ' \
PATH=/bin:/usr/bin:/sbin:/usr/sbin \
/bin/bash --login
Create the network interface configuration file.
cd /etc/sysconfig/
cat > ifconfig.eth0 << "EOF"
ONBOOT=yes
IFACE=eth0
SERVICE=ipv4-static
IP=192.168.1.1
GATEWAY=192.168.1.2
PREFIX=24
BROADCAST=192.168.1.255
EOF
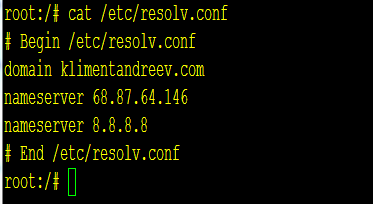
Mind that DHCP won’t work. There is a section in the book Beyond LFS that explains how to use DHCP. For now, just pick up a static IP that you can use. If your NIC in VMware Workstation is set for “Bridged”, then use an IP that’s in the same subnet as your Windows 7 host. If you use NAT, then the IP will most likely be in 192.168.something segment. Next, create the resolv.conf file. I use my provider’s DNS and one Google’s DNS. In my case it looks like this. If you are not on a Comcast network, put Google’s DNS first.
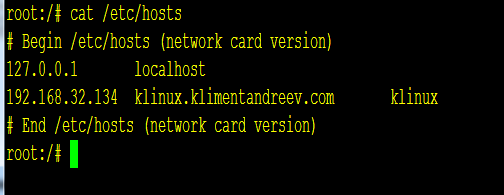
Create the /etc/hosts file as described on page 203. In my case, it looks like this.
Read everything up to page 209, when you need to install the bootscripts. Then, configure Sysvinit as described in paragraph 7.7.1 Configuring Sysvinit. Follow the instructions up to page 222 and for the locale on page 222 use en_US.iso88591.
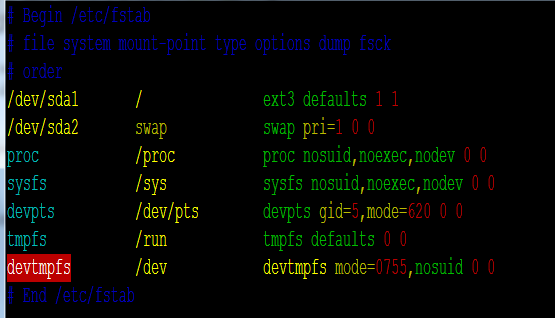
Finally for /etc/fstab, I’ve used these settings.
Now, the most important part comes with the kernel configuration and compiling. The book is vague about what options to use, and if you don’t use the proper options, the server will boot up and stop with a kernel panic error.
So, do:
cd /sources
tar xvf linux-3.8.1.tar.xz
cd linux-3.8.1
make mrproper
make menuconfig
When this screen shows up, make sure you know how to navigate and select/deselect options. It’s fairly simple.
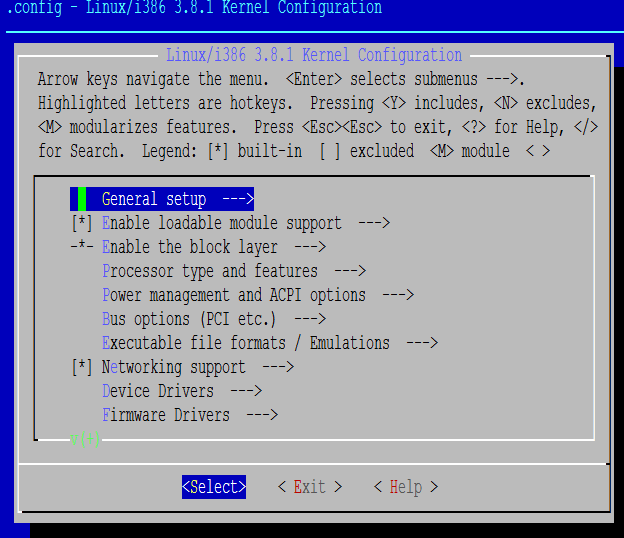
For LFS to work as a VM, you must select (built-in, not module):
– Device Drivers, Generic Driver Options, Maintain a devtmpfs filesystem to mount at /dev
– Device Drivers, Network device support, Ethernet Driver support, AMD PCnet32 PCI support
– Device Drivers, Fusion MPT device support (select the three drivers for SPI, FC, SAS)
– Device Drivers, SCSI device support, SCSI low-level drivers
– File Systems, Ext3 Journaling file system support
Once you exit the kernel configuration, do:
make
make modules_install
cp -v arch/x86/boot/bzImage /boot/vmlinuz-3.8.1-lfs-7.3
cp -v System.map /boot/System.map-3.8.1
cp -v .config /boot/config-3.8.1
install -d /usr/share/doc/linux-3.8.1
cp -r Documentation/* /usr/share/doc/linux-3.8.1
Finally, create /etc/modprobe.d/usb.conf by running the following:
install -v -m755 -d /etc/modprobe.d
cat > /etc/modprobe.d/usb.conf << "EOF"
# Begin /etc/modprobe.d/usb.conf
install ohci_hcd /sbin/modprobe ehci_hcd ; /sbin/modprobe -i ohci_hcd ; true
install uhci_hcd /sbin/modprobe ehci_hcd ; /sbin/modprobe -i uhci_hcd ; true
# End /etc/modprobe.d/usb.conf
EOF
Now, install the GRUB bootloader with:
grub-install /dev/sda
When it completes, create the bootloader config file with:
cat > /boot/grub/grub.cfg << "EOF"
# Begin /boot/grub/grub.cfg
set default=0
set timeout=5
insmod ext2
set root=(hd0,1)
menuentry "GNU/Linux, Linux 3.8.1-lfs-7.3" {
linux /boot/vmlinuz-3.8.1-lfs-7.3 root=/dev/sda1 ro
}
EOF
Command set root=hd(0,1) means we will use first hard drive (0) and the first partition (1). The syntax is misleading, but it’s how it works. The parameter root=/dev/sda1 means that /dev/sda1 is where our root partition is.
That’s it. Follow the simple clean-up in paragraph 9. The End, and reboot with:
shutdown -r now
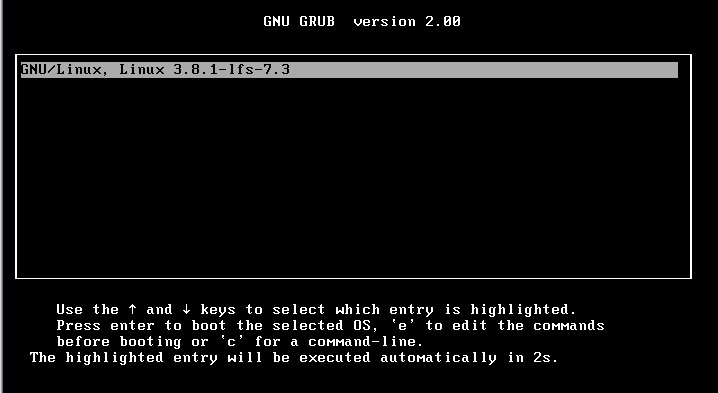
At this point, you want to disconnect the ISO image that you used to boot CentOS, so the VM boots up from the HDD, not the ISO image. If everything is OK, you’ll see the GRUB loader.
….and if the kernel was properly configured and compiled, you’ll get the root prompt.
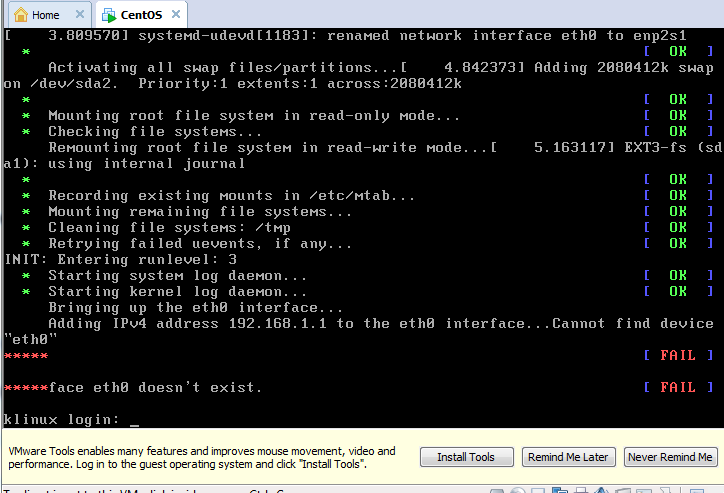
From the last screenshot, you can see that the NIC card was not recognized as eth0. But, look closer at the top of the screenshot and you’ll see that the NIC was renamed as enp2s1. That’s because of the udev scripts. I didn’t have any success in making the NIC work as eth0, so in order to make the NIC work, just log as root. Then:
mv /etc/sysconfig/ifconfig.eth0 /etc/sysconfig/ifconfig.enp2s1
Edit the ifconfig.enp2s1 file with vi or vim and change IFACE=eth0 to IFACE=enp2s1.
As previously mentioned, make sure you assign a static IP (you wrote down that IP from the beginning, right?) that can reach the outside world, either by using NAT or Bridged settings under NIC settings in VMware Workstation.
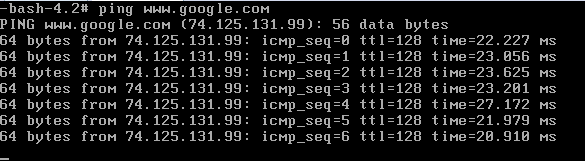
Once you are able to ping the outside world, I can only say CONGRATULATIONS!!!
3 comments
This is really help to me.
mv /etc/sysconfig/ifconfig.eth0 /etc/sysconfig/ifconfig.enp2s1
Edit the ifconfig.enp2s1 file with vi or vim and change IFACE=eth0 to IFACE=enp2s1.
I was stuck without doing above.
Thank u very much.
followed lfs 7.5 tutorial
getting following error
any fix ?
http://stackoverflow.com/questions/23558752/missing-gd-h-header-error-while-building-iso-via-lfs-7-5
The tutorial described here is for v7.3. 7.5 is most likely different.