
In this post I’ll describe how to install Splunk on a CentOS 7.x server, join it to the AD, install SSL certificates and configure reverse proxy. In addition, I’ll install forwarders on Windows, FreeBSD and CentOS. The version of Splunk that I am using is 7.1.2.
Table of Contents
Splunk installation
The installation is very simple. Once you create an account and log in, you can download the Linux installer. Log as root and put the tarball under /tmp on the Splunk server and extract it under /opt.
tar xzvf splunk-7.1.2-a0c72a66db66-Linux-x86_64.tgz -C /opt
Make sure you disable SELinux by editing /etc/selinux/config and change SELINUX=enforcing to SELINUX=permissive. Also, type setenforce 0.
Go to the /opt folder and start Splunk.
cd /opt/splunk/bin
./splunk start
You’ll be prompted to accept the license and enter the admin password. Once completed in 10-20 seconds, you’ll get a message that “The Splunk web interface is at http://splunk-dev.andreev.local:8000” or whatever you named your server.
If you want to start Splunk on each boot, you’ll have to type.
./splunk enable boot-start
If you go to your Splunk server now by visiting http://splunk-ip:8000, you’ll see the login page. If you are getting time-out, make sure that port 8000 is open on the firewall.
firewall-cmd --zone=public --permanent --add-port=8000/tcp
firewall-cmd --reload
Once you see the login page, you can log in as admin and the password you chose when you installed Splunk.
AD Integration
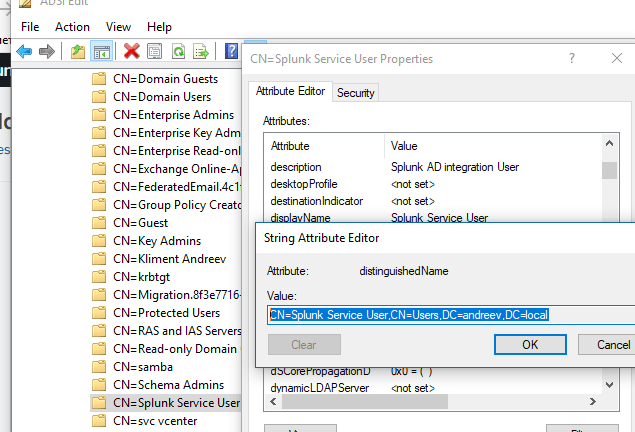
Most likely, you’ll want to integrate Splunk with your corporate Active Directory. This is how it can be done. But, let’s check the AD first and see what do we have there. In my case, I have a user called svc_splunk that will do the LDAP queries for the Splunk server. This user is under the Users OU. Also, I have an OU called Groups and I have three groups there, Splunk Admins, Splunk Users and Splunk Power Users.
Go to Splunk logged as admin and under Settings from the main menu, look at the lower right corner and you’ll see the Access controls. When the new screen appears, click the Authentication method. Select LDAP and click to Configure Splunk to use LDAP. You’ll see a new screen, just click New LDAP in the upper right corner. I’ll describe what you have to enter here section by section. First, enter the LDAP strategy name, in my case is AD Integration with andreev.local. For LDAP connection settings, I have andreev.local for the host. This is not actually my host, it’s my domain that resolves to one of the hosts. You can type a host name here e.g. dc01.andreev.local, but if that hosts goes down, LDAP won’t work. So, use the domain name here and make sure it resolves to an IP of a domain controller. For the port enter 389 which is the standard LDAP port. The Bind DN is the distinguished name for the user that will do the LDAP queries. As I said, I have a user called svc_splunk that does this for me. This user is under my Users OU. Use adsiedit.msc find the user in question and check the distinguished name property.
For Bind DN Password, enter the password for the svc_splunk user. This is how it looks like on my side.

The next section is for the User settings. For the User base DN, enter the OU where you have your users defined. If you have multiple OUs, use semicolon. Check the User base filter and the description. If you have one single OU for the users and thousands of users there, you might want to do some filtering, otherwise the LDAP queries will take some time. For the User name attribute use sAMAccountName and for the Real name attribute use displayName. This is how my config looks like.

In AD I have my three Splunk groups defined in an OU called Groups. So, under Group settings and Group base DN, I have to specify that OU as OU=Groups,DC=andreev,DC=local. The Group name attribute is sAMAccountName and the Static member attribute is member. This is how my config looks like. You can click Save now.
Once completed, you’ll get back to this screen. Now, we have to tell Splunk to map those AD groups with Splunk’s internal roles. In order to do that, click Map Groups.

You will see your groups in the list. If you don’t see any groups, you have something misconfigured or most likely you don’t have any members. Make sure you have at least one member in the group, otherwise it won’t show up. OK, so click on Splunk Power Users for example and click on power on the left side. Click Save after. Now, you can log off from Splunk as admin and log in as the configured AD user.
SSL Certificates
The tutorial for the installation of SSL certificates can be found here and here. It’s a very detailed explanation of how to create your own private key, obtain a third-party signed certificate etc… So, in essence, you’ll need your private key and the signed 3-rd party certificate. Usually, they’ll send you the server certificate and the so called bundle, which is the intermediate certificate and the CA certificate in one file. You’ll have to put the server certificate first and the bundle next. To create the new file, use the cat command.
cat server_cert.pem bundle.pem > full_cert.pem
You have to create a directory called mycerts under /opt/splunk/etc/auth and put the private key and the full certificate there. This assumes that your Splunk directory is at /opt/splunk.
Then, go to /opt/splunk/etc/system/local and edit web.conf. If there is no such file, fine, just create it and paste the following.
[settings]
enableSplunkWebSSL = true
privKeyPath = /opt/splunk/etc/auth/mycerts/private_cert.key
serverCert = /opt/splunk//etc/auth/mycerts/full_cert.pem
Restart Splunk.
/opt/splunk/bin/splunk restart
You should be able to access your server with https://splunk-ip:8000 now. If Splunk doesn’t start, take a look at the Splunk log and look for any SSL errors.
tail -f /opt/splunk/var/log/splunk/splunkd.log
Splunk and reverse proxy
Anytime you access Splunk server, you have to specify port 8000 in the URL. With a reverse proxy, you can just type the URL of the splunk server or IP and the reverse proxy will do the redirects for you.
In order to do that, we’ll install nginx on the same Splunk server.
yum install epel-release
yum install nginx
Make sure to open the firewall for both http and https.
firewall-cmd --zone=public --add-service=http --permanent
firewall-cmd --zone=public --add-service=https --permanent
firewall-cmd --reload
In addition, if you have SELinux enabled (most likely not) or run nginx on a separate server, make this change or you’ll get “Bad Gateway” error from nginx.
setsebool -P httpd_can_network_connect true
Edit nginx.conf from /etc/nginx directory and right before the first server directive, insert these configuration lines. Make sure you have the certificates available or nginx won’t start.
server {
    listen 443 ssl;
    ssl on;
    ssl_certificate /opt/splunk/etc/auth/mycerts/full_cert.pem;
    ssl_certificate_key /opt/splunk/etc/auth/mycerts/private_cert.key;
    location / {
        proxy_pass https://127.0.0.1:8000;
    }
}
These lines will redirect all https requests to port 8000. In addition, modify the original default server config by adding the highlighted line.
    server {
        listen       80 default_server;
        listen       [::]:80 default_server;
        server_name  _;
        root         /usr/share/nginx/html;
        return 301 https://$host$request_uri;

        # Load configuration files for the default server block.
This line redirects all http calls to https, so pretty much you can go to your browser now and type “splunk” or whatever your Splunk server is called and you’ll get the prompt. Don’t forget to enable nginx on boot and restart it after making changes to nginx.conf.
systemctl enable nginx
systemctl restart nginx
Receive data
If you haven’t done so, make sure that you have port 9997 configured on the Splunk server to receive data.
Go to Settings | DATA | Forwarding and Receiving.

Click on Configure Receiving.

Click on New Receiving Port in the upper right corner and enter 9997 for the port. You can have multiple forwarders sending to this port on the server.

Create Indexes
For each forwarder we’ll create a separate index. In order to do so, go to Settings | DATA | Indexes on the Splunk server.
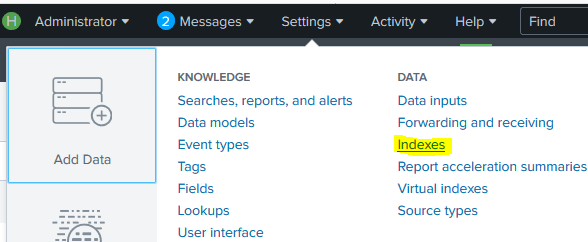
Click on New Index in the upper right corner and name the index.

Accept all defaults and click Save.
Splunk forwarder in Windows
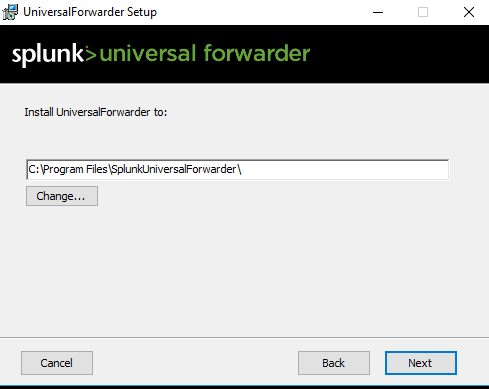
I’ll explain how to install a forwarder on Windows. Download the MSI file from the Splunk website, right-click on it and Run as Administrator. Check to accept the license. Make sure the bottom check mark is checked if you are using on-prem Splunk server. Click on Customize Options so you can specify what to monitor. It’s easier that dealing with conf files.

Choose the destination folder.
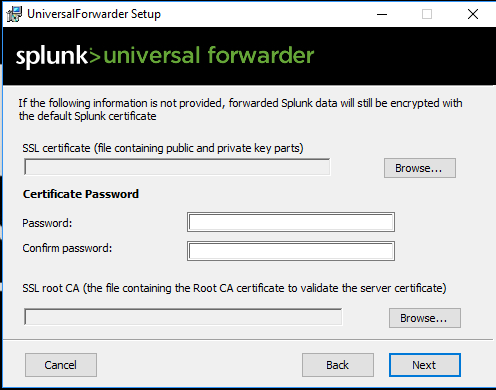
Fill the dialog if you are using certificate for forwarder-index communication.
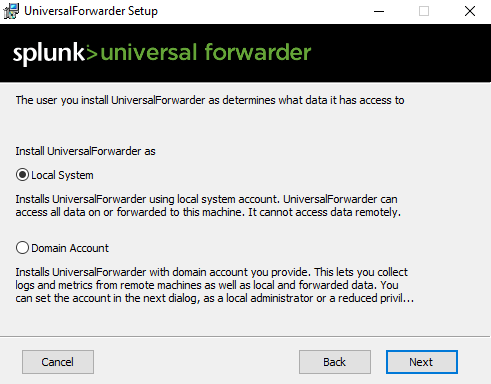
Choose the account that will run the forwarder.
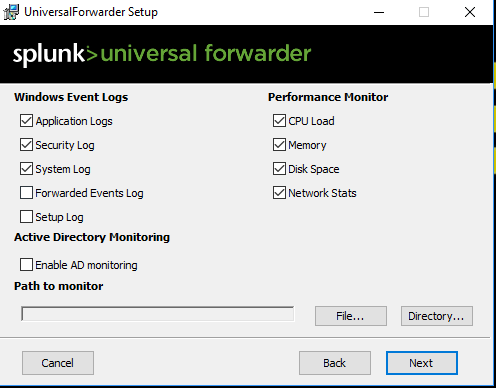
Choose what do you want to monitor.
Enter a password.

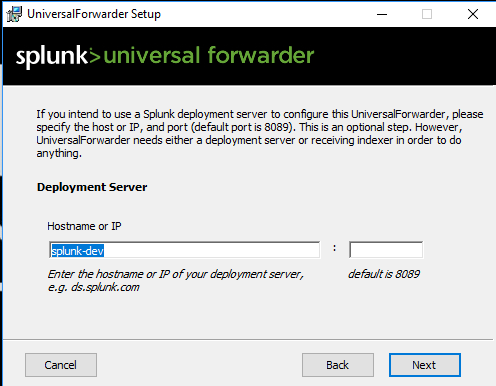
If you have a single server, your deployment and indexing server are the same as in my case.
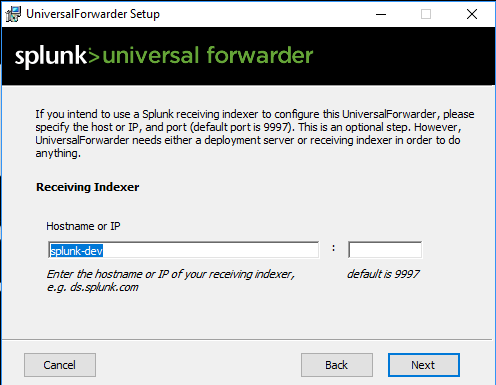
Indexing server.
Click Install and Finish. By default, Splunk on Windows will send everything to the main index. In odrder to change it, open up C:\Program Files\SplunkUniversalForwarder\etc\system\local\inputs.conf and add the highlighted line.
[default]
host = wintest
index = index_name
Splunk forwarder on FreeBSD
I’ll explain how to install a forwarder on FreeBSD 11.x. On the FreeBSD server, log as root and create a directory called /opt.
mkdir /opt
Download the tarball for the universal forwarder from Splunk’s website and extract it there.
tar xzvf splunkforwarder-XXXXXX-freebsd-9.3-amd64.tgz -C /opt
Configure the Splunk forwarder so it knows which server to use.
cd /opt/splunkforwarder/bin
./splunk add forward-server splunk-dev:9997
Then add the file that you want to monitor and specify the index and the type of the file (sourcetype).
./splunk add monitor /var/log/httpd-access.log -index bsd-test -sourcetype access_combined
Start the Splunk forwarder and make sure it starts on boot.
./splunk start
./splunk enable boot-start
You can see what’s monitored.
/opt/splunkforwarder/bin/splunk list monitor
If you want to add another log file after you’ve started the forwarder, you’ll have to restart the forwarder.
/opt/splunkforwarder/bin/splunk restart
If for some reason, you are not able to see your data on the Splunk server, check the /opt/splunk/etc/system/local/inputs.conf file on the server and make sure you have disabled = 0 line there.
Splunk forwader on CentOS
I’ll explain how to install a forwarder on CentOS 7.x. On the CentOS server, log as root and install the Splunk forwarder. You have to download it first.
rpm -ivh splunkforwarder-XXXXXXXX-linux-2.6-x86_64.rpm
This command will extract the package under /opt/splunkforwarder. Configure the Splunk forwarder so it knows which server to use.
cd /opt/splunkforwarder/bin
./splunk add forward-server splunk-dev:9997
Then add the file that you want to monitor and specify the index and the type of the file (sourcetype).
./splunk add monitor /var/log/nginx/access.log -index centos-test -sourcetype access_combined
Start the Splunk forwarder and make sure it starts on boot.
./splunk start
./splunk enable boot-start
If you want to add another log file after you’ve started the forwarder, you’ll have to restart the forwarder.
/opt/splunkforwarder/bin/splunk restart
If for some reason, you are not able to see your data on the Splunk server, check the /opt/splunk/etc/system/local/inputs.conf file on the server and make sure you have disabled = 0 line there.