A public key infrastructure (PKI) is a set of roles, policies, and procedures needed to create, manage, distribute, use, store, and revoke digital certificates and manage public-key encryption. That’s what Wikipedia says.
Today, using certificates is a must. Google search gives you better search scores if your web site is using certificates and if your site is mobile-friendly. So, in this post I’ll describe how to deploy an Enterprise PKI on Windows 2016 server. This post is mostly for on-prem deployments, but it will give you some insights on how PKI works. I will create one Windows IIS web server joined to the domain and one Linux server (not joined to the domain) running Apache. I’ll create SSL sites on both and deploy the certificates, so the clients (Windows machines on your corp domain) won’t get that certificate warning when browsing these site.
In order to do what we planed, we’ll use Active Directory Certificate Services (AD CS). We’ll create a lab with a domain controller, an offline Certificate Authority, an Enterprise Certificate Authority and two web servers. These two web servers (one running IIS and the other running Apache) will host two web sites (test1 and test2) that will have SSL certificates issued by our CA.
The hostnames are :
- dc01.empire.local
- offCA
- entCA.empire.local
- iis.empire.local
- apache
Table of Contents
Domain Controller(s)
I won’t explain how to create a domain controller. Just make sure you have a domain controller(s) in your environment. My domain is called empire.local with EMPIRE as a NetBIOS domain name.
Offline Root Certificate Authority
Why do we need an offline Certificate Authority and enterprise CA? It’s per MS best practices. The offline CA will be the one that holds the PKI, but once it’s configured it can be brought offline. The actual certificates will be signed by the enterprise CA. In case the enterprise CA gets compromised, you’ll have to bring the offlince CA on-line and revoke the certificate for the enterprise CA.
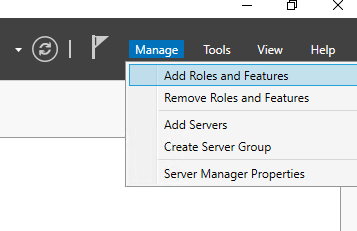
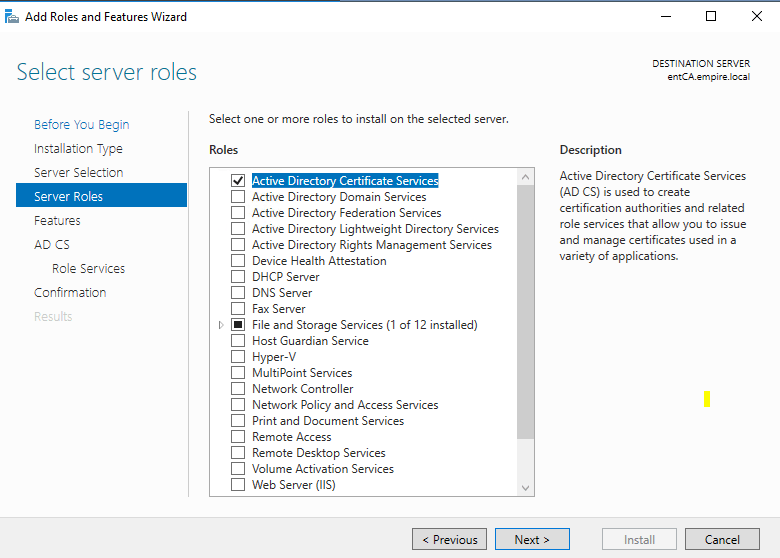
So, let’s build the offline CA. This server shouldn’t be part of the domain. Leave it as a workgroup member. From the Server Manager, click on Add Roles and Features.
Select Active Directory Certificate Services.

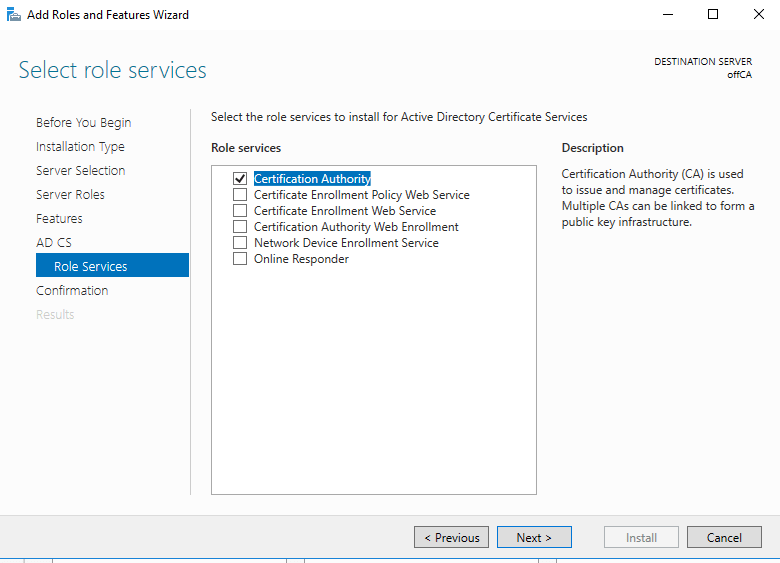
Under role services, select Certification Authority.
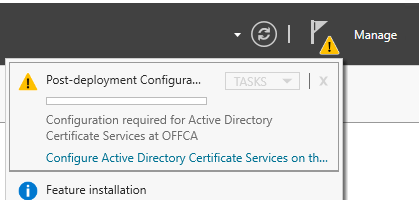
Once the installation is completed, click on the flag icon in the upper right corner to configure the CA.
Choose the defaults or if you want a separate local user, specify it here. You have to create that user first.
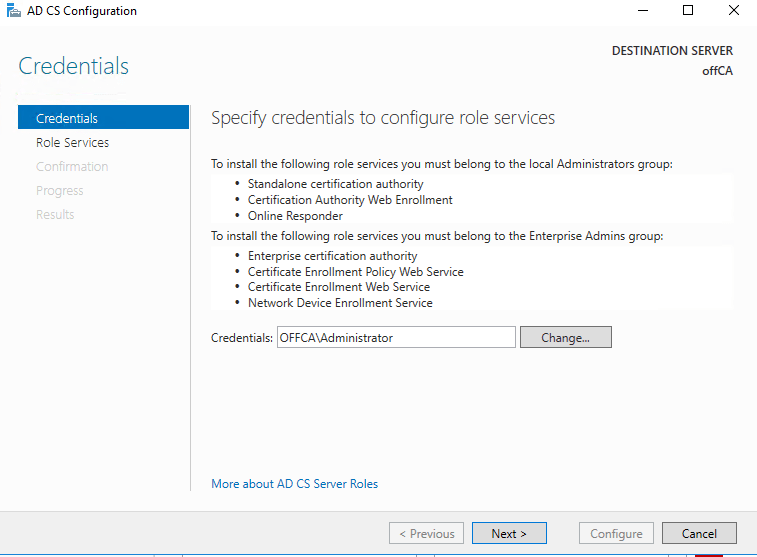
Choose to configure Certification Authority.

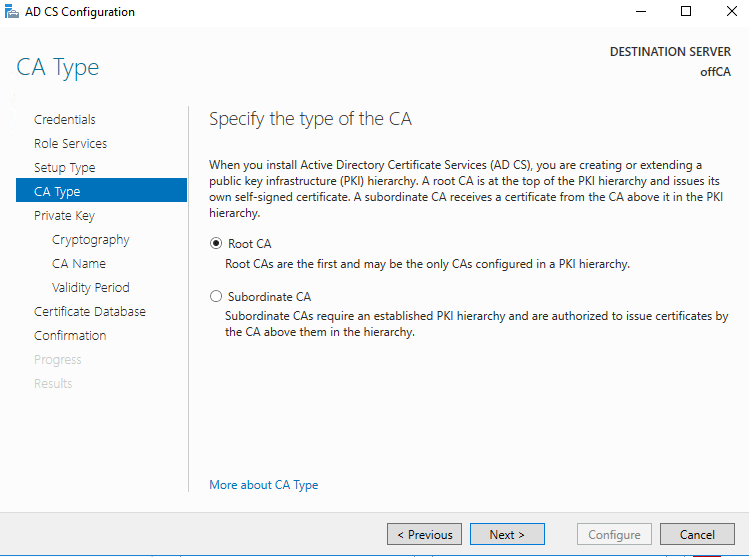
Choose Standalone CA.

Choose Root CA.
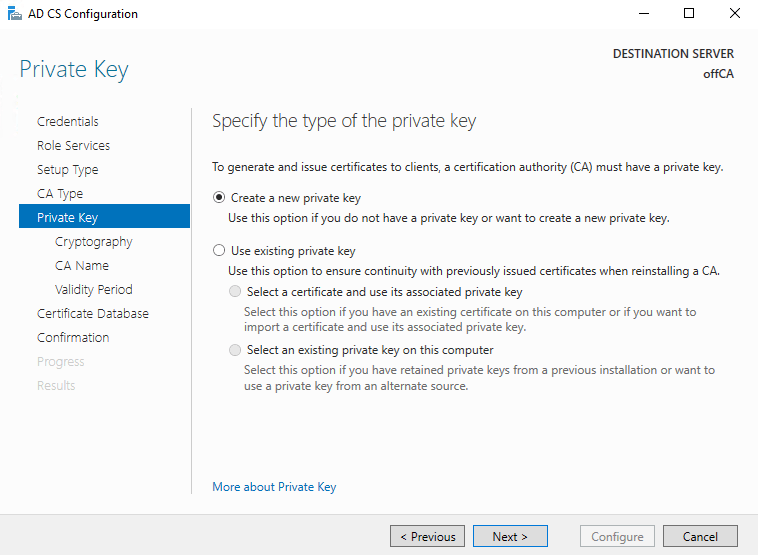
Select to Create a new private key.
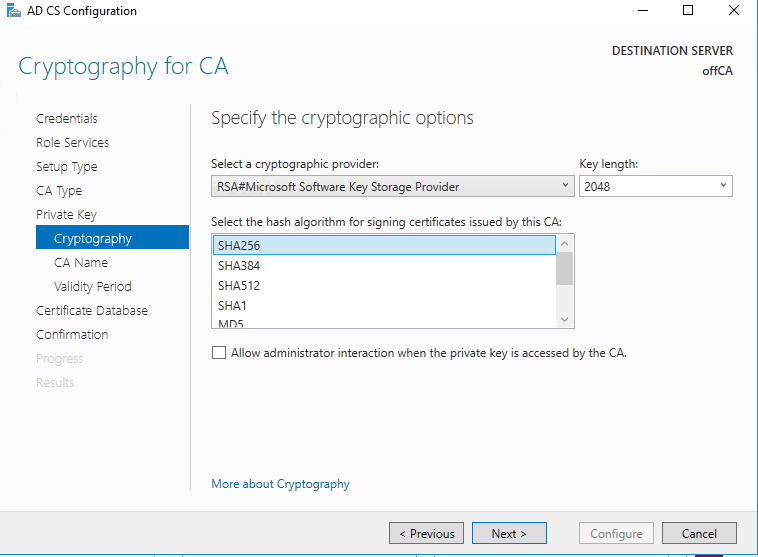
Choose SHA256 and 2048. Don’t use SHA1, it’s being deprecated.
Choose the common name for the CA. In my case it’s ROOT-CA.

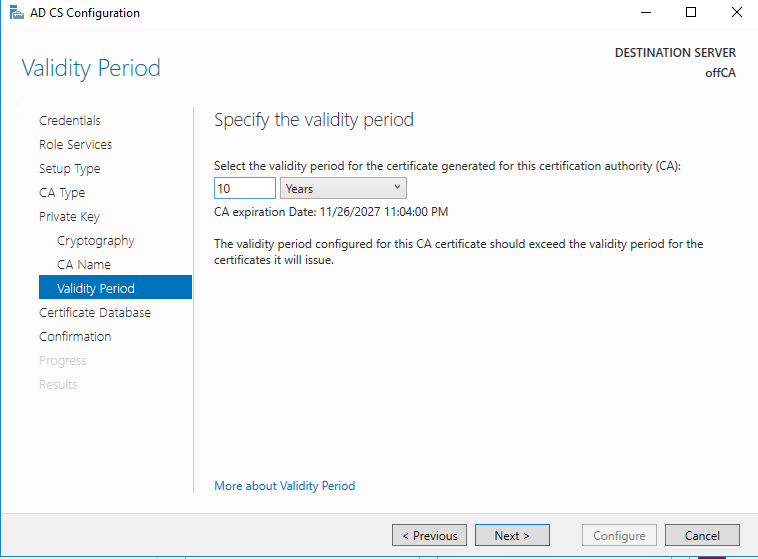
Use validity for this CA. I used 10 instead of the default 5.
Choose where the database and the logs will be located. I used the defaults, best practice is to use a separate data drive.

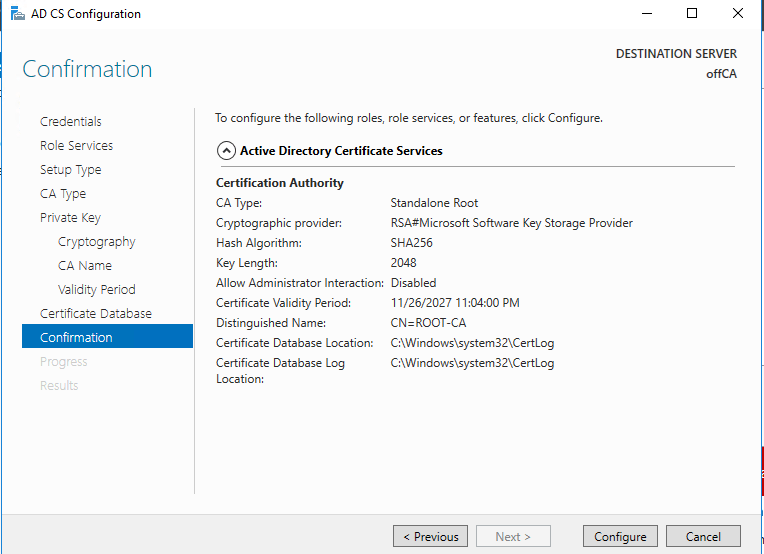
Verify everything looks good and click Configure.
Once completed, go to C:\Windows\System32\CertSrv\CertEnroll. This is where you’ll have the root certificate (offCA_ROOT-CA.crt) and the Certificate Revocation List (ROOT-CA.crl).

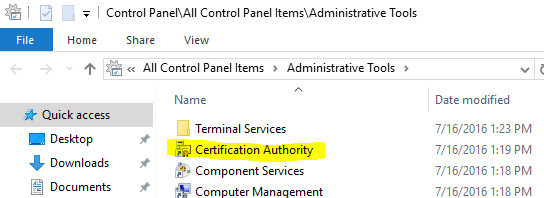
Go to the Administrative Tools under Control Panel and run the Certification Authority.
Now, we have to configure the Root (offline) CA so it is aware of the subordinate (enterprise) CA. Right click the name of the CA, choose Properties and then click on the Extensions tab. You’ll see something like this.

Click Add and enter the following in the Location field. Then click OK. Don’t click Insert.
http://entCA.empire.local/certdata/<CaName><CRLNameSuffix><DeltaCRLAllowed>.crl
Replace entCA.empire.local with the name of your subordinate (enterprise) server.
After you click OK, check these two checkmarks.
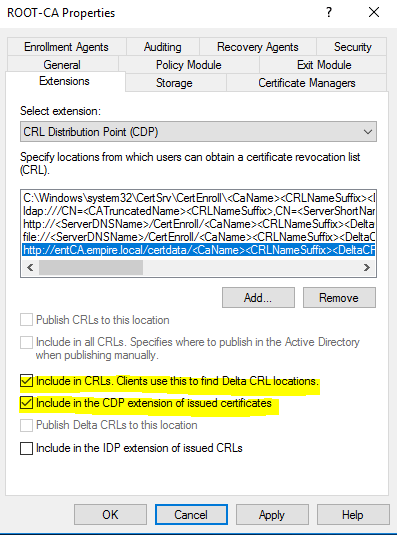
By default, they are not checked. Click Apply and you’ll be prompted to restart the CA service. Go back to the properties of the Root CA, click on the Extensions tab, but this time switch to Authority Information Access (AIA) instead of CRL Distribution Point (CDP).
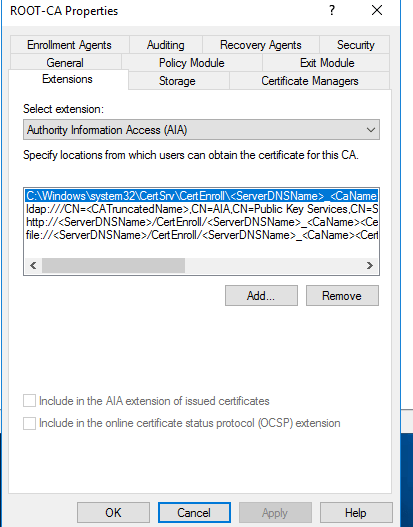
Same thing here. Click Add and enter the following in the Location field.
http://entCA.empire.local/certdata/<ServerDNSName><CaName><CertificateName>.crt
Replace entCA.empire.local with your enterprise CA server name. Click OK, don’t click Insert.
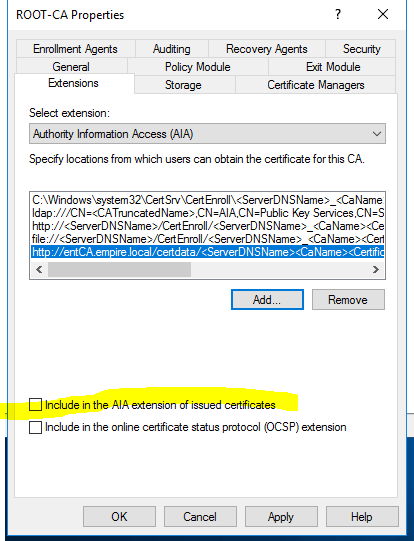
Then check Include in the AIA extension of issues certificates which by default is not checked. Click OK and that will restart the CA service.
Select Revoked Certiicates, right-click, choose All Tasks and then Publish.

Click OK for the New CRL.
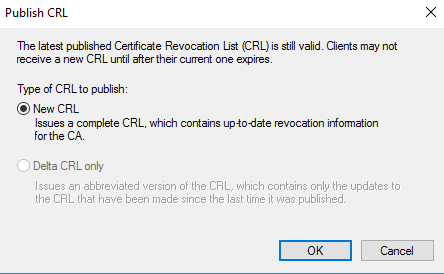
If you go back to C:\Windows\System32\CertSrv\CertEnroll, you’ll see that the time stamp on ROOT-CA.crl file has changed.
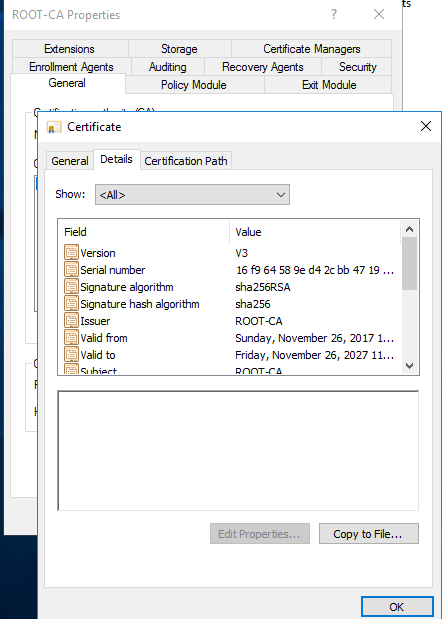
Now, we need the root certificate (without the private key) exported so we can copy it to the enterprise CA. Right-click the CA, choose Properties and from the General tab, choose View Certificate.
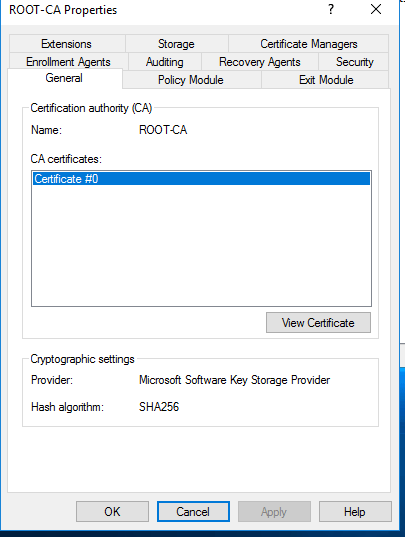
Click on Details tab and then Copy to File.
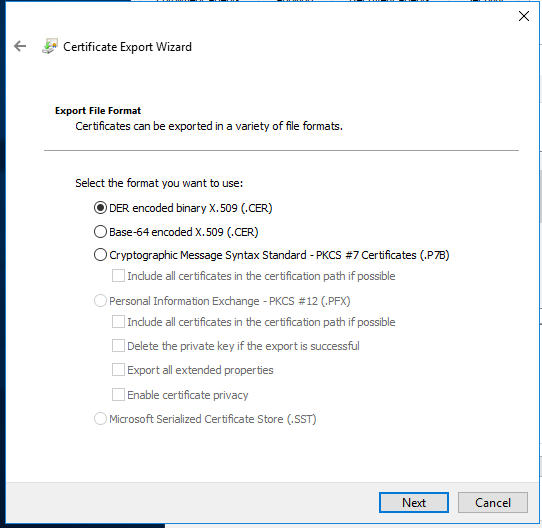
In the Certificate Export Wizard, choose the first option (DER).
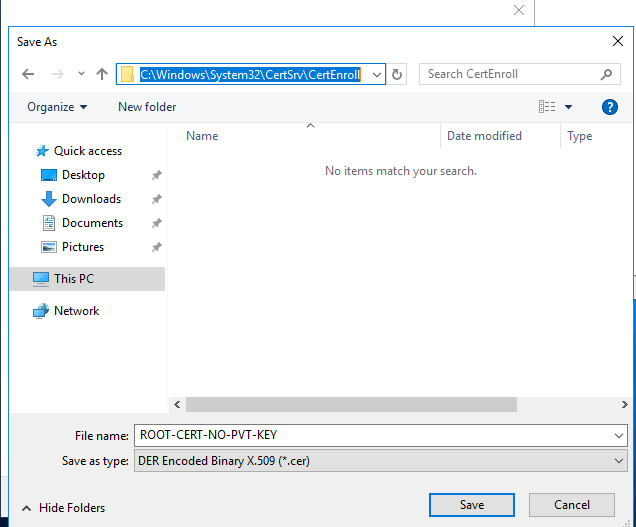
Click Next and save it under c:\windows\system32\certsrv\certenroll with a name something like this.
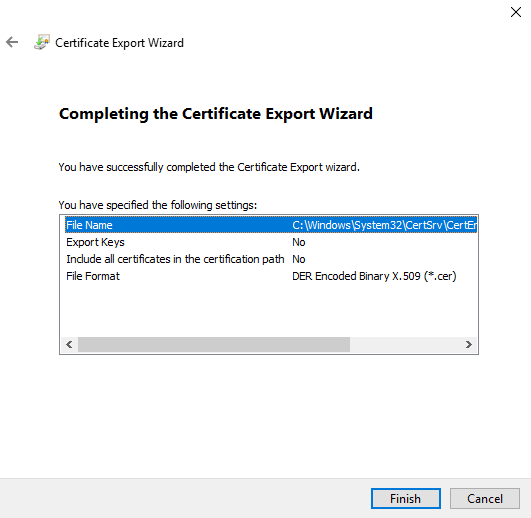
Click Save then Finish.
Enterprise (standalone) Certificate Authority
Now, let’s move to the subordinate (enterprise) CA. This is the server that will actually issue and revoke certificates. Make sure this server is a member of the domain.
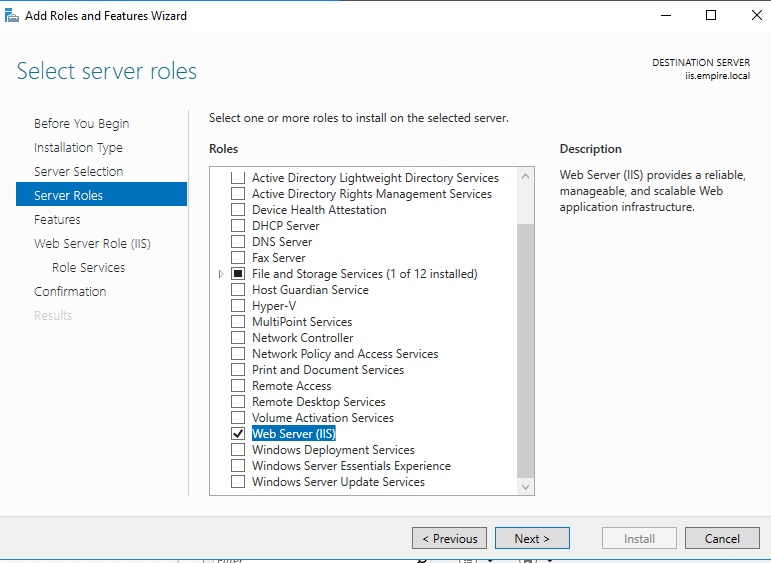
From the server manager go to Add Roles and Features.

Choose Active Directory Certificate Services.
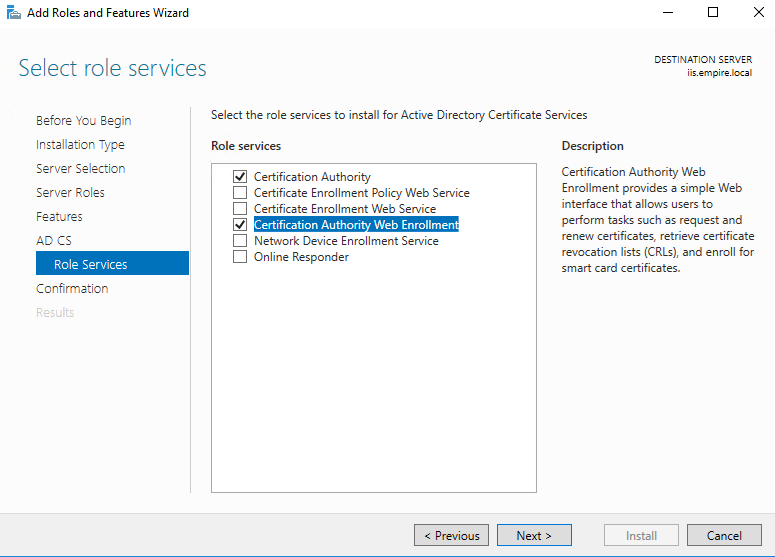
Choose both, Certification Authority and Certificate Authority Web Enrollment.
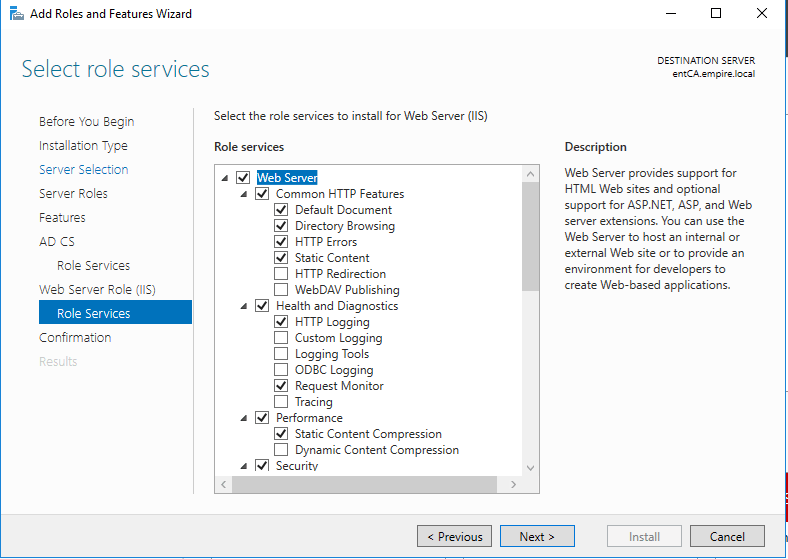
Web enrollment will require IIS. Choose defaults.
Once the installation is completed, click on the flag icon in the upper right corner to configure the CA.

Choose the Administrator or some other domain user if you want.

Select the Certification Authority and Certification Authority Web Enrollment.
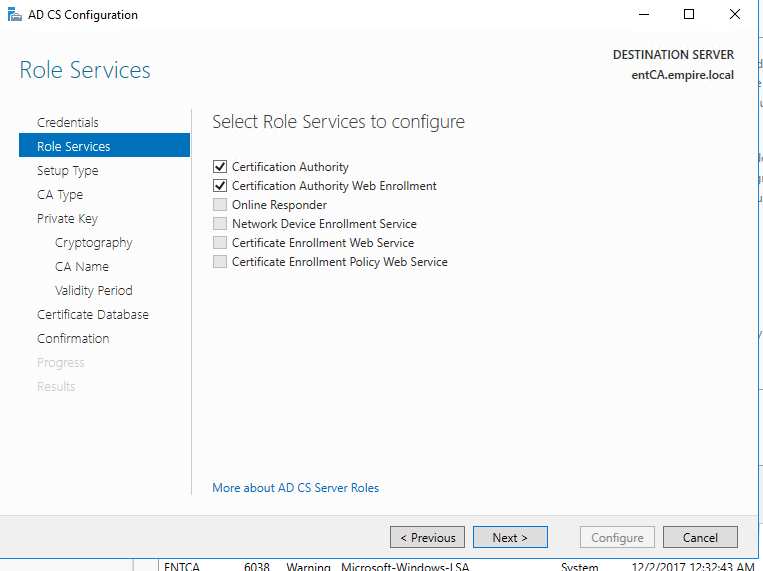
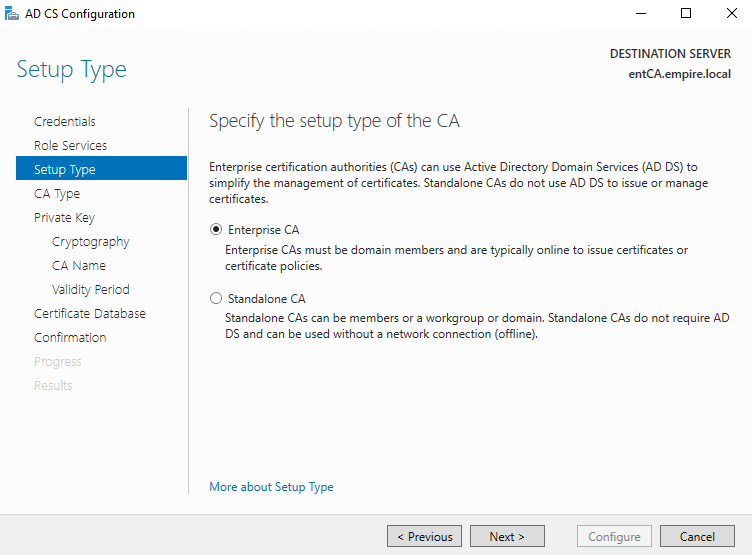
Select Enterprise CA.
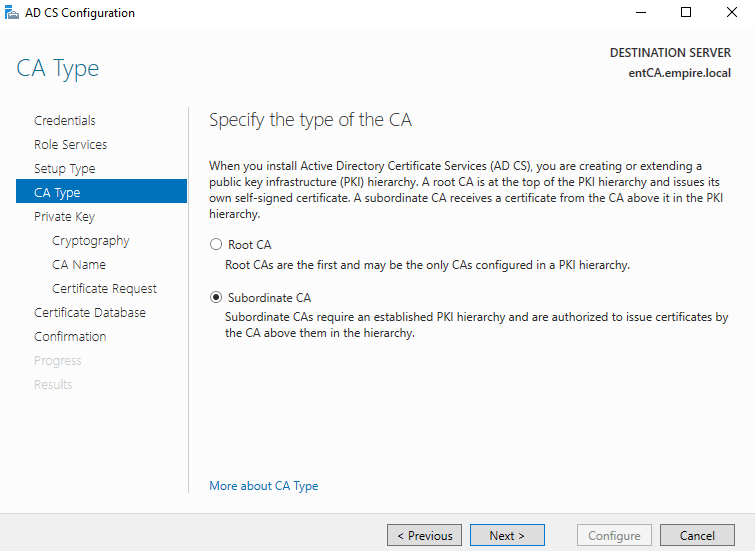
Select Subordinate CA.
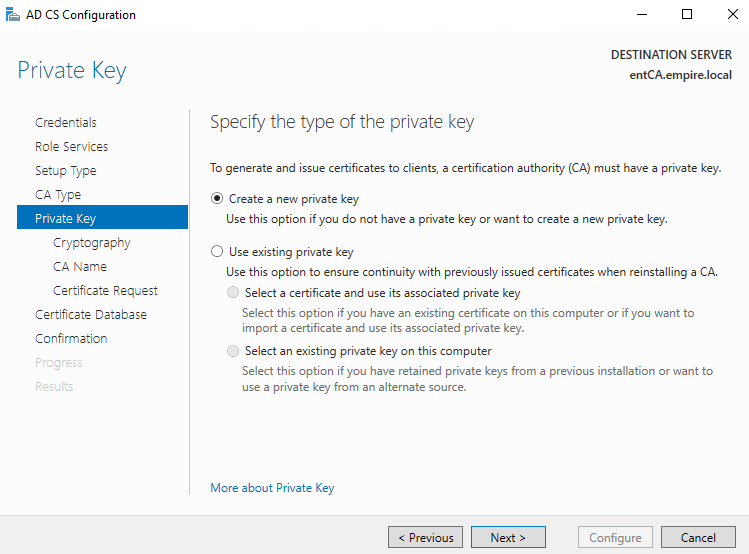
Create a new Private key.
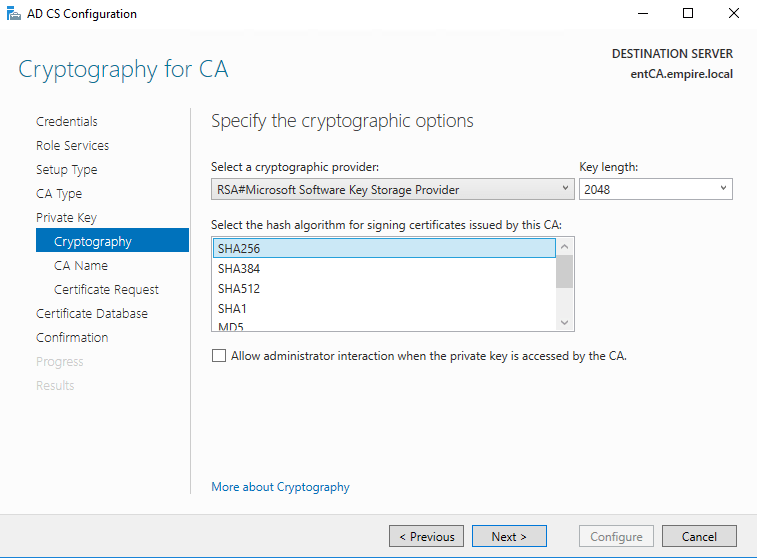
Choose SHA256 and 2048.
Choose the common name. In my case it’s ENT-CA.

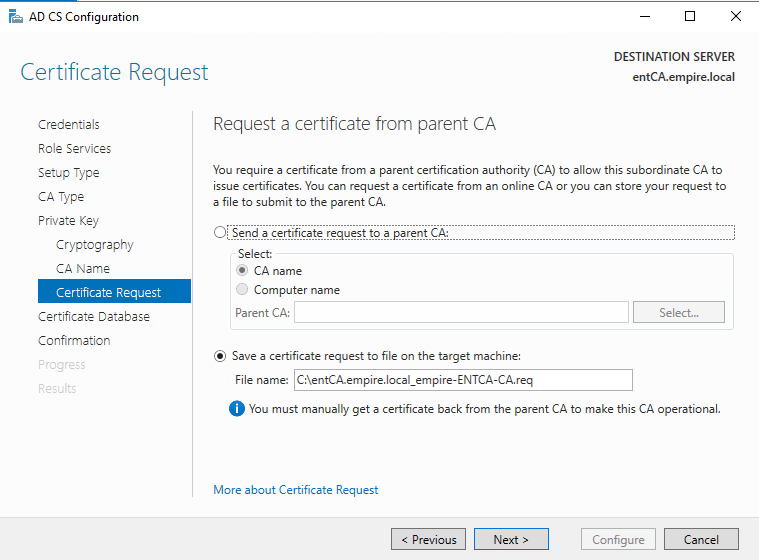
Choose where to save the request file. This will have to be signed by the Root CA.
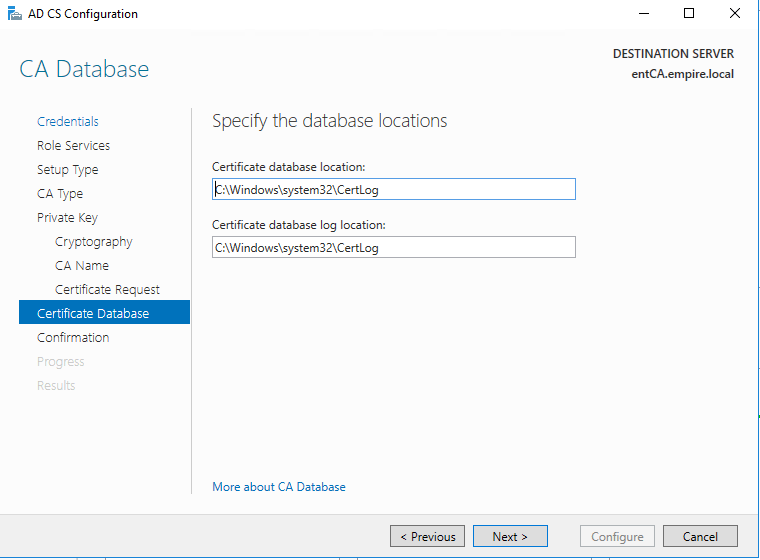
Choose defaults. Again, best practice is to save it to a separate data drive.
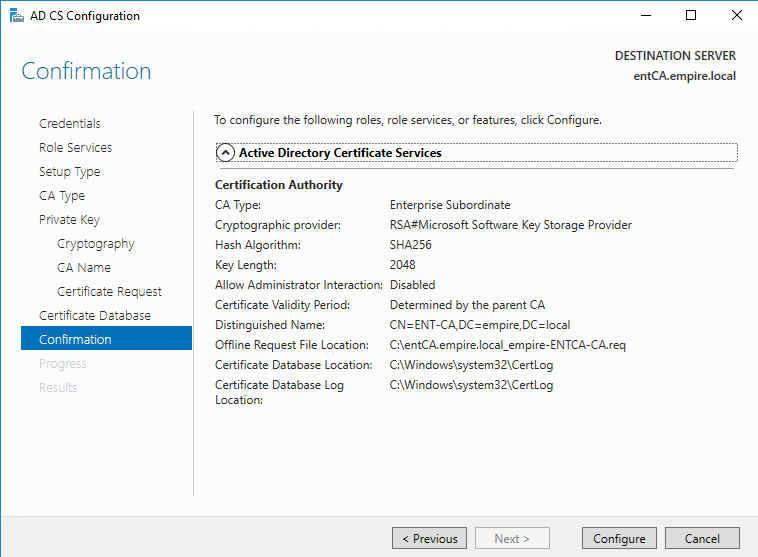
Verify and click Configure.
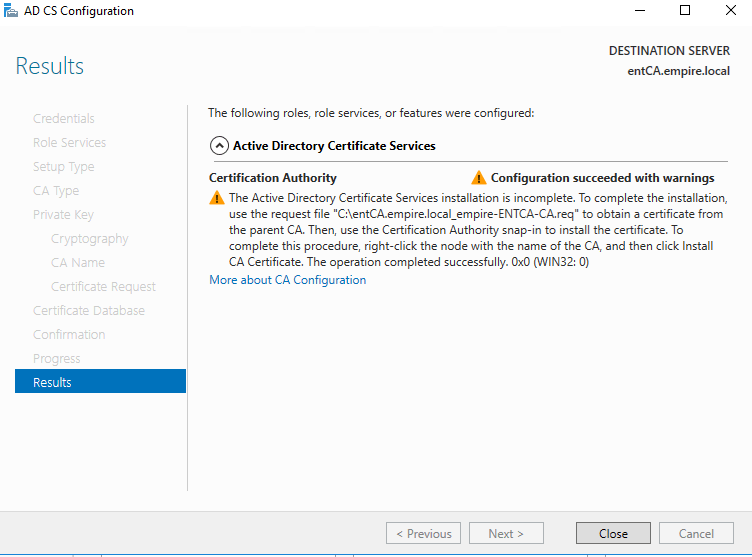
You’ll see this warning. This means you have to sign the request file that we just saved under C:\
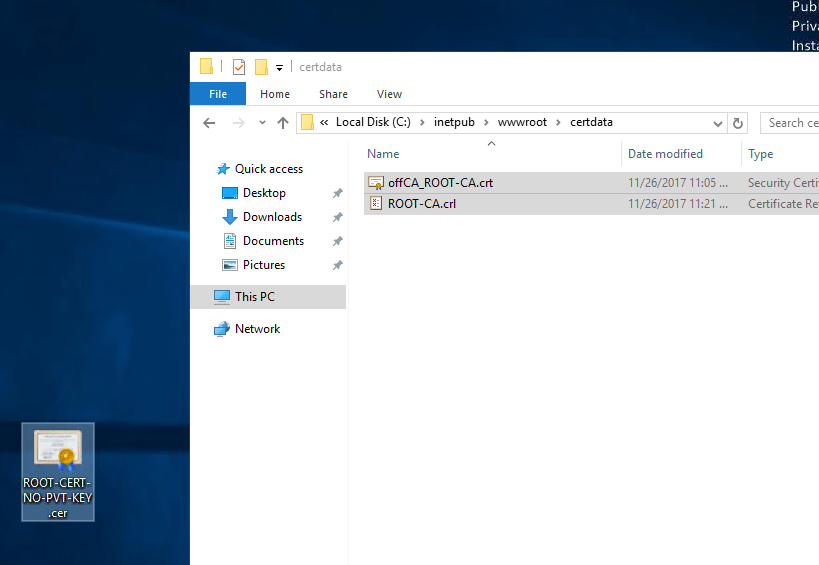
Now, copy the files from the Root CA (the first server) to Enterprise CA (this server). You will need to copy those three files under C:\Windows\System32\CertSrv\CertEnroll to anywhere on the Enterprise CA server. Choose the desktop, we won’t need them after the configuration. Right click on the certificate file that we created (the one with NO-PVT-KEY in its name) in its name and a .cer as a file extenstion. Click on Install Certificate.

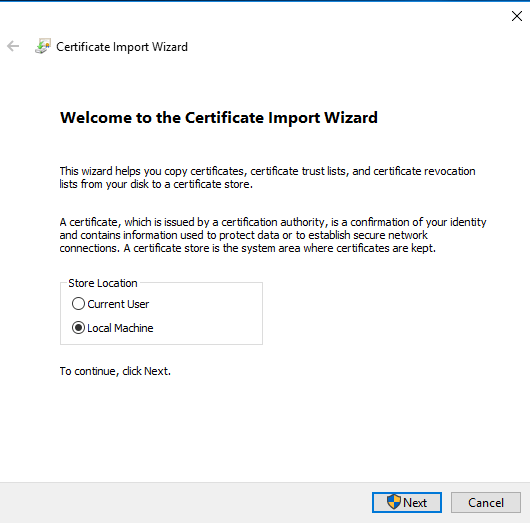
Choose Local Machine.
Choose Place all certificates in the following store.
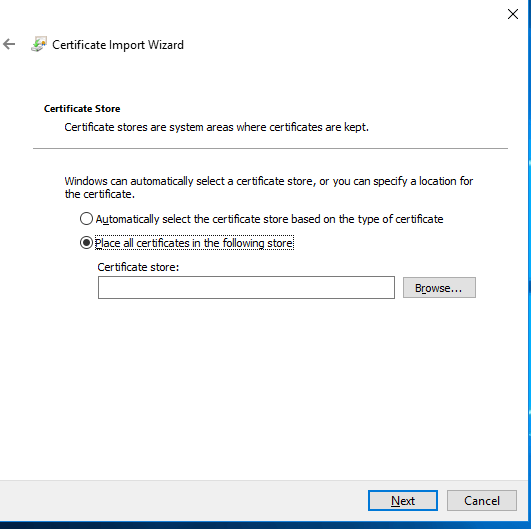
Click Browse and select Trusted Root Certification Authority.

Click Next and Finish.
Now, go to c:\inetpub\wwwroot\ and create a folder certdata. Remember when we created the CDP and IAI extensions? We used something like http://entCA.empire.local/certdata… Well, we are creating that now. So, create that folder and move the other two files there.
OK, now go back to the offline Root CA. Copy the request file that was created when we installed CA on the Enterprise CA. That’s the file that’s on the C:\ drive of the Enterprise CA. Move it to the desktop of the offline Root CA.
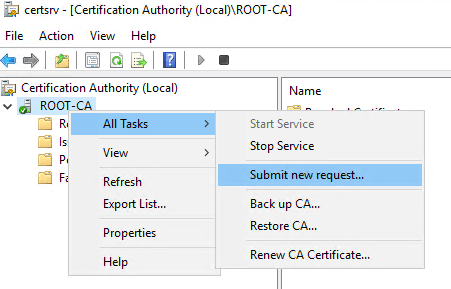
Launch the Certification Authority (Control Panel, Administrative Tools, Certification Authority) and select the name of the Root CA. Right-click, select All Tasks and then Submit New Request.
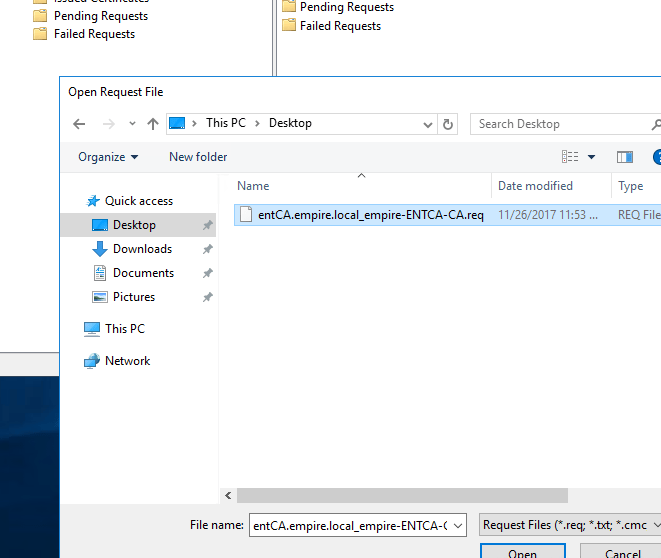
Browse to the file that we just copied on the desktop.
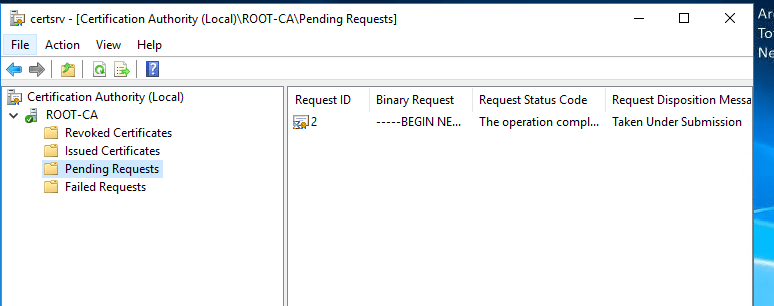
Click on Pending Requests. You’ll see our request is waiting for approval.
Select the requested item on the right and then right-click, All Tasks and Issue.

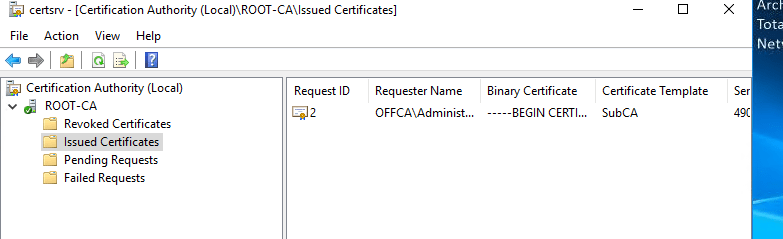
The request entry will be gone, but if you click on Issued Certificates, you’ll see the certificate there.
Double-click the certificate on the right and then click on Details tab.
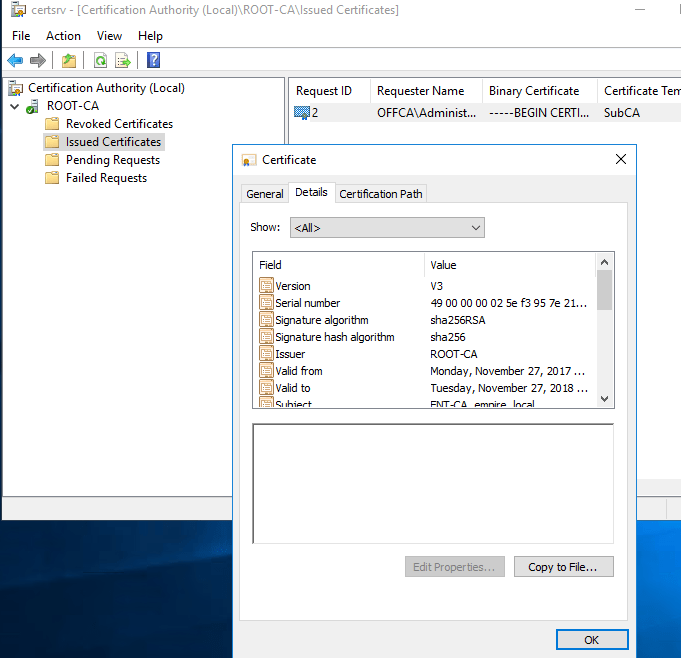
Click Copy to File. In the export wizard choose this option.
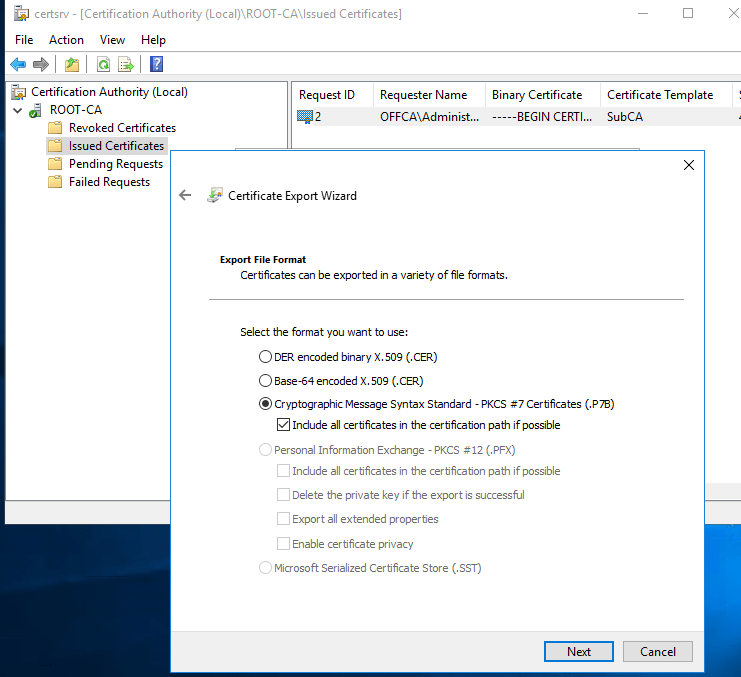
Save it on the desktop. I named it as entCA-signed, which will remind me that this is a signed certificate for the Enterprise CA.

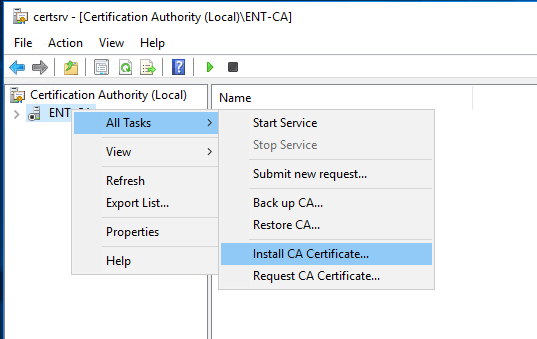
Go back to the Enterprise CA and copy this entCA-signed file to the desktop. Then start the Certification Authority (Control Panel, Administrative Tools, Certification Authority). You will see that the CA service is stopped. Right click the enterprise CA name, choose All Tasks and then Install CA Certificate.
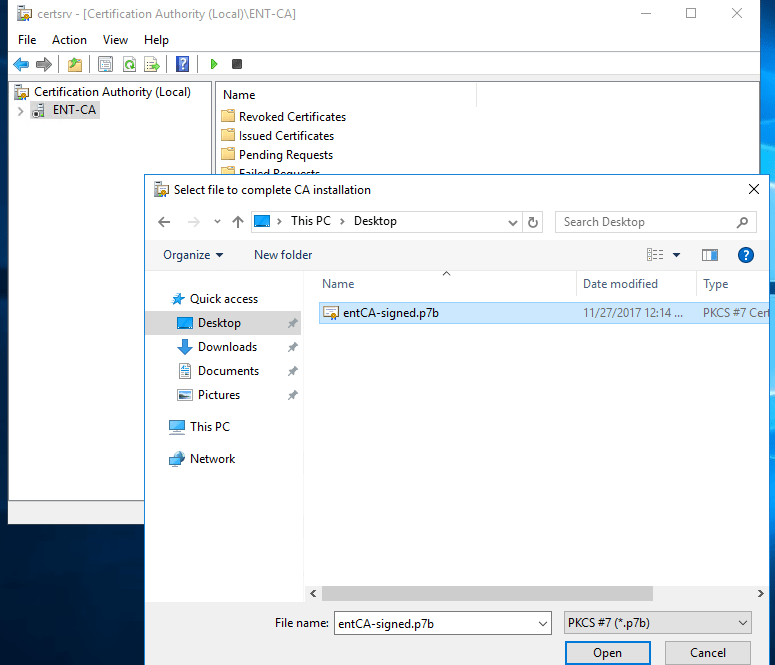
Browse to that file entCA-signed that we just copied from the offline Root CA.
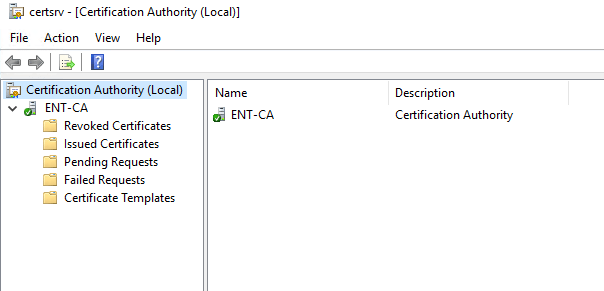
Once imported, start the service from the toolbar (green triangle icon). The service should start successfully.
At this point we have to tell the domain controller that there is a new Enterprise CA in the environment. Log to the domain controller, and copy the file (ROOT-CERT-NO-PVT-KEY) from the Enterprise CA. I saved this file on the desktop on Enterprise CA, so do the same. Copy the file from the desktop of Enterprise CA to the desktop of the domain controller. On the domain controller, go to Control Panel, Administrative Tools, then Group Policy Management.
Expand the GP to edit the default domain policy.
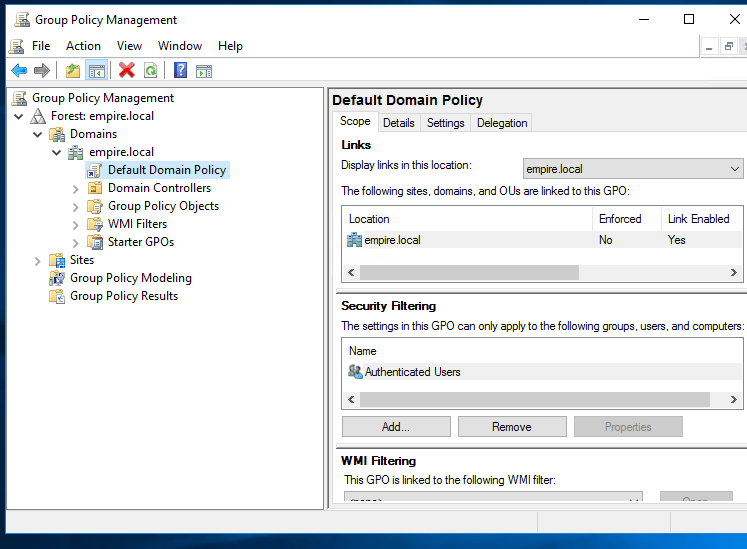
Right-click and Edit. Go to Computer Configuration, Policies, Windows Settings, Security Settings, Public Key Policies and Trusted Root Certification Authorities. Right click on it and choose Import.

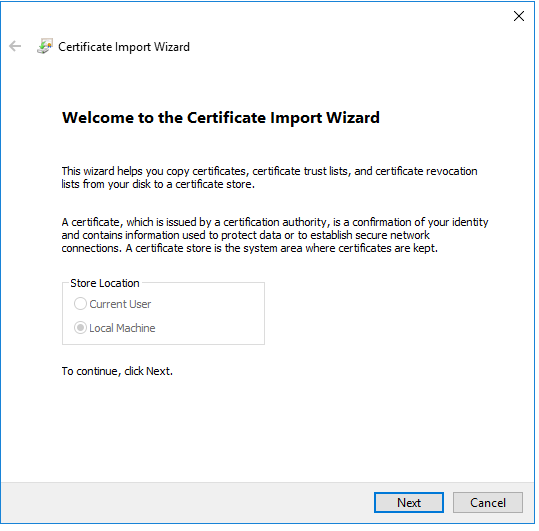
Local machine is automatically selected.
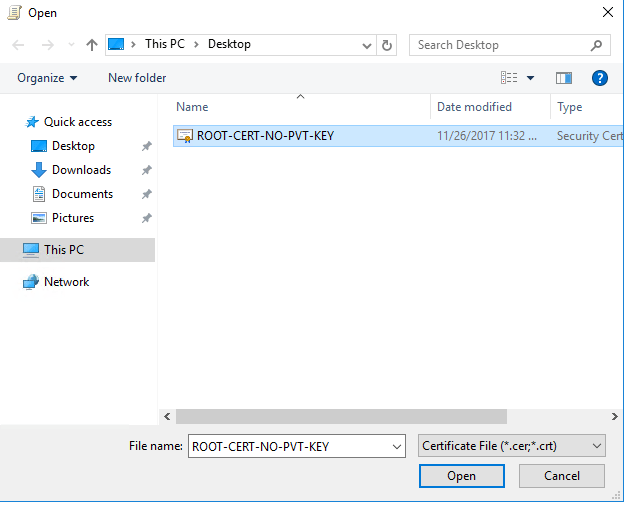
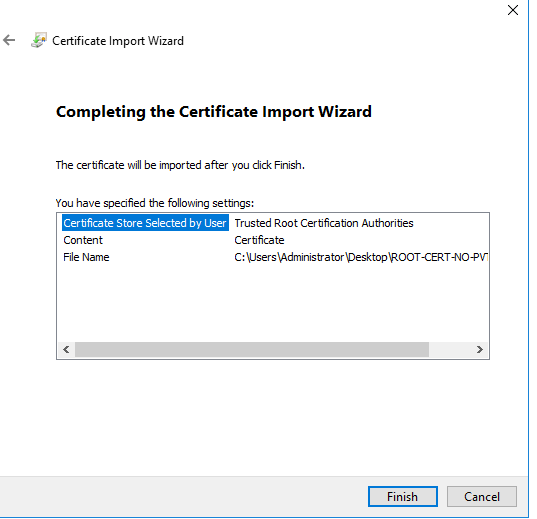
Choose the certificate, the one without private key.
The Certificate Import Wizard will launch.

Make sure this is where the certificate will be stored.
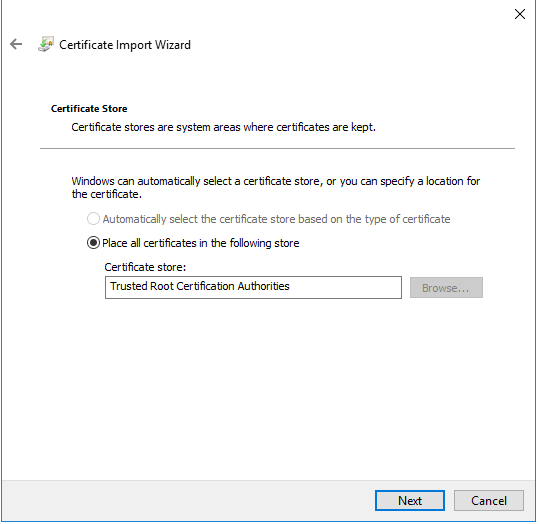
Click Finish.
OK, what now? First, delete the files that you don’t need. The ones on the desktop of the Enterprise CA, the domain controller and the offline CA. and the request file on the c:\drive on the Enterprise CA. You can also shut down offline CA. it’s not needed for another 10 years.
IIS Windows Web Server
OK, so we have the PKI in place, but let’s build an IIS web server that uses certificates, which means it will listen on port 443. This web server will be a member of a domain and the URL will be test1.empire.local. Users will access the site as https://site1.empire.local.
Log in to the IIS server and install IIS. This server must be a member of the domain. From the Server Manager add the IIS role.
Create a folder called test1.empire.local under c:\inetpub\wwwroot. Create a text file called index.txt and type something.
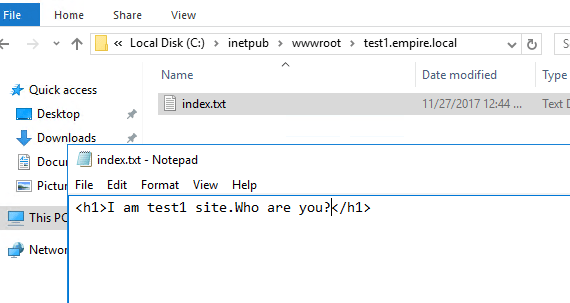
Rename the index.txt as index.html.
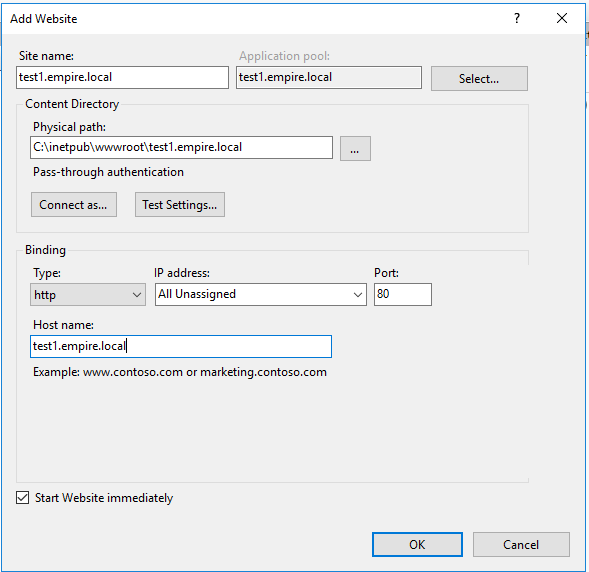
Start the Internet Information Services (IIS) Manager from Control Panel, Administrative Tools or click on Start then type inetmgr. Right-click on Sites and choose Add Website.
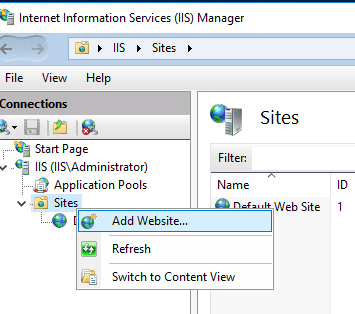
Configure it and click OK.
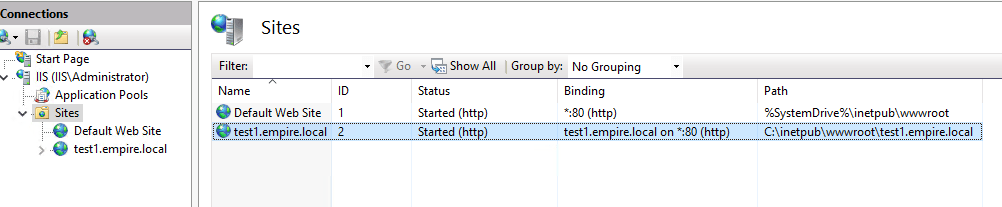
Once the site is started, make sure that you have the test1.empire.local in the DNS, so the client computers know that test1.empire.local resolves to an IP.
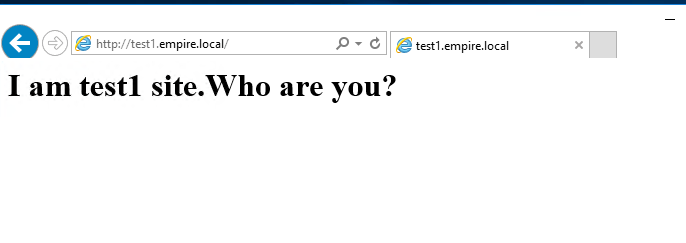
From any machine that’s on the domain, go to http://test1.empire.local. Make sure it works.
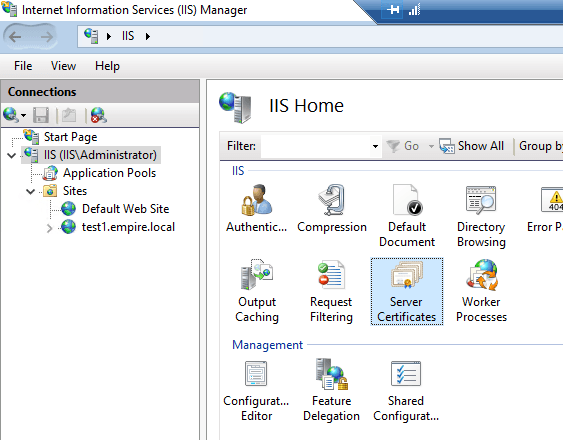
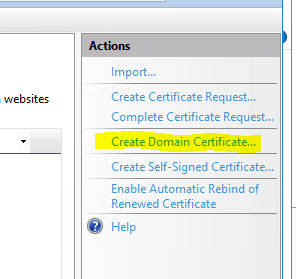
Go back to the IIS server. Click on the IIS server name and double-click Server Certificates.
Click on Create Domain Certificate on the right side.
In the dialog box that shows up, fill out the values. The common name is the actual server name.

Click the Select button and specify our Enterprise CA. If you don’t see anything in the certification Authority box when you click Select, it means that the IIS server doesn’t know about the Enterprise CA because the default domain policy is not present. Try with gpforce /update first, to update the domain policy.
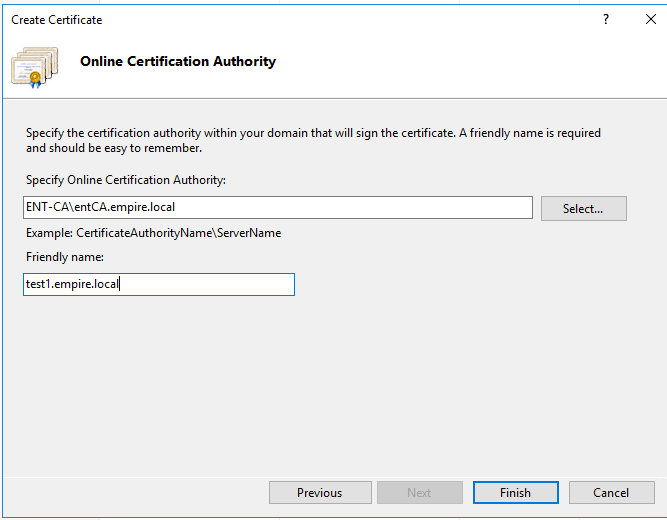
Click Finish.
If everything goes according to the plan, you’ll see that you have your certificate issued.

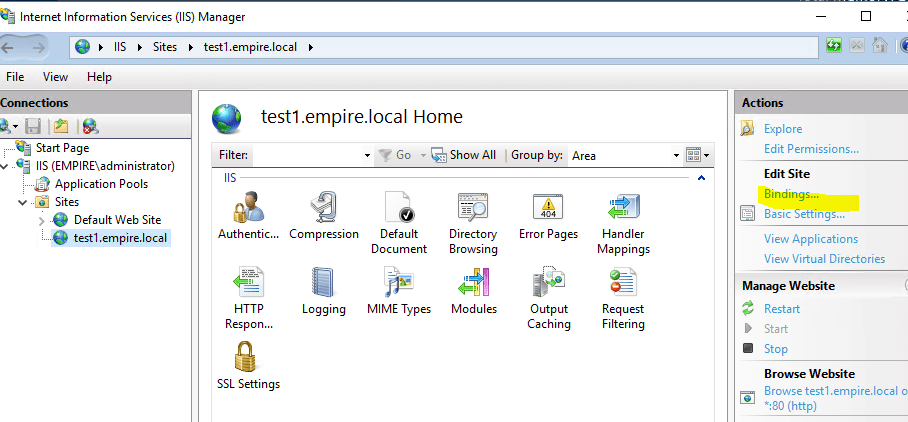
Now, click on the actual web site that we created and click on Bindings on the right-side.
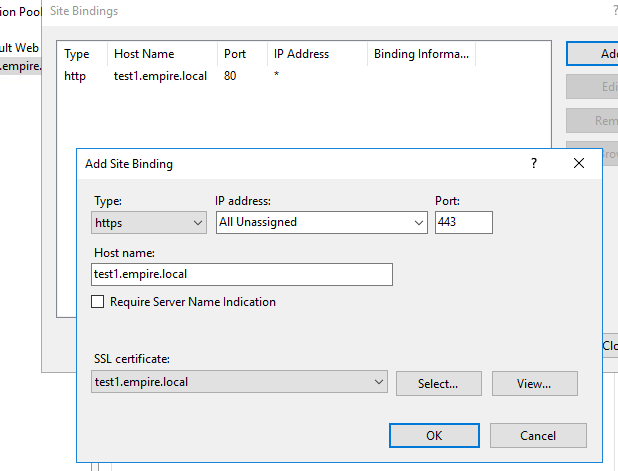
Click on Add button and fill out the values. Pretty much we are telling IIS that we want an SSL site that runs on port 443 with a certificate that we already got from the Enterprise CA.
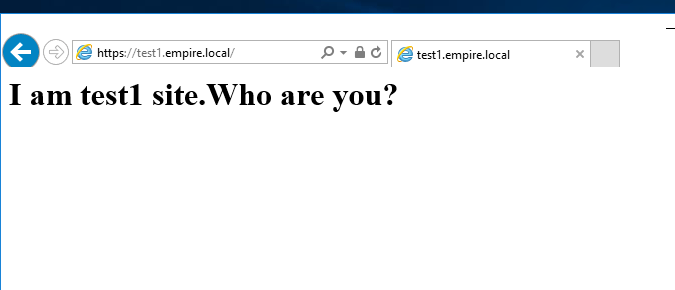
Now, go back to any client on the network and browse to https://test1.empire.local. You’ll see this.
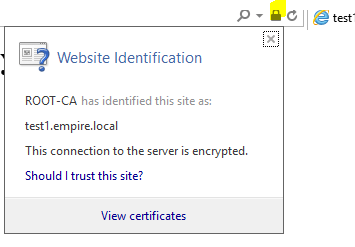
If you click on the lock icon in the address bar, you’ll see that we got the certificates right.
Apache Web Server
I’ll build a web server running Apache in the environment. I won’t go into details how to do that. Each flavor of Linux/*BSD has its own way of doing it. I’ll use AWS Linux which is based on Red Hat 6. It really doesn’t matter what you use, as long as you know how to configure Apache. Make sure you have the URL in the DNS, e.g. test2.empire.local to resolve to some IP.
For instructions on how to configure Apache on AWS/RHEL6/CentOS 6, you can check my post. For RHEL 7/CentOS chek this link and for FreeBSD use this one.
First, we have to generate the private key for the server. I’ll put it under /etc/certs directory.Do this by typing:
mkdir /etc/certs
cd /etc/certs
openssl genrsa -out test2.empire.local.key 2048
Then we’ll generate a request file that the Enterprise CA will have to sign.
openssl req -new -key test2.empire.local.key -out test2.empire.local.csr
You’ll be prompted to fill out the blanks, similarly with what we did with the IIS server.

Remember, common name is the name of your server URL.
Once you execute these two commands, you’ll have two files under /etc/certs. The private key and the the certificate signing request (.csr extension means that).

The Enterprise CA will have to sign the request file and issue a certificate.
Issuing this certificate is a little bit different. Go to the Enterprise CA and using a browser go to http://localhost/certsrv.
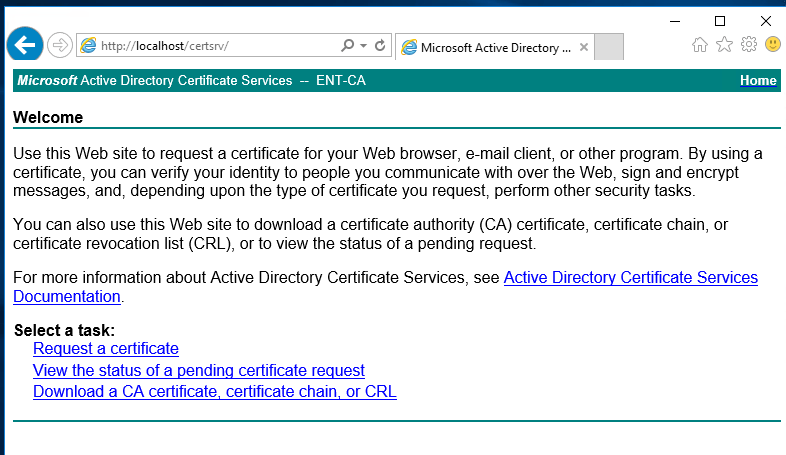
Click on Request a certificate. Then click on advanced certificate request.

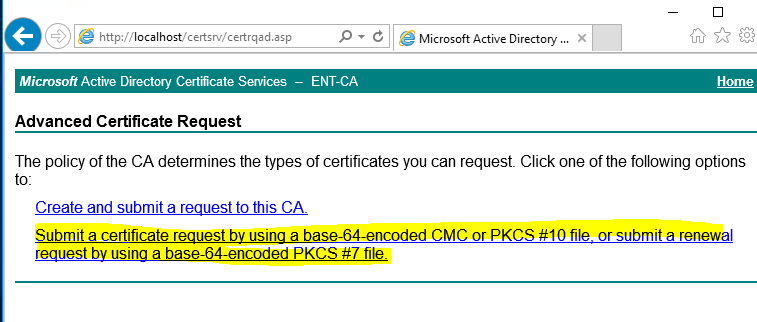
Click on the second line, Submit a certificate…
On the Linux/BSD server, open up the csr file under /etc/certs with your favorite editor (vi, nano, vim). It’s just a text file.

Select the text, copy it to the clipboard and paste it under Saved Request field.
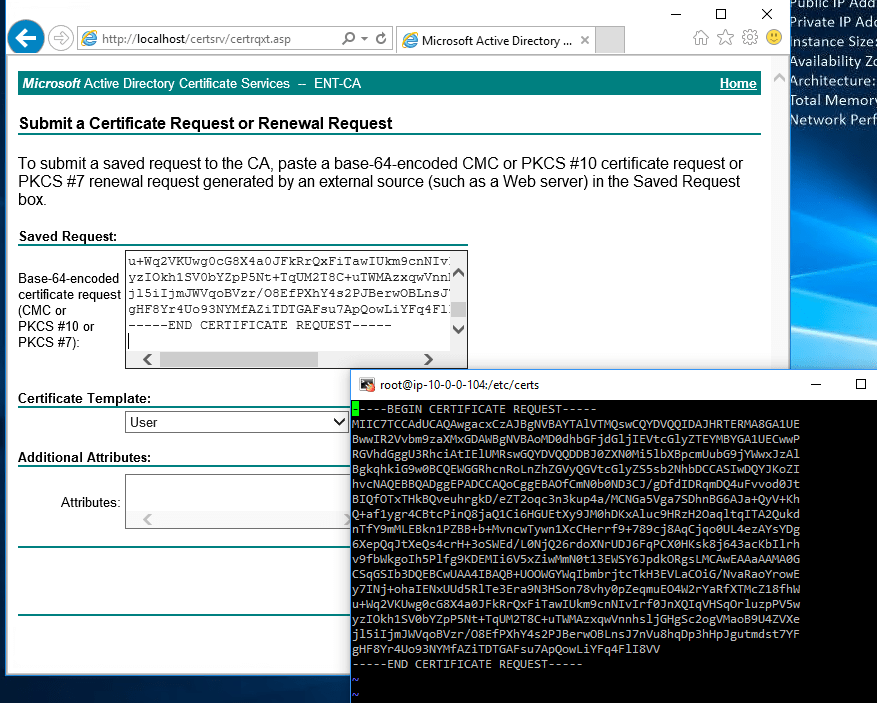
For the Certificate Template, choose the Subordinate Certification Authority and click Submit.

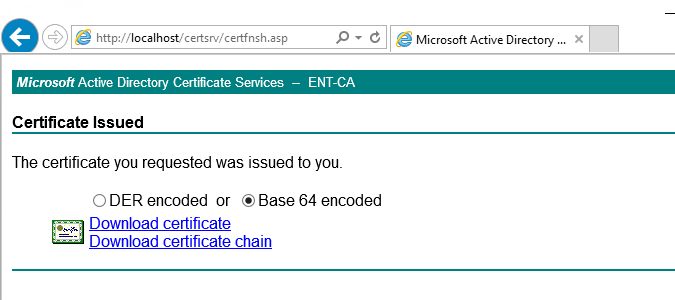
Select Base 64 encoded and then you can download the certificate or the certificate chain by clicking the link. In my case, I’ll download the certificate only.
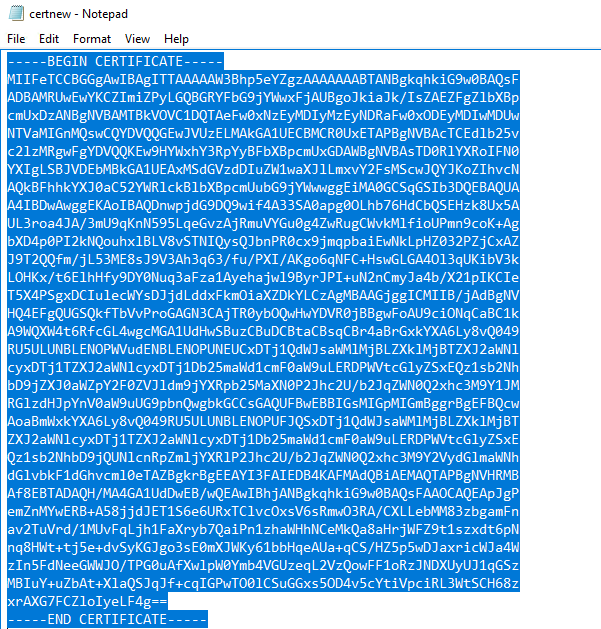
Save the file somewhere on the desktop (delete after use), edit it with notepad, select all and copy. This is how it looks like.
Go back to your Linux/BSD server and edit a new file under /etc/certs. I’ll name my file test2.empire.local.crt, so I know that this is a server certificate. Paste the text from notepad and save it. Edit the httpd.conf or httpd-vhosts.conf or whatever file you have for your web server and create an entry for your web site. In my case it looks like this.
<VirtualHost *:443>
    SSLEngine on
    SSLCertificateFile /etc/certs/test2.empire.local.crt
    SSLCertificateKeyFile /etc/certs/test2.empire.local.key
    ServerAdmin [email protected]
    DocumentRoot /var/www/test2.empire.local
    ServerName test2.empire.local
    ErrorLog logs/test2.empire.local-error_log
    CustomLog logs/test2.empire.local-access_log common
</VirtualHost>
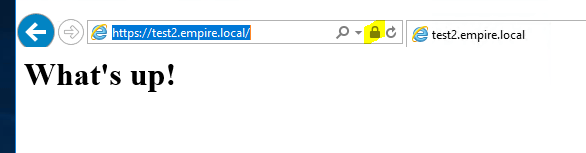
Go to the root of your web site, in my case it’s /var/www/test2.empire.local and create an index.html (not .htm) file with something in it.
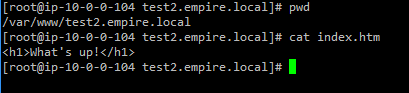
Finally, go to https://test2.empire.local and you should see the site.