
In this article, I’ll explain how to install and configure two Windows 2019 servers running MS SQL 2017 Enterprise with AlwaysOn. The servers will have local storage only but you’ll still have HA. There are several prerequisites that you need in order to test this scenario.
-
– Functional AD and rights to create objects in AD
– Unrestricted traffic access between the SQL nodes and AD (you can probably restrict the ports, but do your research)
– Two AD accounts (an user account and a SQL service account)
– Two extra IPs assigned to each SQL node
– Proper DNS resolution in AWS and time synced between the nodes and DCs
Table of Contents
Domain controllers and AD
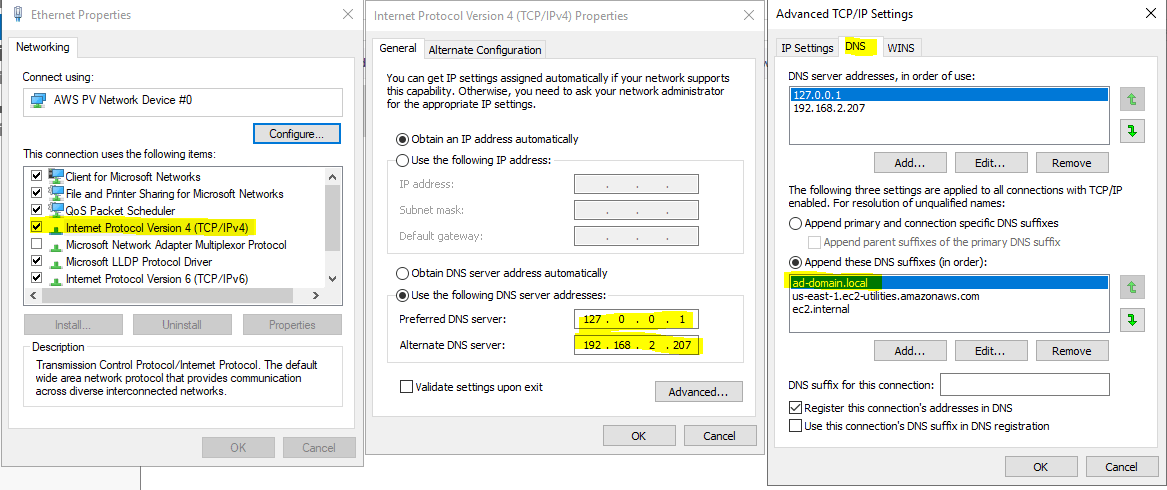
I have two DCs running in two zones in the same region. Make sure that you can ping/resolve the servers by using only the short DNS name. E.g. My first domain controller is dc01. When I do ping dc02 from dc01, it resolves fine. If not, check the DNS settings. You should also check the advanced DNS settings. Make sure that your domain is on the top. In my case, I have the DNS settings of dc01 pointing to itself and dc02. Notice ad-domain.local on top of other suffixes. AD-DOMAIN.LOCAL is the name of my domain. If you have the DNS suffixes configured on the VPC level, you don’t have to make this change. The only thing important is that you have a proper DNS resolution.
Open up AD Users and Computers (dsa.msc) and create a single service account for the SQL servers. I’ll call it svc_sql and it should be a member of Domain Users only. The password should never expire. This account will run the SQL DB engine on SQL nodes.
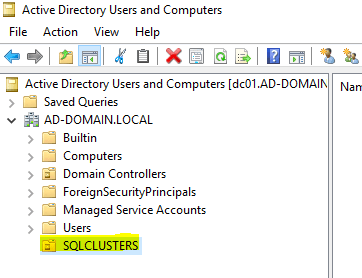
Then create an OU for the cluster object. In my case, I’ll create an OU called SQLCLUSTERS.
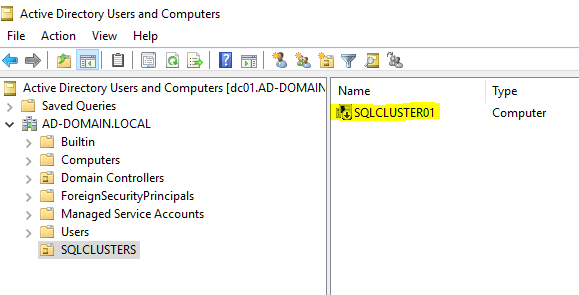
Then create the name of your SQL cluster as a computer object and disable it.
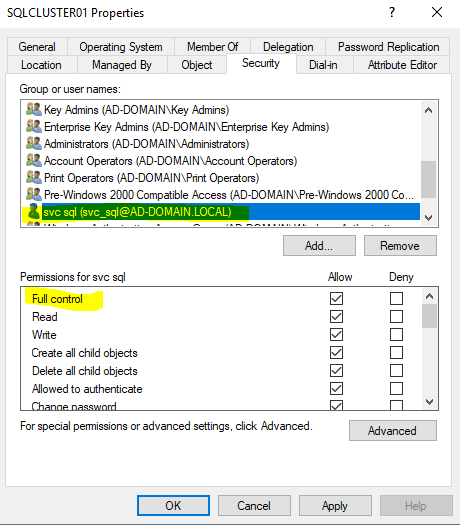
In AD Users and Computers, under the View menu, make sure that Advanced Features is enabled. Right-click the SQL cluster computer object and choose Properties, then click on Security tab and click Add. Type the name of the service account you just created and give it Full Control.
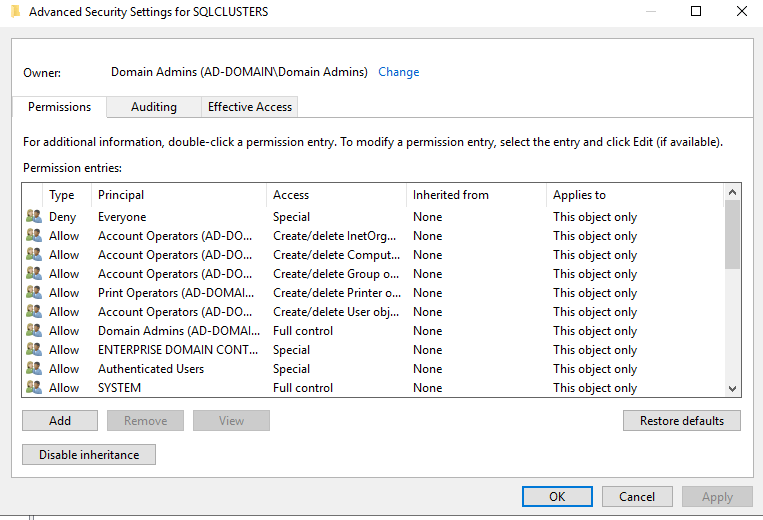
We also need the cluster computer account to have rights to the OU. Right-click the OU that you just created, choose Properties and under the Security tab, click Advanced.
You’ll see something like this.
Click Add and in the new dialog that shows up, in the upper left corner, click the link Select a principal.
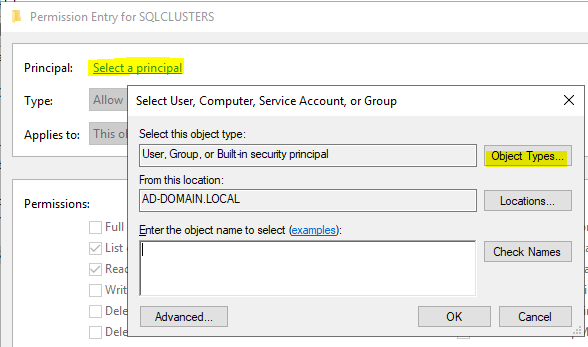
By default, computer object are not going to show up, so click on Object Types button, then check Computer and click OK to go back to the screen above.
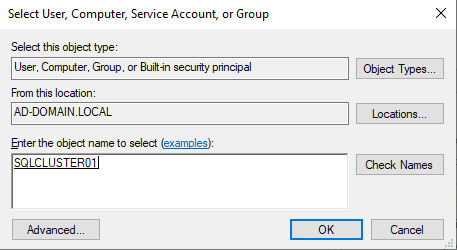
Type the name of the SQL cluster and click on Check Names to verify it.
Click OK when it reminds you that the object is disabled. In the Permission Entry dialog box, make sure that the Type is set to Allow, and the Applies to is set to This object and all descendant objects. Finally, under Permissions, click on the Create Computer objects check box. Click OK until you close all open dialogs.
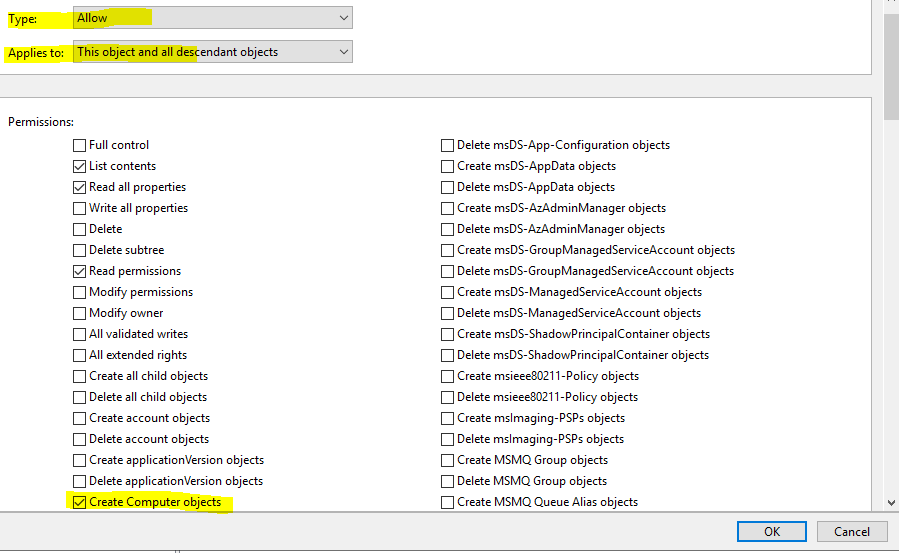
The AD part is now complete.
WSFC (Windows Server Failover Cluster)
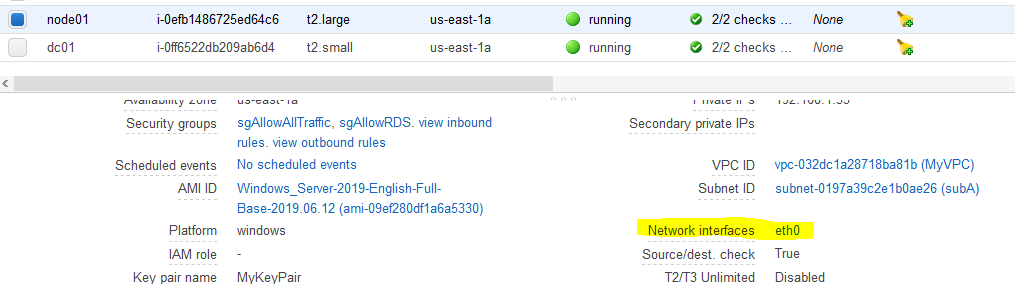
Now, we have to create and configure the failover cluster. I have two SQL nodes, node01 and node02. We have to install WSFC on each node, but before doing that, let’s add extra two IPs per node. In AWS console, on each SQL instance, click on the network adapter, usually called eth0.
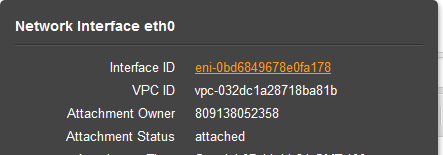
Click on the Interface ID.
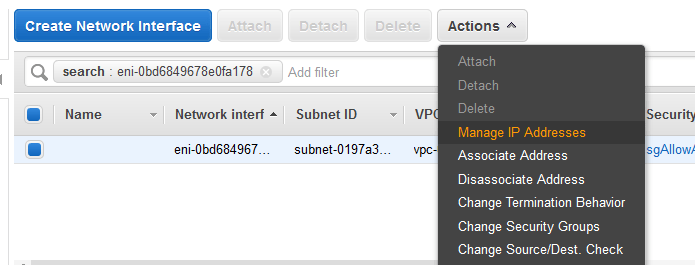
Then from the Actions drop down, click on Manage IP Addresses.
Add two extra IPs per instance. You can choose DHCP provided IPs or manual. I decided to go with manual assignment. Make sure the IPs are in the same subnet as the primary and they are not in use.
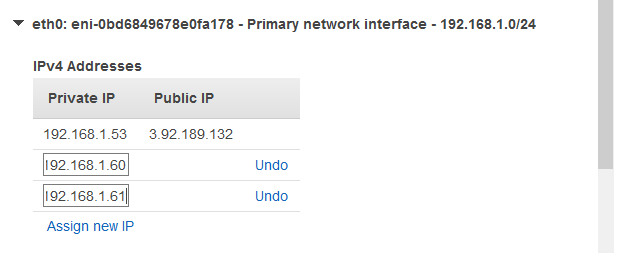
For node01, I’ll use 192.168.1.60 and 192.168.1.61 and for node02 I’ll use 192.168.2.60 and 192.168.2.61. node01 and dc01 are in a 192.168.1.0/24 subnet and node02 and dc02 are in 192.168.2.0/24 subnet. Now, log to both nodes with an admin account and add the SQL service account svc_sql as a local administrator. Then log off and log back to SQL nodes as svc_sql service account.
On both nodes, install the WSFC (Windows Server Failover Cluster) from an elevated PowerShell prompt and reboot.
Install-WindowsFeature -Name Failover-Clustering -IncludeManagementTools
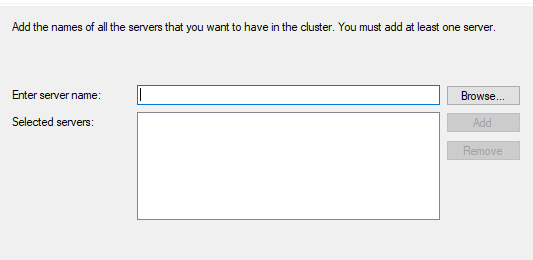
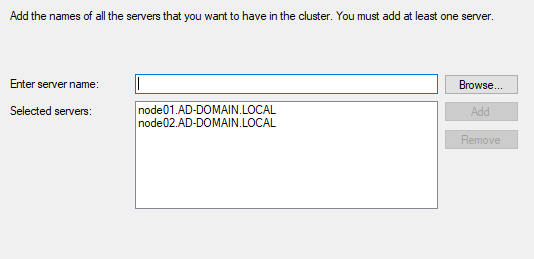
Once the instances come back, log as svc_sql and create the cluster. Open up an elevated command or PowerShell prompt and type cluadmin.msc (do this on one node, not both). In the wizard dialog box, click Browse and type the name of the nodes.
The cluster wizard will do some pre-checks and if everything looks good click Next.
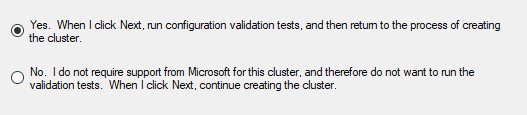
Do not skip this part. Make sure you validate the cluster and you run all tests. It takes about a minute or two.
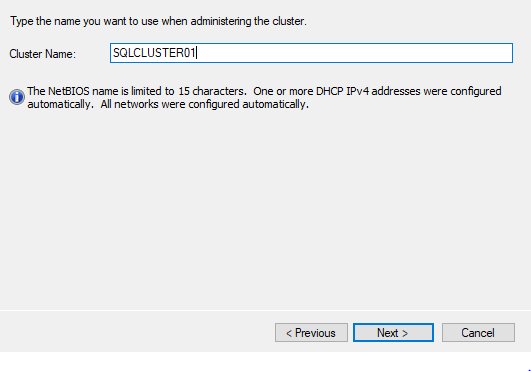
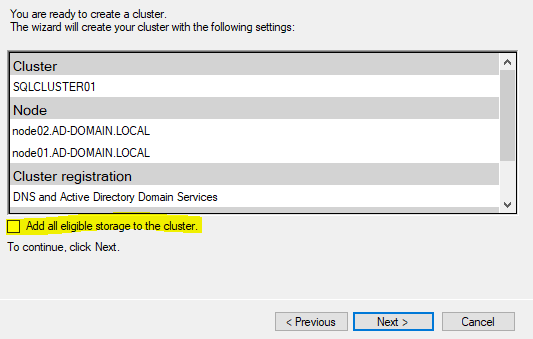
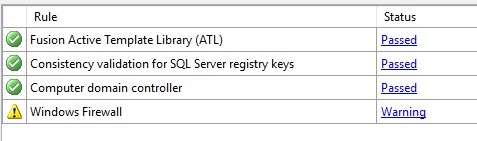
You’ll see some warnings about the network, but you can ignore them. This is how my report looked like. You’ll be able to enter the name of the cluster if everything is OK. In my case, the cluster name is the disabled computer object SQLCLUSTER01 that we created earlier.
Make sure you uncheck the storage setting. We are using local storage, so there is nothing to add to the cluster as a resource.
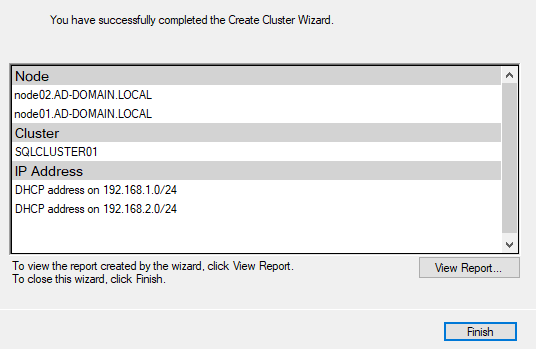
After a minute, you should get a greeting that the cluster is OK.
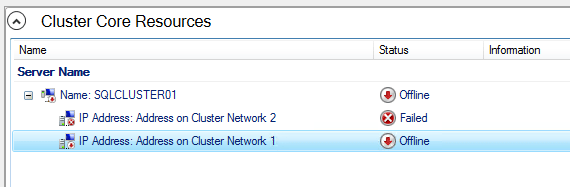
Back in the cluster manager, you’ll see this mess. Don’t worry.
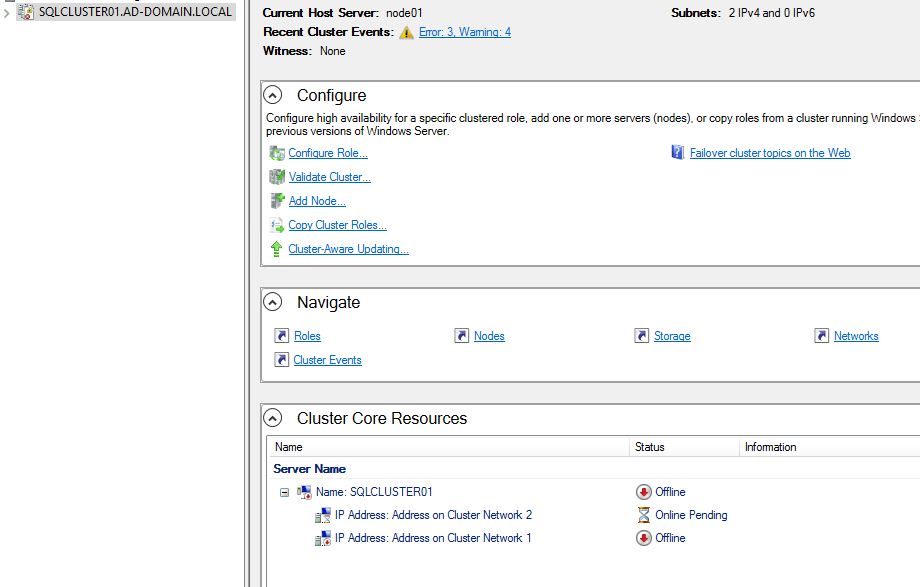
At the bottom of the cluster manager, right click the first node and choose Properties.
How do you know which one is which? Once you open the properties, look at the Network under the General tab. Based on the subnet, you’ll have to assign the IP that belongs to that subnet. So, in my case this is how it looked like before I made the change.

I know that 192.168.2.0/24 belongs to node02, so I’ve changed the settings from DHCP to Static IP and added 192.168.2.60. Remember this IP? It was the first one that we added to node02. Scroll up if you forgot.
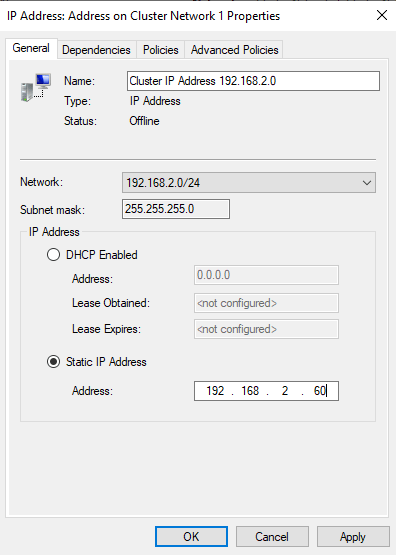
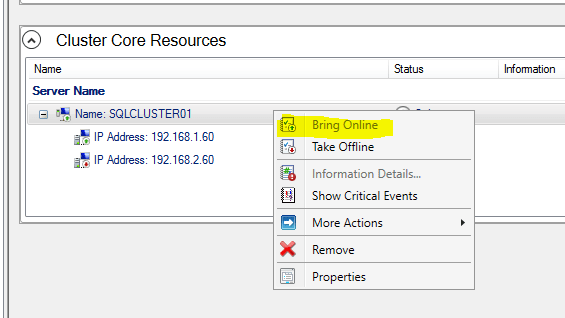
Do the same for the 2nd entry. This time you have to add 192.168.1.60 because the subnet is 192.168.1.0/24. Then, bring the cluster online.
Now, you can install the SQL server.
SQL Server installation
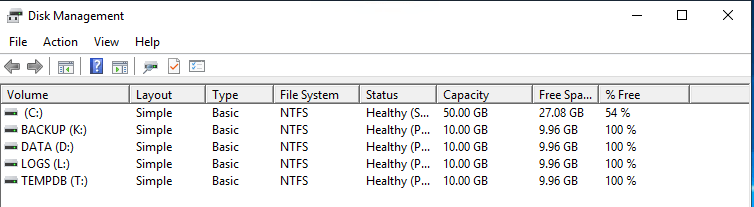
As I mentioned earlier, make sure you have correct DNS settings and the time is in sync with AD. Before you install MS SQL, make sure you have your partitions ready. They don’t have to be like this, you can use C:\ only for everything, but ask your DBA how they want to carve the space for the DB. I am using the trial version downloaded from here.
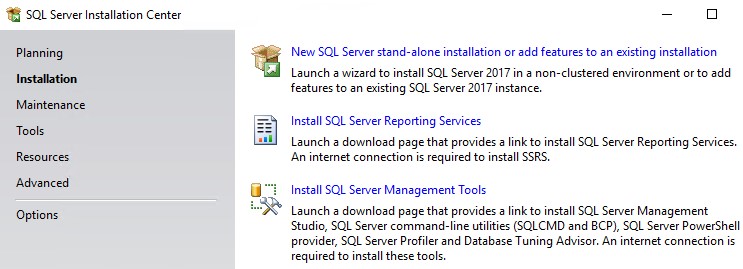
Run the installation on both nodes using the service account svc_sql. You made this a local admin, didn’t you? Click on Installation on the left side and the first option for a new SQL Server stand-alone…
Choose license.

Accept the license terms and use or do not use Microsoft Update for SQL updates.
Ignore the warning for the firewall.
Check the Database Engine Service, SQL Server Replication…
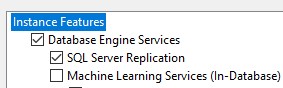
…scroll down and check Client Tools Connectivity.

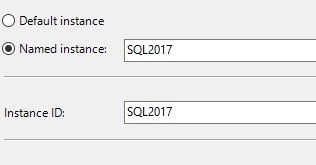
Click on Named instance and type your name. In my case it’s SQL2017.
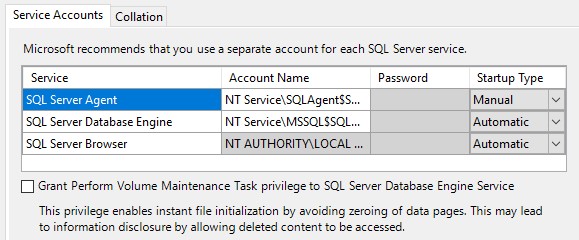
Leave the Service Accounts as is. We’ll change one of them later.
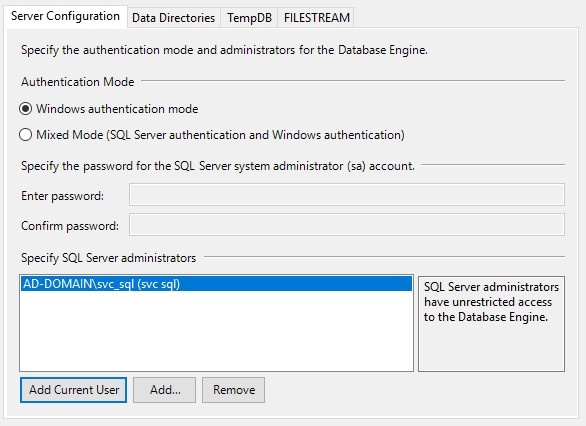
Under Server Configuration tab, use Windows authentication mode and click Add Current User.
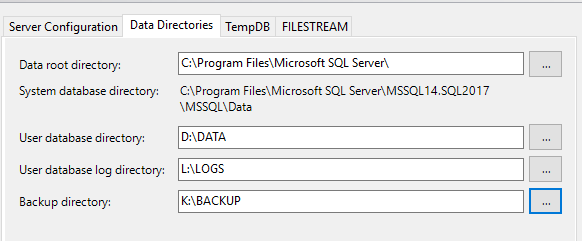
On the Data Directories tab in the same dialog you can change the disk destinations. If you have just one C:\ partition you can skip this part. If not, map the directories here. Here are mine.
And for TempDB on the next tab in the same dialog.

Proceed to Install until the installation completes successfully.

SQL Management Tools (optional)
This step is optional. If you have SSMS already installed, you can skip this part. If not, install it on a node, both or any client workstation. From the same setup menu, install SQL Management Tools (third from the top). This will take you to a MS web site where you can download the latest SMSS (SQL Server Management Studio).

SQL service account change
Before you reboot, let’s change the account that runs SQL. This is mandatory for a SQL cluster. DO NOT change the account from the Services console, instead open SQL 2017 Configuration Manager.
Do this on both nodes. Select where it says SQL Server Services on the left and then right-click on SQL Server (SQL2017) on the right and choose Properties.
Enter the SQL service account, its password and click Apply. This will reset the SQL service and change it to run under the domain service account. Do not reboot yet.
Dynamic ports and firewall
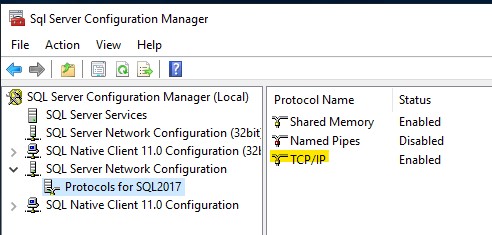
Because we are using a named SQL instance, the DB engine assigns a random dynamic port for the listener. Instead of opening a range of ports on the firewall, we can restrict the listener to a static port and then open the firewall for that port only. Do this on both nodes. In the same SQL 2017 Configuration Manager, look for SQL Server Network Configuration on the left, expand it and select Protocols for SQL2017 or whatever you named your instance. Right-click where it says TCP/IP on the right and choose Properties.
Click on the second tab IP Addresses and scroll all the way down where it says TCP Dynamic Ports. Delete that value, leave it blank and in the next field TCP Port below, enter a random TCP port from 49152-65535. I’ll use 50000 for both nodes. You need to restart the SQL service for this change to take effect, but we’ll reboot, so no need for that. But, if you have your Windows Firewall enabled, you have to open these TCP ports. Run these command from an elevated PowerShell prompt.
New-NetFirewallRule -Name "SQL2017 Named Instance (in)" -Description "SQL2017 Named Instance" `
-DisplayName "SQL2017 Named Instance" -Enabled:True -Profile Domain,Public,Private `
-Direction Inbound -Action Allow -Protocol TCP -LocalPort 50000
New-NetFirewallRule -Name "SQL Server Rule (in)" -Description "SQL Server Rule" `
-DisplayName "SQL Rule" -Enabled:True -Profile Domain,Public,Private `
-Direction Inbound -Action Allow -Protocol TCP -LocalPort 1433
New-NetFirewallRule -Name "SQL Server Browser Rule (in)" -Description "SQL Server Browser Rule" `
-DisplayName "SQL Browser Rule" -Enabled:True -Profile Domain,Public,Private `
-Direction Inbound -Action Allow -Protocol UDP -LocalPort 1434
New-NetFirewallRule -Name "SQL Server AlwaysOn Replication (in)" -Description "SQL Server AlwaysOn Replication" `
-DisplayName "SQL Server AlwaysOn Replication" -Enabled:True -Profile Domain,Public,Private `
-Direction Inbound -Action Allow -Protocol TCP -LocalPort 5022
Now, you can reboot.
AlwaysOn
Log as the SQL service account svc_sql and open SQL Configuration Manager. You have to do this on both nodes. Similarly to what you did when you change the SQL service account, do the same.

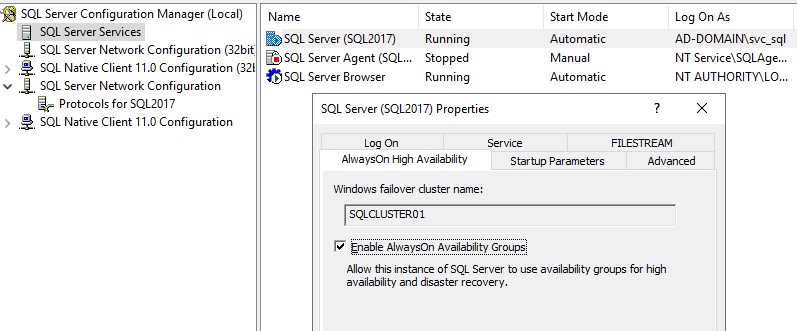
Select SQL Server Services, right-click SQL Server (SQL2017) and check Enable AlwaysOn Availability Groups under AlwaysOn High Availability tab.
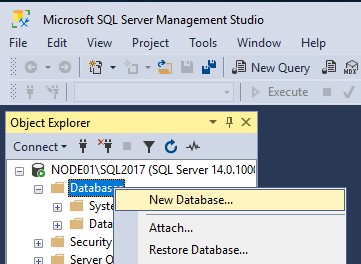
Restart the SQL service on both nodes. Once completed, open SSMS, connect to a node and create a new database.
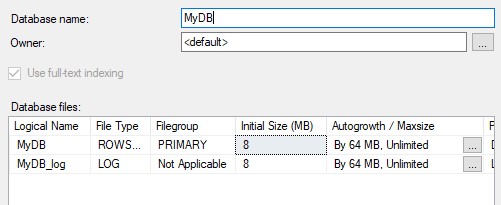
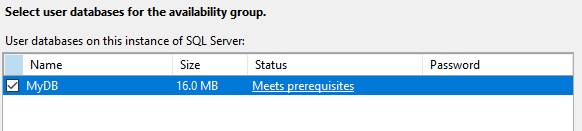
I’ll name my database MyDB.
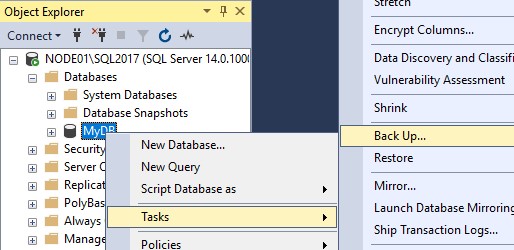
Make sure you backup the database. You can’t proceed without this step.
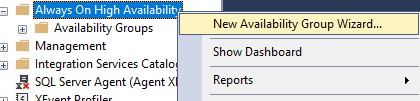
Little further below, right-click on Always On High Availability and click on New Availability Group Wizard.
Specify a name for the availability group.

Select the database that we just created.
Click on Add Replica.
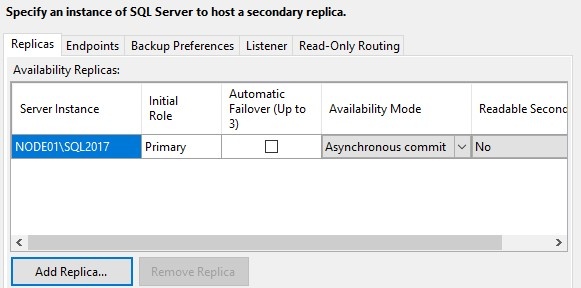
Connect to node02.

I want automatic failover which means it’s a synchronous commit.

Choose Automatic Seeding.

Don’t worry about the listener.
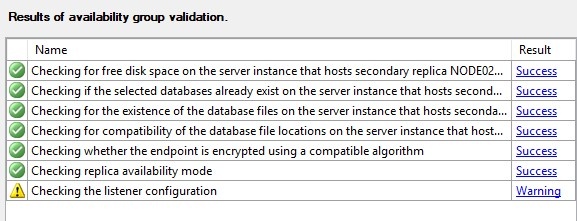
After 10-20 seconds the configuration should complete.
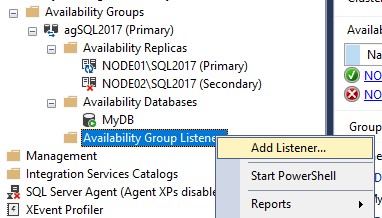
Now, we need to add a listener. Expand the Availability Groups, right-click Availability Group Listeners and select Add Listener.
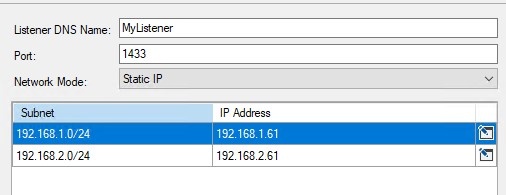
Give listener a name (in my case MyListener), you can choose a port (I used the default 1433, you can choose a random port but don’t forget to open the firewall) and add the other two IPs as static IPs.
Right-click the availability group and click on Show Dashboard.
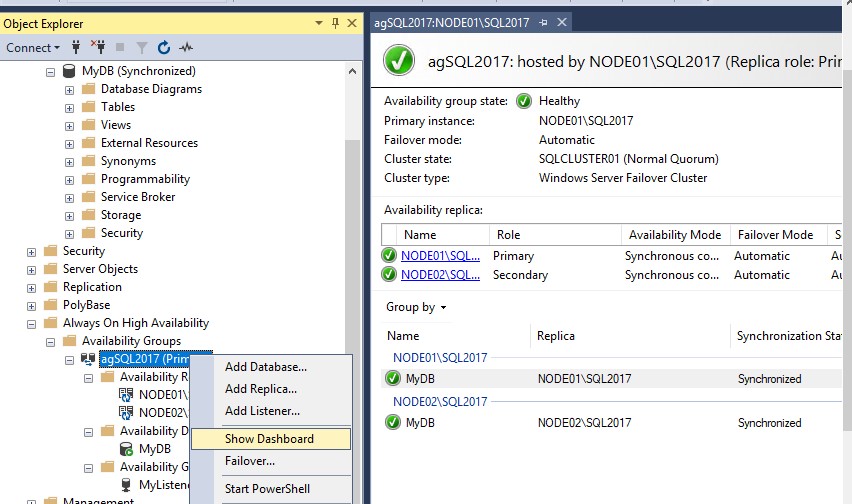
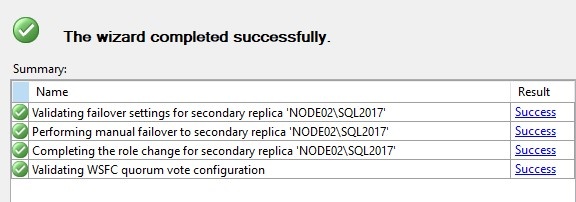
Everything should be with green checkmarks and both states should be synchronized. The availability group (and the database) are configured for automatic failover, but you can do manual failover if you want. Right-click the availability group and click on Failover. This is how my manual failover looks like.
At this point you have a fully functional AlwaysOn cluster.
Test the failover (optional)
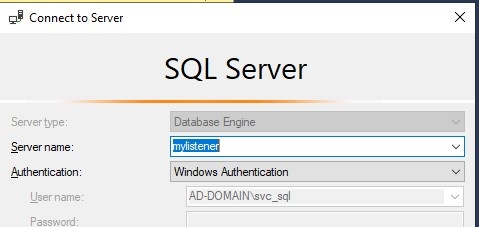
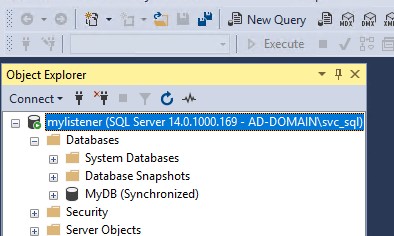
We’ll use a sample populated table to run some queries from PowerShell. Then, we’ll stop one node and watch the outcome. In order to do the test, open up SMSS, log as svc_sql and connect to the listener directly.
Click on New Query from the top.
Insert these statements. They’ll create a SQL login mapped from the domain name (in my case klimenta) and a table in the MyDB database called COLORS. Replace the values that match your domain name and the database. Execute the first part (CREATE LOGIN) on node02 too.
CREATE LOGIN [AD-DOMAIN\klimenta]
    FROM WINDOWS
    WITH DEFAULT_DATABASE = [MyDB];
USE MyDB;
CREATE TABLE COLORS (ID INT, NAME VARCHAR(10));
INSERT INTO COLORS VALUES(1,'RED');
INSERT INTO COLORS VALUES(2,'YELLOW');
INSERT INTO COLORS VALUES(3,'BLUE');
INSERT INTO COLORS VALUES(4,'WHITE');
GO
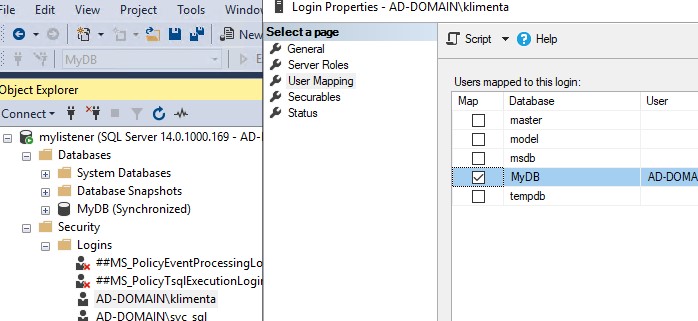
Double-click the login that you just created, click on User Mapping and put a checkmark next to MyDB database.
Right-click the database, choose Properties then click on Permissions. Select the username and make sure you have Connect and Select permissions.

From a separate workstation/server, you can use even the domain controller, log as the username (klimenta) that you just granted right to the MyDB database. Open up PowerShell ISE and run this script. Replace the values for the listener and the database. It’s a script that connects to the database and spits the contect of the COLORS table indefinitely. Use CTRL-C to break.
$Server = 'tcp:mylistener,1433'
$database = 'MyDB'
$Connection = New-Object System.Data.SQLClient.SQLConnection
$Connection.ConnectionString = "server=$($Server);database=$($Database);trusted_connection=true;MultiSubnetFailover=True;"
$Connection.Open()
$Command = New-Object System.Data.SQLClient.SQLCommand
$Command.Connection = $Connection
$x=0
while ($true) {
    $Command.CommandText = 'SELECT * FROM COLORS'
    $Reader = $Command.ExecuteReader()
    $Datatable = New-Object System.Data.DataTable
    $Datatable.Load($Reader)
    $Datatable
    Start-Sleep -s 5
    Write-Host($x, "---")
    $x++;
}
$Connection.Close()
Once you see the output, shutdown the primary node or do a manual failover. You’ll notice that there is no interruption in the program flow. The only thing that changes is the IP of the listener.

Links
YouTube (AWS)
Microsoft
PowerShell