
I have several scripts that I use to do some maintenance on my servers (snapshots, backups, cleanups etc) and they are all scattered on different servers. I’ve decided to consolidate them and use AWS Lambda to do the scheduling and execution for me. So, in this post I’ll explain how to create simple snapshot clean up script that deletes some old AWS snapshots and runs once a day. In addition, I’ll do the same Lambda script, but this time using the serverless framework.
NOTE ABOUT SNAPSHOTS
The Lambda function deletes snapshots only. If the snapshot is associated with an AMI, you’ll get a message that the snapshot is in use.
The setup below requires Full Access to AWS.
Table of Contents
SNS
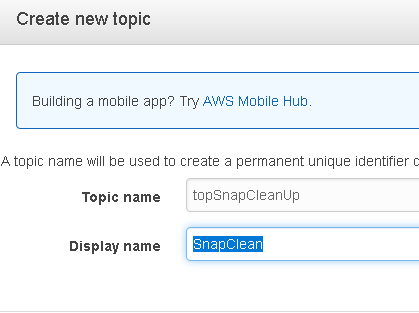
First, let’s configure SNS that we’ll use to send us the notifications from the script. Go to SNS and click on Create topic.

Name your topic and click on Create topic.
Once there, click on Create subscription.
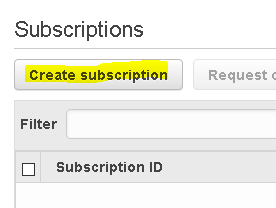
In my case, I want to receive an e-mail. Click on Create subscription.

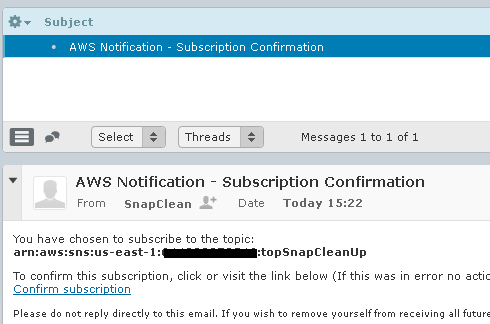
If you check your e-mail, you’ll see that you have to confirm the subscription. Click on Confirm subscription in the e-mail and you are done with this part.
Lambda function
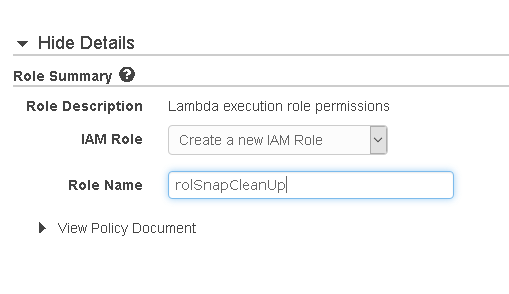
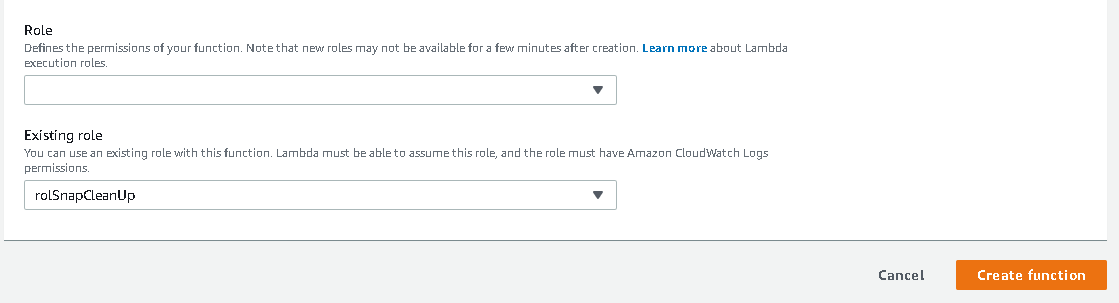
We are ready to deploy the script now. Go to Lambda and click on Create a function. Fill out the form so it looks like this.
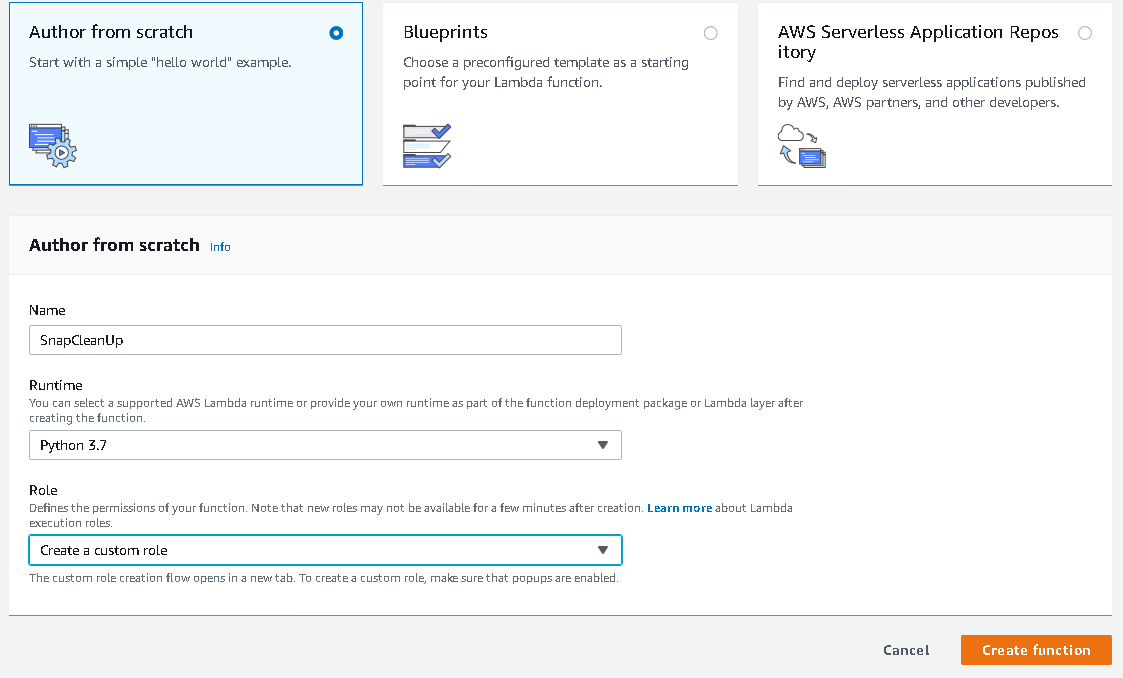
Once you select Create a custom role a new window will pop up.
Click Allow and the window will close. You’ll be back to the initial screen. Click Create function here.
If you scroll down a bit, you’ll see a placeholder for a Python code. I already have my function ready, so I’ll just delete what’s in there and paste my script. Make sure you change the values in line numbers 8 and 10. Line number 8 is your AWS account and line number 10 is the amount of days that you want your snapshots to be kept. Also, if you have any snapshots that you want to keep no matter how many days they are old, you can specify their IDs in line 6. They’ll be skipped. Anything older than diff_time days will be deleted. Also, if your SNS topic was named differently, change the line number 53.
import json, boto3, datetime

def lambda_handler(event, context):

    # Do not delete these snaps
    snap_ignore = ['snap-12718f7046cc2add6','snap-0e738d4c47b2d6e14']
    # Enter the AWS account number here
    accountId = '123456789012'
    # Delete snapshots older than diff_time days
    diff_time = 30
    # Constant string
    no_snap = 'No snaps were found for clean up.'
    # Constant string
    skip_str = 'was skipped because it is in use.'
    # Leave it empty
    mail_body = ''


    ec2 = boto3.resource('ec2')
    sns = boto3.client('sns')

    # Get all the snaps from the account
    snaps = ec2.snapshots.filter(OwnerIds=[accountId])
    # Get the current time
    now_time = datetime.datetime.now().date()
    # Iterate through the snaps
    for snap in snaps:
        # Check for protected snaps, e.g the ones that we have to skip and ignore
        if (snap.id in snap_ignore):
            continue
        # Get the creation time of the snap
        snap_time = snap.start_time.date()
        # Get the current time
        now_time = datetime.datetime.now().date()
        # Calculate the difference
        snapage_time = (now_time - snap_time).days
        # If the creation time is older than the required difference
        if(snapage_time > diff_time):
            try:
                # Delete the snap
                snap.delete(snap.id)
                # Print the snap that will be deleted
                print(snap.id,'created on',snap_time,'was deleted')
                mail_body = mail_body + snap.id + ' created on ' + str(snap_time) + ' was deleted.\n'
            # Catch an exception if the snap is in use
            except:
                print(snap.id, skip_str)
                mail_body = mail_body + snap.id + ' ' + skip_str + '\n'
                continue
    if (mail_body == ''):
        mail_body = no_snap
    response = sns.publish(
        TopicArn = 'arn:aws:sns:us-east-1:' + accountId + ':topSnapCleanUp',
        Message = mail_body,
        Subject = 'Snapshot Clean up ' + str(now_time)
    )
Click Save in the upper right corner and click Test. Enter something for the Event name and click Create. Click Test again. You’ll get an error at the top of the screen.
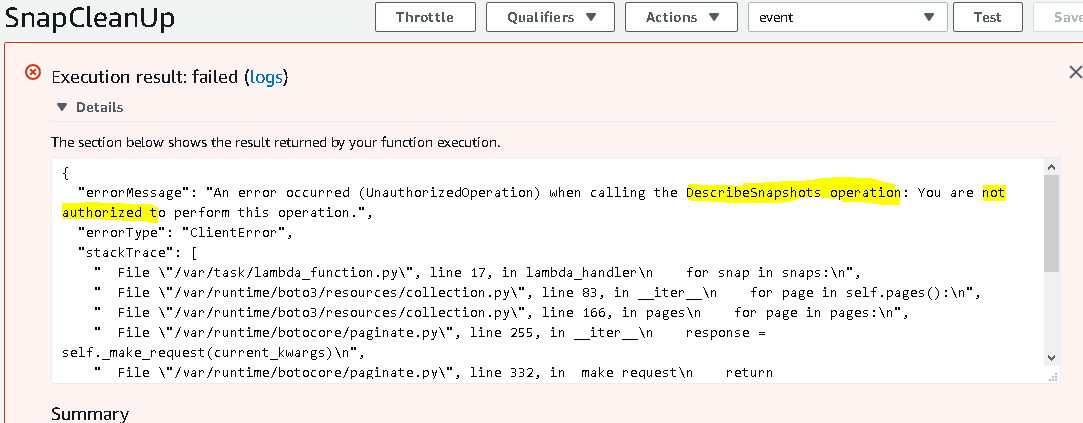
The error means that we don’t have rights. So, we have to add a policy to our role that we created earlier.
IAM Roles and Policies
If you go to the IAM service and search for the role that you’ve created, you’ll see that it’s there and that there is a simple Lambda policy attached.

If you look at the policy, you’ll see that this policy gives access to CloudWatch logs. What we need in the policy is access to snapshots and SNS. Click on Edit policy and copy and paste this one. Replace your account number in line 16.
{
    "Version": "2012-10-17",
    "Statement": [
        {
            "Effect": "Allow",
            "Action": [
                "ec2:DeleteSnapshot",
                "ec2:DescribeVolumes",
                "ec2:DescribeSnapshots"
            ],
            "Resource": "*"
        },
        {
            "Effect": "Allow",
            "Action": "sns:Publish",
            "Resource": "arn:aws:sns:us-east-1:123456789012:topSnapCleanUp"
        }
    ]
}
If you save the policy and run the Lambda function, you’ll see that everything works as expected. But, we want to go a step further and automate the execution of the script.
CloudWatch
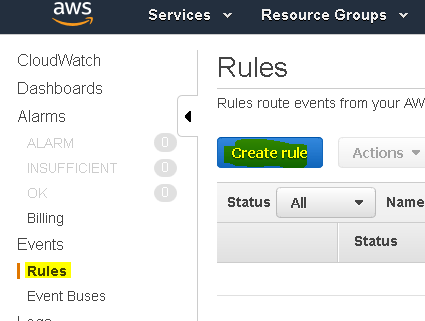
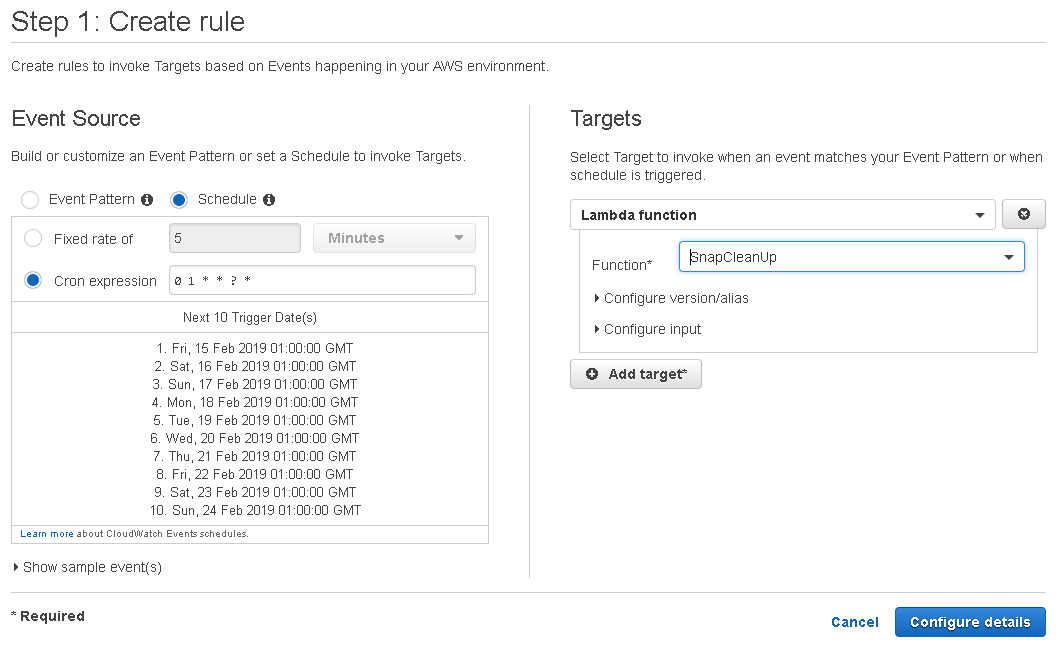
First, we need to decide when we want this script to start. In my case, I want the script to run at 1AM in the morning. Go to CloudWatch, click on Rules on the left side and click on Create rule button.
Click on Cron expression and enter 0 1 * * ? *. If you don’t know what this means, it’s a cron syntax. Google it and you’ll figure it out. It’s easy. On the right side, under Targets, choose our Lambda function from the drop-down. Then click Configure details.
Under Step 2, enter the rule name, description and click on Create rule.

In case your function times out because you have way too many snapshots, you can increase the time-out settings for the function from the main Lambda screen.

You are all set.
Serverless
You can deploy the same solution without even logging to the console. All you need is the serverless framework. I won’t explain how to install and configure serverless, so once you are done, let’s create our first serverless project.
sls create -t aws-python3 -p SnapCleanUp
Serverless: Generating boilerplate...
Serverless: Generating boilerplate in "/home/klimenta/SnapCleanUp"
 _______                             __
|   _   .-----.----.--.--.-----.----|  .-----.-----.-----.
|   |___|  -__|   _|  |  |  -__|   _|  |  -__|__ --|__ --|
|____   |_____|__|  \___/|_____|__| |__|_____|_____|_____|
|   |   |             The Serverless Application Framework
|       |                           serverless.com, v1.37.1
 -------'

Serverless: Successfully generated boilerplate for template: "aws-python3"
Serverless will generate the skeleton code and YAML config file for you. If you go to that directory, you’ll see two files: handler.py which is our Python function and serverless.yml which is the AWS config written in YAML. You can take a look at the generic files to see what’s going on. In our case we’ll replace these two files with ours. So, here is the handler.py file. As you can see it’s pretty much the same as the Python file that we used initially.
import json, boto3, datetime

def snapcleanup(event, context):

    # Do not delete these snaps
    snap_ignore = ['snap-12718f7046cc2add6','snap-0e738d4c47b2d6e14']
    # Enter the AWS account number here
    accountId = '123456789012'
    # Delete snapshots older than diff_time days
    diff_time = 30
    # Constant string
    no_snap = 'No snaps were found for clean up.'
    # Constant string
    skip_str = 'was skipped because it is in use.'
    # Leave it empty
    mail_body = ''

    ec2 = boto3.resource('ec2')
    sns = boto3.client('sns')

    # Get all the snaps from the account
    snaps = ec2.snapshots.filter(OwnerIds=[accountId])
    # Get the current time
    now_time = datetime.datetime.now().date()
    # Iterate through the snaps
    for snap in snaps:
        # Check for protected snaps, e.g the ones that we have to skip and ignore
        if (snap.id in snap_ignore):
            continue
        # Get the creation time of the snap
        snap_time = snap.start_time.date()
        # Get the current time
        now_time = datetime.datetime.now().date()
        # Calculate the difference
        snapage_time = (now_time - snap_time).days
        # If the creation time is older than the required difference
        if(snapage_time > diff_time):
            try:
                # Delete the snap
                snap.delete(snap.id)
                # Print the snap that will be deleted
                print(snap.id,'created on',snap_time,'was deleted')
                mail_body = mail_body + snap.id + ' created on ' + str(snap_time) + ' was deleted.\n'
            # Catch an exception if the snap is in use
            except:
                print(snap.id, skip_str)
                mail_body = mail_body + snap.id + ' ' + skip_str + '\n'
                continue
    if (mail_body == ''):
        mail_body = no_snap
    response = sns.publish(
        TopicArn = 'arn:aws:sns:us-east-1:' + accountId + ':topSnapCleanUp',
        Message = mail_body,
        Subject = 'Snapshot Clean up ' + str(now_time)
    )
And here is the YAML file that does the heavy lifting of creating and gluing everything for you.
service: SnapCleanUp

provider:
  name: aws
  runtime: python3.7
  timeout: 10
  stage: prod
  region: us-east-1
  iamRoleStatements:
    - Effect: "Allow"
      Action:
      - ec2:DeleteSnapshot
      - ec2:DescribeVolumes
      - ec2:DescribeSnapshots
      Resource: "*"
    - Effect: Allow
      Action: sns:Publish
      Resource: {"Ref" : "SNSTopic"}

functions:
  snapcleanup:
    handler: handler.snapcleanup
    description: Deletes snaps older than XX days
    events:
      - schedule: cron(* 1 * * ? *)
        enabled: true
resources:
  Resources:
    SNSTopic:
      Type: AWS::SNS::Topic
      Properties:
        DisplayName: 'Snap Clean'
        TopicName: topSnapCleanUp

    SNSSubscription:
      Type: AWS::SNS::Subscription
      Properties:
        Endpoint: [email protected]
        Protocol: email
        TopicArn: {"Ref" : "SNSTopic"}
Here is a brief description. In the provider section you specify that you’ll use Python 3, the timeout for the execution will be 10 seconds and the region is us-east-1. We also have the role defined here. If you look the initial JSON script for the role, well, this is the same, except it’s in YAML. You can use any online converter to translate JSON to YAML. The function section is where I specify the name of the function and I also create the CloudWatch rule so the script runs at 1AM every day. Finally in the resources section I create the SNS topic and the subscription. For more information about the syntax, see the docs on the serverless site.
Anyway, we can deploy the function now.
sls deploy -v
It takes about a minute for all resources to be completed. Once deployed, check your e-mail and look for the confirmation e-mail. You have to confirm your subscription. And pretty much that’s it. If you take a look at the console (Lambda, IAM roles, CLoudWatch rules and logs), you’ll see that pretty much every AWS resource looks the same as our first manual try.
Helpful tips
If you have to make a change in the function (handler.py), you don’t have to redeploy the whole solution. You can just deploy the function itself.
sls deploy function -f snapcleanup
Also, we have a scheduled that runs the function at a specified interval, but you can run the script manually.
sls invoke -f snapcleanup -l
Check the logs of the function in real-time.
sls logs -f snapcleanup -t
If you want to remove all resources and delete the function, use the remove parameter.
sls remove