
Azure Arc (some components still in beta at the time of writing) is a new Azure service that allows you to manage your on-prem or “other” cloud resources with the familiar Azure interface.
But, when I say manage, I don’t think of manage in terms of add disk, increase CPU on a VM – no, you can only certain aspects, like tagging your instances, get the logs so you can use Log Analitycs, assign RBAC controls etc. For more information go to this link.
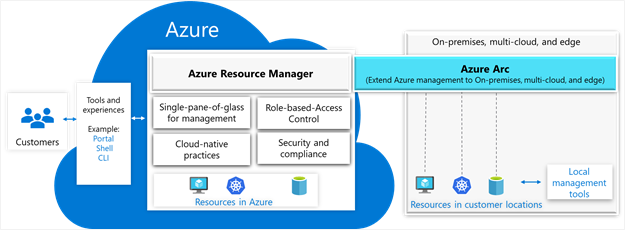
So, it’s pretty much a governance across different environments as this diagram shows.
In this post, I’ll show you how that looks in practice. I have two VMs in my own vCenter, one Windows and one CentOS Linux. There is no VPN tunnel between the on-prem environment and Azure. We’ll install an agent on both of them and show how that looks like in Azure Arc. Let’s go to the Azure console first and they type Arc in the search bar on top.
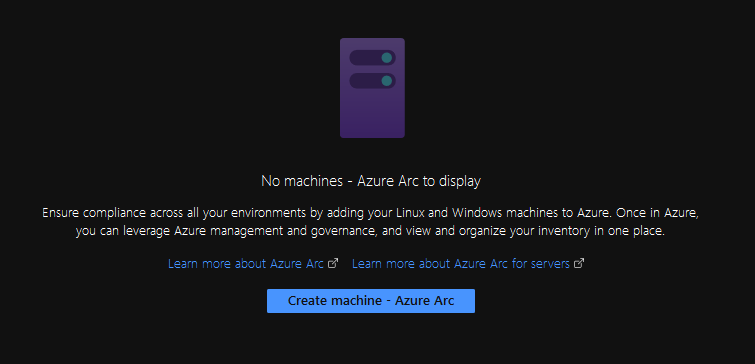
As I said, the other components are not in public for everyone, so we’ll go with the Manage servers option. You’ll be presented with this screen. You’ll see your servers here lately. For now, just click Create machine – Azure Arc.
You have two options here. The first one is if you want to add a couple of servers manually and the second is if you want to automate the import with a SPN and a PowerShell script. If you click on Learn more link, you’ll see the instructions. It’s very simple and very straightforward. We’ll go with the first option so click on Generate script.
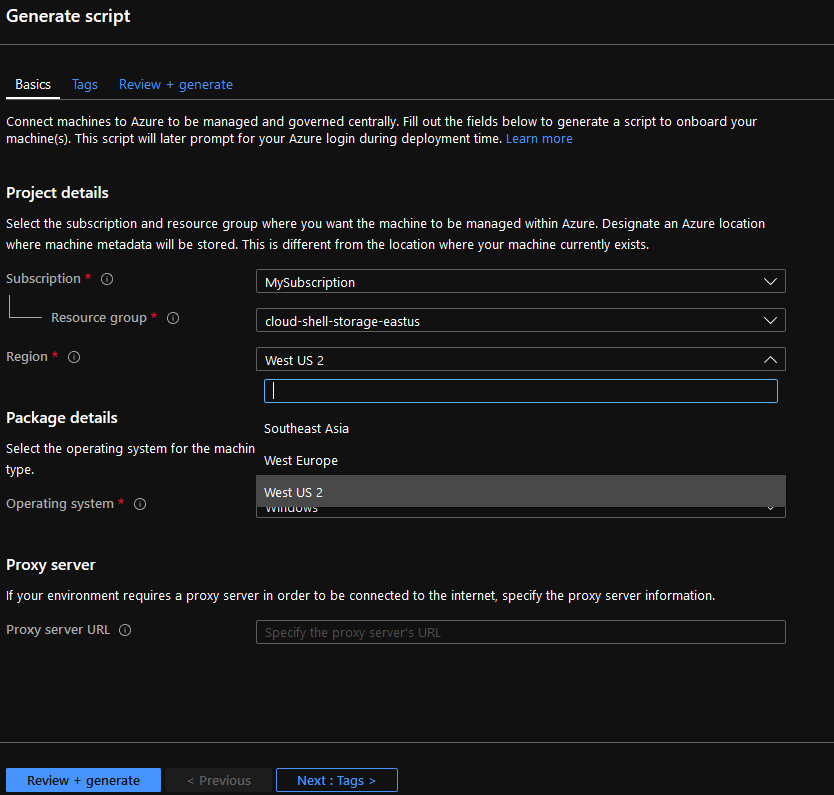
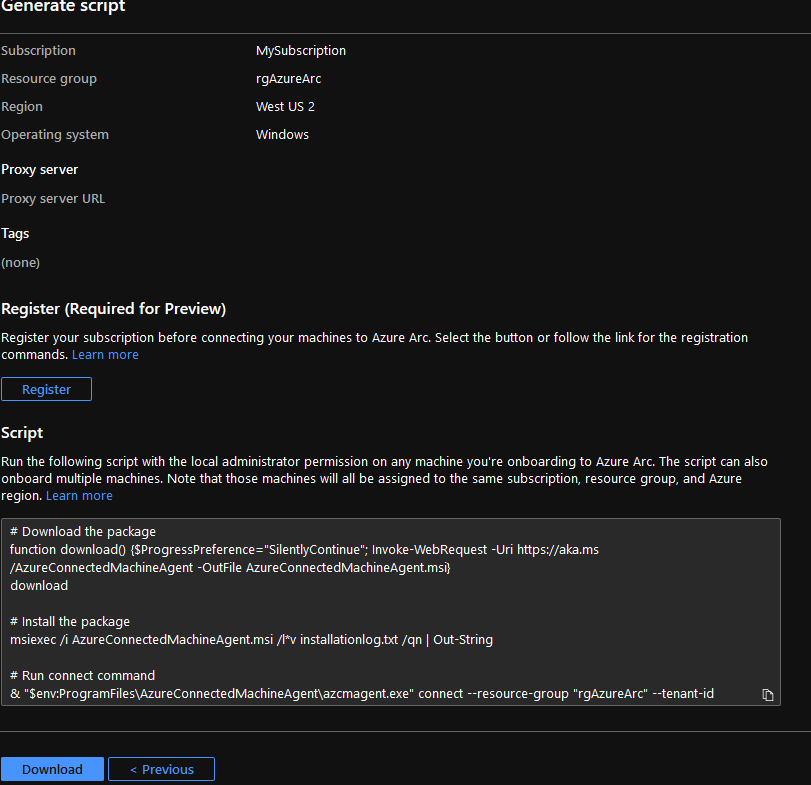
Select your subscription and the resource group and choose the region. As you can see only 3 regions are supported so far. Specify the proxy if you use it on-prem and select the OS type. Click Review + Generate after.
Before using it for the first time, you have to register first. Click Register and then copy the script below. If you click Download, you’ll get the same script in the file. Once you click Register, you’ll see on the screen that the registration is submitted and you have to wait couple of minutes.
Download the script or copy and paste it in a Windows VM on-prem and run it from a Powershell console with Administrator rights. It pretty much downloads a MSI package and execute it in the background. But, as you can see you have to open a browser and register the VM.
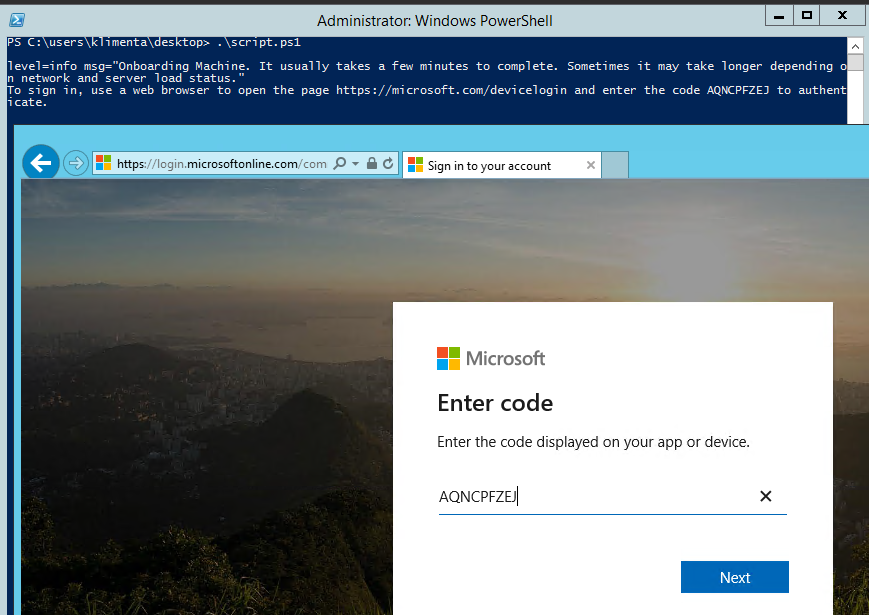
You will also have to enter your Azure credentials after you register your VM. Once you log in, you’ll receive a message that you can close the browser. DO NOT close the PowerShell console, wait for 5-6 seconds until you receive a message – “Successfully Onboarded Resource to Azure”. Now you can close the PS console window.
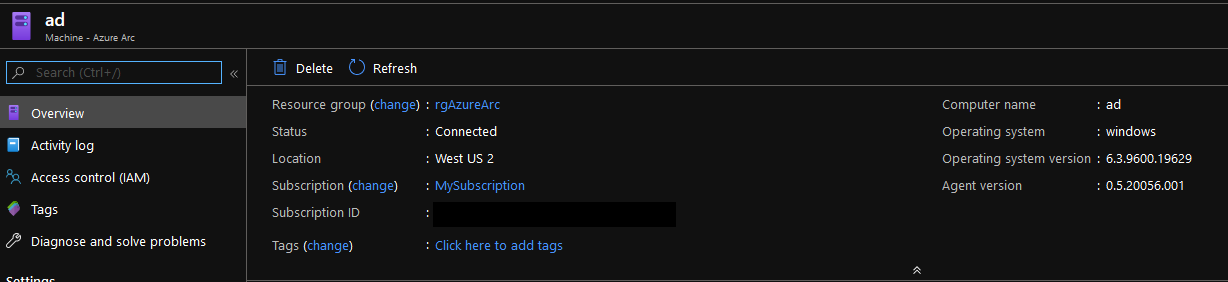
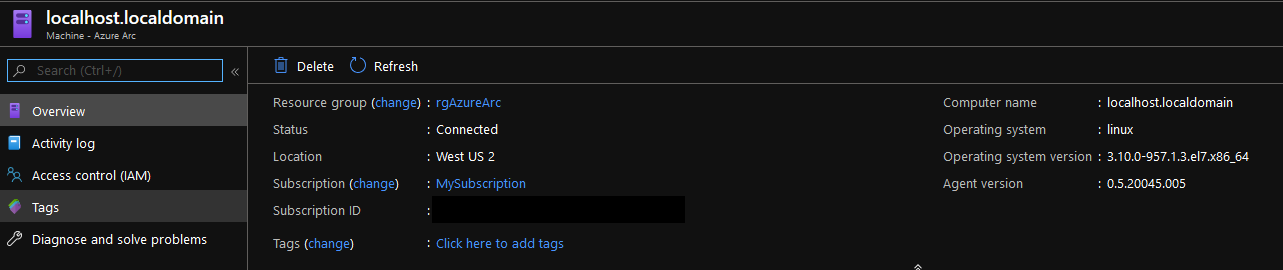
If you go back to Azure Arc, you’ll see that your VM is there.
For a Linux instance, we’ll use CentOS 7. Do the same as with Windows, add a machine, but this time choose Linux from the dropdown and generate a script. CentOS 7 doesn’t come with wget, so you have to install it first with sudo yum -y install wget. Same thing as with Windows, you’ll have to register the VM.
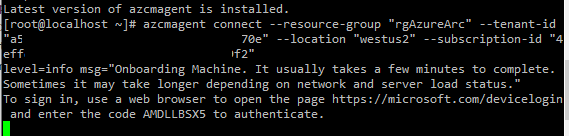
Again, wait for the confirmation message in the console that the VM is registered and then you can close the Linux session.
Once you finish onboarding, you can go ahead and create the policies, assign rights, monitor the instance and check the logs.
NOTE: The agents communicate over port 443 to a Microsoft site. I am not sure if you can redirect this traffic through a private link. You can check the log file on the Linux machine in /var/opt/azcmagent/log/himds.log. Looks like this in the logs.
{"level":"info","msg":"Send HeartBeat to service via HTTP PATCH @ https://wus2.his.hybridcompute.azure-automation.net/machine/12345678-c3a2-6112-ab89-asdf343dcc307/metadata?api-version=1.0-preview\u0026location=westus2","time":"2020-03-03T16:01:55-05:00"}