
The initial AWS VPN offering was a site-to-site VPN where you connect your resources in AWS to your data center or your home lab. There is no need for a client installed on a local laptop for this. Anytime you need to access something in AWS or on-prem, the site-to-site VPN and the routes take care of that. But, if you have only a handful of computers and you don’t want to deal with setting up a site-to-site VPN, then AWS Client VPN solution is for you. Maybe. There are some issues that I’ve encountered and it tells me that this VPN is not that good for Enterprise users.
In this scenario, I’ll explain how to configure a client VPN on a VPC with one public and one private subnet. I’ll have an instance in the public subnet that will be used as a NAT gateway for the resources in the private subnet. This is how my VPC and the subnets look like.
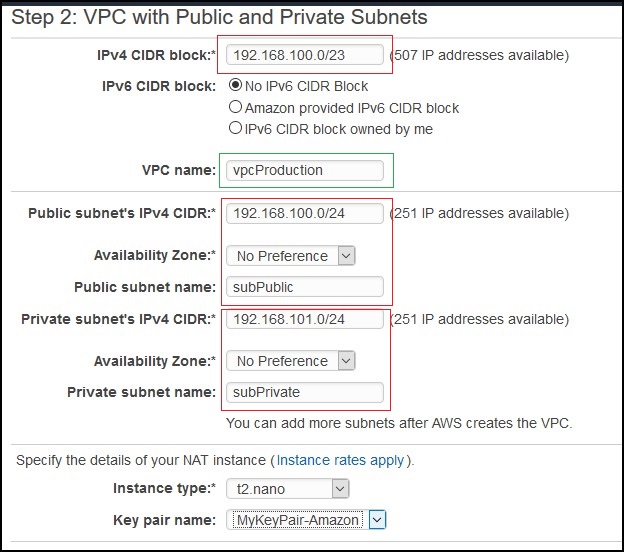
I’ll also have two instances. The NAT instance in the public subnet and some instance in a private subnet.
Table of Contents
Certificates
Before we create the AWS VPN endpoint we need to create the certificates. AWS is using RSA certificates because their solution is based on OpenVPN. So, certificates generated with openssh libraries won’t work. This is another issue. I need to be able to use my own SSL certificates. Instead you have to follow the instructions given here to generate a server and a client certificate. Another option is to use AD for authentication, but you’ll need AD connector to talk back to a functional AD. In this case, I’ll use mutual authentication with certificates. Find some linux instance with git installed and do the following. In my case, I’ll be using the NAT gateway instance for that (AWS Linux).
yum install git -y
git clone https://github.com/OpenVPN/easy-rsa.git
cd easy-rsa/easyrsa3
Then initialize and create a new CA.
./easyrsa init-pki
./easyrsa build-ca nopass
You can accept the default or name your CA as you want.
Create the server certificate and the key.
./easyrsa build-server-full server nopass
…and create the client certificate and the key.
./easyrsa build-client-full client1.domain.tld nopass
If you go to pki/issued directory you’ll see your certificates there.
# pwd
/home/ec2-user/easy-rsa/easyrsa3/pki/issued
# ls -l
total 16
-rw------- 1 root root 4460 Mar 17 15:09 client1.domain.tld.crt
-rw------- 1 root root 4547 Mar 17 15:09 server.crt
The keys are under pki/private directory.
You’ll have to upload these files to the Certificate Manager in AWS. If you have AWS CLI installed you can use aws acm import as described in the link above, if not, just cat out the certificates and paste them in the Certificate Manager console.
Under Certificate body paste the pki/issued/server.crt file, under the Certificate private key, paste the pki/private/server.key and under Certificate chain paste the pki/ca.crt. Do the same for the client part.
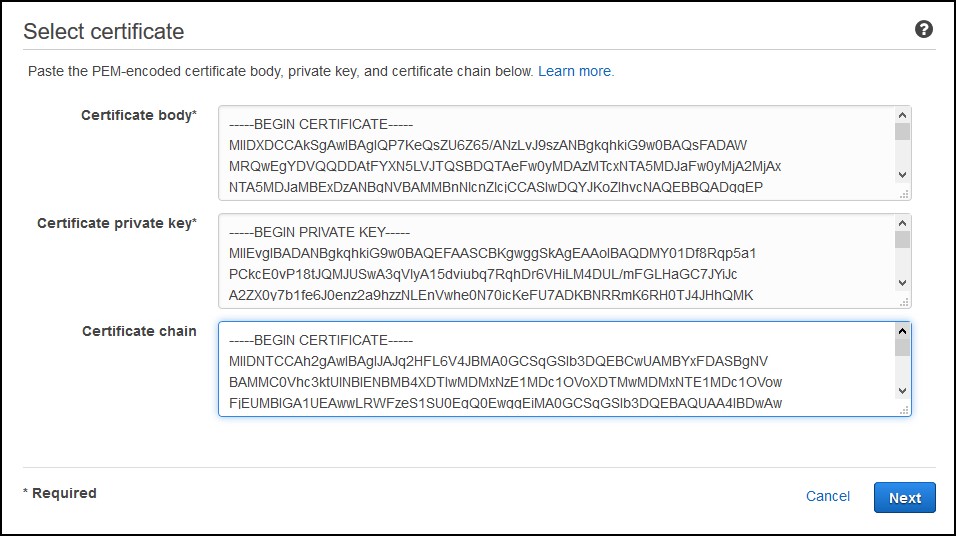
At the end you’ll have something like this.

Client VPN
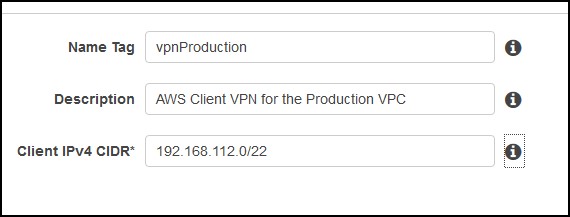
In AWS go to the VPC console and from there click on Client VPN Endpoints. Click to Create Client VPN Endpoint. Name the VPN connection and enter a subnet that will be given to the VPN clients. This subnet shouldn’t overlap with the VPC subnet.
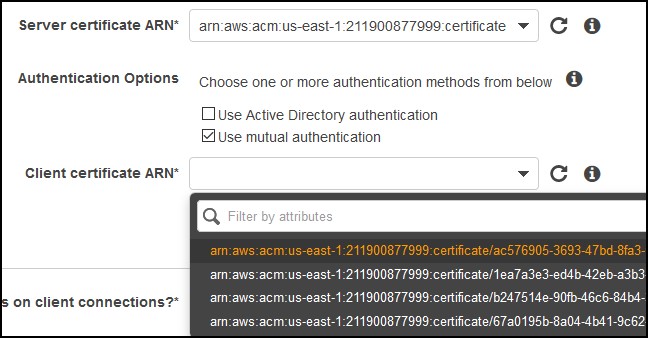
 For the authentication, choose the certificate that you just created and uploaded. Most likely, you’ll have to find the ID because you can’t figure out which one is a server and client certificate. Make sure you have Use mutual authentication checked.
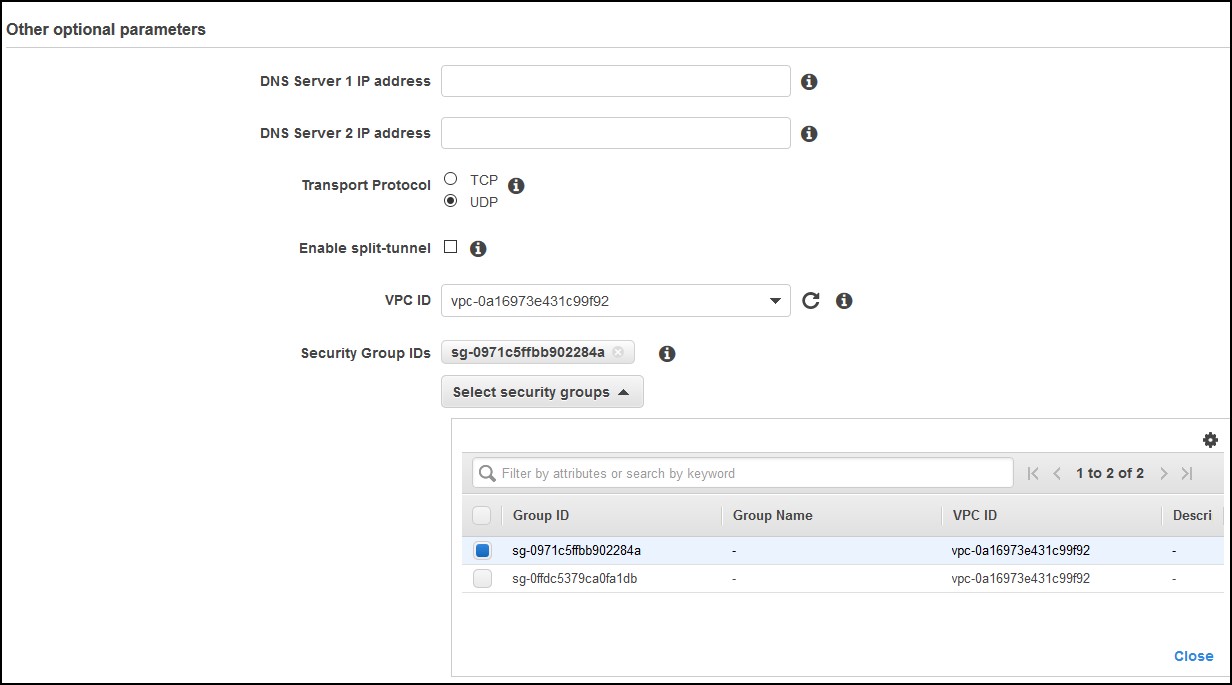
For the rest of the parameters, you can choose if you want client logging or not in CloudWatch, then you can choose to use your own DNS servers and most importantly if you want to use Split-tunnel or not. If you use split-tunnel, all the traffic that goes to the Internet will use the client’s Internet gateway. If you choose not to, then the traffic to the Internet will go to through the tunnel which is slower. You’ll also need to have an Internet gateway in your VPC. Finally, choose your VPC, select UDP vs TCP (UDP is preferred) and choose a security group. In my case I’ve used the default VPC security group.
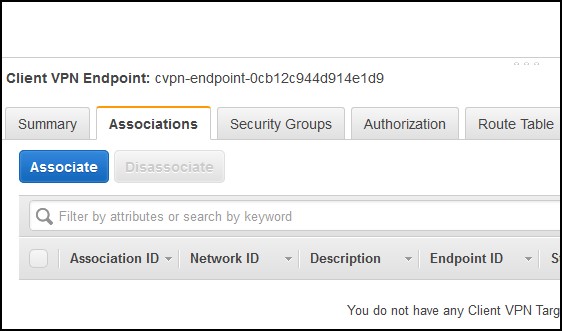
Once the VPN is created, you have to associate a subnet to it. In my case, I’ll associate the private subnet.
A really bad thing is that you might get a notice that your subnet (availability zone) is not supported. You can’t do anything at this point. You either associate a different subnet in a different zone or go with another solution. Really bad!

At this point, I had to redo my lab so I am not using this zone.
It takes some time to associate the subnet maybe 5-10 mins, but in the mean time you can click on the Authorization tab and click on Authorize Ingress button. Add the VPC subnet 192.168.100.0/23 under Destination network to enable. At this point, you are done on the AWS side.
AWS Client installation
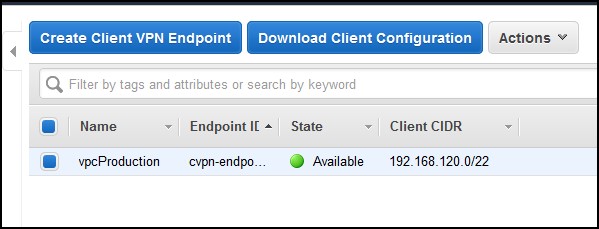
On a computer that you want to use to access your AWS resources, go to this website and download the client for Windows or MacOS. For Linux, you can use an OpenVPN client. Install the client and from the AWS Console under the Client VPN endpoint where you’ve created the VPN, download the client configuration.
You have to specify this file when you create a new VPN profile configuration for the client
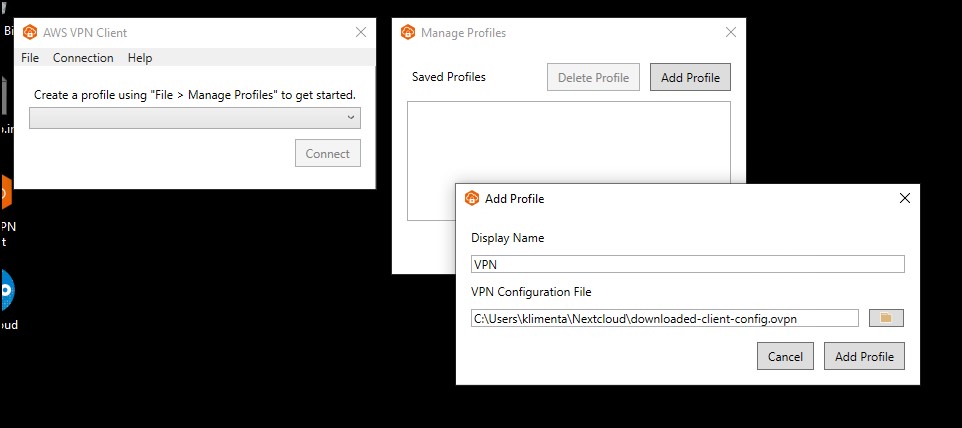
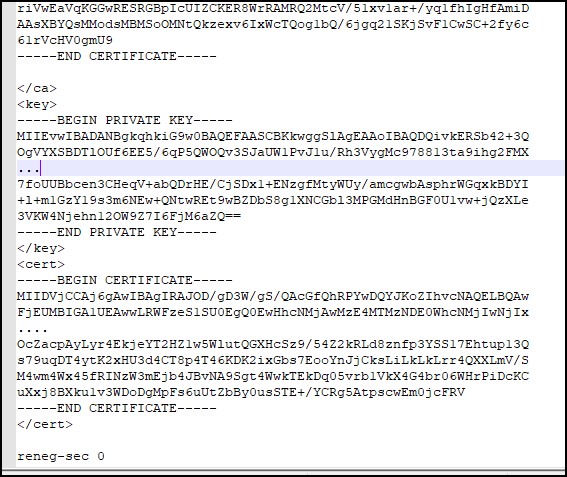
If you try to add the profile, you’ll get an error “The config should have either cert and key or auth-user-pass specified.”. To fix this error, you’ll have to modify the config file. Go to the </ca> line at the bottom of the config file and add the client certificate and the client key enclosed in <cert> and <key> so it looks like this. The files are client1.domain.tld.crt and client1.domain.tld.key that you’ve generated earlier.
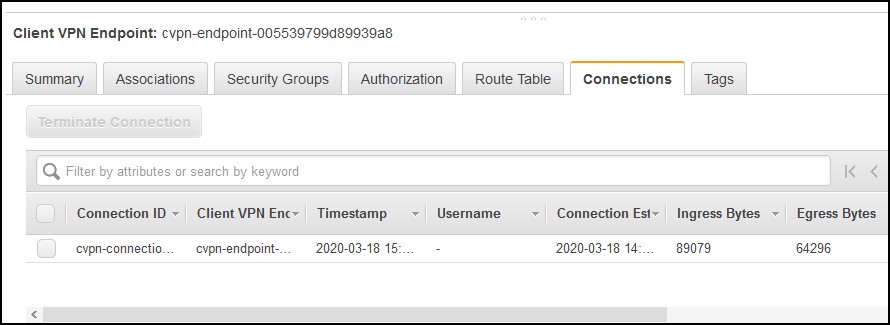
Now, you can connect. It takes about 5-10 seconds to connect which is much slower than any IPSec VPN client. In the console, under the Connections tab, you can see your connection.
If you do a lot of connects/disconnects from the same client, you’ll see multiple connections here, all from the same VPN profile and you won’t be able to tell which one is which. Another bad design.
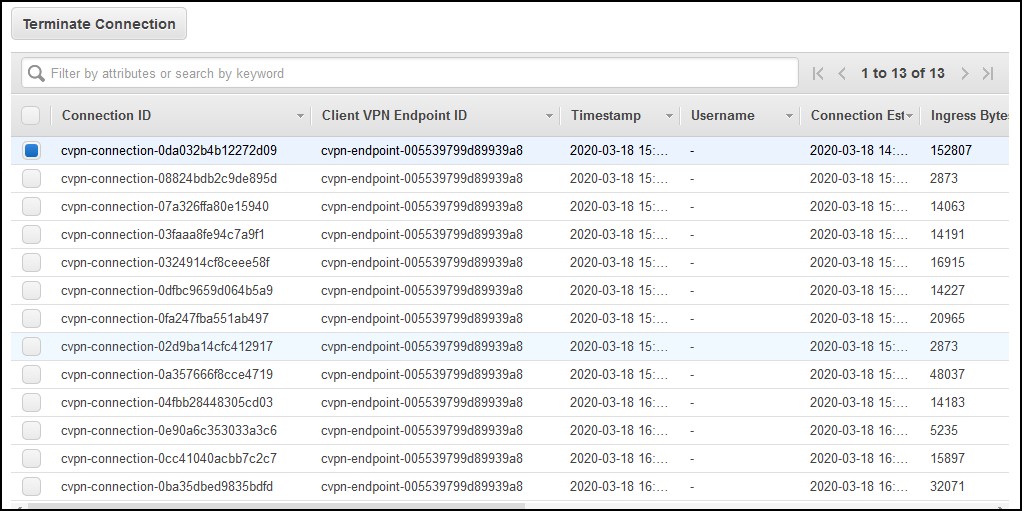
…and you have no idea what to terminate if needed. It takes some time for them to clear out on their own.
Troubleshooting
In case you are not able to access the resources, make sure you do some troubleshooting. I’ve used the default security group for the VPN endpoint which pretty much gives 0.0.0.0/0 access to the VPN server. I also authorized the whole VPC subnet. The subnets attached to the VPN endpoint do not matter. You can attach any subnet and you will still be able to access resources in any subnet in that VPC. The security groups attached to the instances do matter. If you have strict rules, make sure that you allow the subnet attached to the endpoint to have access. For example, in order to access my resource in the private subnet from my laptop, I had to whitelist the private subnet, not the VPN subnet in the security group attached to the instance in the private subnet. Hope this helps…