
Recently, I had to deal with a lot of bounced e-mails from a bunch of websites that we manage and send daily newsletters, order updates etc. These sites use AWS SES to send e-mails using the AWS SMTP server. Unfortunately for me, the developers didn’t have any logging enabled and different sites are managed by different developers in different countries. So, the easiest way was to get the logs from the SMTP server itself. But, how? At the time of this writing, you can’t just get the SMTP logs from SES like any other SMTP server. It’s a multi-step process. Fortunately, AWS provided a tutorial for this. The idea is to enable notifications on each SES domain that sends a notification to a SNS topic anytime there is a bounce, complaint or delivery. This SNS topic then triggers a Lambda function in Node.js that populates a DynamoDB table with the information that you need. Here is the link to AWS tutorial and I strongly suggest to watch the video. It goes into much more details. BUT! This approach works fine if you have to deal with several domains and bounces per day. But if you have to deal with 50+ domains and over 10K bounced emails a day, you’ll have to automate the way of handling the results.
So, I’ll show you how to implement this solution using the AWS approach with some changes in the script and then we’ll use some tools to export the DynamoDB table on a daily basis to whoever is managing the cleanups of the bounced e-mails. An optional part of this post will be to go full serverless and instead of using a server with parsing tools, we’ll use AWS Glue to export the DynamoDB to an S3 bucket.
Table of Contents
SNS topic and subscription
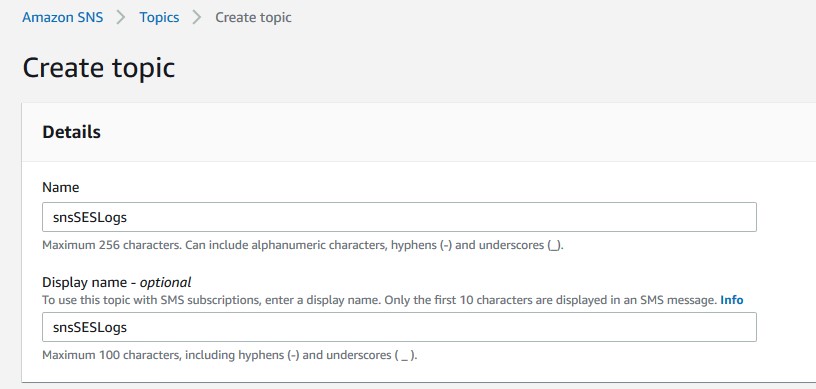
We’ll use SNS topic and SNS subscription to trigger the SES notifications. Go to SNS and create a topic. I named mine snsSESLogs.
Once completed, create a subscription.
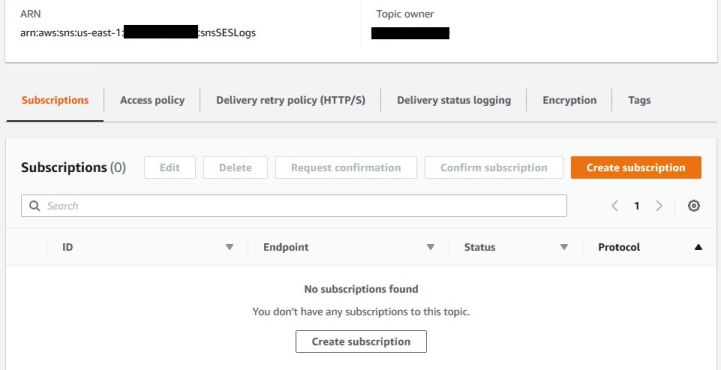
We’ll use a temporarily e-mail subscription that notifies us for any SES activity. You can leave this notification as permanent as you want, but mind that you’ll receive an email for EVERY SES event (delivery, bounce or complaint). I don’t want to receive thousands of e-mails a day, so I’ll use this only for the purpose of troubleshooting. Under Topic ARN, select the topic that you just created, choose Email for the Protocol and type your e-mail address under Endpoint.

Make sure you confirm your subscription by checking the e-mail address that you used for this subscription. You’ll receive an e-mail from AWS telling you to click the link in the e-mail and confirm.
SES
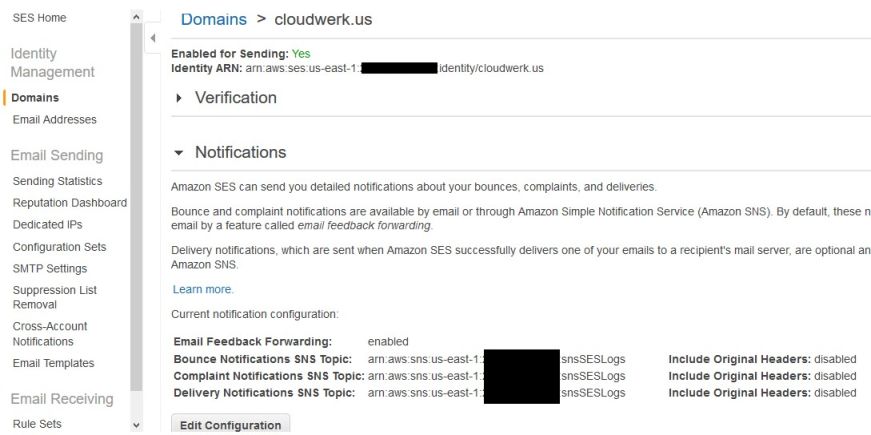
Now, go to SES and click on the domain that you have there. Find the Notifications section and click on Edit Configuration button at the bottom. Depending on what do you want logged, select the SNS topic that you just created. Most likely, you won’t want to see the delivery confirmations. You can still enable it here and then make a change in the script. The idea is to configure the SES domain, so anytime there is an e-mail going thru, a SNS notification is generated.
DynamoDB
Go to DynamoDB and click on Create table.

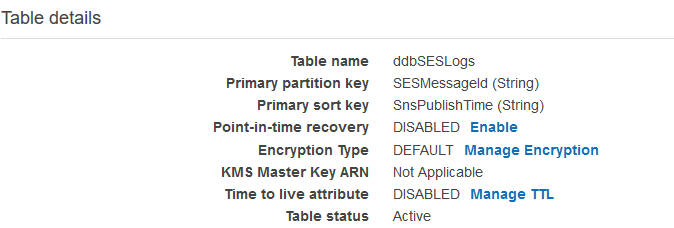
Name the table however you want, but keep in mind that you have to reference the name later. Add a primary key and a sort key. Also, name them whatever you want, but you have to reference them later. All these are case sensitive.
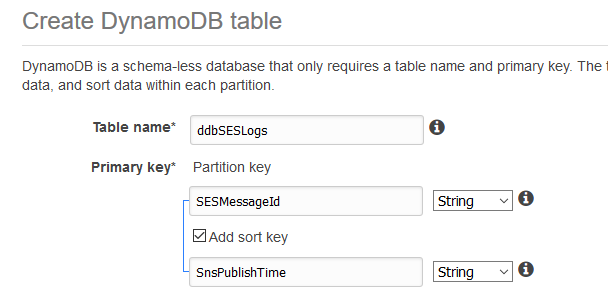
Use the defaults for the rest and click Create.
TTL (time-to-live) for items
Here is the first change that differs from the AWS tutorial above. In their tutorial, the records are there indefinitely. We don’t want that. All we care is to get the logs, parse them, deliver them and delete them. If you DO care about the logs for some compliance reason, skip this step. You’ll probably have to modify the parsing script later, but we’ll worry about that later. For now, let’s configure the TTL. In essence, this option tells AWS backend to delete certain records after whatever_you_choose hours or so. Read this, so you have an understanding of what’s going on. AWS doesn’t guarantee that it will delete those records/items exactly after whatever_you_choose hours, so you still have to do some filtering. I’ll talk about that later.
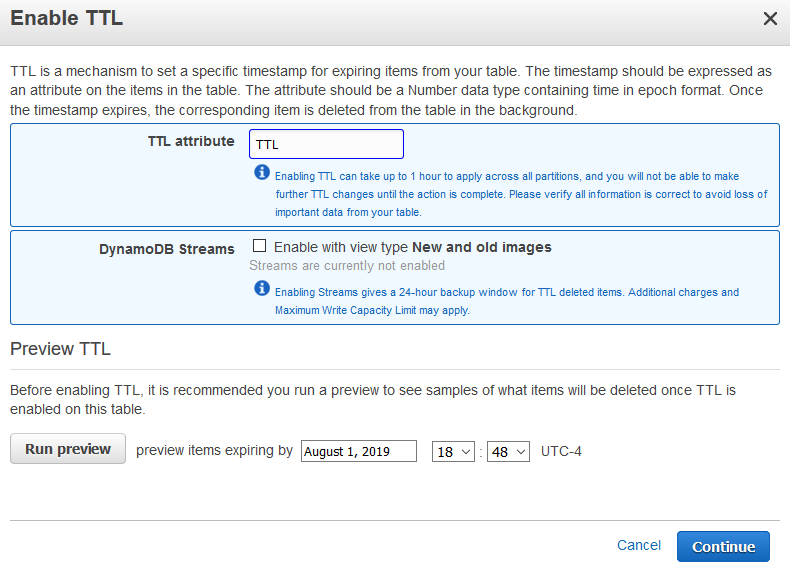
Go to the Overview tab of your table and click on Manage TTL.
Type TTL , leave the rest as is and click Continue. NOTE: Everything is case sensitive.
IAM
We’ll need a role and a policy to restrict access to the solution that we are implementing. Go to IAM console and click on Policies. Click on Create policy and click on the JSON tab. Delete the placeholder and paste this text. Make sure you replace the account number with yours and the name of the DynamoDB table that you just created. Don’t add the <> pair.
{
    "Version": "2012-10-17",
    "Statement": [
        {
            "Sid": "Stmt1428510662000",
            "Effect": "Allow",
            "Action": [
                "DynamoDB:PutItem"
            ],
            "Resource": [
                "arn:aws:dynamodb:us-east-1:<account_number>:table/<DynamoDB_table_name>"
            ]
        }
    ]
}
Click on Review policy and enter a Name and a Description.
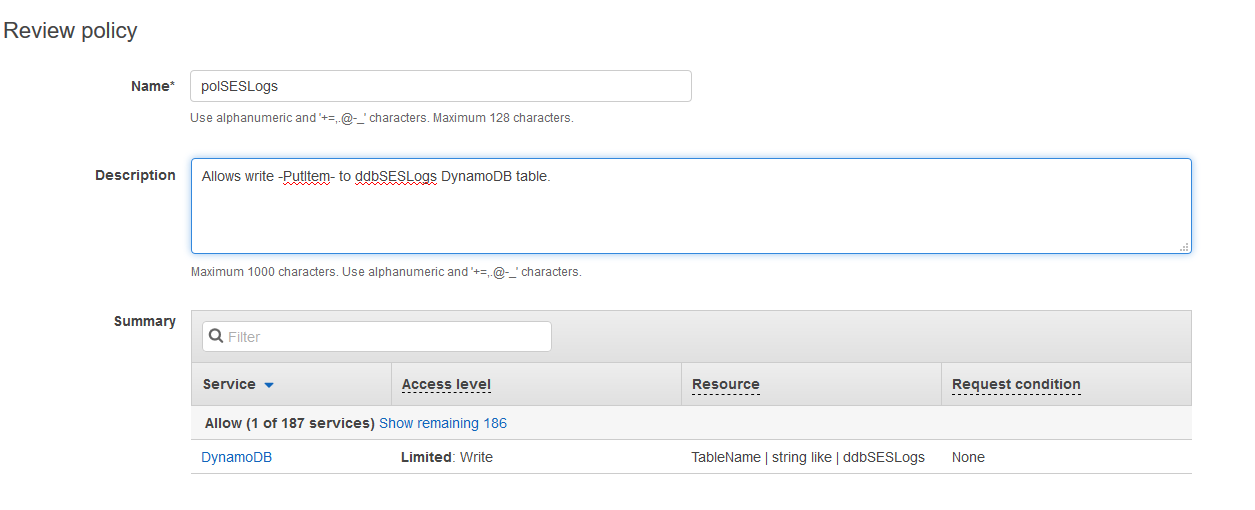
Click on Create policy after.
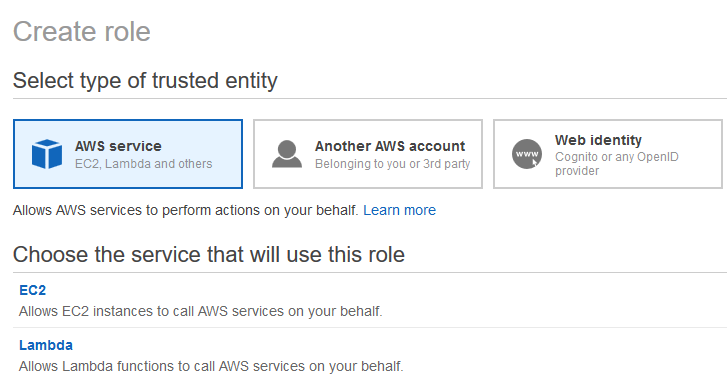
The next step is to create an AWS role. Click on the Roles on the left and then click on Create role. Choose AWS service and then Lambda, then click Next: Permissions at the bottom.
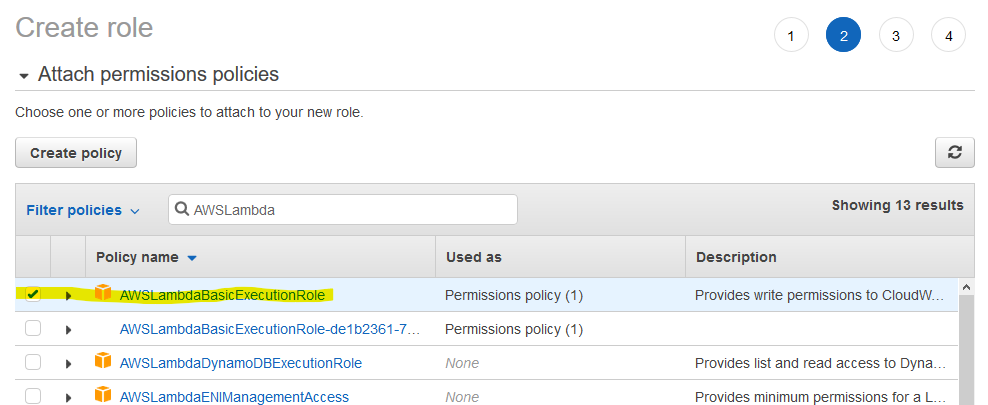
Under Filter policies, start typing AWSLambda and choose the AWSLambdaBasicExecutionRole. Put a check mark next to it.
Before you click Next: Tags, type polSESL (or whatever you named your policy) under Filter policies again. Put a check mark to this policy and click on Next: Tags. The idea is to attach our policy for DynamoDB but also the policy for the execution of Lambda.

Tag it if you want and proceed with Next: Review.
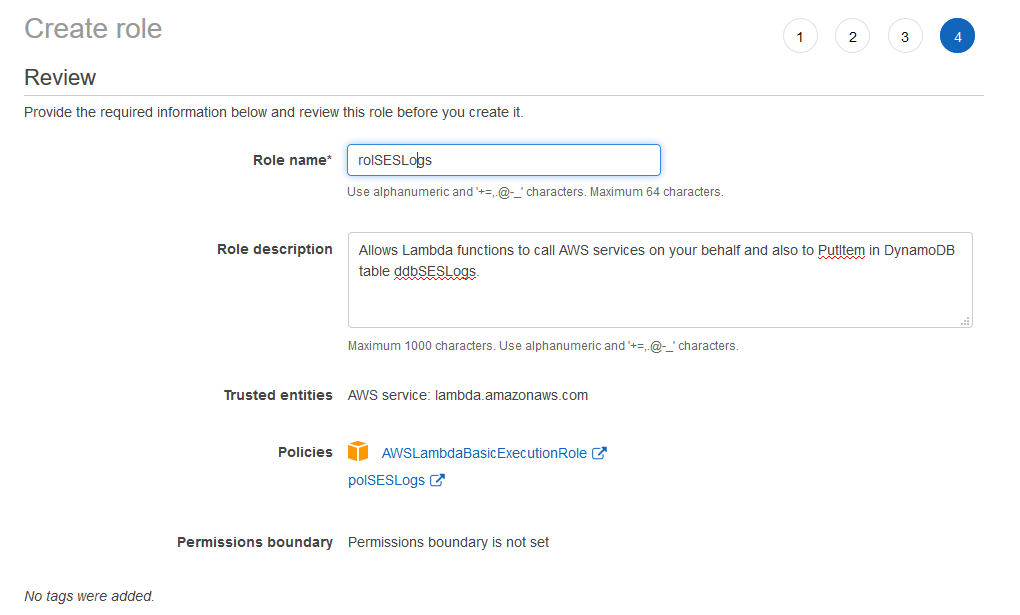
Enter the Role name, Role description (if you want) and click on Create role.
Lambda
It’s time for our Lambda function. I made some changes to the Node.js script that was provided by AWS. The original script doesn’t log the sender’s domain/e-mail. Also, the original script doesn’t deal with the TTL attribute that we added. So, go to Lambda and click on Create function.
Use the following. Name your function, choose Node.js 8.10 for the Runtime, choose Use an existing role and select the role that we just created.
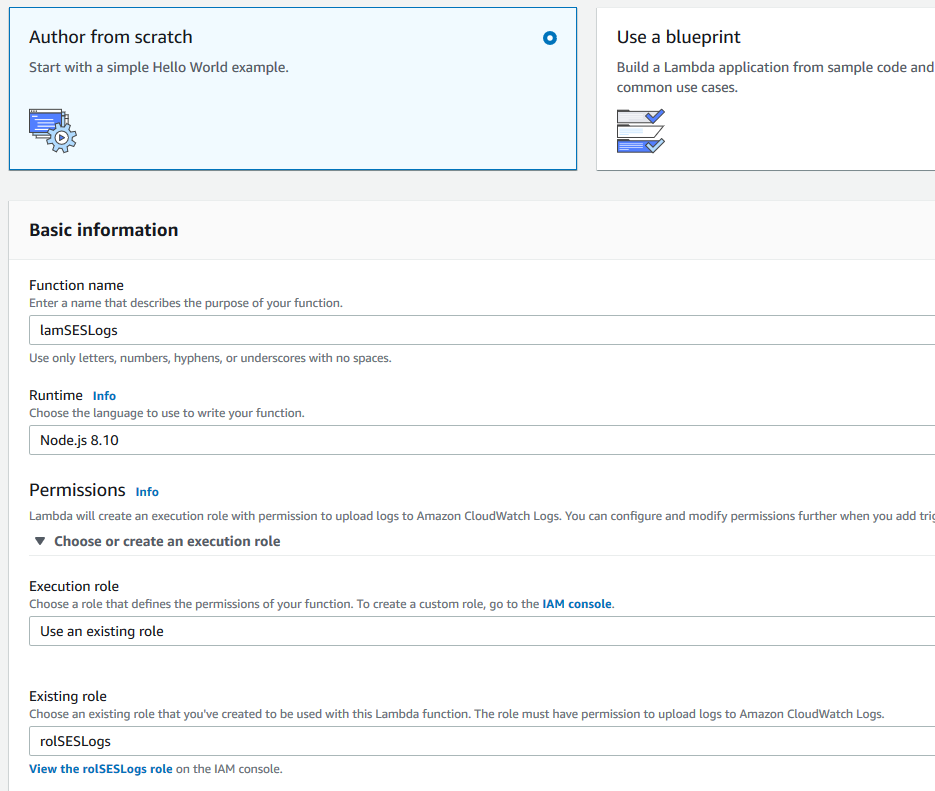
Click on Create function after.
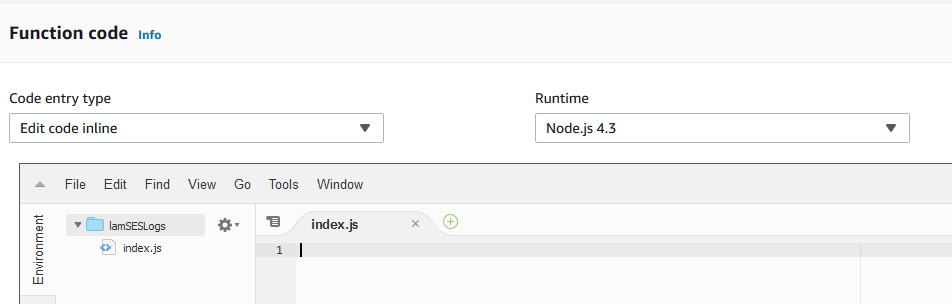
Switch to Node.js 4.3 under Runtime and delete the placeholder code under index.js. NOTE: I am not Node.js expert and I am not sure if the code will work under Node.js 8+ and above. I didn’t have time to test it.
Paste this Node.js code. If you change the names of the DynamoDB table and the keys, make sure you change the names in the highlighted lines. The number “24” on line 7 means 24 hours. That’s my time-to-live. If you need to keep your records more or less, change this accordingly. If you don’t want to register the successful deliveries in DynamoDB comment line 40. Add // as prefix.
console.log('Loading event');
var aws = require('aws-sdk');
var ddb = new aws.DynamoDB({params: {TableName: 'ddbSESLogs'}});
exports.handler = function(event, context)
{
  console.log('Received event:', JSON.stringify(event, null, 2));
  const TTL = Math.round(Date.now() / 1000) + 24 * 3600;
  var SnsPublishTime = event.Records[0].Sns.Timestamp
  var SnsTopicArn = event.Records[0].Sns.TopicArn;
  var SESMessage = event.Records[0].Sns.Message
  SESMessage = JSON.parse(SESMessage);
  var SESMessageType = SESMessage.notificationType;
  var SESMessageId = SESMessage.mail.messageId;
  var SESDestinationAddress = SESMessage.mail.destination.toString();
  var SESSourceAddress = SESMessage.mail.source.toString();
  var LambdaReceiveTime = new Date().toString();
  if (SESMessageType == 'Bounce')
  {
    var SESreportingMTA = SESMessage.bounce.reportingMTA;
    var SESbounceSummary = JSON.stringify(SESMessage.bounce.bouncedRecipients);
    var itemParams = {Item: {SESMessageId: {S: SESMessageId}, SnsPublishTime: {S: SnsPublishTime}, TTL: {N: TTL.toString()},
      SESreportingMTA: {S: SESreportingMTA}, SESSourceAddress: {S: SESSourceAddress},
      SESDestinationAddress: {S: SESDestinationAddress}, SESbounceSummary: {S: SESbounceSummary}, SESMessageType: {S: SESMessageType}}};
    ddb.putItem(itemParams, function(err, data)
    {
      if(err) { context.fail(err)}
      else {
         console.log(data);
         context.succeed();
      }
    });
  }
  else if (SESMessageType == 'Delivery')
  {
    var SESsmtpResponse1 = SESMessage.delivery.smtpResponse;
    var SESreportingMTA1 = SESMessage.delivery.reportingMTA;
    var itemParamsdel = {Item: {SESMessageId: {S: SESMessageId}, SnsPublishTime: {S: SnsPublishTime}, TTL: {N: TTL.toString()}, SESsmtpResponse: {S: SESsmtpResponse1},
      SESreportingMTA: {S: SESreportingMTA1}, SESSourceAddress: {S: SESSourceAddress },
      SESDestinationAddress: {S: SESDestinationAddress }, SESMessageType: {S: SESMessageType}}};
    ddb.putItem(itemParamsdel, function(err, data)
    {
      if(err) { context.fail(err)}
      else {
        console.log(data);
        context.succeed();
      }
    });
  }
  else if (SESMessageType == 'Complaint')
  {
    var SESComplaintFeedbackType = SESMessage.complaint.complaintFeedbackType;
    var SESFeedbackId = SESMessage.complaint.feedbackId;
    var itemParamscomp = {Item: {SESMessageId: {S: SESMessageId}, SnsPublishTime: {S: SnsPublishTime}, TTL: {N: TTL.toString()}, SESComplaintFeedbackType: {S: SESComplaintFeedbackType},
      SESFeedbackId: {S: SESFeedbackId}, SESSourceAddress: {S: SESSourceAddress },
      SESDestinationAddress: {S: SESDestinationAddress }, SESMessageType: {S: SESMessageType}}};
    ddb.putItem(itemParamscomp, function(err, data)
    {
      if(err) { context.fail(err)}
      else {
        console.log(data);
        context.succeed();
      }
    });
  }
};
Click Save in the upper-right corner once you are done and then click on Add trigger.
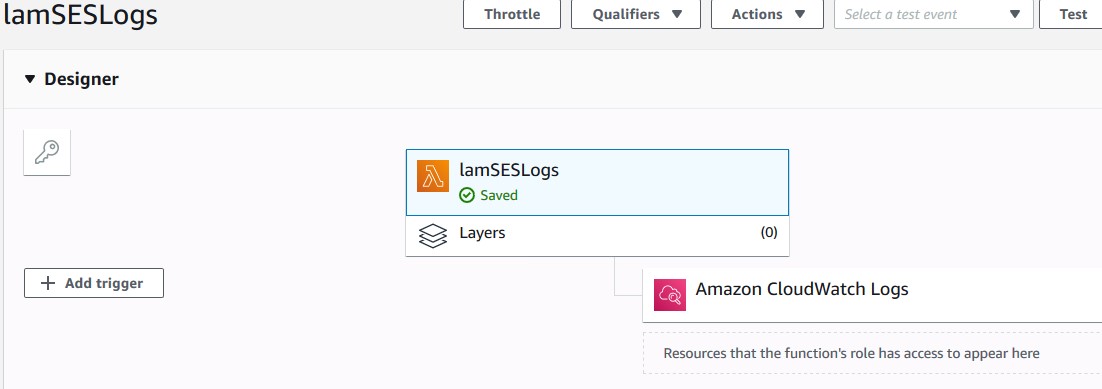
Configure the trigger so it looks like this. The SNS topic that we created should be the trigger.
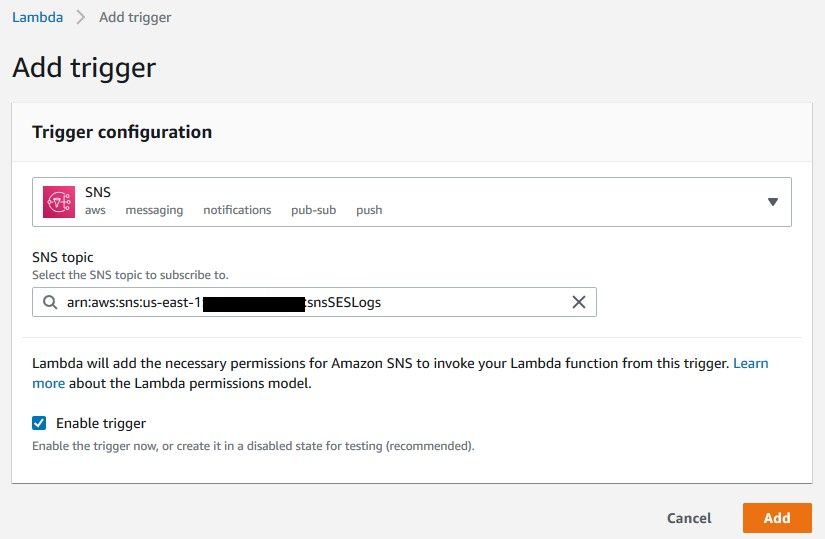
Click Add. At this point we are pretty much done with the AWS part.
Test
To check if everything works fine, send an e-mail from one of your domains that you configured to a non-existing e-mail address and existing domain (e.g. [email protected]). If everything is right, you’ll see a record in DynamoDB.
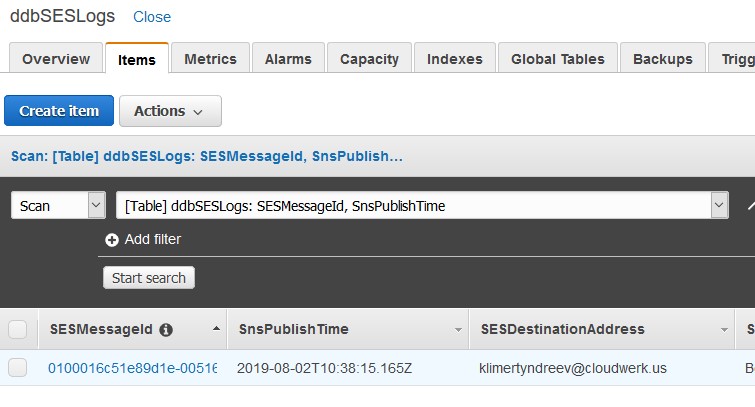
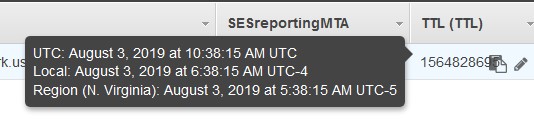
Scroll to the right and you’ll see our TTL attribute. Hover your mouse over it and you’ll see when is the record set to expire. I did my test on August 3rd, 6:30ish AM and it tells me that the record will expire in 24 hrs. Remember line 7 in the Node.js Lambda script? We put 24 there.
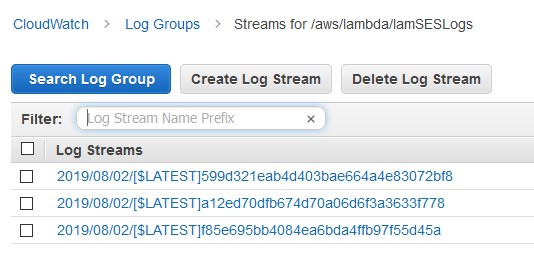
If something is wrong and you are not seeing the expected result, go to Cloudwatch and under Logs, choose the logs for your Lambda function.
Parsing
You can export the records from DynamoDB from the console as CSV file. Unfortunately, if you want to export the table from command line using AWS CLI, you can’t. You can only get the output as text or JSON.
aws dynamodb scan --table-name ddbSESLogs --query "Items[*]" --output json
In order to convert it to CSV, we’ll use a tool called jq. You can get the tool from here. Create this file first and save it as json2csv.jq.
def json2header:
  [paths(scalars) | join(".")];

def json2array($header):
  json2header as $h
  | if $h == $header
    then [paths(scalars) as $p | getpath($p)]
    else "headers do not match: \($header) vs \($h)" | error
    end ;

# given an array of conformal objects, produce "CSV" rows, with a header row:
def json2csv:
  (.[0] | json2header) as $h
  | ($h, (.[] | json2array($h)))
  | @csv ;

# `main`
json2csv
Now, you can pipe the output of the JSON file to jq.
aws dynamodb scan --table-name ddbSESLogs --query "Items[*]" --output json | jq -rf json2csv.jq > output.csv
If you open output.csv, you’ll see that you have all your records there. But, here is the problem. Let’s say that you schedule the command above to run every 24 hours. You would think that AWS will delete the expired records that are older than 24 hours. But, they don’t guarantee that. So, we have to do the filtering. We’ll download whatever is in the table and then parse the input to filter records that are within 24 hour range.
Let’s create these two files. Name them names.json and values.json. If you named your TTL attribute differently or in lower case, you have to change the values below.
names.json
{
  "#t": "TTL"
}
values.json
{
    ":TTL":
     {
       "N": "1564502762"
     }
}
The value 1564502762 is an Epoch date. The Unix epoch (or Unix time or POSIX time or Unix timestamp) is the number of seconds that have elapsed since January 1, 1970 (midnight UTC/GMT), not counting leap seconds (in ISO 8601: 1970-01-01T00:00:00Z).
The idea is to inject an Epoch value in values.json that is 24 hours in the past, so when we run the command to filter, we’ll get the records that are 24 hours or less old.
This is the command that will filter the DynamoDB table.
aws dynamodb scan --table-name ddbSESLogs --query "Items[*]" --output json --filter-expression "#t > :TTL" \
--expression-attribute-names file://names.json --expression-attribute-values file://values.json
If you run the command as-is, you’ll get all the records. Why? Because 1564502762 is in the past. It’s July 30th, 4PM. Use this site to convert between human readable output and Epoch Unix time. To get an idea of what’s going on, here are my TTL values for the latest records.
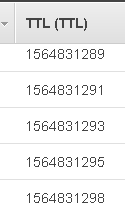
If I change the value in values.json to be 1564831295, I’ll get the last record from the set and nothing more. The before-last record won’t be included because I am using greater than, not greater or equal than comparison in the line below.
aws dynamodb scan --table-name ddbSESLogs --query "Items[*]" --output json --filter-expression "#t > :TTL" \
--expression-attribute-names file://names.json --expression-attribute-values file://values.json
So, before I do a comparison, I have to change the value in values.json and make it 24 hours ago. Make sure the JSON format of values.json is exactly the same as my example.
sed -i "s/.*[\"]N[\"]:.*/$(echo -e "\t"'"N": "'$(echo "`date +%s` -3600*24"|bc)'"')/" values.json
The command above when executed will change the value in values.json for 24 hours in the past when executed. Now, you can combine these two in a small script and schedule it in a cron. You can expand the script so it sends the result to S3 or in an e-mail to whoever is responsible. Make sure the paths are correct for sed, aws and json files.
#!/bin/sh
/usr/bin/sed -i "s/.*[\"]N[\"]:.*/$(echo -e "\t"'"N": "'$(echo "`date +%s` -3600*24"|bc)'"')/" /somewhere/values.json
/usr/bin/aws dynamodb scan --table-name ddbSESLogs --query "Items[*]" --output json --filter-expression "#t > :TTL" \
--expression-attribute-names file://somewhere/names.json \
--expression-attribute-values file://somewhere/values.json > /somewhere/output.csv
AWS Glue (optional)
If you don’t want to deal with a Linux server, AWS CLI and jq, then you can use AWS Glue. This AWS ETL service will allow you to run a job (scheduled or on-demand) and send your DynamoDB table to an S3 bucket. It’s up to you what you want to do with the files in the bucket. You might want to keep them indefinitely, move them to Glacier or just expire them after some time. First, create an S3 bucket and name it aws-glue-something. The reason I’ll name the bucket like this is because AWS Glue will create its own policy and this policy have write access to all aws-glue-* buckets. So, instead of naming my bucket whatever I want and then attach extra policy, I’ll use only a single policy.
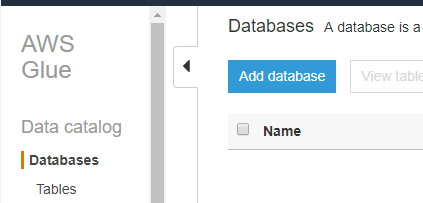
Then, go to AWS Glue and click on Databases from top left. Then click Add database.
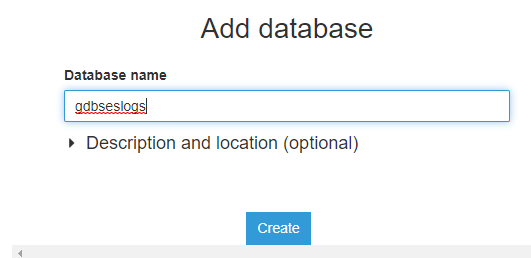
Name the database (in my case gdbSESLogs) and click on Create.
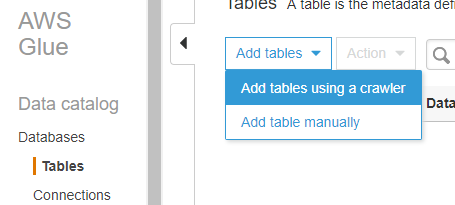
Click on Tables below Databases and click Add tables, then Add tables using a crawler.
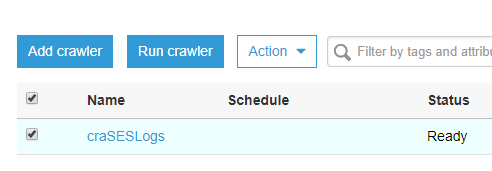
I’ll name my crawler craSESLogs.

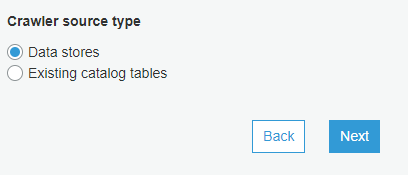
Choose Data stores.
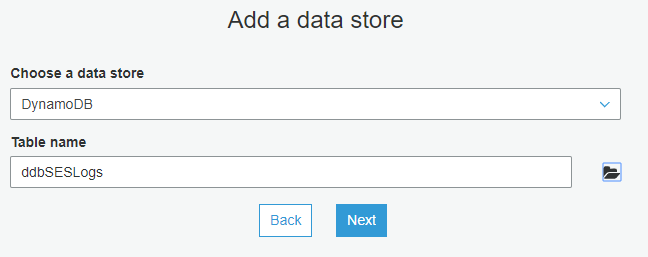
Choose a DynamoDB data store and select your DynamoDB table.
Don’t add any additional data stores and click Next.
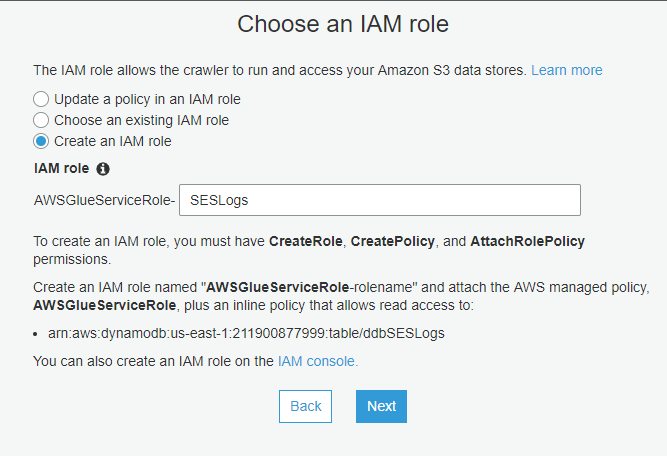
Allow AWS to create an IAM role for you. Just name it.
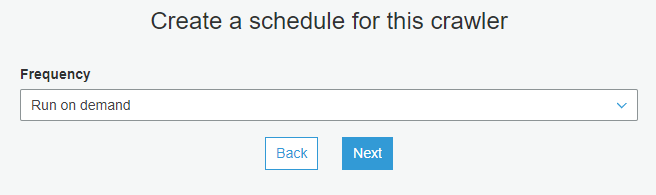
You can choose how do you want to schedule the crawler. Pick the Run on demand option so you can test. You can always modify the crawler later and schedule it.
Select the Glue database that you’ve created initially.

Finally, click Finish. Now that you have Glue database, table and crawler ready, run the crawler so it takes the data from DynamoDB and populates the Glue table.
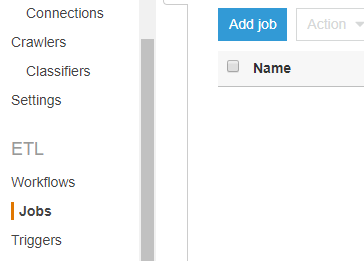
Once the crawler completes, from the left-side menu under ETL sub-menu choose Jobs and click Add job.
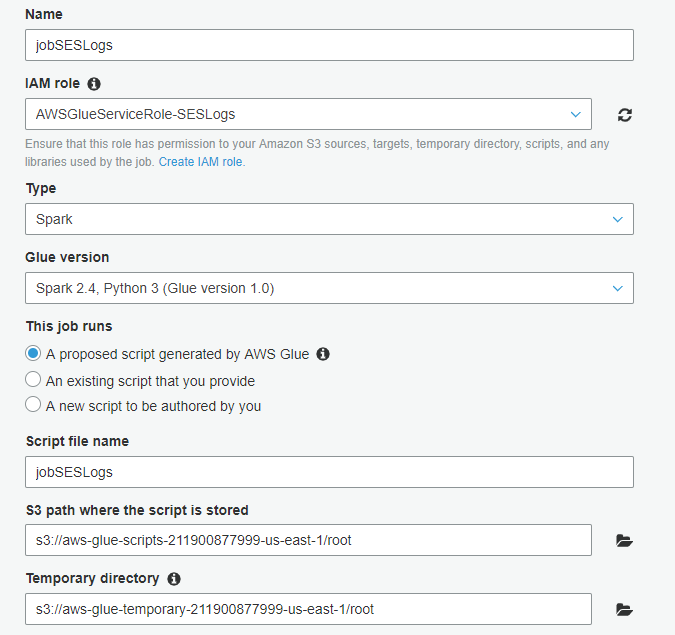
Name the job, select the role you’ve created earlier and leave the rest as-is on my screenshot.
For the data source, choose the DynamoDB table.

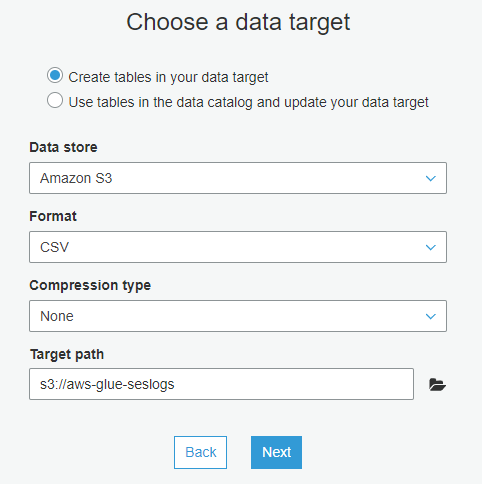
For the data target, choose to Create tables in your data target. Choose S3 for the Data store, CSV as Format and choose the bucket where the exported file will end as below. NOTE: Make sure your IAM role allows write access to the S3 bucket.
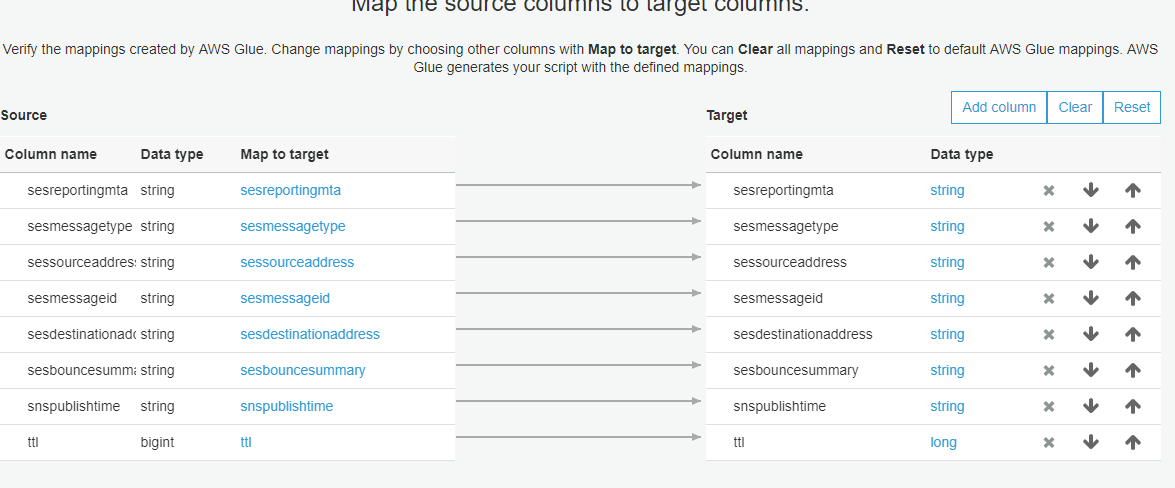
You can change the mappings or accept the defaults as I did. For example, if you don’t like some columns to end up in the CSV file, you can delete them here. Finally, click Save job and edit script.
You’ll be presented with the Python script. The problem with this script is that for each record in DynamoDB, it will generate a separate file. If you are fine with this approach, just click Run job and see the logs. This isn’t a behavior that I expected, so I found a way to merge all these single files into a single file. If you have millions of records, this approach is not recommended. Anyway, these are the modifications that I made so I get a single file.
Original script.
...
applymapping1 = ApplyMapping.apply(frame = datasource0, mappings = [("sesreportingmta", "string", "sesreportingmta", "string"), ("sesmessagetype", "string", "sesmessagetype", "string"), ("sessourceaddress", "string", "sessourceaddress", "string"), ("sesmessageid", "string", "sesmessageid", "string"), ("sesdestinationaddress", "string", "sesdestinationaddress", "string"), ("sesbouncesummary", "string", "sesbouncesummary", "string"), ("snspublishtime", "string", "snspublishtime", "string"), ("ttl", "long", "ttl", "long")], transformation_ctx = "applymapping1")
## @type: DataSink
## @args: [connection_type = "s3", connection_options = {"path": "s3://aws-glue-seslogs"}, format = "csv", transformation_ctx = "datasink2"]
## @return: datasink2
## @inputs: [frame = applymapping1]
datasink2 = glueContext.write_dynamic_frame.from_options(frame = applymapping1, connection_type = "s3", connection_options = {"path": "s3://aws-glue-seslogs"}, format = "csv", transformation_ctx = "datasink2")
job.commit()
Modified script.
applymapping1 = ApplyMapping.apply(frame = datasource0, mappings = [("sesreportingmta", "string", "sesreportingmta", "string"), ("sesmessagetype", "string", "sesmessagetype", "string"), ("sessourceaddress", "string", "sessourceaddress", "string"), ("sesmessageid", "string", "sesmessageid", "string"), ("sesdestinationaddress", "string", "sesdestinationaddress", "string"), ("sesbouncesummary", "string", "sesbouncesummary", "string"), ("snspublishtime", "string", "snspublishtime", "string"), ("ttl", "long", "ttl", "long")], transformation_ctx = "applymapping1")
repartition = applymapping1.repartition(1)
## @type: DataSink
## @args: [connection_type = "s3", connection_options = {"path": "s3://aws-glue-seslogs"}, format = "csv", transformation_ctx = "datasink2"]
## @return: datasink2
## @inputs: [frame = applymapping1]
datasink2 = glueContext.write_dynamic_frame.from_options(frame = repartition, connection_type = "s3", connection_options = {"path": "s3://aws-glue-seslogs"}, format = "csv", transformation_ctx = "datasink2")
job.commit()
Pretty much, I’ve added one line #2 repartition = … after applymapping1 = … and then replaced applymapping1 in line #7 with repartition in the datasink2 = … line. Now, if you run the job and wait to finish, you’ll see a single file under your S3 bucket.
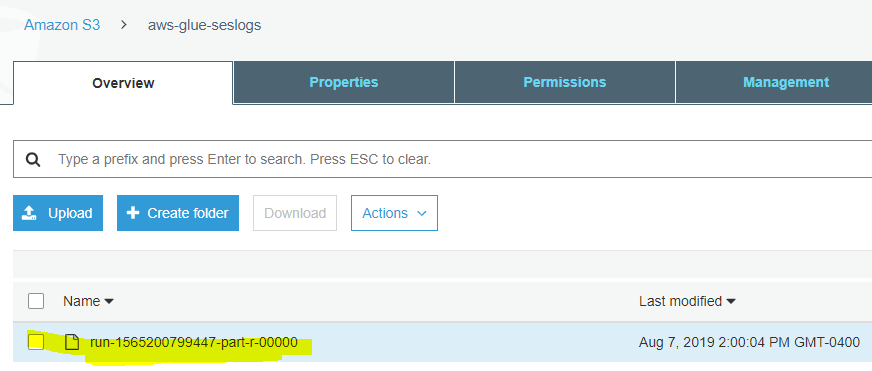
… and the content of the file.
