
My plan was to see if I can move my blog to use containers instead of a server, so I decided to try and see if WordPress would work on AWS ECS. The result is mixed. While I was able to run WordPress without any issues, the performance wasn’t that good and I had problems figuring out when to scale in and out. I wouldn’t say that WordPress architecture is not meant to be containerized, but there were some challenges along the way. So, use this post more as a guide for ECS and how to containerize an application, not as a guide on making WordPress work as a container.
Table of Contents
Pre-requisites
In order to make a Docker image and upload it to the AWS Docker Registry (ECR), we’ll need a Linux machine (I am using CentOS), Docker, AWS CLI and AWS ECS CLI installed. You can see how to install Docker in my other post. Same for AWS CLI, you can use one of my earlier guides. And for installing AWS ECS CLI, you can visit the official AWS page.
Make sure you get some output for all three commands.
docker ps
CONTAINER ID        IMAGE               COMMAND             CREATED             STATUS              PORTS               NAMES
aws --version
aws-cli/1.16.96 Python/2.7.5 Linux/3.10.0-957.5.1.el7.x86_64 botocore/1.12.86
ecs-cli --version
ecs-cli version 1.12.1 (e70f1b1)
EFS file system
We’ll use AWS EFS as a shared file system for all containers. The containers will have Apache + PHP7 on the OS partition and the WordPress will be on a NFS file share. That way all containers will write to a same WordPress instance. But before we create that, let’s create a security group that will allow access to our NFS share.
In my case, the security group looks like this.

The port 2049 is the NFS port. The source subnet 172.17.0.0/16 is the subnet for the containers. When you launch a container, its IP will be in this subnet. The second subnet 172.31.0.0/16 is the subnet of the VPC where the containers reside. Why do we need this subnet? Well, we’ll have to download the WordPress ZIP file and extract it on the NFS filesystem. Because we can’t browse the file system from the console, we’ll have to use a temp instance to transfer the files. Make sure the instance and the EFS file system are in the same AZ. So, create the security group and the EFS filesystem and make sure you assign the security group to the EFS. Mine looks like this.

Once you have the EFS ready, get its DNS name.

Spin up an instance in the same VPC where you created the EFS file system. Download the latest WordPress archive and open it.
cd /tmp
wget https://www.wordpress.org/latest.zip
unzip latest.zip
Mount the NFS and unzip the files there. Make sure you put your DNS name here.
mkdir /mnt/nfs
mount -t nfs fs-3b6XXXXX.efs.us-east-1.amazonaws.com:/ /mnt/nfs
cd /tmp
cp -R wordpress/* /mnt/nfs
The idea is to get the WordPress extracted in the root of the NFS, so it looks like this.
[root@guac nfs]# ls -l /mnt/nfs
total 204
-rw-r--r--.  1 nfsnobody nfsnobody     0 Feb  7 19:13 health.txt
-rw-r--r--.  1 nfsnobody nfsnobody   418 Feb  5 16:14 index.php
-rw-r--r--.  1 nfsnobody nfsnobody 19935 Feb  5 16:14 license.txt
-rw-r--r--.  1 nfsnobody nfsnobody  7415 Feb  5 16:14 readme.html
-rw-r--r--.  1 nfsnobody nfsnobody  6878 Feb  5 16:14 wp-activate.php
drwxr-xr-x.  9 nfsnobody nfsnobody  6144 Feb  5 16:14 wp-admin
-rw-r--r--.  1 nfsnobody nfsnobody   364 Feb  5 16:14 wp-blog-header.php
-rw-r--r--.  1 nfsnobody nfsnobody  1889 Feb  5 16:14 wp-comments-post.php
Now, we are ready to create the image.
Dockerfile
Here is my Dockerfile that I used to build the image. Make sure you put your EFS DNS in line 17.
FROM alpine:3.8

LABEL maintainer "[email protected]"

RUN apk update && apk upgrade && apk add apache2 && \
    apk add php7-fpm apache2-proxy bash php7-mysqli && \
    apk add php7-gd php7-curl nfs-utils && \
sed -i '/mod_mpm_prefork/s/^/#/' /etc/apache2/httpd.conf && \
sed -i '/^#.*mod_mpm_event/s/^#//' /etc/apache2/httpd.conf && \
sed -i '/^#.*slotmem_shm/s/^#//' /etc/apache2/httpd.conf && \
sed -i '/ServerName www/s/^#//g' /etc/apache2/httpd.conf && \
sed -i $'/<IfModule dir_module>/a \    ProxyPassMatch ^/(.*\.php(/.*)?)$ fcgi://127.0.0.1:9000/var/www/localhost/htdocs' /etc/apache2/httpd.conf && \
sed -i 's/DirectoryIndex index.html/DirectoryIndex index.php index.html/' /etc/apache2/httpd.conf && \
sed -i 's|ErrorLog logs/error.log|ErrorLog /dev/stdout|' /etc/apache2/httpd.conf && \
sed -i 's|CustomLog logs/access.log combined|CustomLog /dev/stdout combined|' /etc/apache2/httpd.conf && \
echo 'PidFile /var/run/httpd.pid' >> /etc/apache2/httpd.conf && \
echo 'fs-3b6XXXXX.efs.us-east-1.amazonaws.com:/       /var/www/localhost/htdocs    nfs     defaults 0 0' >> /etc/fstab

COPY script.sh /usr/sbin/script.sh

EXPOSE 80

CMD ["/bin/bash", "/usr/sbin/script.sh"]
I won’t go into details, the script is self explanatory. First we download the necessary packages, make some changes in httpd.conf and mount the NFS on boot. Each container will expose port 80 and it will run a script on each startup.
Here is the script. It should be in the same directory as the Dockerfile. Change the DNS EFS in line 10.
# Start the PHP-FPM process
/usr/sbin/php-fpm7 -D
status=$?
if [ $status -ne 0 ]; then
  echo "Failed to start php-fpm7: $status" >> /var/log/script.log
  exit $status
fi

# Mount the NFS share
/bin/mount -t nfs4 -o nfsvers=4.1,rsize=1048576,wsize=1048576,hard,timeo=600,retrans=2,noresvport fs-3bXXXXX.efs.us-east-1.amazonaws.com:/ /var/www/localhost/htdocs
status=$?
if [ $status -ne 0 ]; then
  echo "Failed to mount NFS share: $status" >> /var/log/script.log
  exit $status
fi

# Add health check file
/bin/touch /var/www/localhost/htdocs/health.txt

# Change ownership of www root
/bin/chown -R nobody:nobody /var/www/localhost/htdocs

# Start the Apache process
/usr/sbin/httpd -D FOREGROUND
status=$?
if [ $status -ne 0 ]; then
  echo "Failed to start httpd: $status" >> /var/log/script.log
  exit $status
fi
Now, you can build the image.
docker build --rm -t wordpress:1.0 .
ECR
Once we have the image ready, we can upload it to the ECR (the container registry). Replace XYZ with your AWS account number in lines 3 and 4.
$(aws ecr get-login --no-include-email)
aws ecr create-repository --repository-name wordpress
docker tag wordpress:1.0 XYZ.dkr.ecr.us-east-1.amazonaws.com/wordpress:1.0
docker push XYZ.dkr.ecr.us-east-1.amazonaws.com/wordpress:1.0
If you go to ECR, you’ll see the image there.

RDS
We’ll need a MySQL database for WordPress. But before we create the database, create a security group and allow the following subnets and ports. We’ll assign this group to the RDS database.

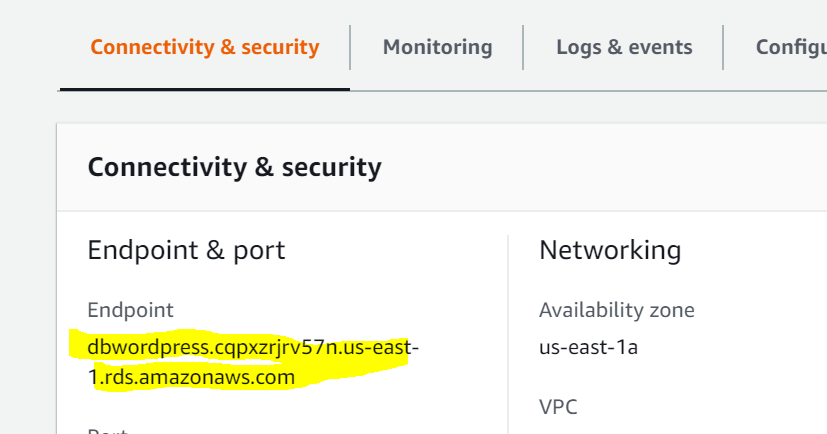
You can create the database now. I’ll create a MariaDB RDS. Nothing specific here, just make sure it’s not publicly accessible. I’ve created the database using CLI. In my case, I use 20GB storage, t2.small instance, the name of the instance is dbwordpress, a MariaDB SQL instance. The admin username is dbmaster with dbpassword as password. I’ve attached the security group sg-ID that I just created previously. The DB will in a single AZ and without public access. Finally, I’ll create a database called wordpress.
aws rds create-db-instance --allocated-storage 20 --db-instance-class db.t2.small --db-instance-identifier dbwordpress --engine mariadb --master-username dbmaster --master-user-password dbpassword --vpc-security-group-ids sg-ID --no-multi-az --no-publicly-accessible --db-name wordpress
CloudWatch
In my Dockerfile, I’ve changed the httpd.conf file, so all the logs are going to the console. This is the original config.
ErrorLog logs/error.log
CustomLog logs/access.log combined
And this is the modified httpd.conf config.
ErrorLog /dev/stdout
CustomLog /dev/stdout combined
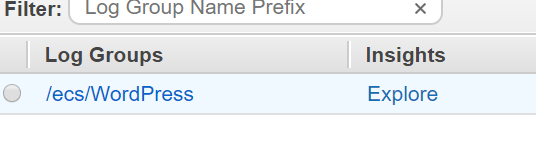
In CloudWatch go to Logs and create a new Log Group called /ecs/WordPress.
ECS
Go to ECS and create a new cluster. It has to be EC2 Linux + Networking. Name the cluster and choose On-Demand Instances.

Choose the instance type, 2 instances and the key to log to the instances if needed.

Select your VPC and for a security group choose or create one that has port 80 allowed from everywhere (0.0.0.0/0). Let’s call this security group sgECS. You can also create your ECS cluster with CLI.
ecs-cli up --keypair MyKeyPair --instance-type t3.medium --size 2 --cluster clusterWordPress --capability-iam --security-group sg-ID1 --vpc vpc-ID --subnets subnet-XY1,subnet-XY2 --verbose
Where sg-ID1 is a security group that allows port 80 from 0.0.0.0/0, vpc-ID is the ID of your VPC where the RDS and EFS are and choose two subnets from that VPC where the instances will be created. It’s recommended that the subnets you choose are the same where the RDS and the EFS are located.
Now, we have to create a task that will include the Docker image that we created. We can’t do that in the console because the NFS mount parameter requires an argument that can’t be specified there. So, we have to create a JSON file and create the task from CLI. If we would’ve run the image from a command line, we would have to specify the sys_admin parameter. This parameter can’t be specified in the task screen, but can be specified in JSON.
docker run --name wordpress --cap-add sys_admin -d wordpress:1.0
So, create the following JSON file and save it as task-wordpress.json.
{
  "containerDefinitions": [
    {
      "portMappings": [
        {
          "hostPort": 0,
          "protocol": "tcp",
          "containerPort": 80
        }
      ],
      "linuxParameters": {
         "capabilities": {
             "add": ["SYS_ADMIN"]
          }
      },
      "logConfiguration": {
          "logDriver": "awslogs",
          "options": {
              "awslogs-group": "/ecs/WordPress",
              "awslogs-region": "us-east-1",
              "awslogs-stream-prefix": "ecs"
          }
      },
      "memoryReservation": 1024,
      "volumesFrom": [],
      "image": "XYZ.dkr.ecr.us-east-1.amazonaws.com/wordpress:1.0",
      "essential": true,
      "name": "cWordPress"
    }
  ],
  "placementConstraints": [],
  "family": "taskWordPress",
  "requiresCompatibilities": [
    "EC2"
  ],
  "networkMode": "bridge",
  "volumes": []
}
Create the task from CLI.
aws ecs register-task-definition --cli-input-json file://task-wordpress.json
Line 6 maps port 0 to port 80 on each container, which means a random port on the host. We can’t have multiple containers listen on port 80.
Line 13 allows mount command to be run from the container, otherwise it will fail. We specify the CloudWatch log group in line 19. Line 24 allows 1GB soft-limit for each container. Replace XYZ in line 26 with you account number. That’s the Docker image. And we’ll use a bridge mode.
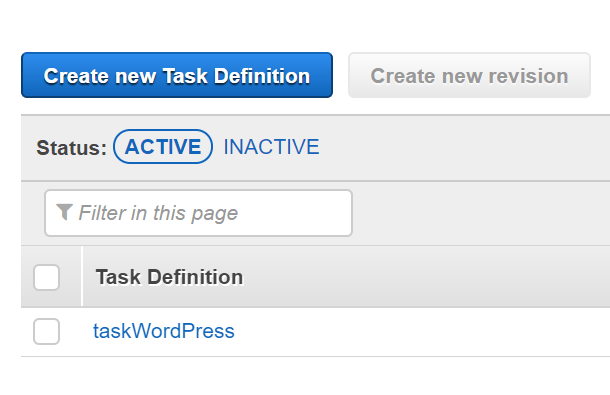
Once you complete this, you’ll have your task under Task Definitions.
ELB
Before we proceed with the ECS, we’ll have to create a load balancer. But before we create a load balancer, let’s create a new security group. Let’s call this security group sgELB. This security group should allow port 80 from everywhere. In addition, because we won’t be exposing the ECS clusters to the internet and the containers will run Apache on a random port, we have to modify the group for the ECS cluster. So, find the group (sgECS) that you specified when you created the ECS cluster (ecs-cli up command) and modify it so it looks like this. The All Traffic source is the ID of sgELB.

You can remove port 22 if you want, but the the traffic from the ELB security group has to be allowed all the traffic. The reason being that the containers can map port 80 to any random port on the host. Technically, you can change the rule from All Traffic to TCP range 1024-65535.
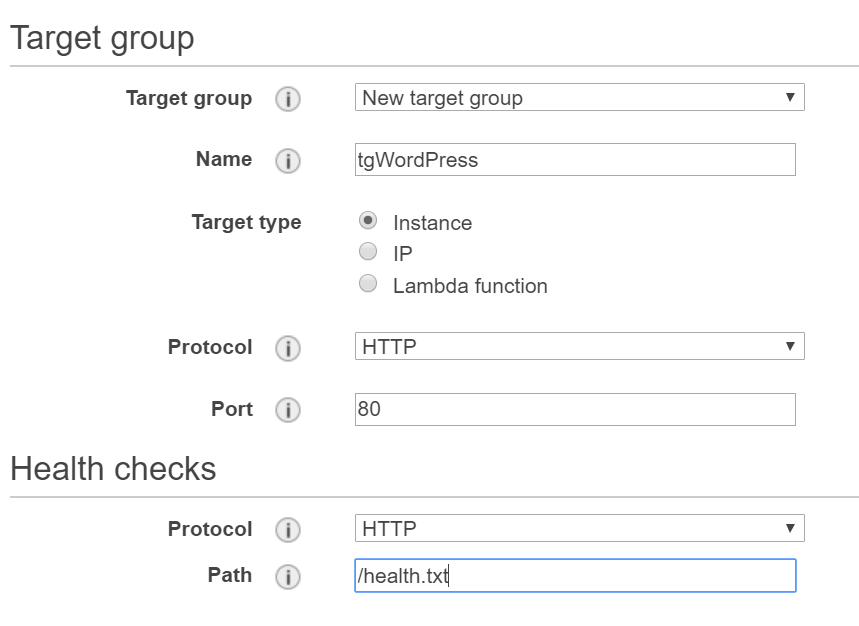
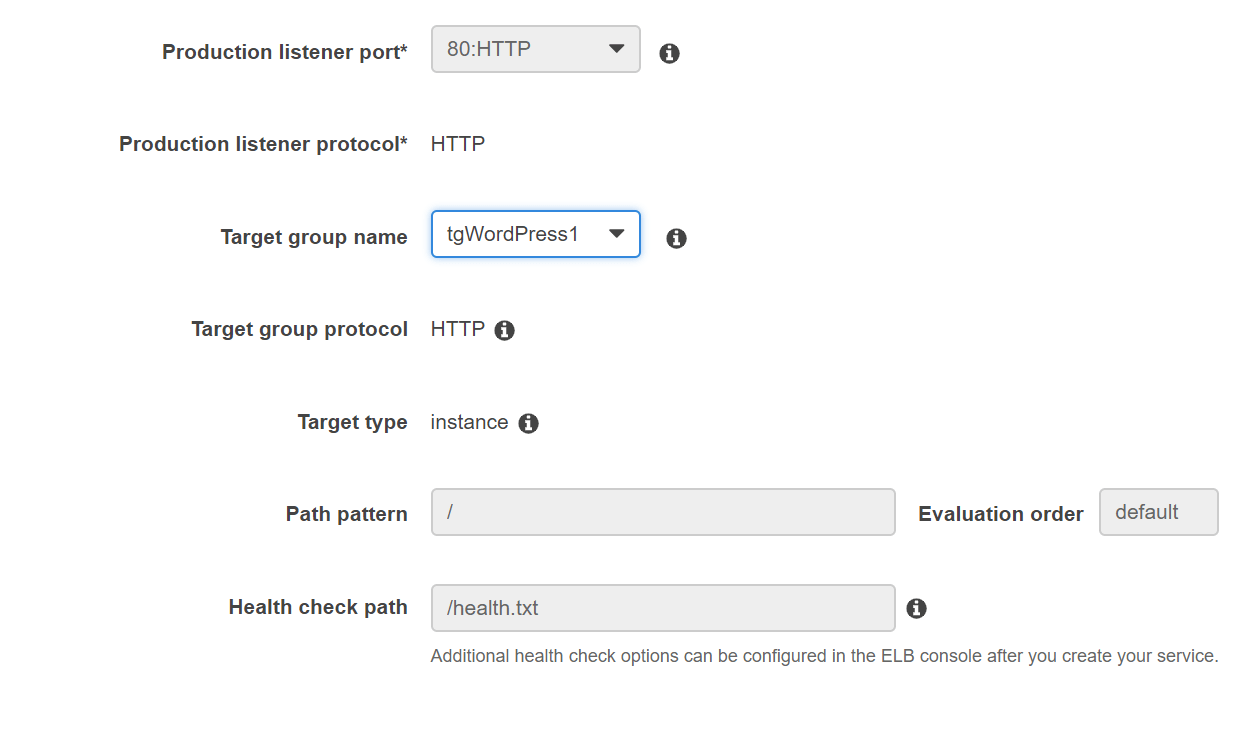
Now, we can create a new application load balancer. Nothing special here. Choose an Internet facing load balancer, create a listener on port 80, choose two subnets, the same where the ECS EC2 instance were created and choose the security group that allows port 80 (sgELB). For the target group an the health checks, do something like this. Make sure health.txt is configured.
Don’t choose ANYTHING for targets, just click Review and Create.
ECS Service
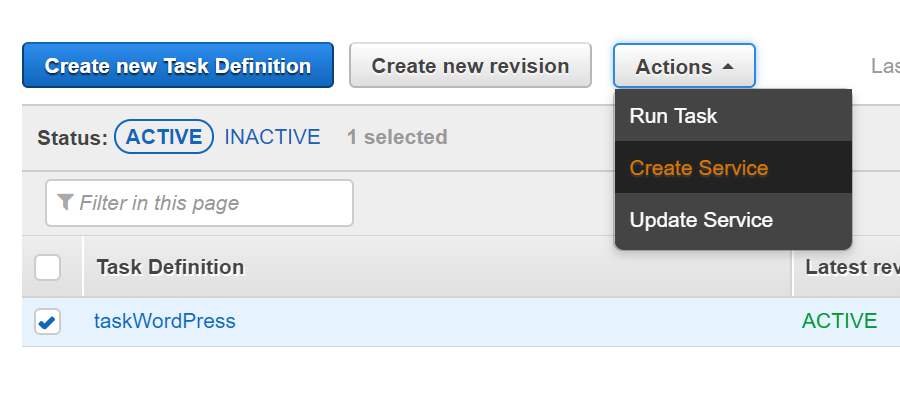
Almost there… Go back to ECS and select the task and choose Create Service from Actions.
Fill out the following values.
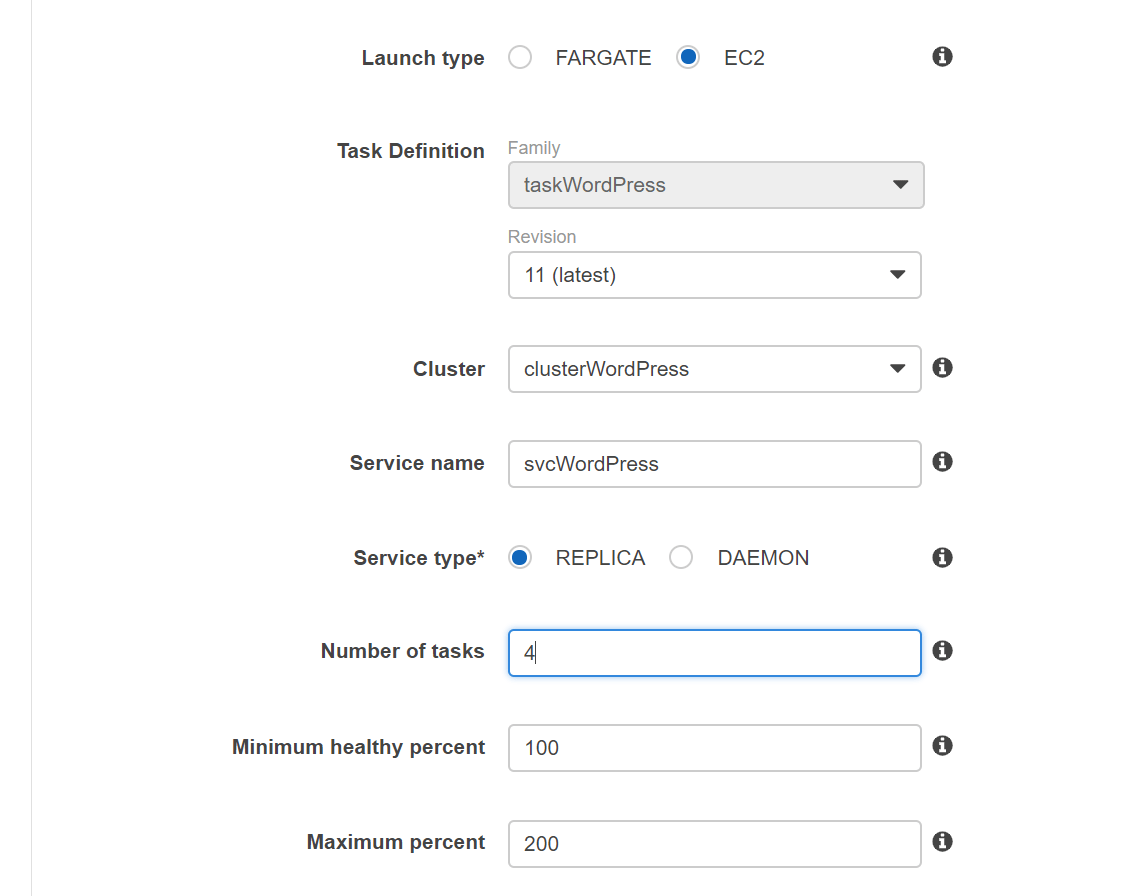
Fargate won’t work because SYS_ADMIN flag is not supported. For the Deployments and Task Placement use the defaults and click Next Step.
Choose Application Load Balancer and if you don’t have the role created (AWSServiceRoleForECS), let AWS create one for you. For the Container to load balance, you should see our container there. Just click Add to load balancer.
Choose the port and the target group that you created when creating the load balancer.
You can leave the rest as defaults and click Next Step. Allow auto-scaling by clicking on the second option (Configure Service Auto Scaling to adjust your service’s desired count). And then configure the auto-scaling policy. It’s up to you how you’ll configure it.
This is how mine looks like.
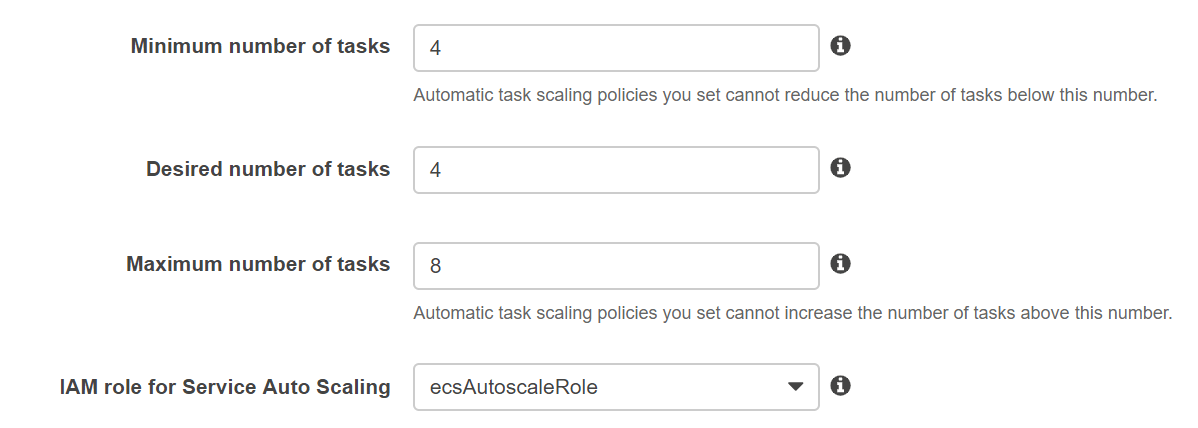
I shouldn’t be scaling based on CPU, 30% CPU is very low value. Maybe scaling based on Network Bytes In/Out is better. I didn’t have time to play with this, so this is how my scaling policy looks like.

You can ommit the Scale in policy for the test. Click Next Step and click Create Service. If it fails because of a namespace error, just go back twice and then forward to create the service.
Once that’s done, click on the Clusters, click the cluster name and then on the Services tab. Your service should have a status of Active. If you click on Tasks, you should see 4 tasks running. Finally, get the DNS name for the load balancer and go to that URL in a browser.
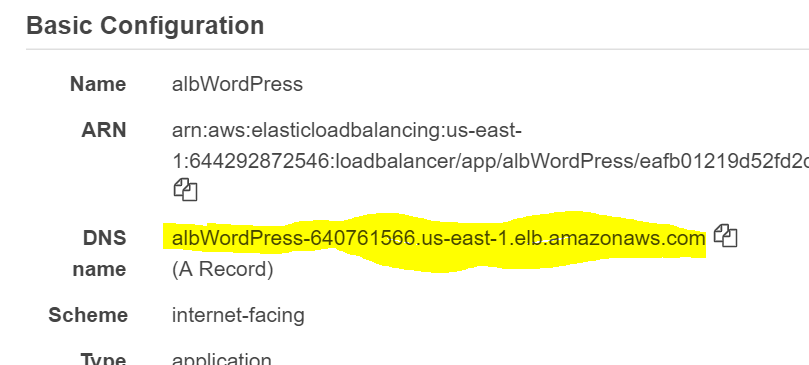
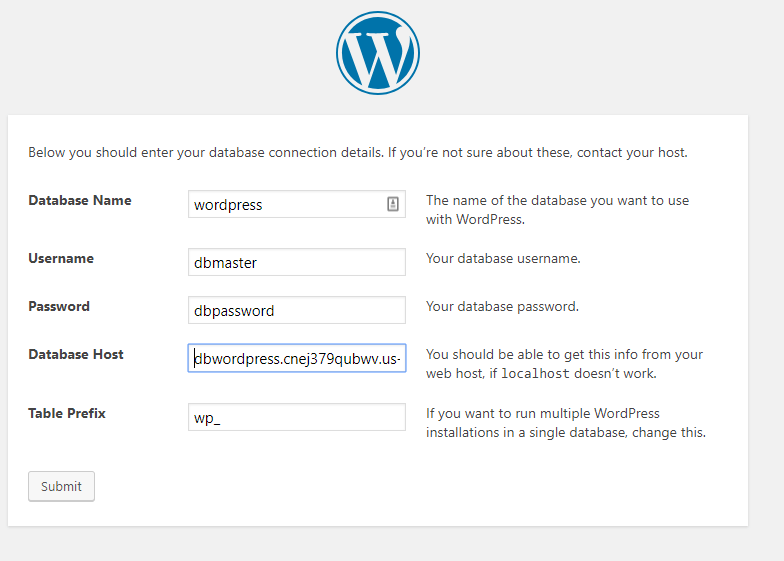
You should see the known WordPress initial page. When asked to configure the database, enter the values that you use when creating the RDS (dbmaster, dbpassword, wordpress and the hostname which can be found as an endpoint in the RDS console).
You should be all set now with a fully functional WordPress site. You can check the ClouwWatch for the Apache logs.
