
In this post I’ll describe how to connect/integrate your on-prem domain with Azure AD and enable SSO. So, when you want to log to your Office 365 subscription or access your Azure resources, you can just type your username and you’ll be logged on without being asked for a password. In order to do that there are some prerequisites. First, you will need admin access to both your on-prem local Active Directory and your Azure AD subscription. I am using Office 365 so I have Azure AD already and my on-prem domain controller is Windows 2012R2. If you are using Azure cloud, you should also have Azure AD. The trial version is also supported. Second, the SSO works only for devices joined to the domain. IE and Chrome are supported, Edge is not. The process below explains how to do this with a single AD forest. If you have multiple domains and forests, read the links all the way at the bottom.
NOTE
You can’t log to Office/Azure with your LOCAL domain. It has to be a public domain accessible with a public DNS. If you have the public domain already in Azure AD, then you can skip the next part.
The on-prem AD server needs to be able to talk to Azure AD.
Table of Contents
Add custom domain in Azure AD
Go to Azure AD and on the left side click on Azure Active Directory and then click on Custom domain names.
Click on Add custom domain on the top.
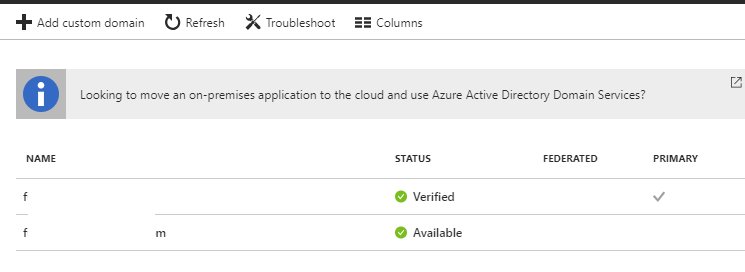
Enter the name of your public domain and you’ll get some instruction on what to do next. Pretty much, you have to create a TXT record in the DNS for the public domain that you want to use.
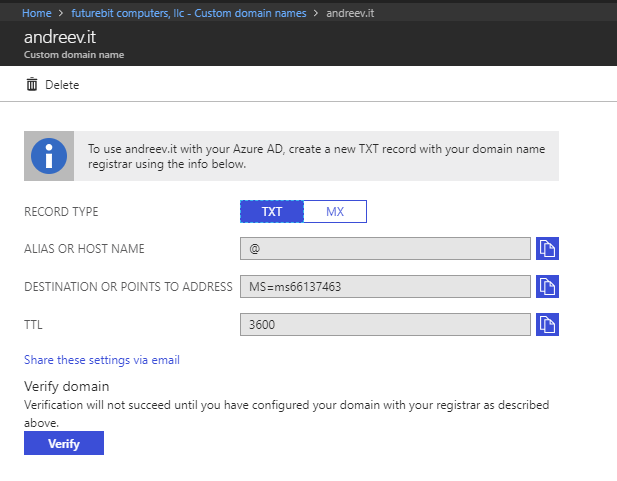
It might take some time. My DNS is with godaddy and it took about 10 mins. Just wait for 5-10 mins, click Verify and the domain should show up as Verified.
On-prem change
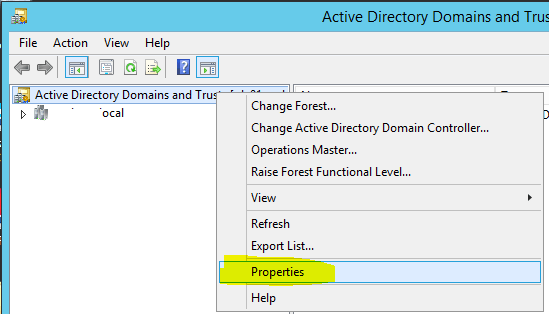
As I said earlier, the SSO won’t work with your local domain user name. You will have to change it to be with a public domain suffix. For example, if my on-prem username is kliment and the UPN is [email protected], I have to change that to be [email protected]. You can do that by adding the public domain in AD. On the domain controller, open up Active Directory Domains and Trusts, right-click the top item and click Properties.
Add your public domain that you just verified in Azure AD.

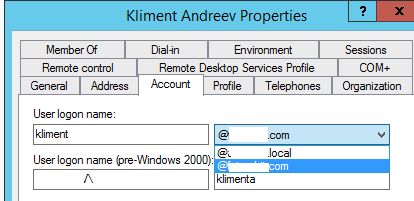
Now, open up Active Directory Users and Computers and change the UPN for a test user so the public domain is visible, not the local one.
 If you need to change the UPN using a script, look at this link all the way at the bottom.
Azure AD Connect
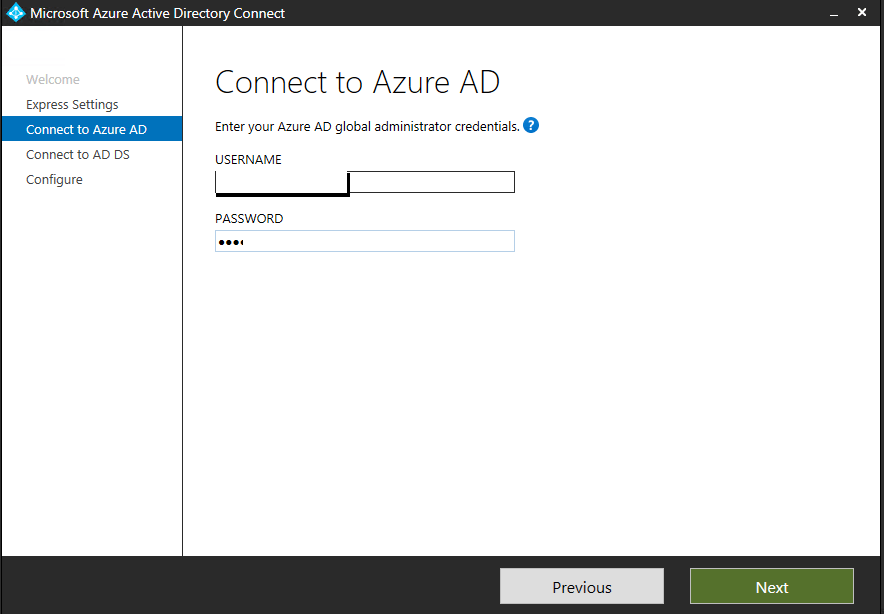
On a PC or a domain controller that’s joined to the local domain, download and install Azure AD Connect from their official site. Enter the admin credentials for your Azure AD subscription.
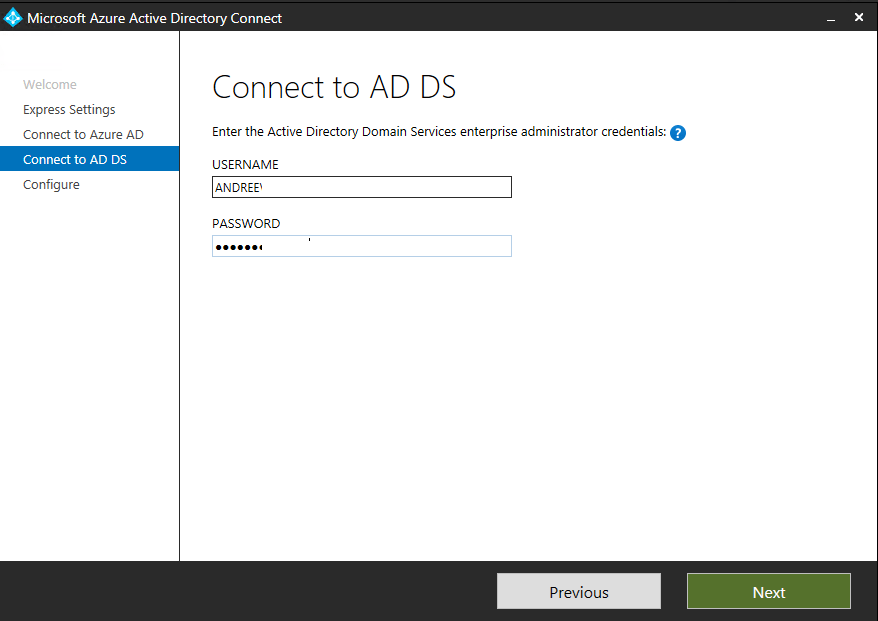
Enter the admin credentials for your on-prem AD.
Make sure your domain shows up here and says Verified. Click on Continue without any verified domains.

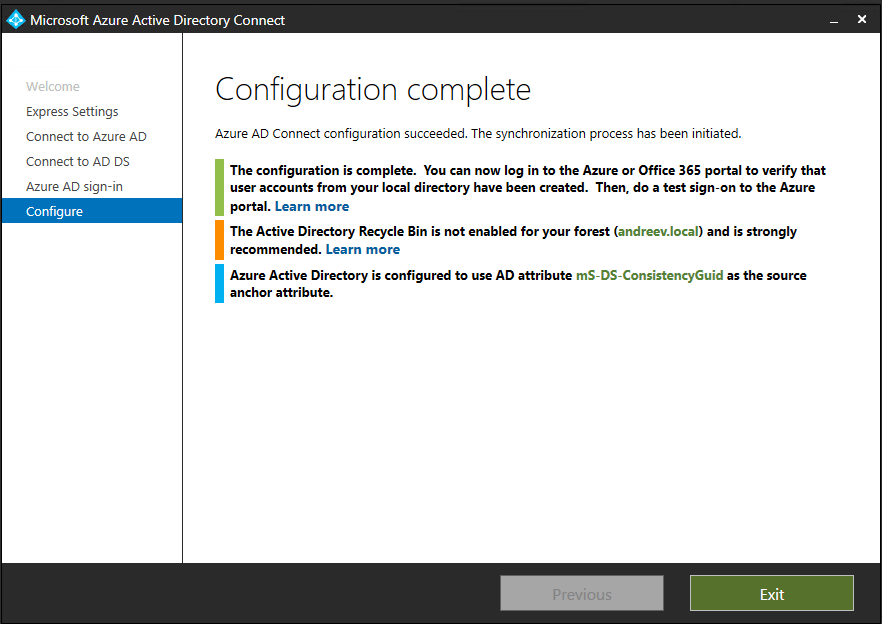
At the end you’ll see this. Click Exit.
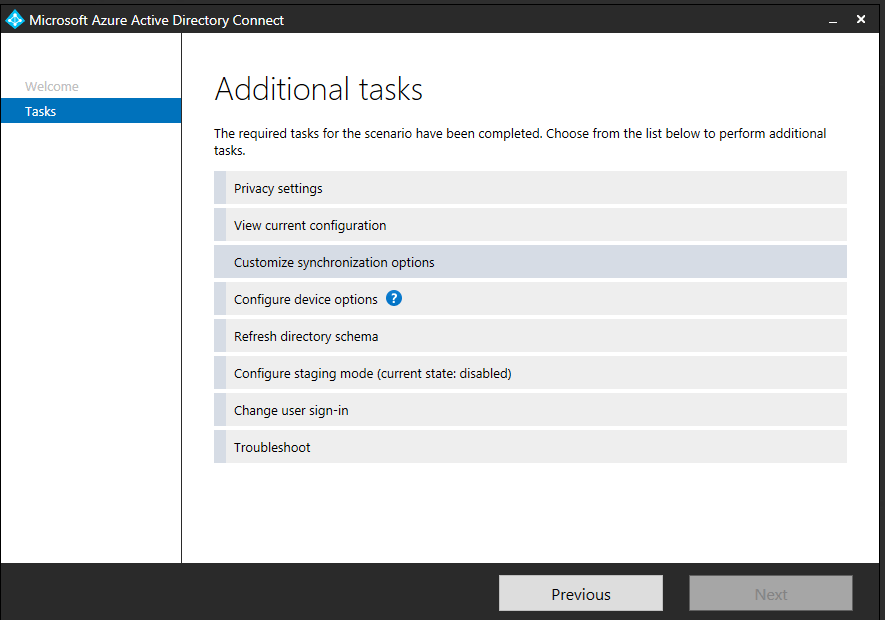
Give it some time for the initial sync to complete. This might take some times depending on the size of your AD. I have only a couple of users on-prem, so the sync took about 5 mins or less. Once it’s complete, launch the Azure AD Connect again and click on Change user sign-in.
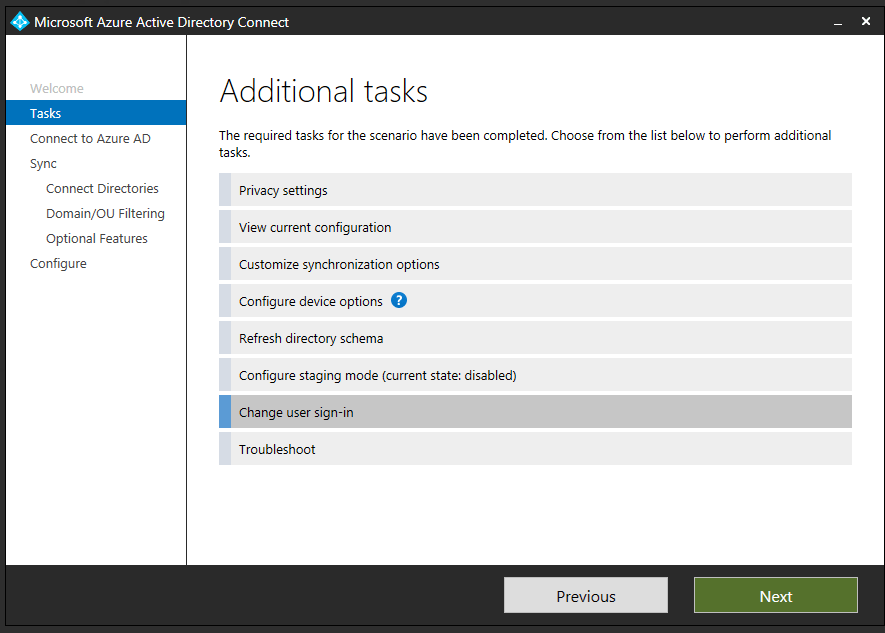
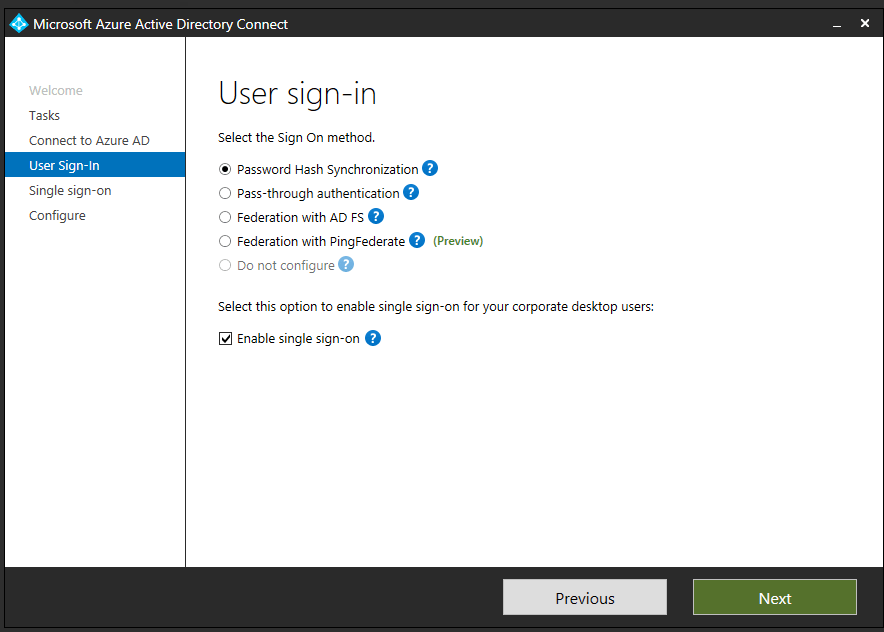
Click on Enable single sign-on and click Next. You’ll be prompted to enter your on-prem admin password again.
At this point you should be able to log in. Just go to portal.office.com if you have an Office 365 subscription or portal.azure.com for Azure and once you enter your e-mail address as a login, you’ll be able to log in.
Tips
If your username for the Azure AD is the same as an on-prem user, you’ll have problem syncing. The easiest way is to not change the UPN for that user. Or you can create a separate OU and not sync that OU with the AD Connector. If you have a conflict, you’ll get an email that looks like this.

In AD connector, go to Customize synchronization options.
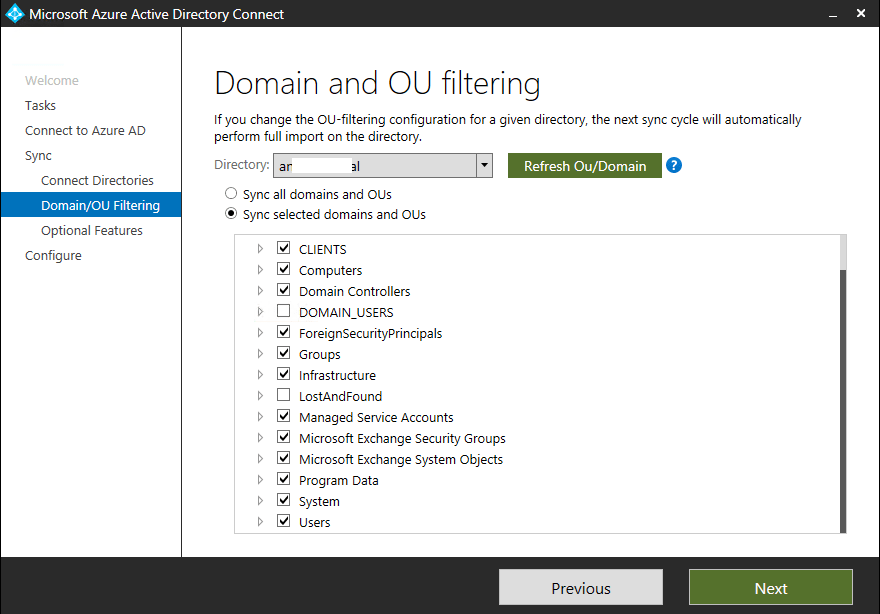
Then uncheck the OU that you don’t want to be synchronized.
In case you want to remove the domain, you’ll have to remove the users first. But in order to remove the users, you’ll have to stop the sync. Uninstalling the AD Connector won’t help. So, download PowerShell for Azure Active Directory and execute these lines.
Connect-MsolService
Set-MsolDirSyncEnabled –EnableDirSync $false
You have to wait quite a while, in my case about 30 mins. You can check if the sync is disabled by doing:
(Get-MSOLCompanyInformation).DirectorySynchronizationEnabled
Once you get false as an output, you can delete the users and the custom domain.
Useful links
https://docs.microsoft.com/en-us/azure/active-directory/connect/active-directory-aadconnect-prerequisites
https://docs.microsoft.com/en-us/azure/active-directory/connect/active-directory-aadconnect-sso-quick-start
https://docs.microsoft.com/en-us/azure/active-directory/connect/active-directory-aadconnect
https://support.office.com/en-us/article/how-to-prepare-a-non-routable-domain-such-as-local-domain-for-directory-synchronization-e7968303-c234-46c4-b8b0-b5c93c6d57a7
https://docs.microsoft.com/en-us/azure/active-directory/connect/active-directory-aadconnect-troubleshoot-sso