In this post I’ll describe how to configure a tunnel between pfSense and AWS. At home I have a box running pfSense 2.4.2 as a firewall/gateway and my internal network is 192.168.1.0/24.
First things first, let’s configure AWS.
Table of Contents
AWS
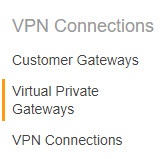 Log to your AWS account and go to your VPC. On your left side at the bottom, you’ll see these items.
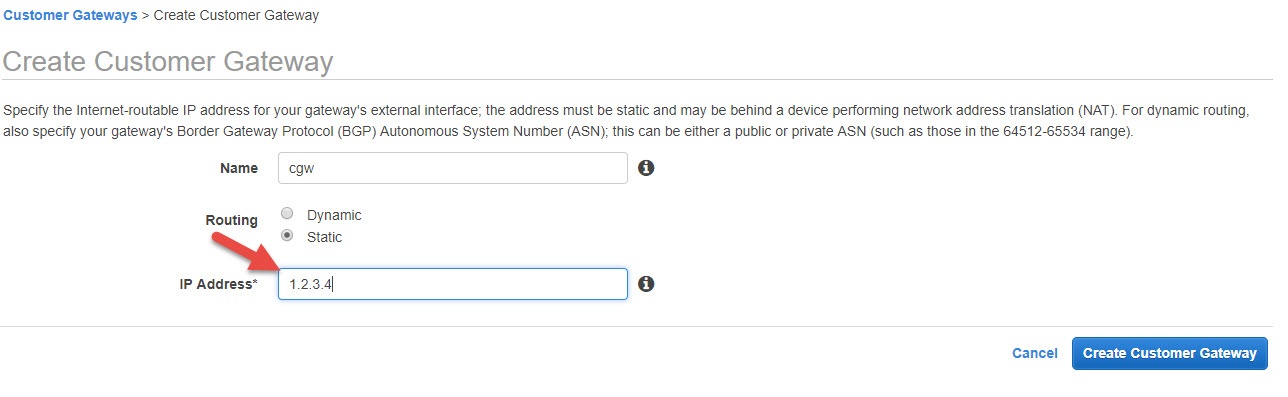
Click on Customer Gateways first and then click to create a Customer Gateway. Name your gateway connection and enter the external IP of your pfSense box.
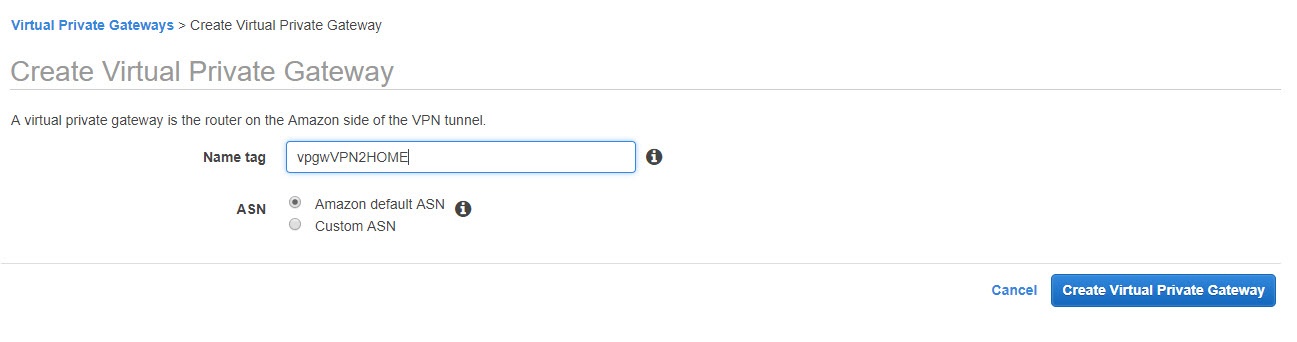
Go back to the same entries on the left and click to create a Virtual Private Gateway. Name your Virtual Private Gateway.
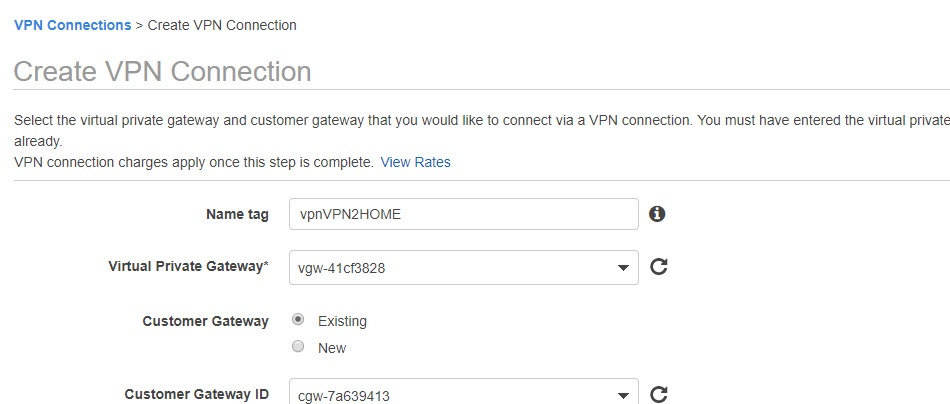
Go back again and this time click the last option to create a VPN Connection.
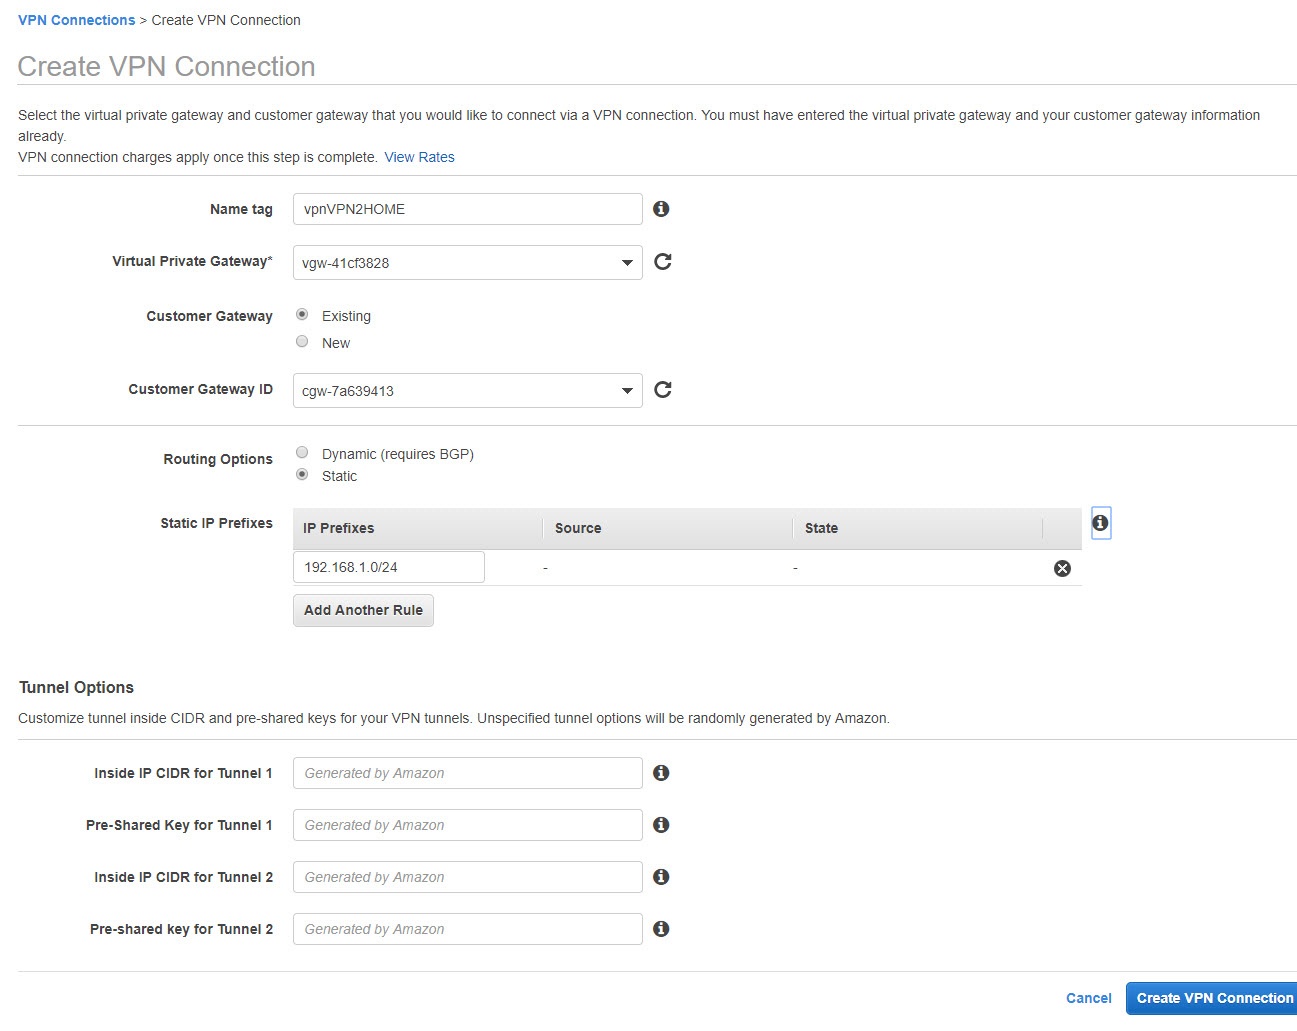
Name it, choose the Virtual Private Gateway that you just created and also choose the Customer Gateway that you created initially.
For the Routing Options, select Static and enter the subnet that’s behind your pfSense. If you have more subnets at home/work, add them all if you want to be reachable.
You don’t have to enter anything for Tunnel Options.
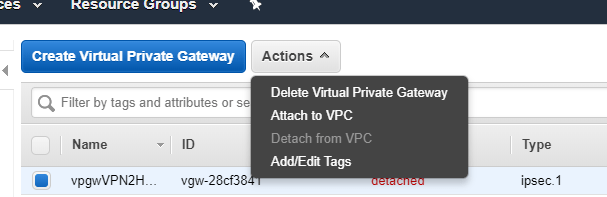
Go back to the initial entries and click Virtual Private Gateway. Select your Virtual Private Gateway and from the Actions, choose Attach to VPC.
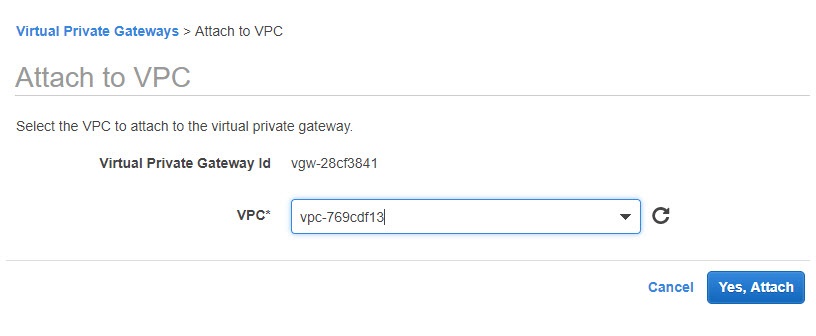
Choose the VPC that you will use.
Again, go back to the initial entries, select VPN Connections and click on Download Configuration.
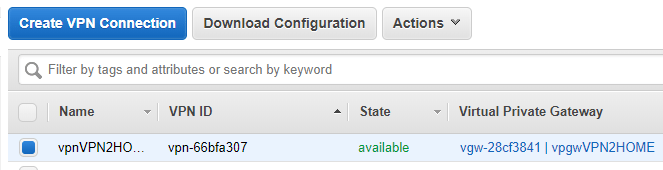
When prompted, choose the configuration for pfSense.
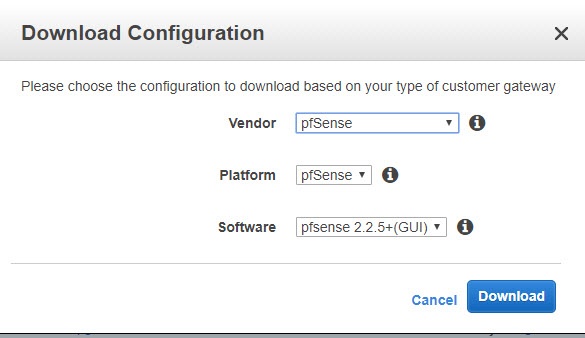
You’ll get a text file. Make sure you open this with Wordpad or Notepad++. Notepad won’t display it correctly. This file tells you pretty much what to do on the pfSense side.
pfSense
Go to your pfSense box and choose VPN | IPsec from the menus. You’ll see something like this.

Click on Add P1. Fill out the values from the text file that you just downloaded from AWS. It looks like this.
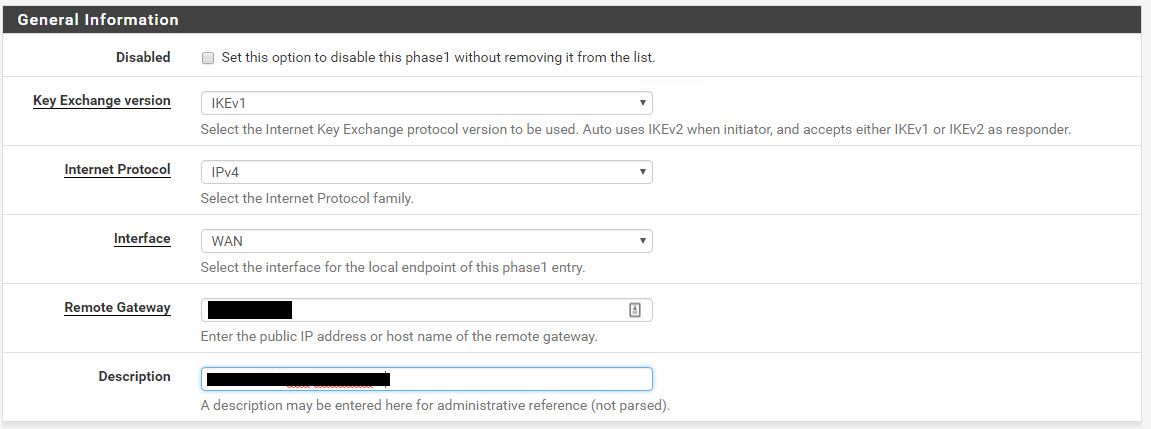
…and this.
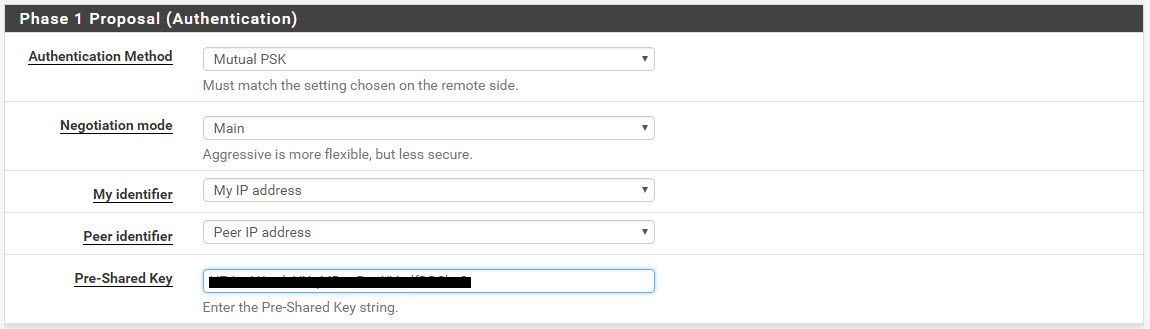
…and this.
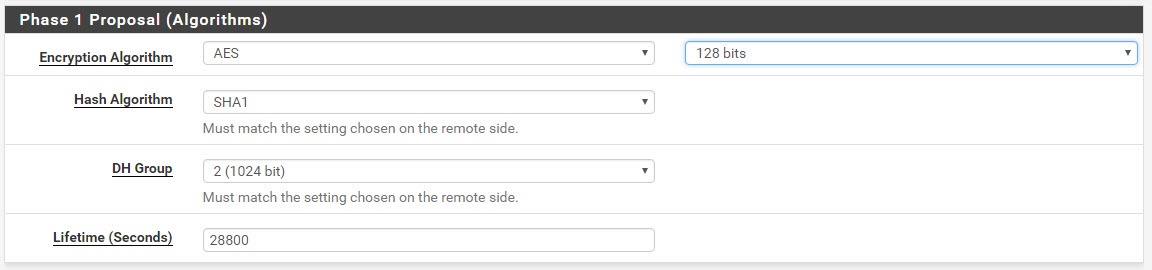
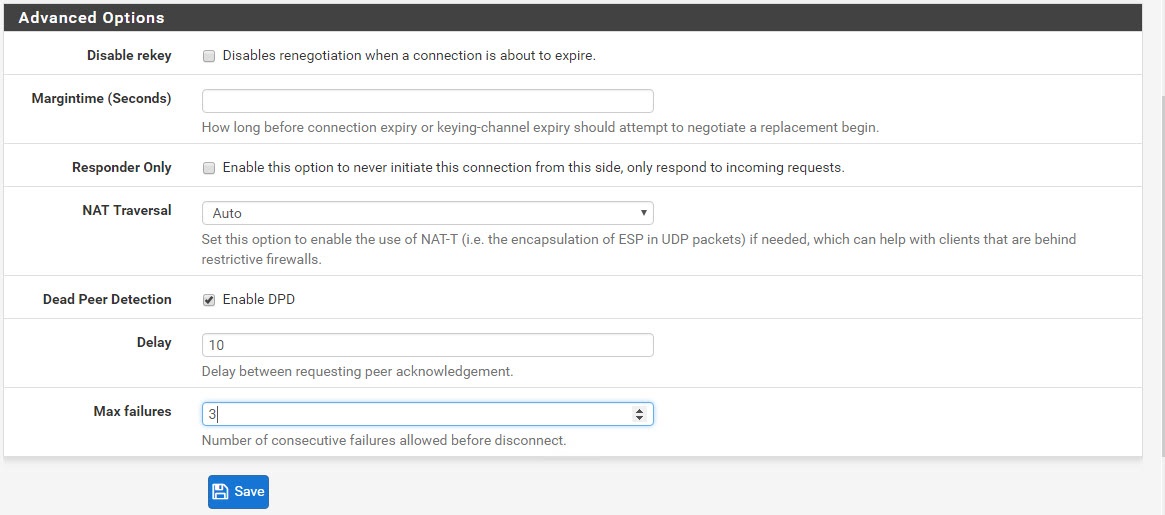
…and finally this. Click Save.
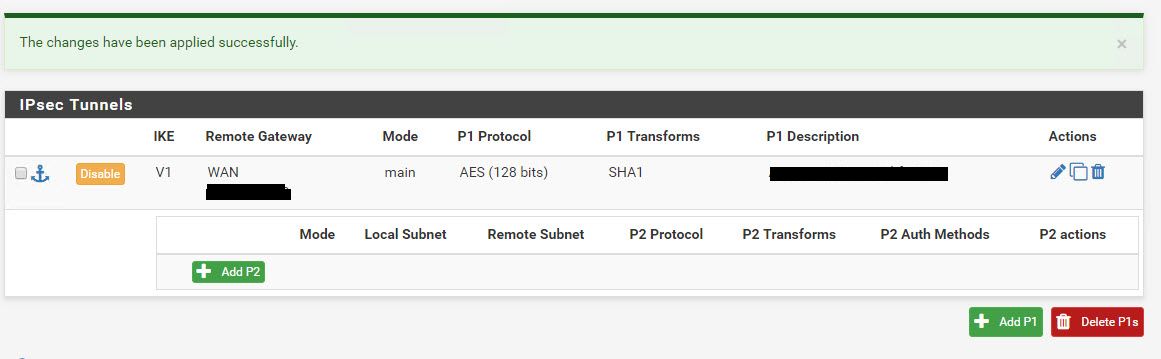
Click Apply and then click on Add P2.
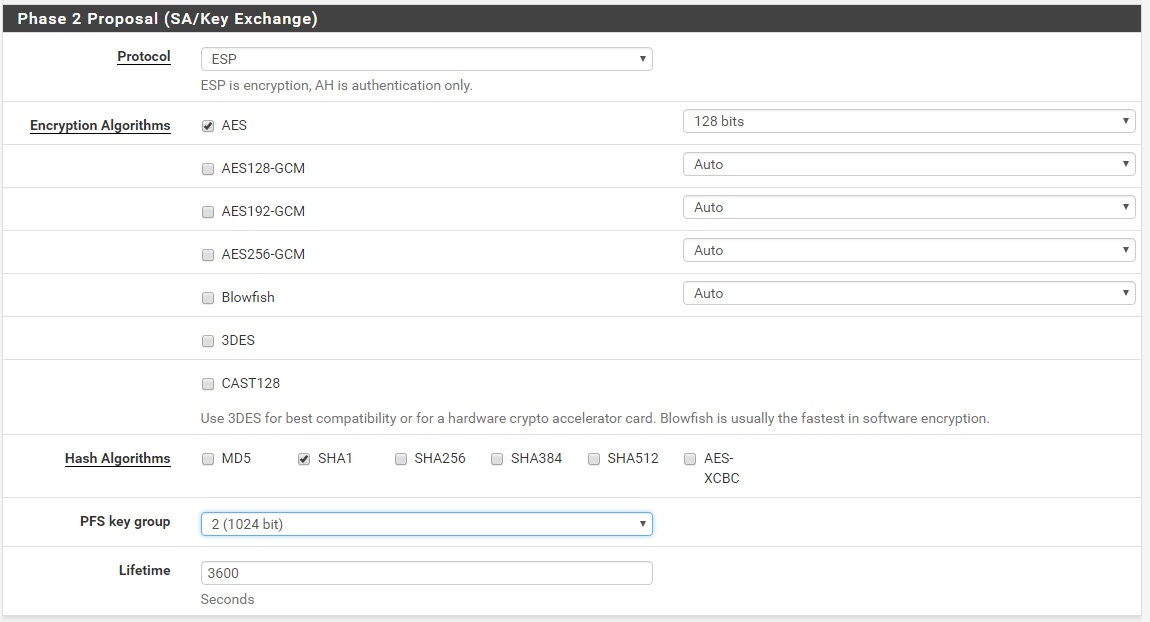
As with Phase 1, do the same for Phase 2. Read the values from the text file so it looks like this. For the Remote Network subnet, enter the subnet of your VPC. You can get that if you click on the VPC and check the IPv4 CIDR column.
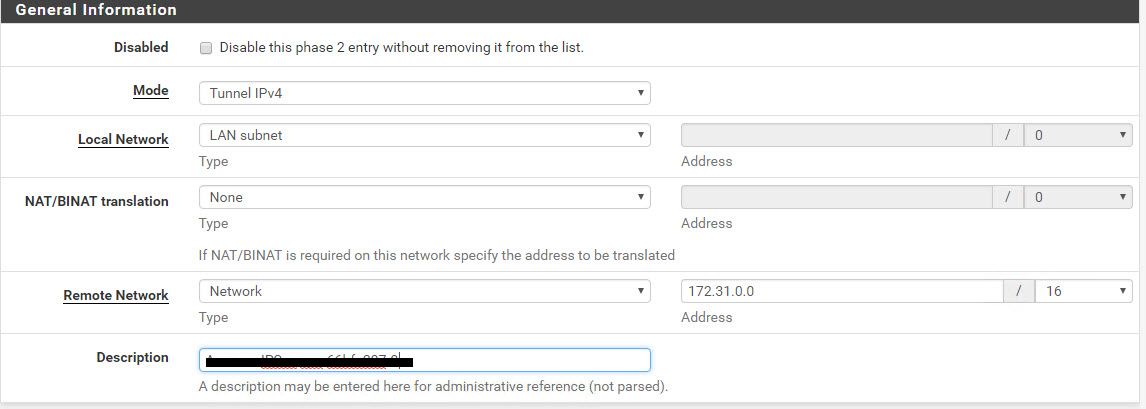
Keep entering the values.
For some reason, my VPN tunnel got disconnected a lot if there was no traffic, so under Advanced Configuration I had to enter an internal IP of an AWS instance to be pinged all the time to keep the traffic flow.
Click Save and then Apply Changes.
Now, we have to allow the traffic coming from AWS to our internal network.
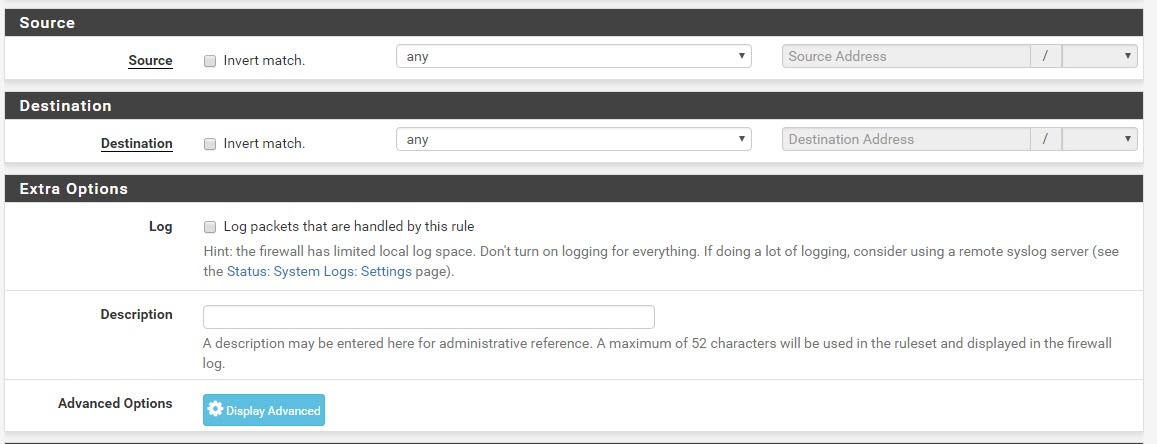
From the menus in pfSense, go to Firewall | Rules and click on IPsec. Click Add and allow the traffic that suits your needs. In my case, I allow all the traffic.
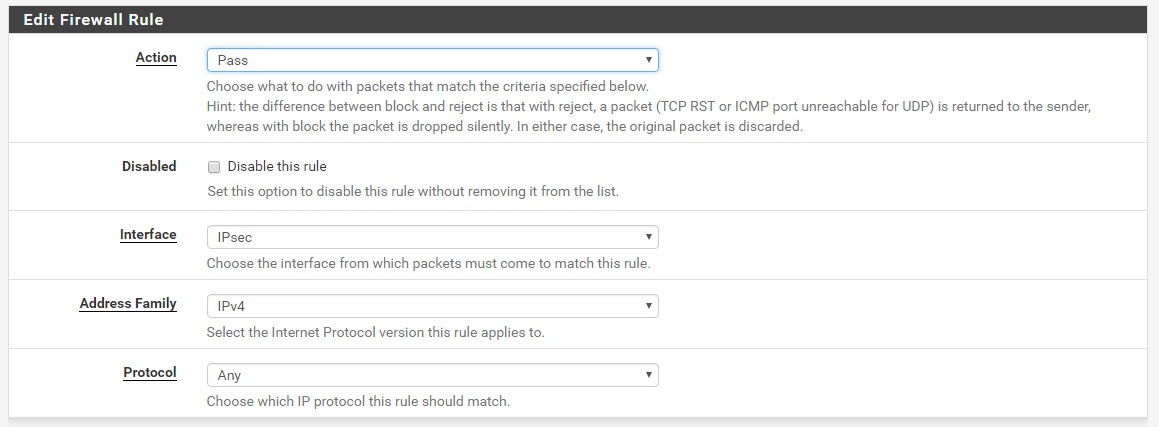
..and this.
Once you apply the changes it should look like this.
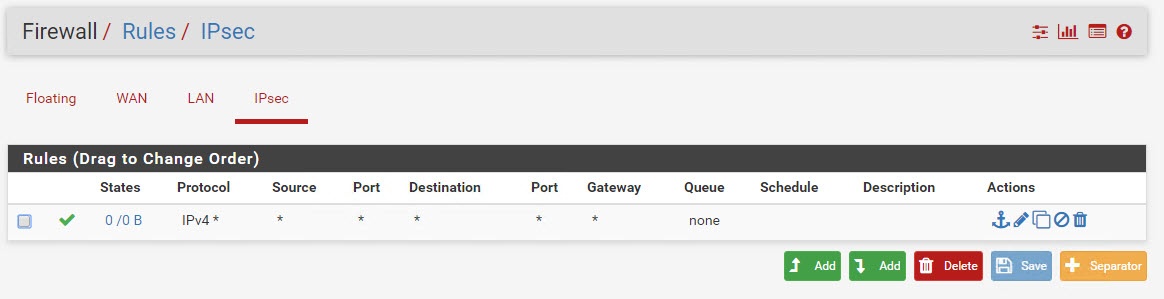
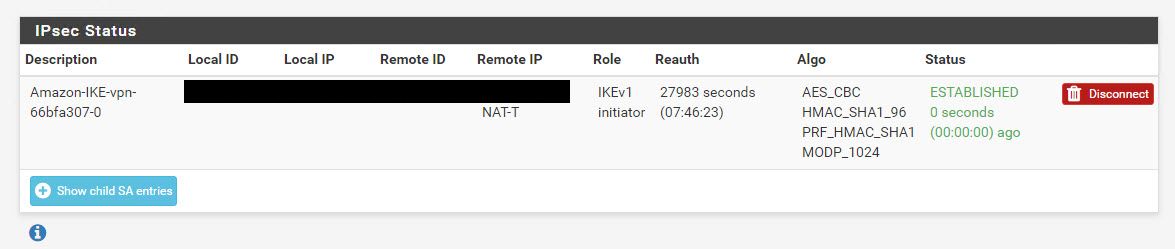
Go to Status | IPsec from the menus and click Connect. If everything is OK, you’ll see the connection established.
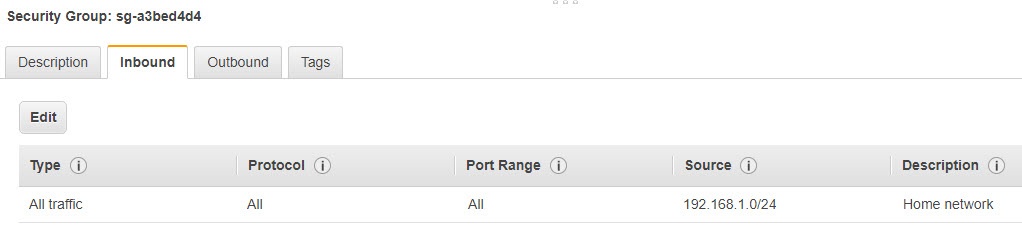
Now, we have the rules in place that allows the traffic originating from AWS to pfSense to pass through, but if you want the traffic originating from your internal network to reach AWS, you’ll have to assign AWS Security groups to the instances that allow traffic from your internal network.
In my case, I have a security group that looks like this. It is assigned to all of my AWS intances. It allows traffic from my internal network to reach AWS.
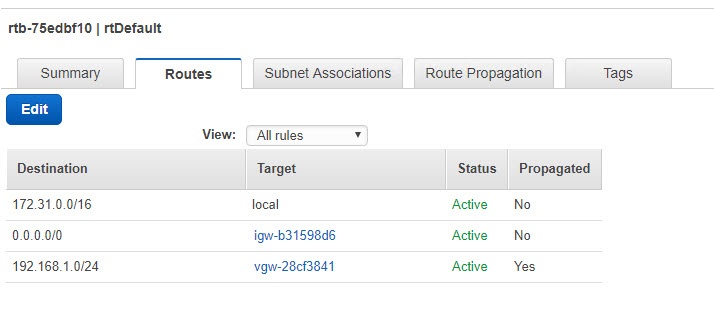
But that’s not all. Because we are using static routes, we have to tell AWS to use the Virtual Private Gateway to reach our internal network. If you go back to AWS and click on route tables you’ll see something like this.
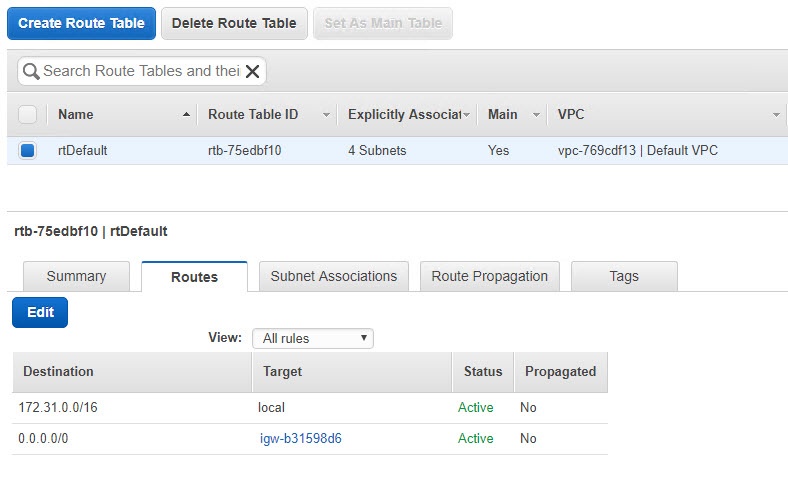
This means that all the traffic that goes to 172.31.0.0/16 subnet, which is the VPC’s internal subnet should use local routing and all other traffic to use igw-b31598d6 which is the Internet gateway. But, we don’t want that. If an instance in AWS tries to reach an instance behind pfSense it will try to reach it over the Internet. So, we have to tell AWS to use the Virtual Private Gateway for our local subnet.
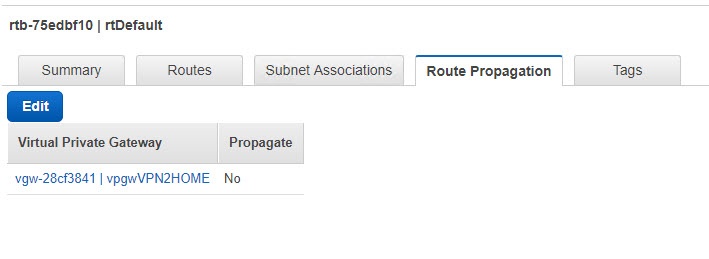
So, click on Route Propagation and see how the Propagate field says No. We have to Edit that and check the checkmark, so all the internal traffic uses the Virtual Private Gateway.
Once completed you should see something like this under the Routes.
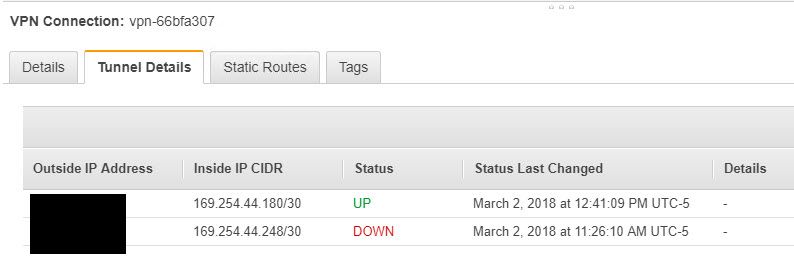
At this point you should be able to reach all instances back and forth. Also, make sure that the VPN tunnel is UP on the AWS side. Don’t worry about the second tunnel down. By default, AWS provides you two redundant tunnels. Since we have only one pfSense with a single public IP, we don’t have to worry about the 2nd tunnel…unless you have 2 pfSense boxes in a cluster with 2 public IPs.