In this post I’ll describe how to create a fully functional WordPress blog on Amazon AWS. The blog will run on a server that can scale up or down depending on the load. The database will reside on Amazon RDS, not on a separate server. I’ll use both the AWS console and CLI to show how things work. Some of the steps are optional and you may choose more or less resources or redundancy and different type of security. See the following post if you plan to use CLI and you don’t have that configured. Do not execute the CLI commands if you created/deleted something from the console. It won’t work. Also, it won’t work if you just blindly copy and paste the CLI commands. Pretty much all of them are tied with unique ids for the AMIs, security groups, scaling groups…
Table of Contents
Security Groups
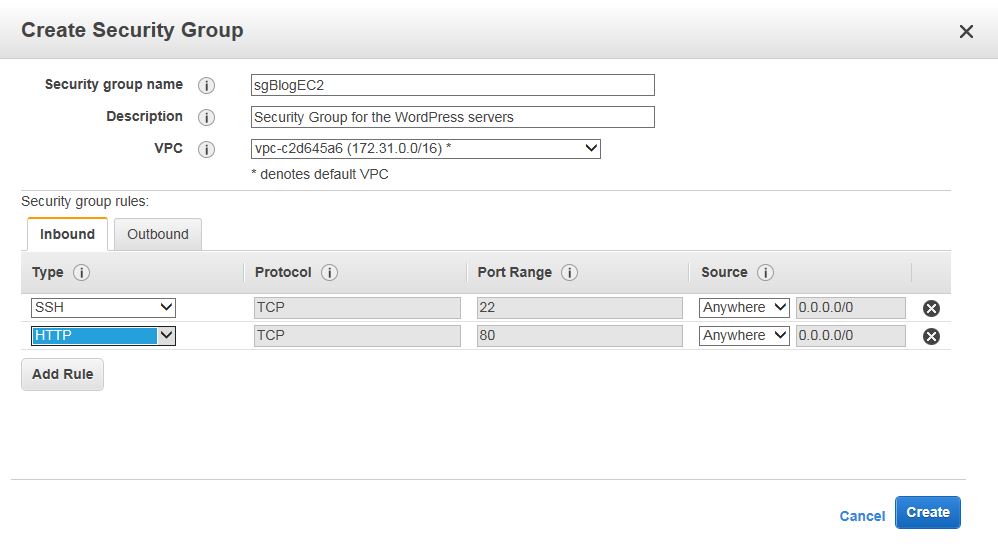
First, we’ll create two security groups, sgBlogEC2 and sgBlogRDS. The first one will be used for the servers and the second one for the database. The first one will allow ports 22 (ssh) and port 80 (http) from anywhere and the second one will allow port 3306 from sgBlogEC2 only. This means that you can manage any of the VM servers from anywhere, the blog can be accessed from anywhere and the database can be accessed only from the servers.
Go to Compute | EC2.

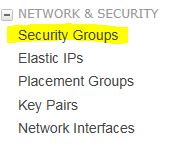
Then, under NETWORK & SECURITY, click Security Groups.
Click on Create Security Group and fill the blanks. We’ll use the default VPC. Then, click Add Rule and add both rules for port 22 (ssh) and port 80 (http). Click Create when done.
Do the same for the 2nd security group. This time add only port 3306 (MYSQL/Aurora) and for the source specify the Group ID of the first group that you’ve created.

Using CLI, we have to find the default VPC ID first.
aws ec2 describe-vpcs
{
    "Vpcs": [
        {
            "VpcId": "vpc-c2d645a6",
            "InstanceTenancy": "default",
            "State": "available",
            "DhcpOptionsId": "dopt-ca3593af",
            "CidrBlock": "172.31.0.0/16",
            "IsDefault": true
        }
    ]
}
In my case, the ID is vpc-c2d645a6. Now, we can create the groups.
aws ec2 create-security-group --group-name sgBlogEC2 --description "Security Group for the WordPress servers" \
--vpc-id vpc-c2d645a6
aws ec2 create-security-group --group-name sgBlogRDS --description "Security Group for the WordPress database" \
--vpc-id vpc-c2d645a6
When you execute these commands, you’ll get the security group ID as an output. Get the GroupId, you’ll need them now. In my case, the GroupIds were sg-37535351 and sg-3b53535d. We have the groups created, but we need the inbound rules.
aws ec2 authorize-security-group-ingress --group-id sg-37535351 --protocol tcp --port 22 --cidr 0.0.0.0/0
aws ec2 authorize-security-group-ingress --group-id sg-37535351 --protocol tcp --port 80 --cidr 0.0.0.0/0
and for the second group
aws ec2 authorize-security-group-ingress --group-id sg-3b53535d --protocol tcp --port 3306 --source-group sg-37535351
Database
WordPress requires a MySQL compatible database to work. We can install the database on the WordPress server, but if we want to use more than one server in a load-balanced configuration, this scenario won’t work. So, we’ll just use a database instance separate from the servers.
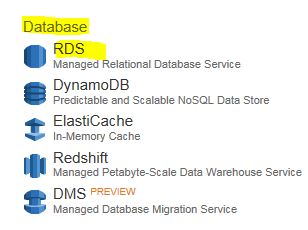
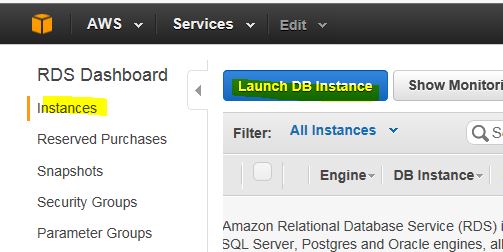
From the main AWS menu, go to Database | RDS.
Click on Instances and then Launch DB Instance.
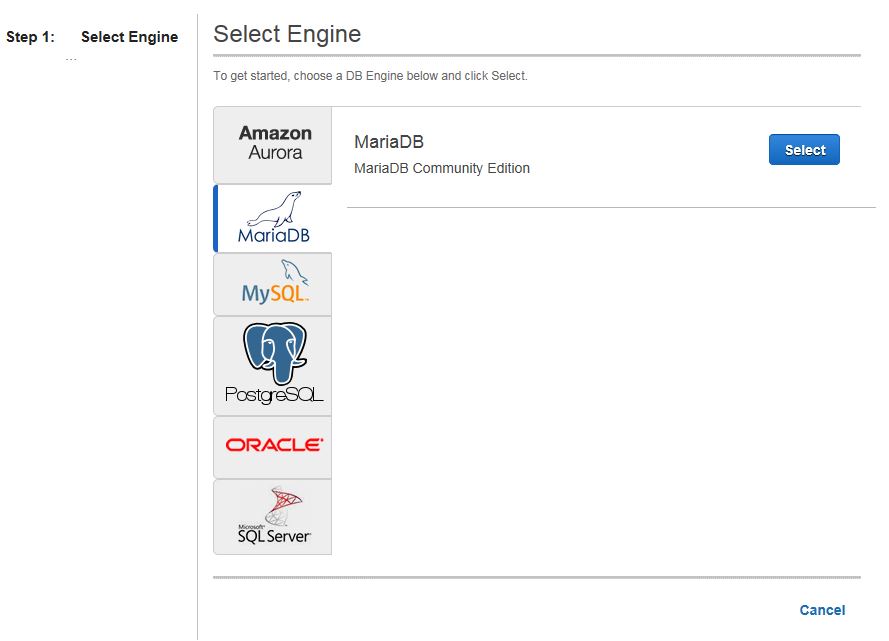
I’ll be using MariaDB, but you can choose Amazon Aurora or MySQL.
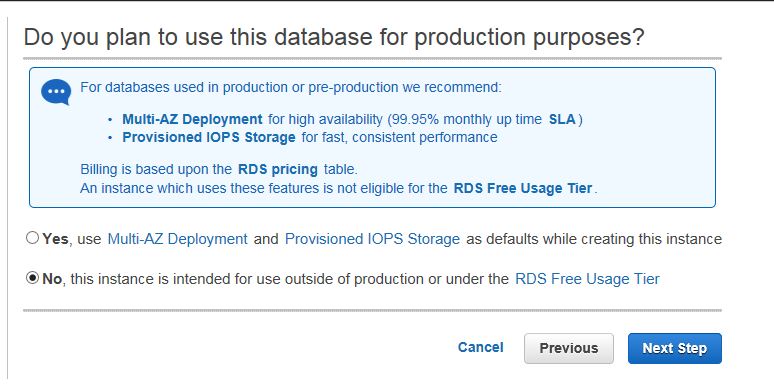
On the next screen, Amazon recommends to use Multi-AZ deployment and PIOPS for production databases. The benefit is that if one zone goes down, you’ll still have your database running in the other zone. And the PIOPS is just a faster SSD. I don’t need any of these so I’ll go with the Free Usage Tier option.
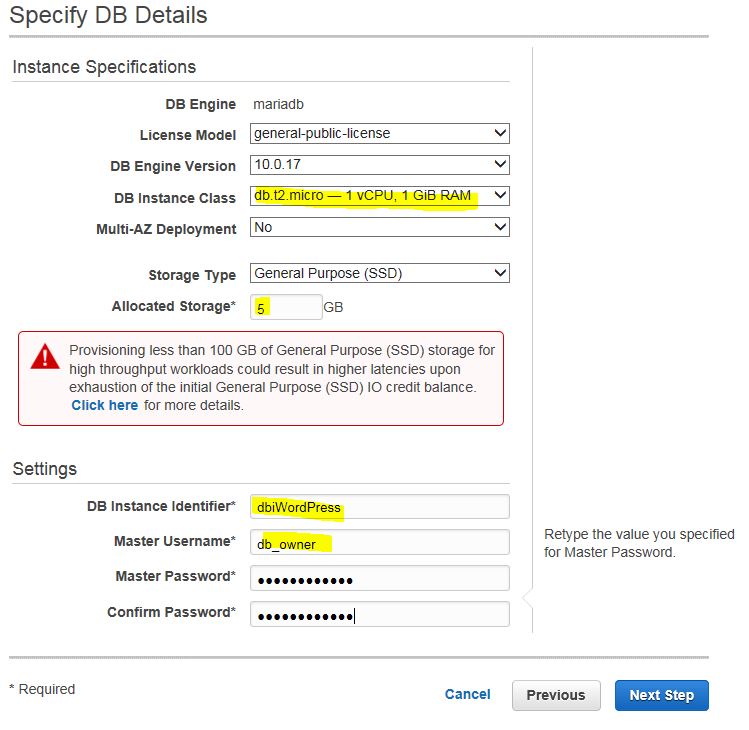
On this screen, you have to specify the details for the database, such as the resources (in my case 1CPU, 1GB RAM), 5GB of storage (you’ll probably need 10 or more GB) and the username and password that will have full access to the instance.
In the advanced settings dialog, make sure you choose your default VPC, disable the public access, choose the security group that we created for this database and name the database.
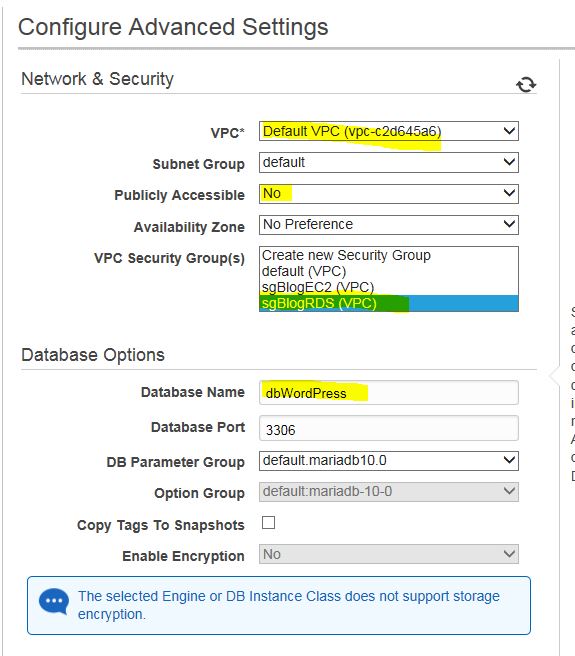
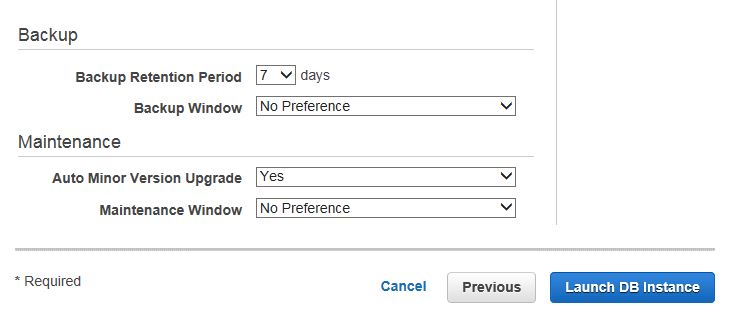
I’ve used the defaults for the backup options.
If you click on View DB Instance and then on the magnifying glass icon, you’ll see that the endpoint is not yet available.
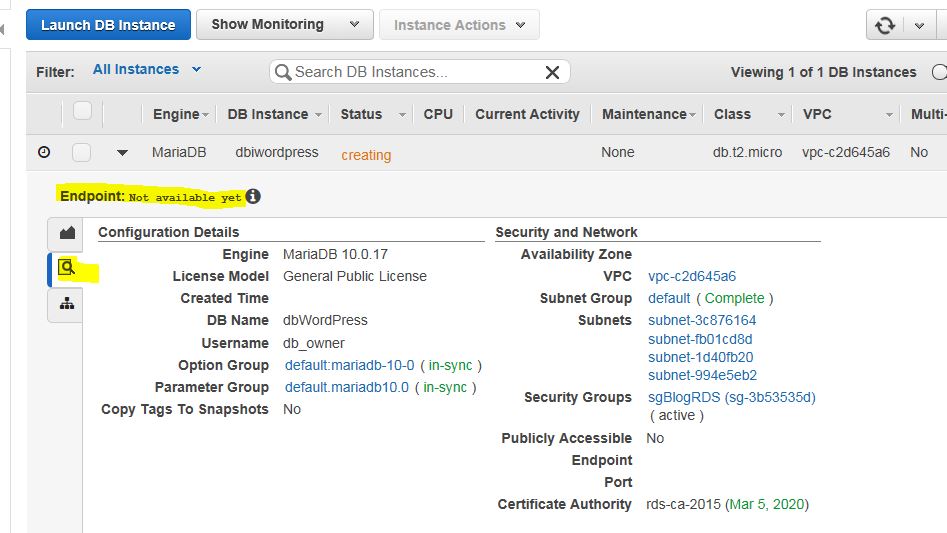
Wait for a couple of minutes until the endpoint shows up. We’ll need this when we install WordPress.
Using CLI, you can accomplish the same.
aws rds create-db-instance \
--db-instance-identifier dbiWordPress \
--db-name dbWordPress \
--allocated-storage 5 \
--db-instance-class db.t2.micro \
--engine MariaDB \
--vpc-security-group-ids sg-3b53535d \
--master-username db_owner \
--master-user-password T0pS3cr3tP4ssw0rd \
--storage-type gp2 \
--no-publicly-accessible \
--no-multi-az
This is what we need when we install WordPress.

Key Pairs
If you already have a SSH key pair that you want to use, you can skip this step. If not, continue reading.
Go to Compute | EC2

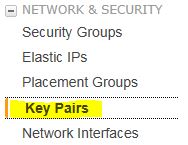
Then, under NETWORK & SECURITY, click Key Pairs.
Click on Create Key Pair and enter the name. I used kpWordPressEC2. Save the provided .pem file somewhere. You’ll need this file to access the servers using ssh.
Using AWS CLI, you can create the key pair using the following command.
aws ec2 create-key-pair --key-name kpWordPressEC2 --query "KeyMaterial" --output text > kpWordPress.pem
If you open this file, which is basically a text file, you’ll see something like this.
-----BEGIN RSA PRIVATE KEY-----
EXAMPLEKEYKCAQEAy7WZhaDsrA1W3mRlQtvhwyORRX8gnxgDAfRt/gx42kWXsT4rXE/b5CpSgie/
vBoU7jLxx92pNHoFnByP+Dc21eyyz6CvjTmWA0JwfWiW5/akH7iO5dSrvC7dQkW2duV5QuUdE0QW
Z/aNxMniGQE6XAgfwlnXVBwrerrQo+ZWQeqiUwwMkuEbLeJFLhMCvYURpUMSC1oehm449ilx9X1F
G50TCFeOzfl8dqqCP6GzbPaIjiU19xX/azOR9V+tpUOzEL+wmXnZt3/nHPQ5xvD2OJH67km6SuPW
oPzev/D8V+x4+bHthfSjR9Y7DvQFjfBVwHXigBdtZcU2/wei8D/HYwIDAQABAoIBAGZ1kaEvnrqu
/uler7vgIn5m7lN5LKw4hJLAIW6tUT/fzvtcHK0SkbQCQXuriHmQ2MQyJX/0kn2NfjLV/ufGxbL1
mb5qwMGUnEpJaZD6QSSs3kICLwWUYUiGfc0uiSbmJoap/GTLU0W5Mfcv36PaBUNy5p53V6G7hXb2
bahyWyJNfjLe4M86yd2YK3V2CmK+X/BOsShnJ36+hjrXPPWmV3N9zEmCdJjA+K15DYmhm/tJWSD9
81oGk9TopEp7CkIfatEATyyZiVqoRq6k64iuM9JkA3OzdXzMQexXVJ1TLZVEH0E7bhlY9d8O1ozR
oQs/FiZNAx2iijCWyv0lpjE73+kCgYEA9mZtyhkHkFDpwrSM1APaL8oNAbbjwEy7Z5Mqfql+lIp1
YkriL0DbLXlvRAH+yHPRit2hHOjtUNZh4Axv+cpg09qbUI3+43eEy24B7G/Uh+GTfbjsXsOxQx/x
p9otyVwc7hsQ5TA5PZb+mvkJ5OBEKzet9XcKwONBYELGhnEPe7cCgYEA06Vgov6YHleHui9kHuws
ayav0elc5zkxjF9nfHFJRry21R1trw2Vdpn+9g481URrpzWVOEihvm+xTtmaZlSp//lkq75XDwnU
WA8gkn6O3QE3fq2yN98BURsAKdJfJ5RL1HvGQvTe10HLYYXpJnEkHv+Unl2ajLivWUt5pbBrKbUC
gYBjbO+OZk0sCcpZ29sbzjYjpIddErySIyRX5gV2uNQwAjLdp9PfN295yQ+BxMBXiIycWVQiw0bH
oMo7yykABY7Ozd5wQewBQ4AdSlWSX4nGDtsiFxWiI5sKuAAeOCbTosy1s8w8fxoJ5Tz1sdoxNeGs
Arq6Wv/G16zQuAE9zK9vvwKBgF+09VI/1wJBirsDGz9whVWfFPrTkJNvJZzYt69qezxlsjgFKshy
WBhd4xHZtmCqpBPlAymEjr/TOlbxyARmXMnIOWIAnNXMGB4KGSyl1mzSVAoQ+fqR+cJ3d0dyPl1j
jjb0Ed/NY8frlNDxAVHE8BSkdsx2f6ELEyBKJSRr9snRAoGAMrTwYneXzvTskF/S5Fyu0iOegLDa
NWUH38v/nDCgEpIXD5Hn3qAEcju1IjmbwlvtW+nY2jVhv7UGd8MjwUTNGItdb6nsYqM2asrnF3qS
VRkAKKKYeGjkpUfVTrW0YFjXkfcrR/V+QFL5OndHAKJXjW7a4ejJLncTzmZSpYzwApc=
-----END RSA PRIVATE KEY-----
Follow this article on how to connect to your AWS EC2 instances.
Servers
Now that we have the database ready, we’ll go ahead and create one server that will be used as a template. I’ll use the Amazon Linux AMI, which is based on Red Hat 6.
Go to Compute | EC2
Click on Instances under Instances and then click Launch Instance.
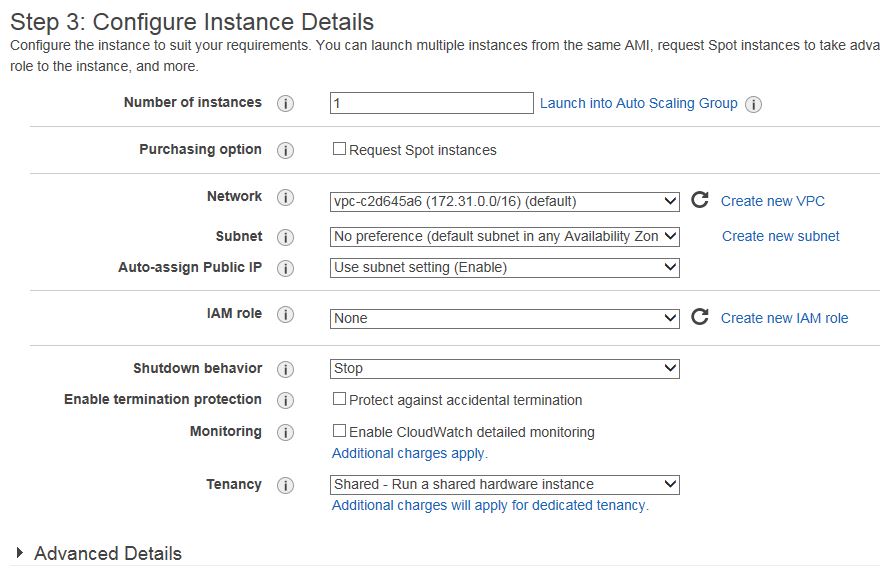
Choose the first choice, Amazon Linux AMI, then choose the type (I’ll use the t2.micro), accept the defaults for the instance.
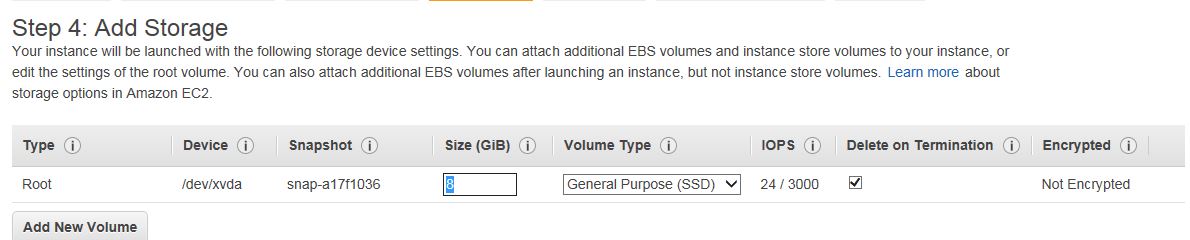
Specify the amount of storage you want. I used 8GB which is more than enough because the database is not on the servers.
Tag the instance if you want and make sure you select the security group that we created for the servers.
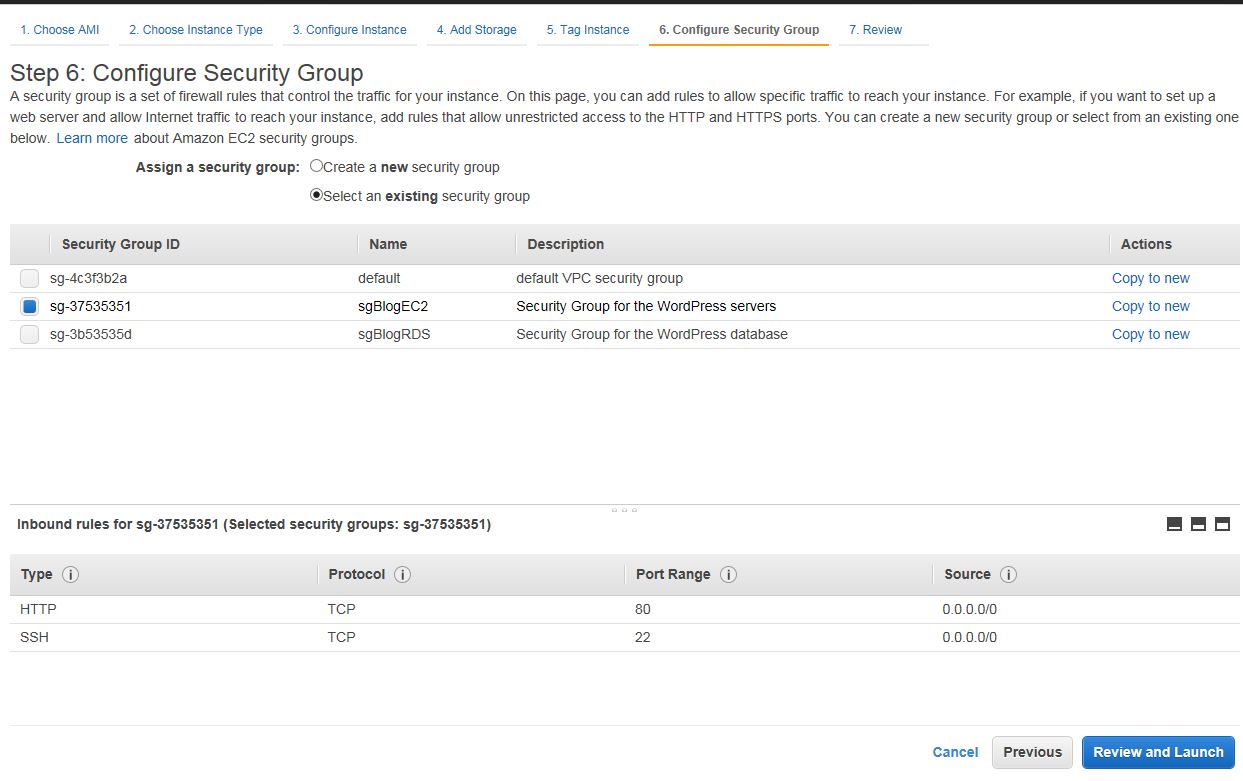
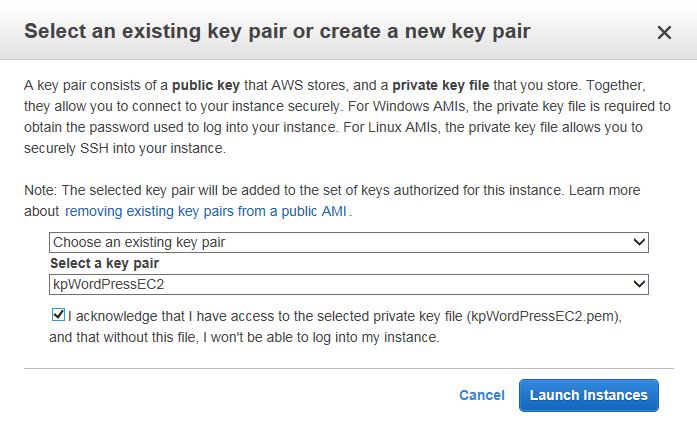
Choose the key pair and launch the instance.
Using AWS CLI, the same thing can be accomplished with:
aws ec2 run-instances --image-id ami-60b6c60a --security-group-ids sg-37535351 --count 1 \
--instance-type t2.micro --key-name kpWordPressEC2
We will need the public IP for the server. From the console, click the newly created server and you’ll see the public IP.

Or, type:
aws ec2 describe-instances
and look for “PublicIp” line.
DNS – Route 53
The blog that I will create will reside at blog.andreev.us. We need to create a DNS record that will point this child domain to the IP of the server that we just built. Use your domain management panel to change this. I purchased my domain (andreev.us) through GoDaddy, but I can still delegate the subdomain blog.andreev.us to be managed from Route 53. All you have to do is tell GoDaddy or whatever your domain hosting company is, to look for this subdomain somewhere else. This is how my domain management panel at GoDaddy looks like.

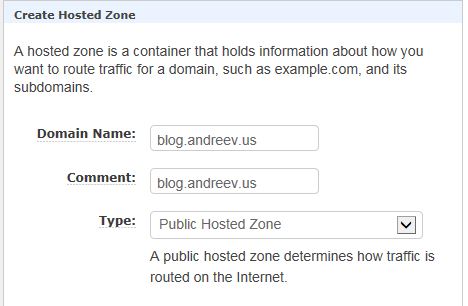
Back to AWS, go to Networking and then click Route 53. Click on Create Hosted Zone. Fill the blanks with your blog’s name and click Create.
You will get your hosted zone and you’ll see your Name Servers. These are the servers that you want to put under your domain management panel if you purchased your domain somewhere else.
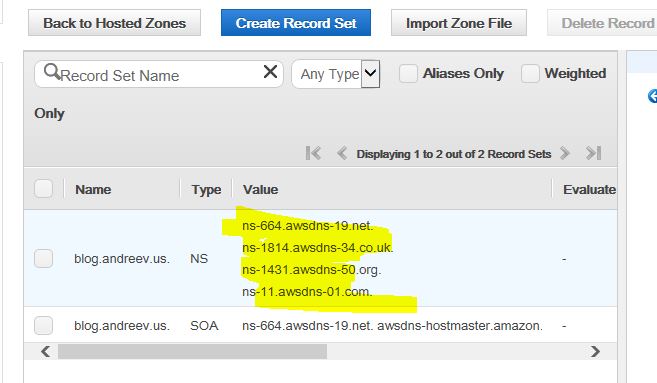
You are not finished yet. You just created your zone and got your name servers, but they have no clue where the actual host is. What you have to do now is to create an A record. Click on Create Record Set and put the IP of the server there.

Once you create your A record, wait between 5 mins and 30 mins and make sure that your domain resolves to your IP. The easiest way is to ping. You won’t get a response, which is fine, but you should get the IP.
ping blog.andreev.us
Pinging blog.andreev.us [52.90.209.108] with 32 bytes of data:
Request timed out.
And doing the same thing with AWS CLI.
aws route53 create-hosted-zone --name blog.andreev.us --hosted-zone-config Comment="blog.andreev.us" \
--caller-reference 2015-12-09-14:00
If you look at the output, you’ll see your Zone Id that looks like this.
"Id": "/hostedzone/Z3F33MZHA3FTIL",
Now, add the A record with this command.
aws route53 change-resource-record-sets --hosted-zone-id Z3F33MZHA3FTIL --change-batch file://C:\add-record.json
but before running the command create a file called add-record.json and add the following inside. Replace the IP and the domain name with yours.
{
  "Comment": "Adding A record",
  "Changes": [
    {
      "Action": "CREATE",
      "ResourceRecordSet": {
        "Name": "blog.andreev.us",
        "Type": "A",
        "TTL": 300,
        "ResourceRecords": [
          {
            "Value": "52.90.209.108"
          }
        ]
      }
    }
  ]
}
WordPress installation
Once you have your instance up and running, ssh to it and log as ec2-user. If you are using some other OS flavor, the username ec2-user might not apply. Also, the following steps differ between various Linux/BSD systems. I’ll describe how to install Apache, PHP and WordPress on AWS Linux AMI. The procedure is the same for Red Hat 6 and CentOS 6, but differs for FreeBSD, Fedora, Ubuntu, etc…
First, install the Apache web server and PHP.
sudo yum install httpd php php-zlib php-iconv php-gd php-mbstring php-fileinfo php-curl php-mysql
Let’s make sure Apache starts on boot.
sudo chkconfig httpd on
We need to make some configuration changes to the web server. Go to the Apache config directory and edit the configuration file httpd.conf.
cd /etc/httpd/conf
sudo vi httpd.conf
Scroll all the way down (Shift + G) and add the following lines at the very end. My test blog will be called blog.andreev.us and I am creating a virtual web directory for that. You have to replace this with your blog name.
<VirtualHost *:80>
     ServerAdmin [email protected]
     DocumentRoot /var/www/blog.andreev.us
     ServerName blog.andreev.us
     ErrorLog logs/blog.andreev.us-error_log
     CustomLog logs/blog.andreev.us-access_log combined
</VirtualHost>
Let’s download WordPress install file, unzip it and start the web server.
cd /var/www
sudo wget www.wordpress.org/latest.zip
sudo unzip latest.zip
sudo rm latest.zip
sudo mv wordpress blog.andreev.us
sudo chown -R apache:apache blog.andreev.us
sudo apachectl start
After this, you can access your blog. Go to http://blog.whatever.com or whatever you named your blog and you should see the WordPress page. Fill up the blanks with the values that we got previously. Your DB host name is the endpoint.

Congrats! You have your WordPress blog on AWS now. But, we have a lot of other cool features to implement.
Creating AMI
Now that we have the blog up and running, just create a new post and publish it. The posts and comments are stored in the database, but if you decide to change a theme you have to know that the themes and plugins are stored on the local file system. We plan to run the blog on multiple servers based on a template, so once we create the template, anytime you decide to change your theme, you’ll have to create a new AMI. So, before creating the AMI template, do all of your customization and install all plugins that you intend to use.
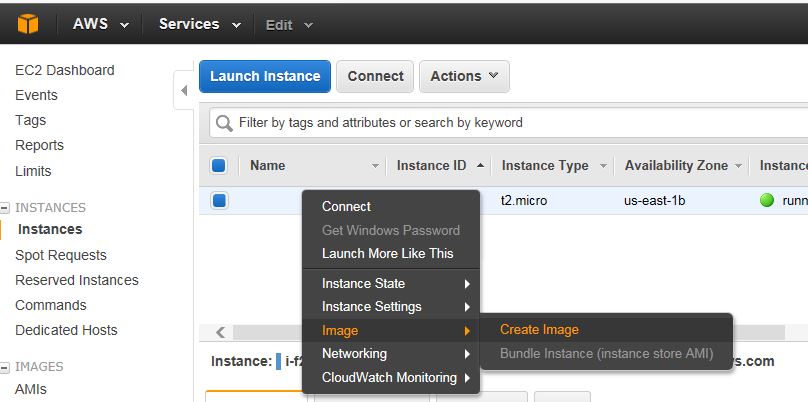
Let’s create the template now. The server will reboot when creating a template. Go to the EC2 dashboard, right click on the server, click Image then Create Image.
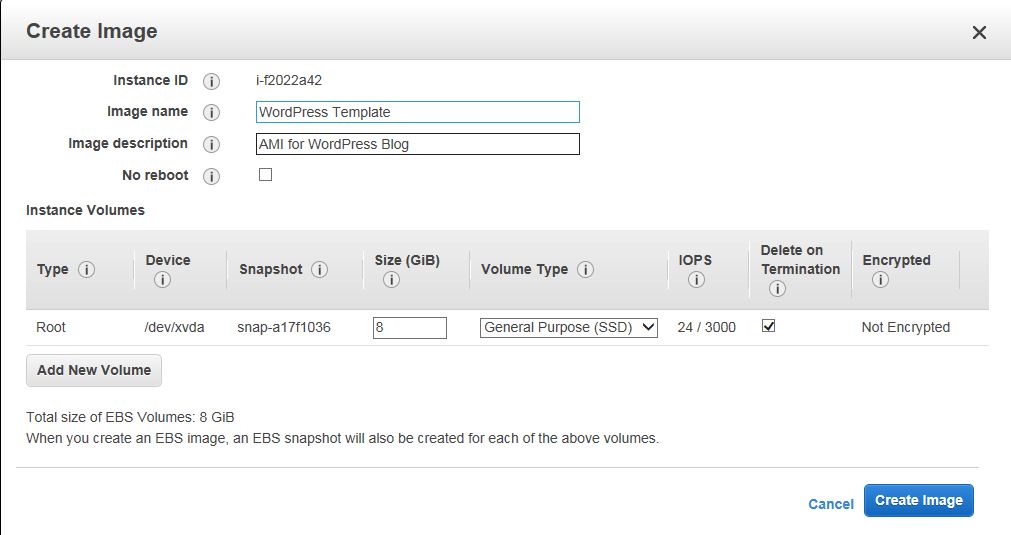
Enter a name, description and choose the size of the disk.
After a minute, you can see your AMI (template) under IMAGES | AMIs.
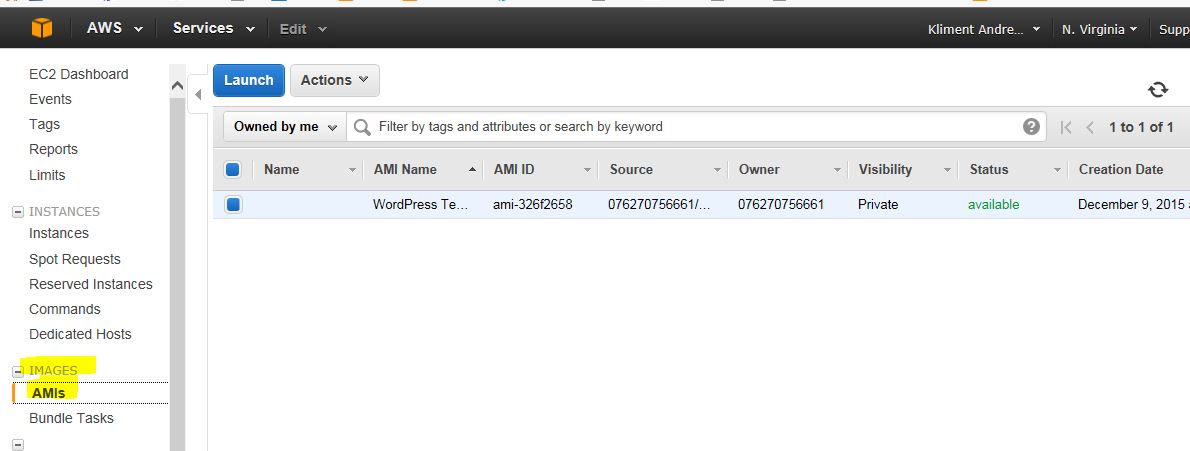
When the status is available, you can go ahead and terminate your original instance. We won’t need it, because we’ll go ahead and use auto scaling to create the new servers from the template.
Using AWS CLI you can create a template with:
aws ec2 describe-instances
Get the InstanceId from the output above and create an AMI with:
aws ec2 create-image --instance-id i-f2022a42 --name "Word Press Template" --description "AMI for WordPress Blog"
Make sure that you’ve deleted the original instance and that your blog is not accessible before going to the next step.
Auto Scaling
Go to EC2 | AUTO SCALING | Launch Configurations. Click on Create Auto Scaling group. If you don’t have a launch configuration, you’ll have to create one. Click on Create launch configuration. When you see a list of a bunch of AMIs, click on My AMIs on the left.
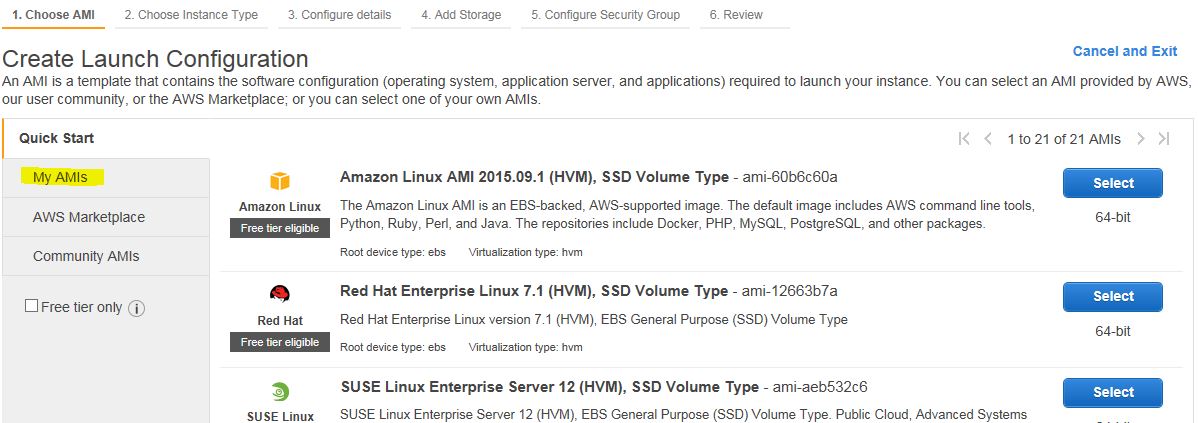
Select the AMI that you’ve created, choose resources (I’ll use t2.micro) and then name your Launch Configuration . Click on Next: Add Storage

Specify the size of the storage for the AMI (I used 8GB which is the default) and choose the security group for the EC2 servers that we created.
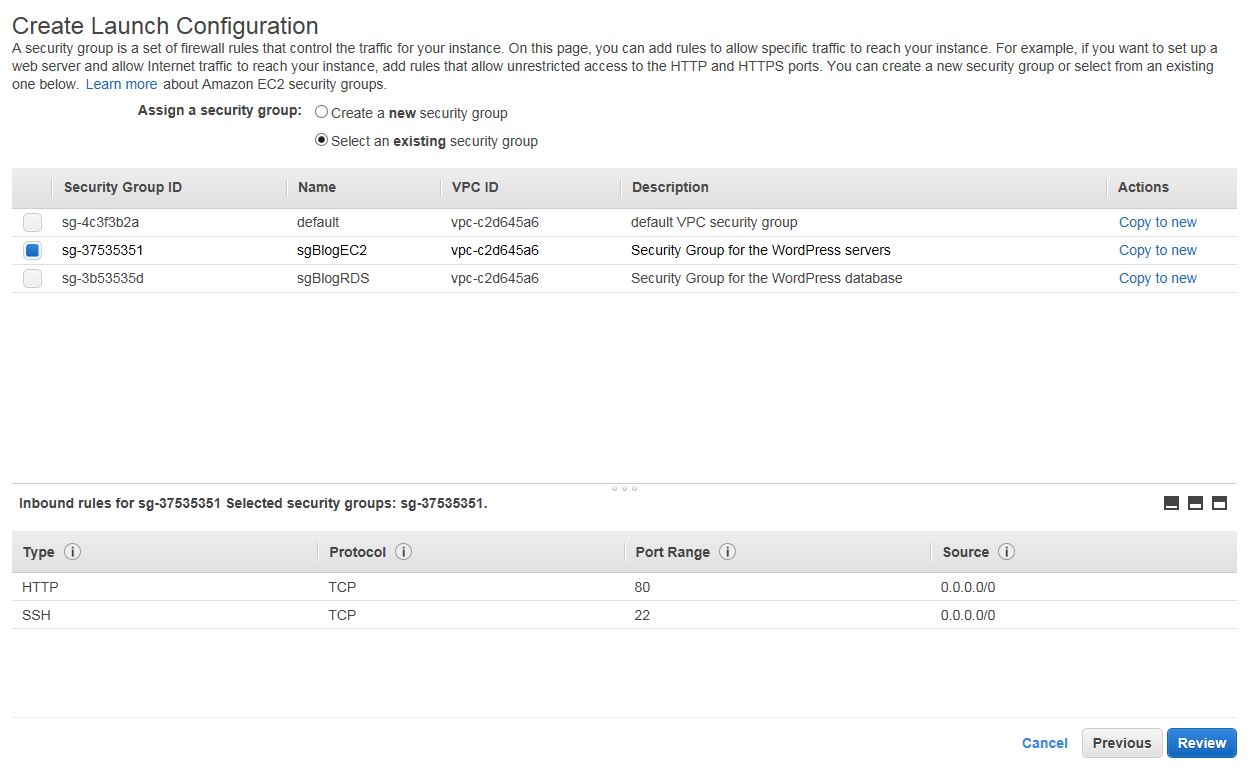
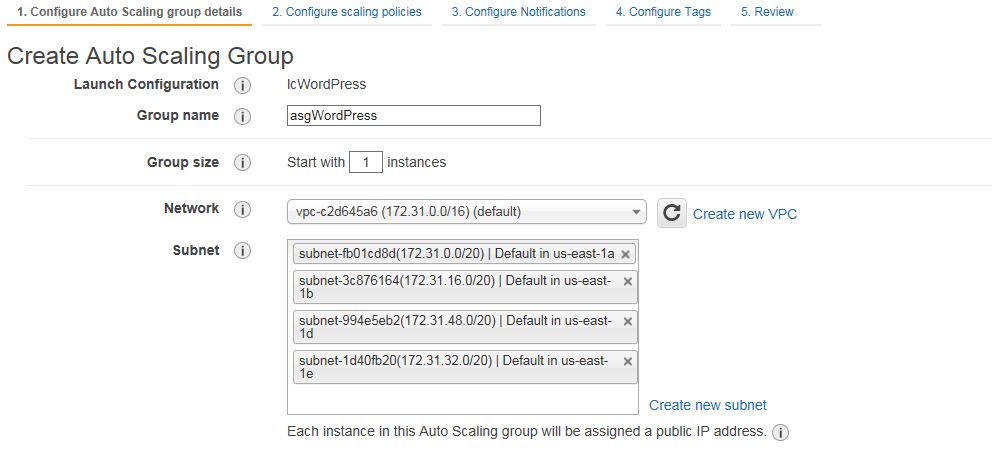
Click on Review to check for any errors and then click on Create launch configuration. Select the key pair and create the Launch Configuration. You’ll be immediately redirected to create the Auto Scaling Group. In my case, I just named the group and used all of the available subnets in that region.
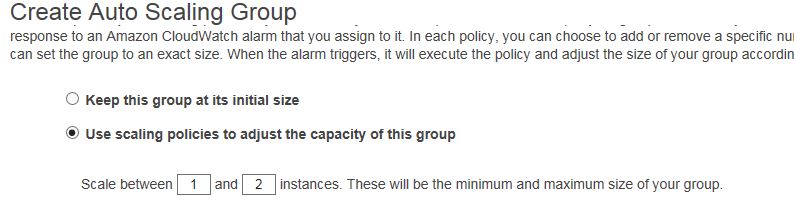
Select Use scaling policies to adjust the capacity of this group and change to scale between 1 and 2 or whatever instances you like to have max.
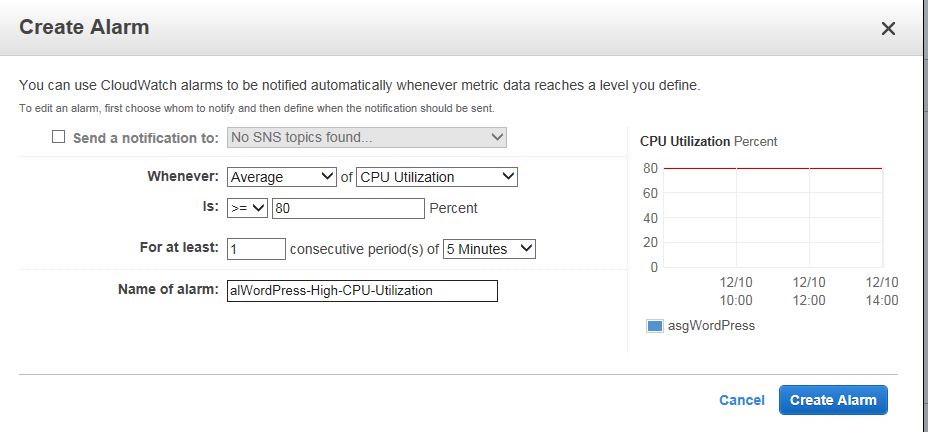
For the Auto Scaling policy, where it says Take the action change 0 to 1, so you’ll be adding/removing 1 instance depending on the load. I also named my policies spIncrease and spDecrease. Click on Add New alarm under Increase Group Size.
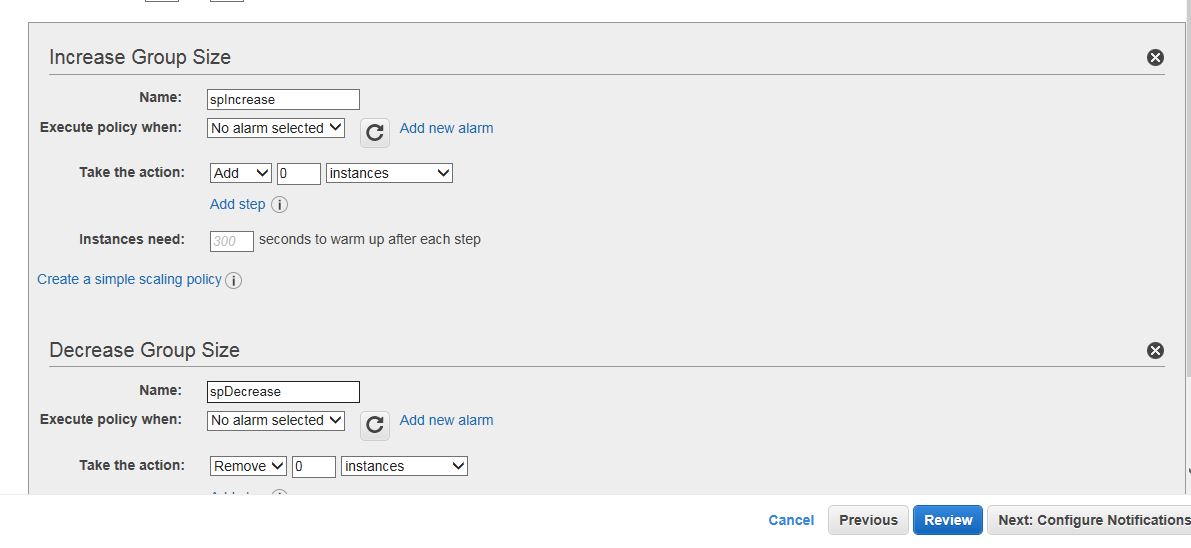
Uncheck the notification checkmark if you don’t want to receive notifications (email, pager…) whenever there is a change in the number of instances and put 80 for the threshold. Name the alarm and click on Create Alarm.
Do the same for the Decrease Group Size. This time use less or equal 30 percent as shown below.
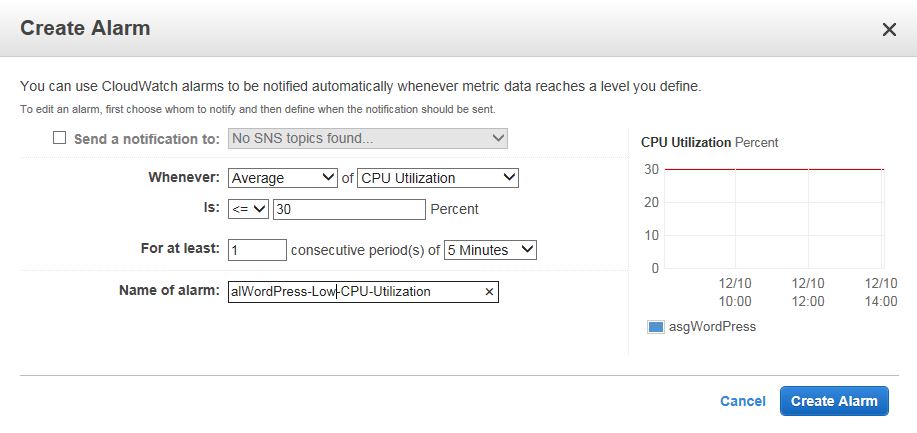
Or, this means, whenever the average CPU utilizations of all instance is greater or equal than 80%, add another instance. When the same average CPU utilization is less or equal than 30%, remove one instance. Sudden burst of CPU utilization won’t have any effect, because the utilization has to last 5 minutes. If you have more than 10 instances, you don’t add one or two instances whenever there is a change in the utilization. Instead you add a percentage of the total number of the instances. For example if you have 20 instances, you won’t add one extra instance. It won’t make any difference. You’ll add 20% of the instances, which is four.
OK, click next and if you want to receive notifications when the resources are added or removed, you can configure them here, but I’ll skip this step. Click next and use the tags if you want to and finally click Review and then Create Auto Scaling group. If you go to the EC2 Dashboard, you’ll see that one server already started. That’s because we have specified a minimum of one server.
Using AWS CLI, we can create the launch configuration first. Make sure you specify the ID of your AMI that we created.
aws autoscaling create-launch-configuration --launch-configuration-name lcWordPress --image-id ami-176f267d \
--instance-type t2.micro --security-groups sg-37535351
In order to create an auto scaling group, we’ll need to know the subnets. Look for SubnetId.
aws ec2 describe-subnets
Create the auto scaling group.
aws autoscaling create-auto-scaling-group --auto-scaling-group-name asgWordPress --launch-configuration-name \
lcWordPress --min-size 1 --max-size 2 --vpc-zone-identifier \
"subnet-994e5eb2,subnet-1d40fb20,subnet-fb01cd8d,subnet-3c876164"
Create the scaling policies.
aws autoscaling put-scaling-policy --auto-scaling-group-name asgWordPress --policy-name spIncrease \
--scaling-adjustment 1 --adjustment-type ChangeInCapacity
aws autoscaling put-scaling-policy --auto-scaling-group-name asgWordPress --policy-name spDecrease \
--scaling-adjustment -1 --adjustment-type ChangeInCapacity
The output of these two commands will be two PolicyARNs. One looks like this.
{
    "PolicyARN": "arn:aws:autoscaling:us-east-1:076270756661:scalingPolicy:d1d03
001-c9a6-4097-bd41-dc1a27ab7286:autoScalingGroupName/asgWordPress:policyName/spD
ecrease"
}
Make sure you get them both, because we’ll need them now when we create the alarm and associate it with the policy.
c:\>aws cloudwatch put-metric-alarm --alarm-name alWordPress-High-CPU-Utilization --metric-name CPUUtilization \
--namespace AWS/EC2 --statistic Average --period 600 --threshold 80 \
--comparison-operator GreaterThanOrEqualToThreshold --dimensions "Name=AutoScalingGroupName,Value=asgWordPress" \
--evaluation-periods 1 --alarm-actions arn:aws:autoscaling:us-east-1:076270756661:scalingPolicy:830f183a-585d
4b8ea1c26f3c0581021c:autoScalingGroupName/asgWordPress:policyName/spIncrease
where 600 is 5 minutes. See the parameters when we did the same from the console. Do the same for the second policy with the seconds PolicyARN.
CloudWatch
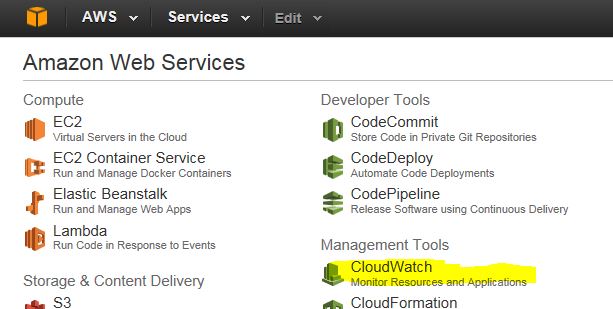
Go to the AWS home page, click on CloudWatch and then look under Alarms.
If the instance is running less than 5 min, the alarms should be under INSUFFICIENT. Click on the label INSUFFICIENT or OK. If you click to Modify one of the alarms, you’ll see the same threshold and actions that we defined before. This is actually where you create new alarms and modify existing ones and change the actions needed.

Testing the scaling
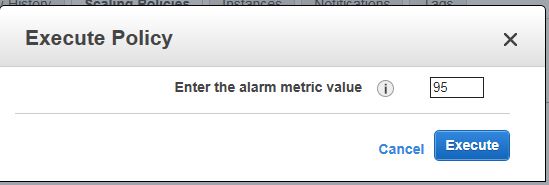
Go to the Auto Scaling Groups menu, click on Scaling Policies, then click on Actions and then click Execute.
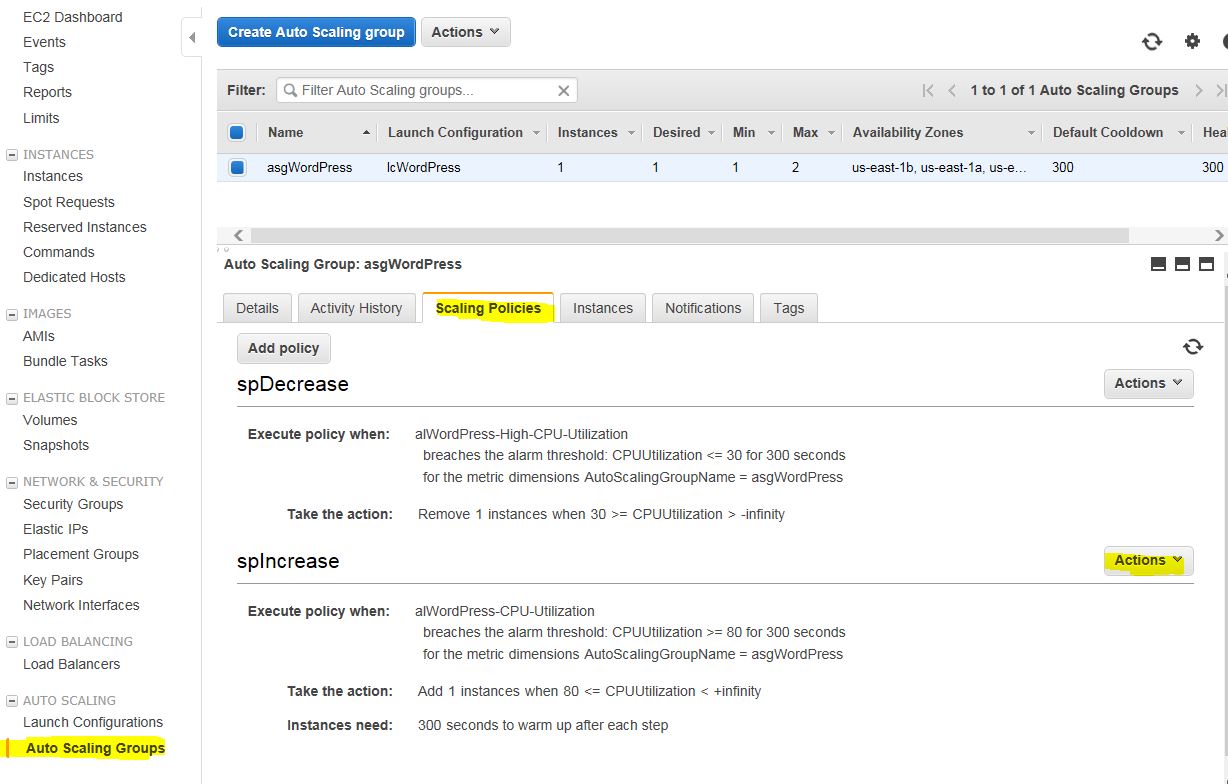
Enter any number that’s greater than 80 and wait for 5 minutes. We’ll kick the policy that says, add another instance if the average CPU utilization is greater than 80 and it lasts for more than 5 mins.
After 5 mins, you’ll see another instance showing up. You don’t have to do anything. The instance will remove itself after another 5 mins, because the actual usage is less than 30% (that was the 2nd policy).
Using CLI:
aws autoscaling execute-policy --auto-scaling-group-name asgWordPress --policy-name spIncrease \
--metric-value 95 --breach-threshold 80
Elastic Load Balancer
Now that we have a scaling policy working, we can create the Load Balancer.
From the EC2 menu, click on Load Balancers under LOAD BALANCING.
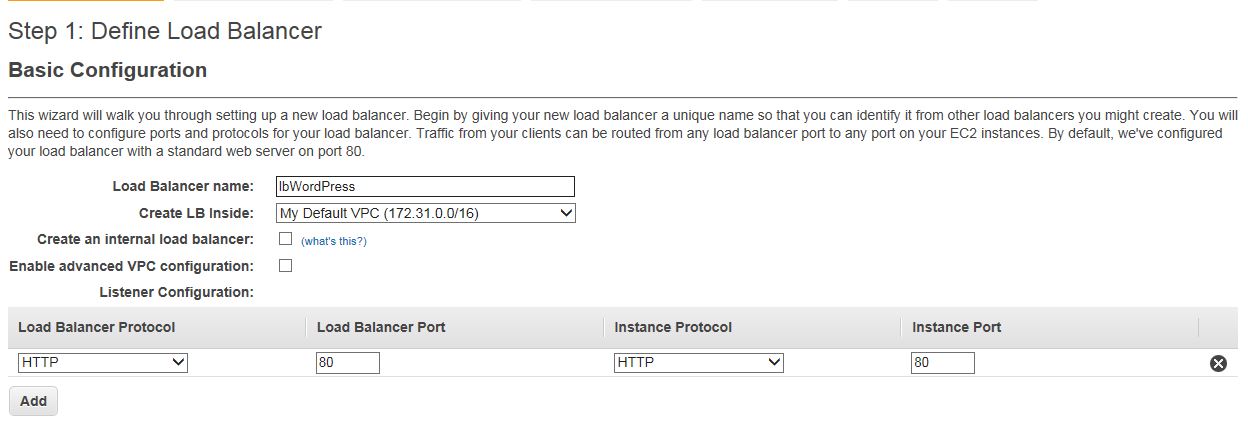
Click on Create Load Balancer and name it. Leave the port 80.
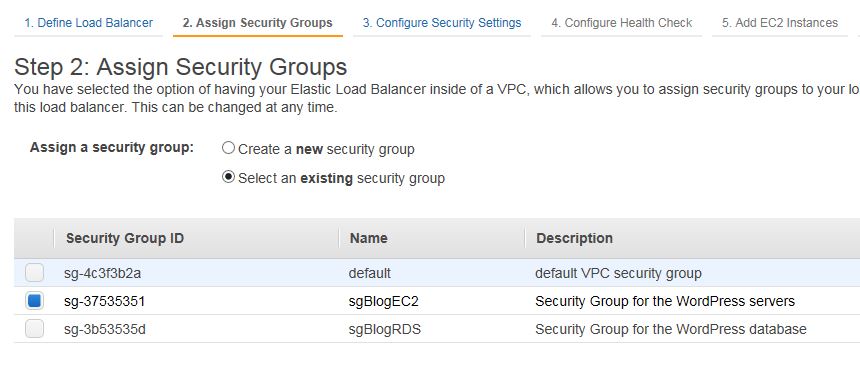
Assign the security group for the servers. NOTE: A proper way would be to create a new security group for the load balancer and then modify the server security group to accept port 80 only from that LB security group, very similar with what we did with the RDS security group.
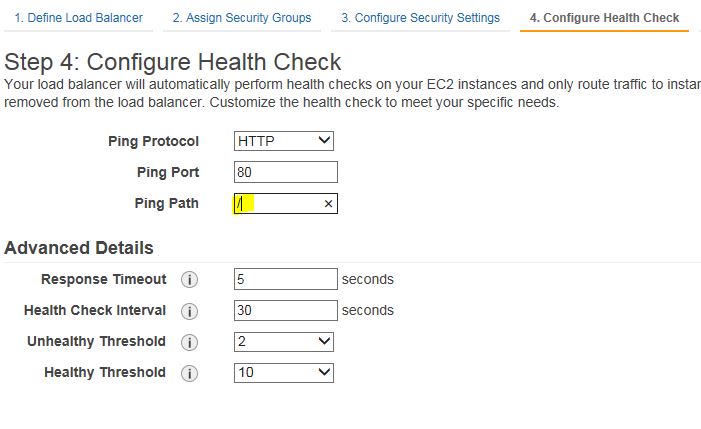
Skip step 3 and remove index.html under Ping Path on step 4.
You can skip step 5, we don’t need to add the instances yet. Same with step 6, skip. Click Review and Create and then click Create. Once the LB is created, look for the DNS name under the description tab.

Now, we have to associate our Auto Scaling Group with the Load Balancer. Go to the Auto Scaling Group menu, notice how the Load Balancers entry is blank and click Edit to fix it.
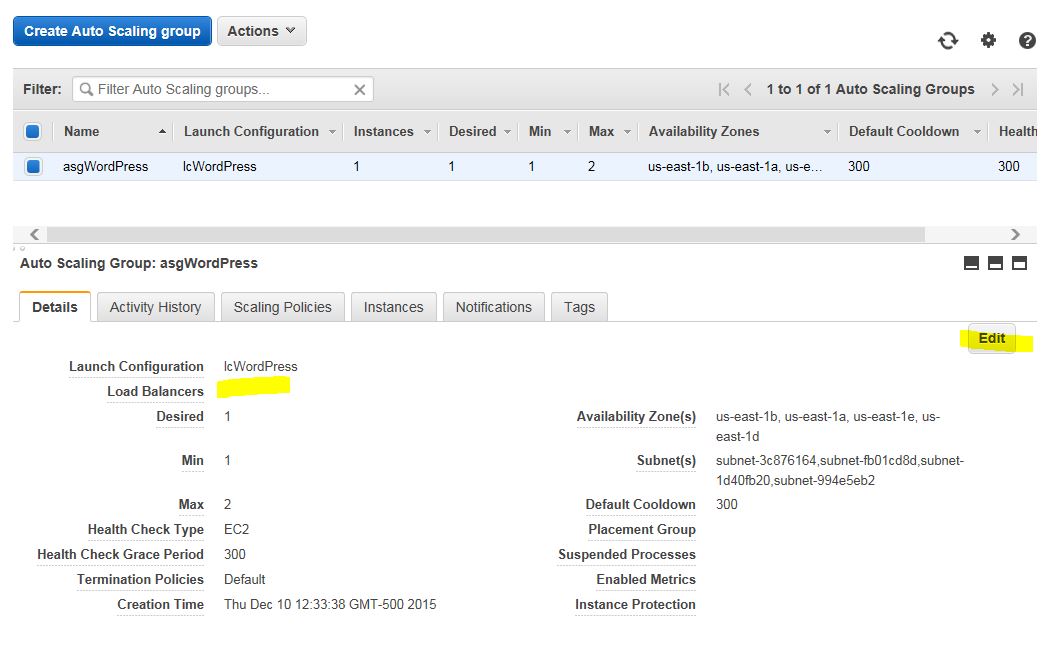
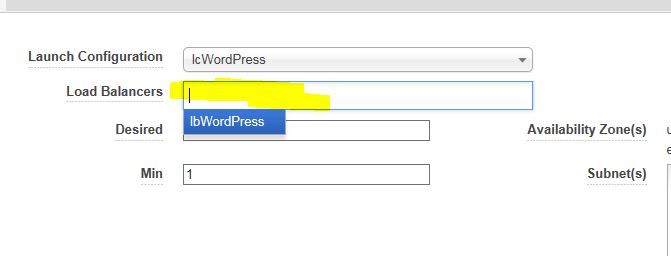
Click anywhere on the blank line and our load balancer will show up. Click Save.
Go back to the Load Balancers menu and click on the Instances tab.
Wait for 2-3 minutes and the status should turn into InService. If it says OutOfService, you’ll have to investigate. The easiest way is to ssh to the server and check the log files for the Apache. If you scroll all the way up, you’ll see that we defined the log files for our web site.
ErrorLog logs/blog.andreev.us-error_log
CustomLog logs/blog.andreev.us-access_log combined
Look at the access log and you’ll see that every 30 seconds there is a hit from the load balancer. If the return code is not 200, which is OK in HTML, then you have to troubleshoot.
And the same thing with AWS CLI.
aws elb create-load-balancer --load-balancer-name lbWordPress \
--listeners "Protocol=HTTP,LoadBalancerPort=80,InstanceProtocol=HTTP,InstancePort=80" \
--security-groups sg-37535351 --subnets subnet-3c876164 subnet-fb01cd8d subnet-1d40fb20 subnet-994e5eb2
Configure LB health-check.
aws elb configure-health-check --load-balancer-name lbWordPress \
--health-check Target=HTTP:80/,Interval=30,UnhealthyThreshold=2,HealthyThreshold=10,Timeout=5
Associate the Auto Scaling Group with the Load Balancer.
aws autoscaling attach-load-balancers --load-balancer-names lbWordPress --auto-scaling-group-name asgWordPress
Final change
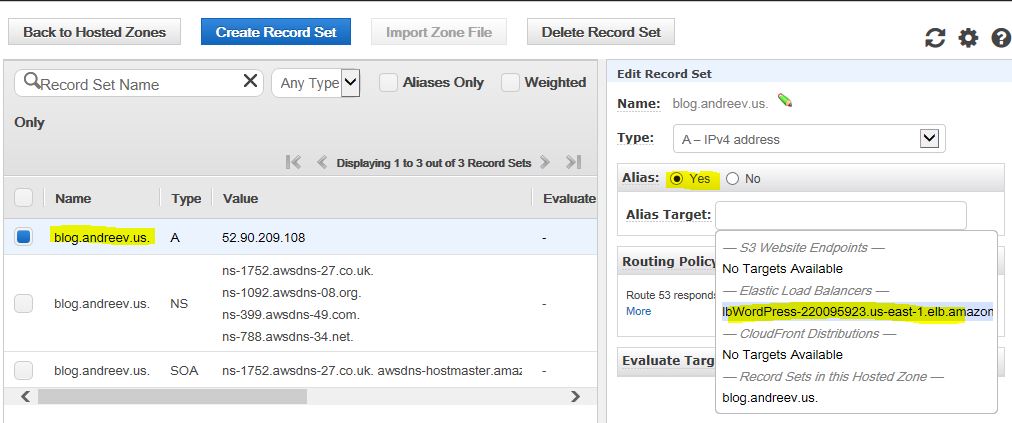
Now that everything is up & running, we just have to point the DNS record of blog.andreev.us to point to the load balancer.
Go to Route 53 console, select the domain name, select your A record, click on Yes for the Alias and select the DNS name for the load balancer from the drop down Alias Target.