
This is a very simple setup to run squid proxy. You can use the provided config file to run the proxy as a transparent proxy but you have to deal with pf and port 3128 (default squid port) and your OpenBSD server must act as a internet router. In my case, I have FreeBSD that does the NAT job and my OpenBSD is a regular server on the network. I don’t mind to setup my browsers manually to use this non-transparent proxy.
First, you have to install squid from packages.
export PKG_PATH=ftp://ftp.openbsd.org/pub/OpenBSD/4.2/packages/i386
pkg_add squid-2.6.STABLE13.tgz
At the end of the installation, you’ll see the following.
--- squid-2.6.STABLE13 -------------------NOTES ON OpenBSD POST-INSTALLATION OF SQUID 2.6
The local (OpenBSD) differences are:

configuration files are in              /etc/squid
sample configuration files are in       /usr/local/share/examples/squid
error message files are in              /usr/local/share/squid/errors
sample error message files are in       /usr/local/share/examples/squid/errors
icons are in                            /usr/local/share/squid/icons
sample icons are in                     /usr/local/share/examples/squid/icons
the cache is in                         /var/squid/cache
logs are stored in                      /var/squid/logs

the ugid squid runs as is               _squid:_squid

Please remember to initialize the cache by running "squid -z" before
trying to run Squid for the first time.

You can also edit /etc/rc.local so that Squid is started automatically:

if [ -x /usr/local/sbin/squid ]; then
        echo -n ' squid';       /usr/local/sbin/squid
fi
First, let’s edit /etc/rc.local and add the last part (lines 20 to 22) so squid starts automatically. Regardless of the configuration files, we can run squid -z now to build the cache. Default configuration file /etc/squid/squid.conf won’t work, so we have to make some small changes before we start squid for the first time. Edit /etc/squid/squid.conf and change the following.
#acl our_networks src 192.168.1.0/24 192.168.2.0/24
#http_access allow our_networks
change to
acl our_networks src 192.168.1.0/24
http_access allow our_networks
Make sure that the IP and subnet match your network. Also, change the e-mail address that shows in the browser for any errors that might occur (page not found, internal server error etc).
# cache_mgr webmastercache_mgr [email protected]
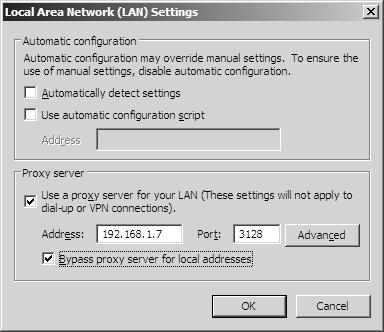
Before you start squid, change the proxy settings in all of your browsers. Remember, this is not a transparent proxy, so you have to change it manually. If you don’t change the proxy settings, it doesn’t matter, you can still access the internet, you just won’t be able to go through the proxy server. The IP address of my OpenBSD/squid server is 192.168.1.7.
Internet Explorer: Click Tools, Internet Options, Connections tab, then LAN settings.
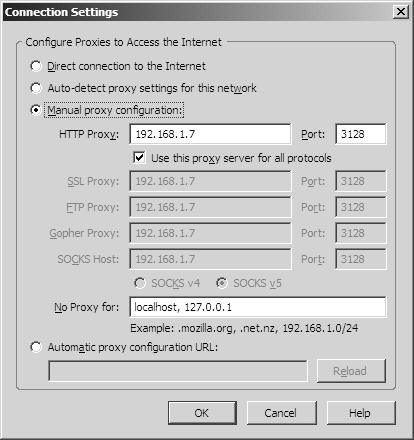
Firefox: Click Tools, Options, Network tab, then Settings.
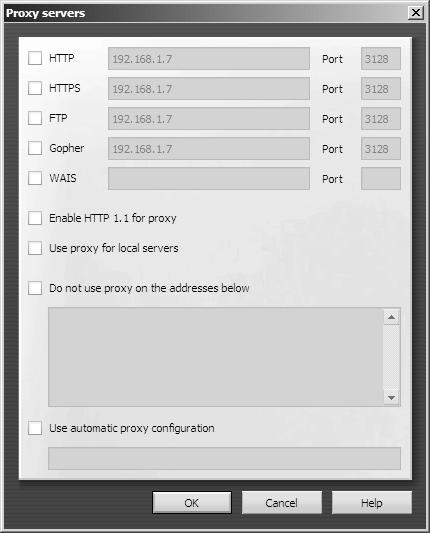
Opera: Click Tools, Preferences, Advanced tab, then Proxy servers.
Now, start squid by using
/usr/local/sbin/squid
Fire up the browser and go to www.google.com. If everything is OK, you’ll see the known page. You can also check the logs too.
tail -f /var/squid/logs/access.log
1205505033.035    111 192.168.1.3 TCP_MISS/200 3071 GET http://www.google.com/ - DIRECT/64.233.169.99 text/html
1205505033.156    120 192.168.1.3 TCP_MISS/200 8882 GET http://www.google.com/intl/en_ALL/images/logo.gif - DIRECT/64.233.169.99 image/gif